
Share this post:
Halloween Wounds, Cuts & Bruises Face Paint Tutorial
Fake wounds, scratches, bruises, and cuts can transform even a simple Halloween design into something much more dramatic. And you don’t necessarily need complicated prosthetics or professional SFX materials to create convincing effects.
.jpg)

In this Halloween wound face paint tutorial, we’ll show you how to use face paint to create fake wounds, realistic-looking cuts, and colorful bruises step by step. Once you understand how color, highlights, and shadows work together, you can adapt these techniques for zombies, monsters, Frankenstein, mummies, vampires, and many other Halloween characters.
You can keep the effects simple for children and beginner face painters or build additional layers for more dramatic Halloween cuts and bruises makeup.
Ready to make things a little spooky? Let’s get started! 👻
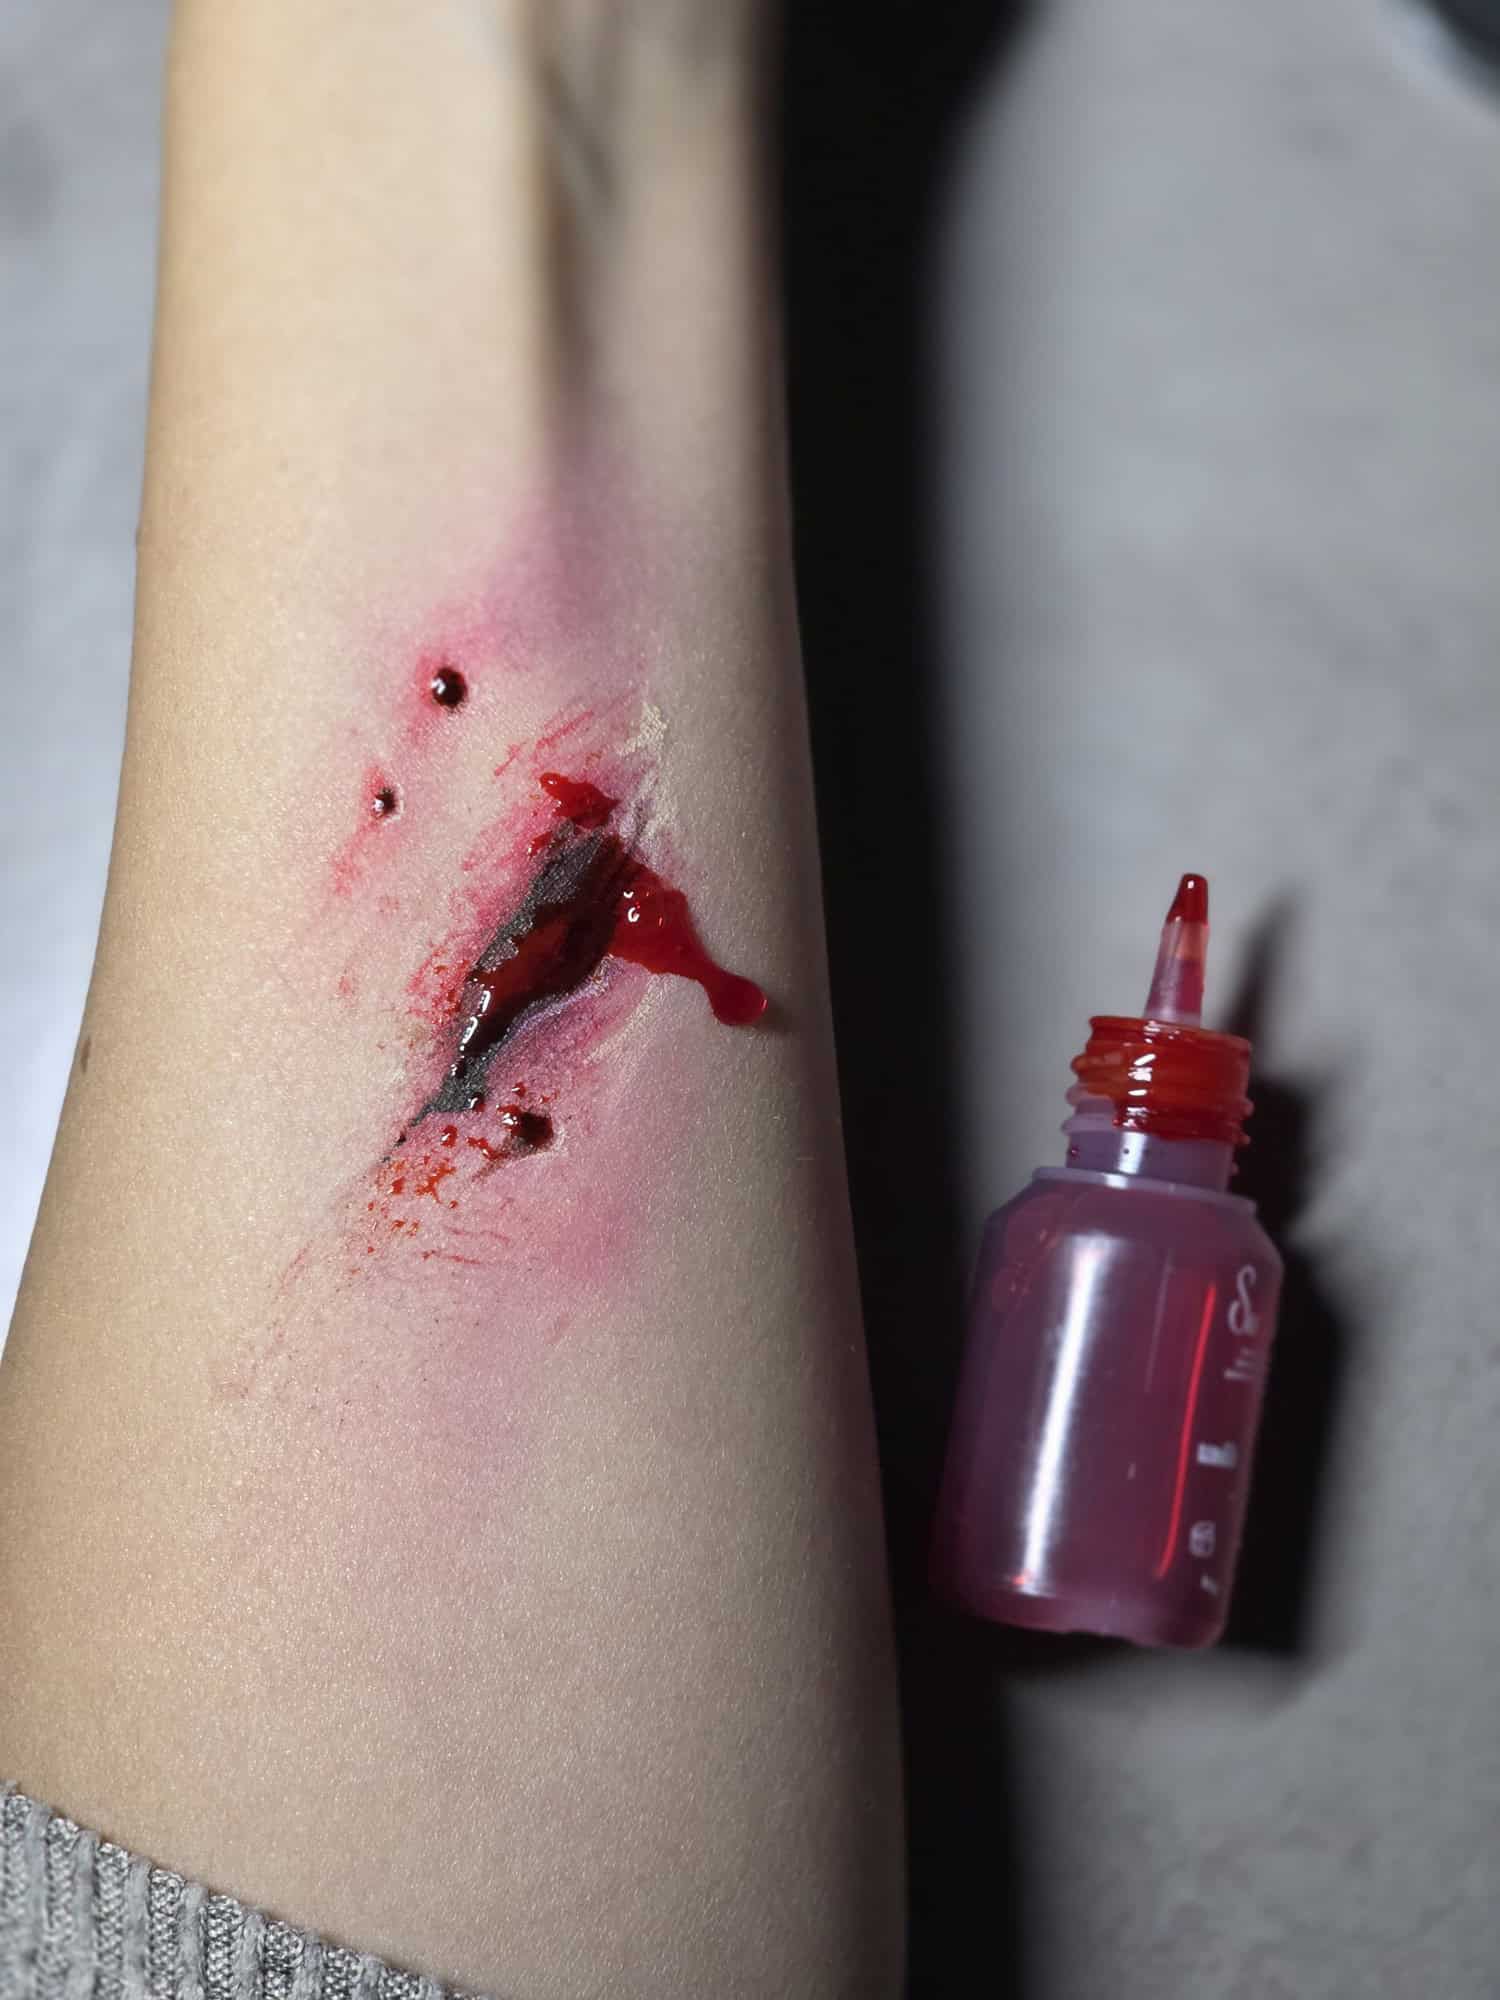
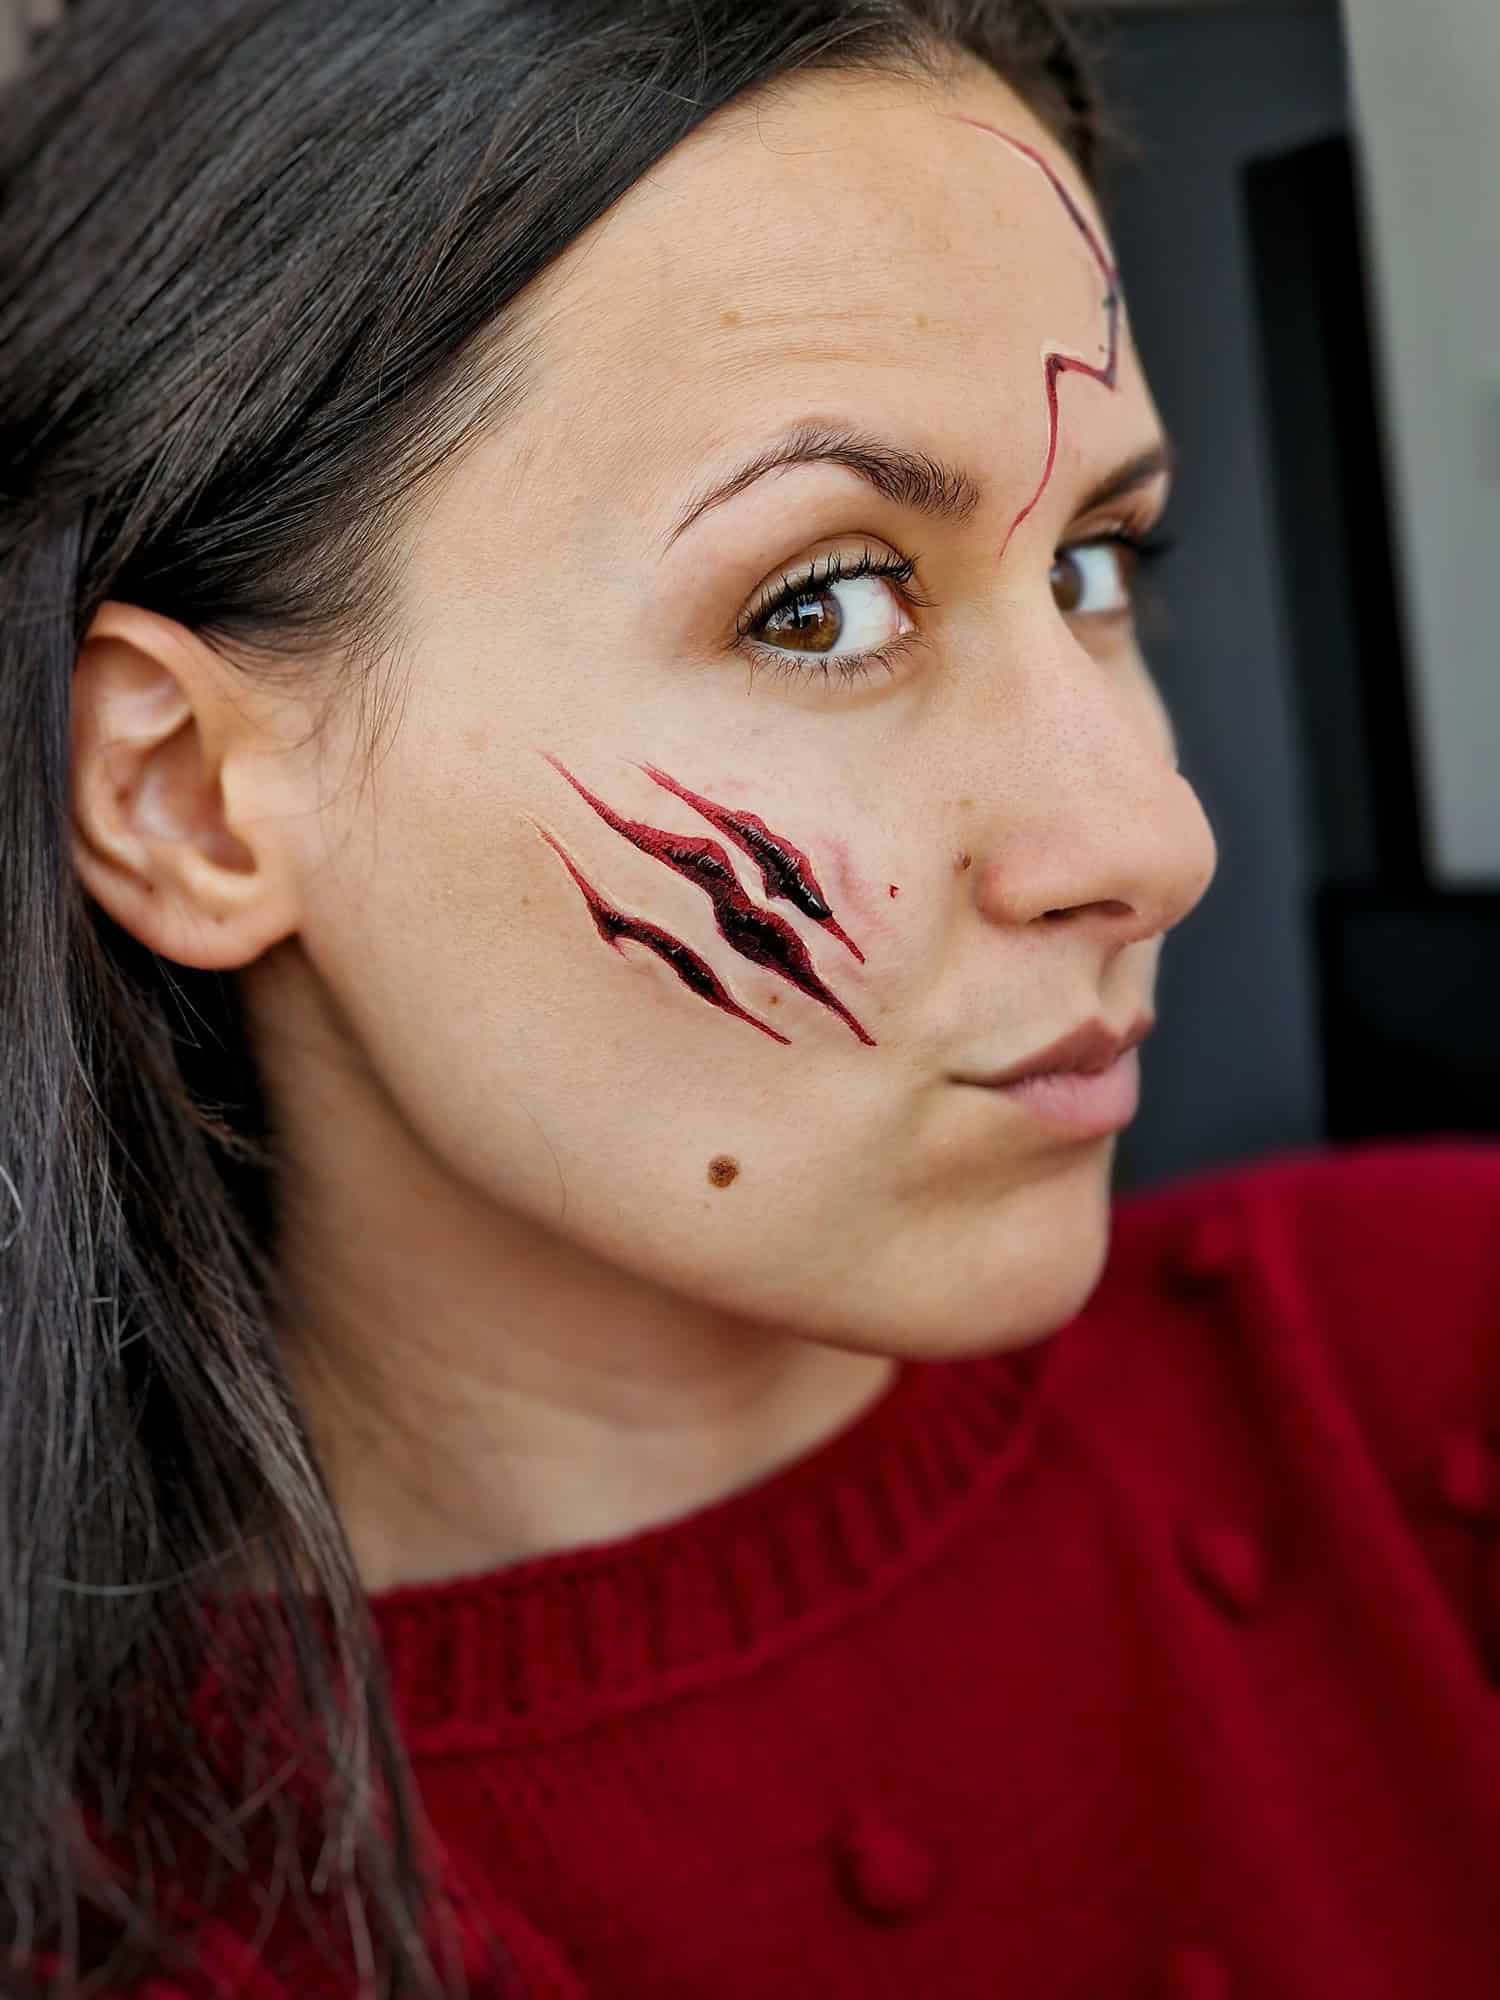
What You Need to Create Halloween Wounds, Cuts and Bruises
You can create many convincing injury effects with regular professional face paints, although optional SFX products can add extra texture if you already know how to use them safely.
For the tutorials below, prepare:
- Red face paint
- Dark red or burgundy face paint
- Purple face paint
- Blue face paint
- Yellow face paint
- Green face paint
- Brown face paint
- Black face paint
- White face paint
- A face painting sponge
- Stipple sponge, if available
- Medium round brush
- Small detail brush
- Blending brush
- Optional cosmetic-grade fake blood
- Optional skin-safe SFX materials
For most wound face paint, color placement is more important than having dozens of products. A few carefully layered shades can create much more depth than one solid red line.
If you’re still building your professional setup, explore our guides to face paints, face painting brushes, sponges, and complete face painting kits.
Always use products specifically designed for use on skin, and follow the manufacturer’s instructions for any SFX products or adhesives.
How to Create a Fake Wound with Face Paint
A convincing painted wound relies on three things: an irregular shape, depth around the center, and subtle color changes in the surrounding skin.
Instead of thinking of the wound as one red line, build it gradually in layers.
Step 1: Create the Base
Start by deciding where the wound will sit.
The forehead, cheek, and side of the face can work particularly well because you have enough space to build the effect without painting too close to the eyes or mouth.
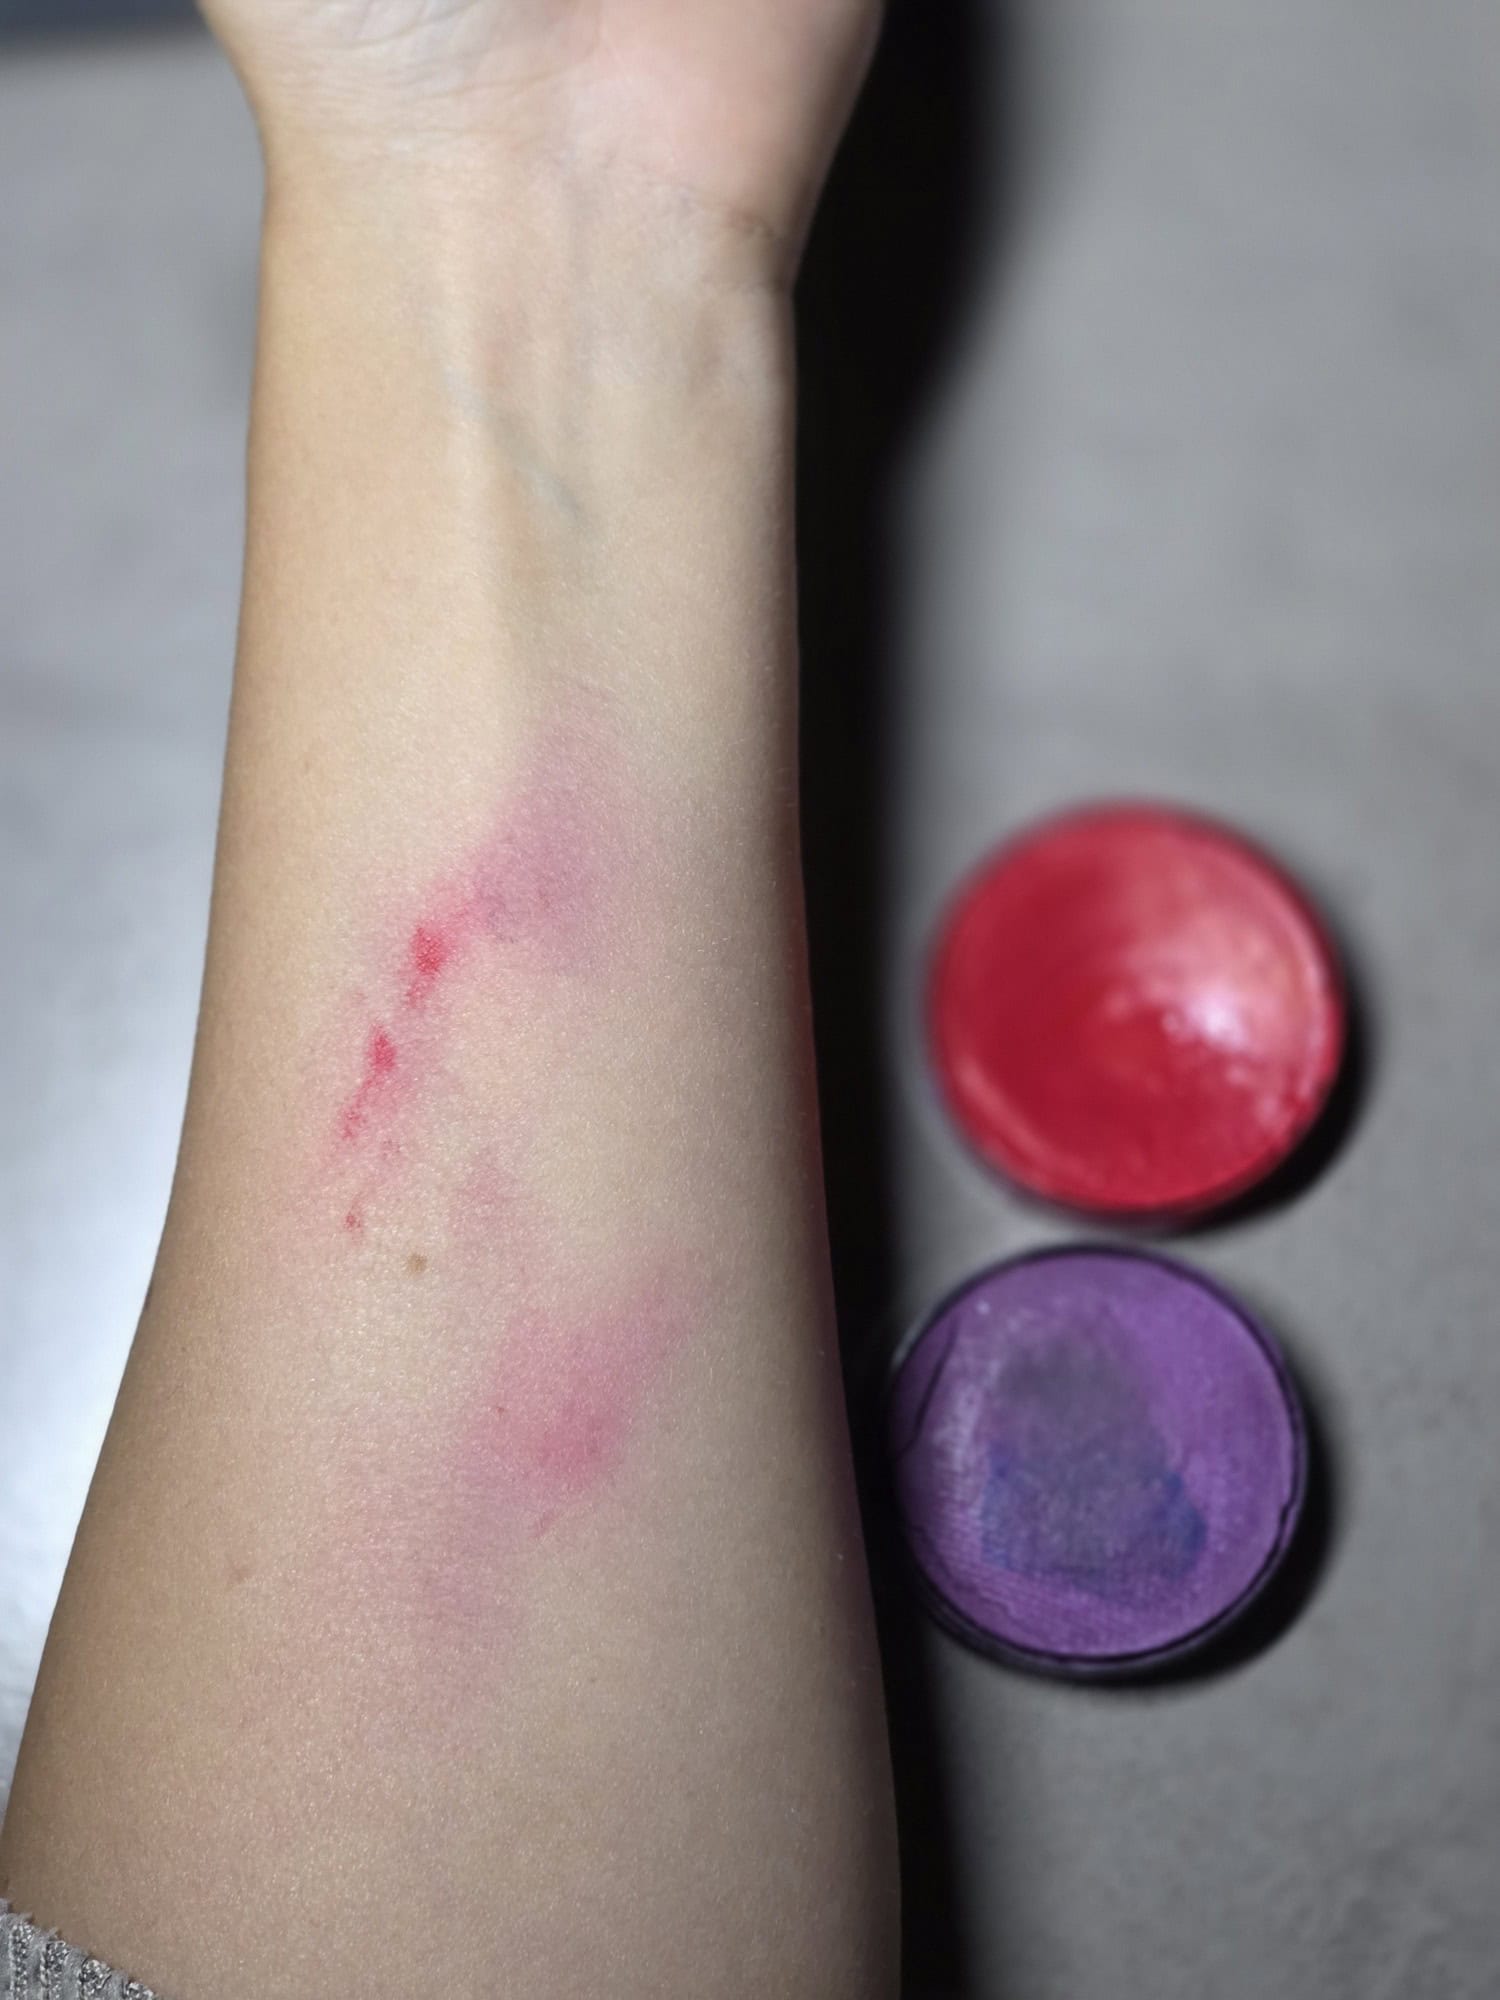
Using a sponge or blending brush, lightly apply muted red, purple, or brown around the area where the wound will be.
Keep this first layer soft. You are creating irritation and discoloration around the wound rather than painting the wound itself.
Avoid making a perfect circle or rectangle. Realistic-looking effects usually work better when the edges are irregular.
Step 2: Add Depth and Redness
Now increase the contrast closer to the center.
Add deeper red, burgundy, purple, or a tiny amount of black where you want the wound to appear deepest.
Blend the surrounding colors outward so they gradually disappear into the skin.
Try not to cover the entire area with the same shade. Leave some lighter spaces between the darker tones to make the skin look more dimensional.
For a fresher wound, use stronger reds. For an older or more bruised effect, introduce purple, brown, and muted yellow around the edges.
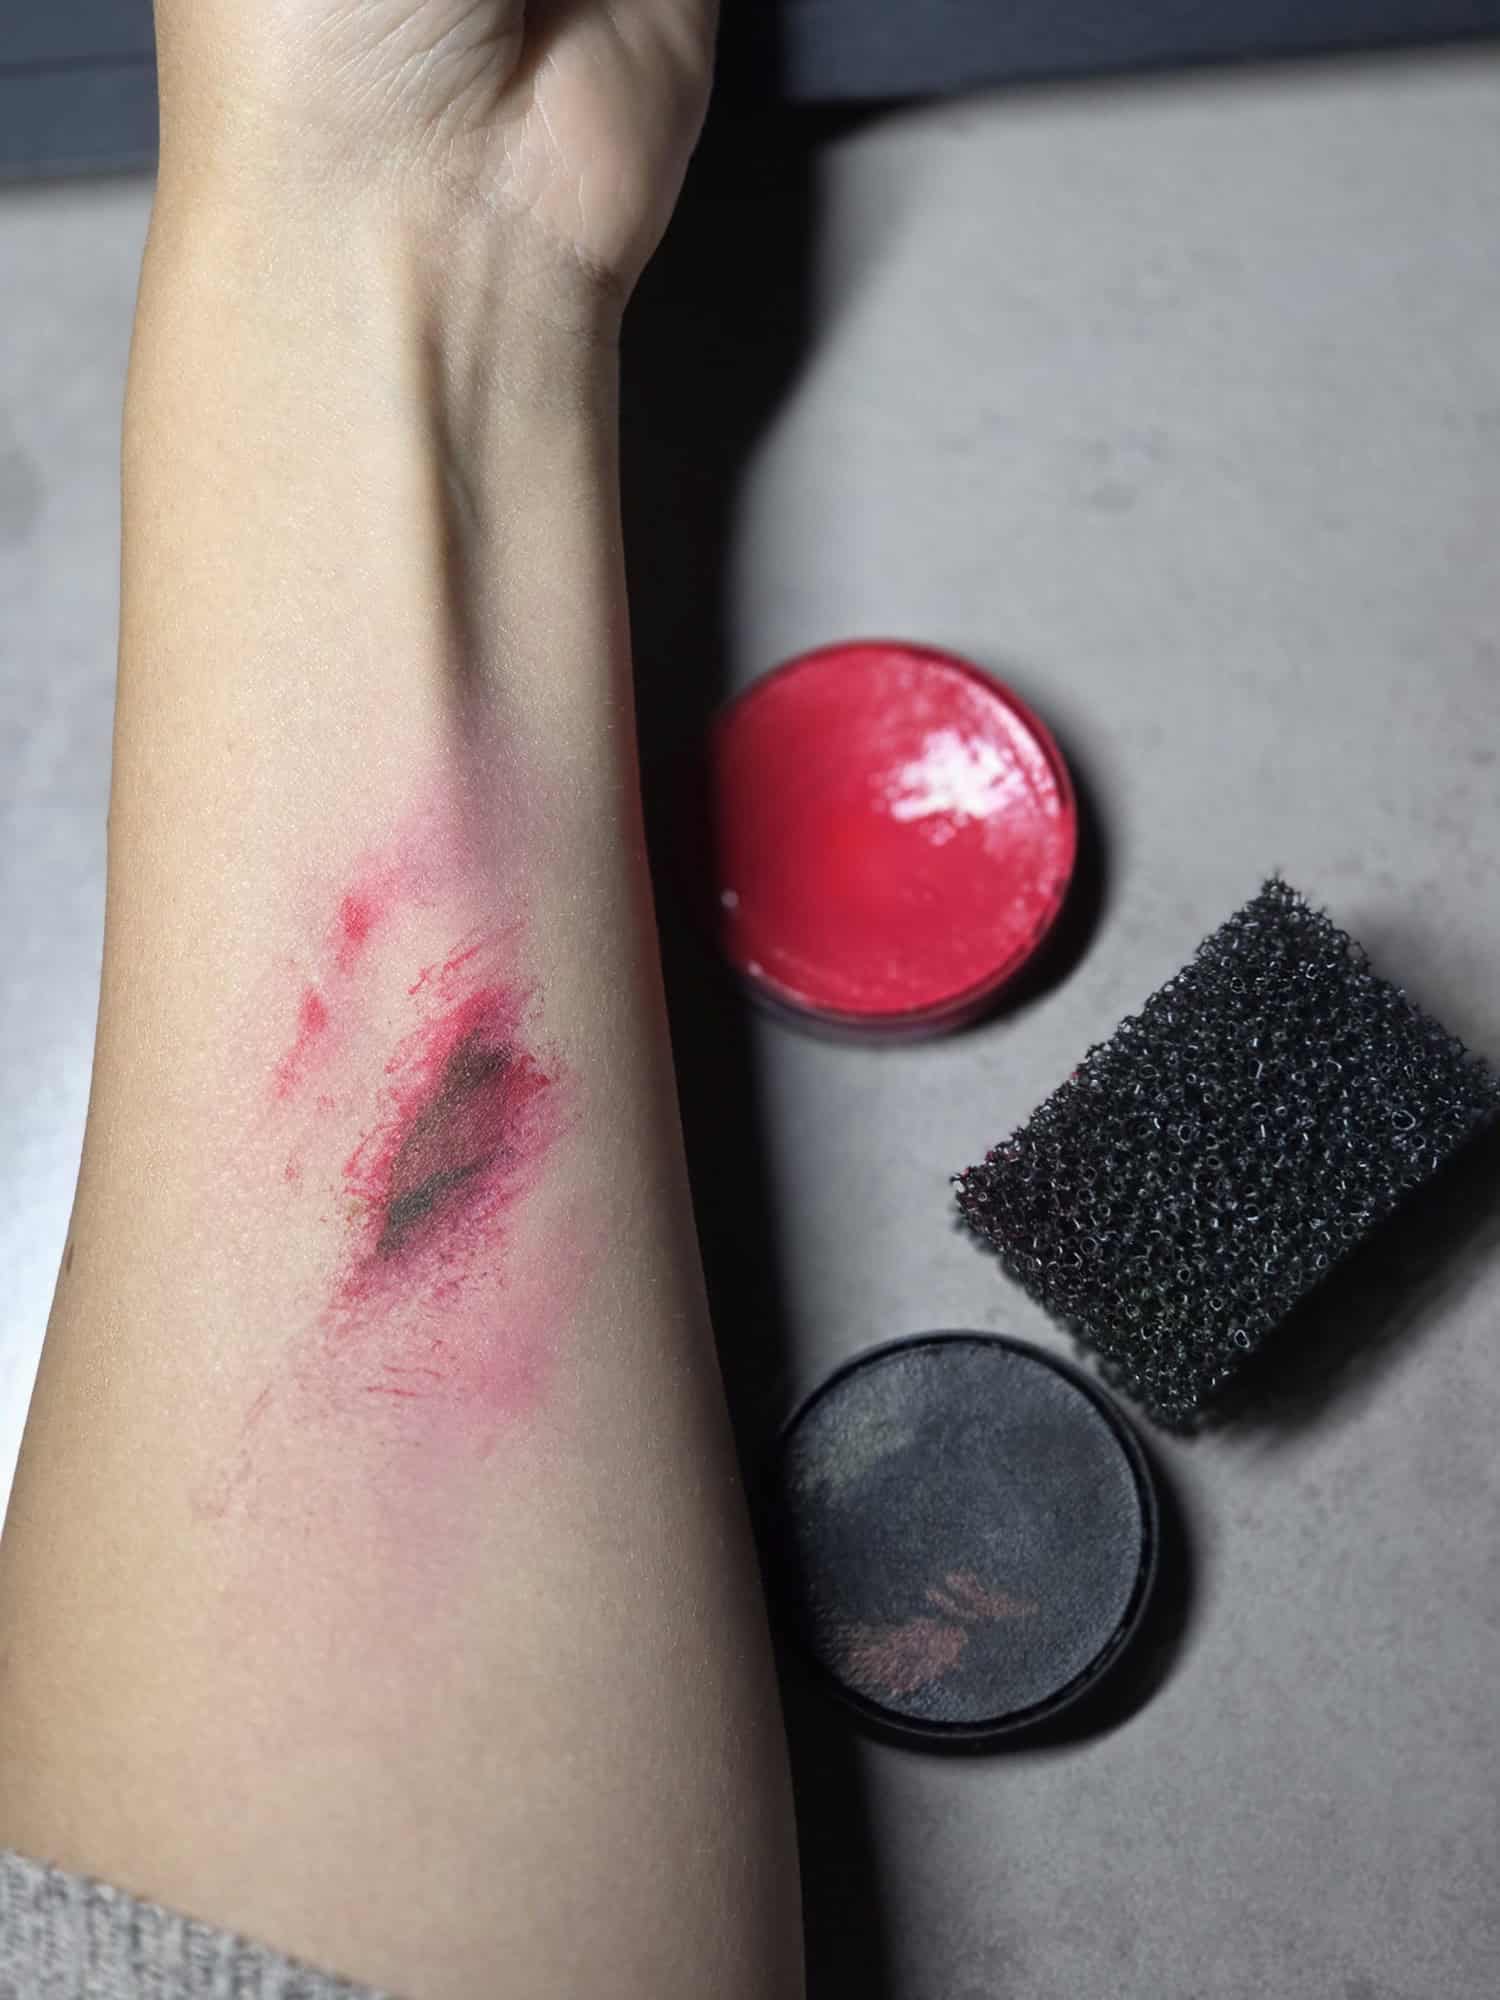
Pro Tip: Build dark colors gradually. It’s much easier to add another layer than to remove too much black once it has been applied.
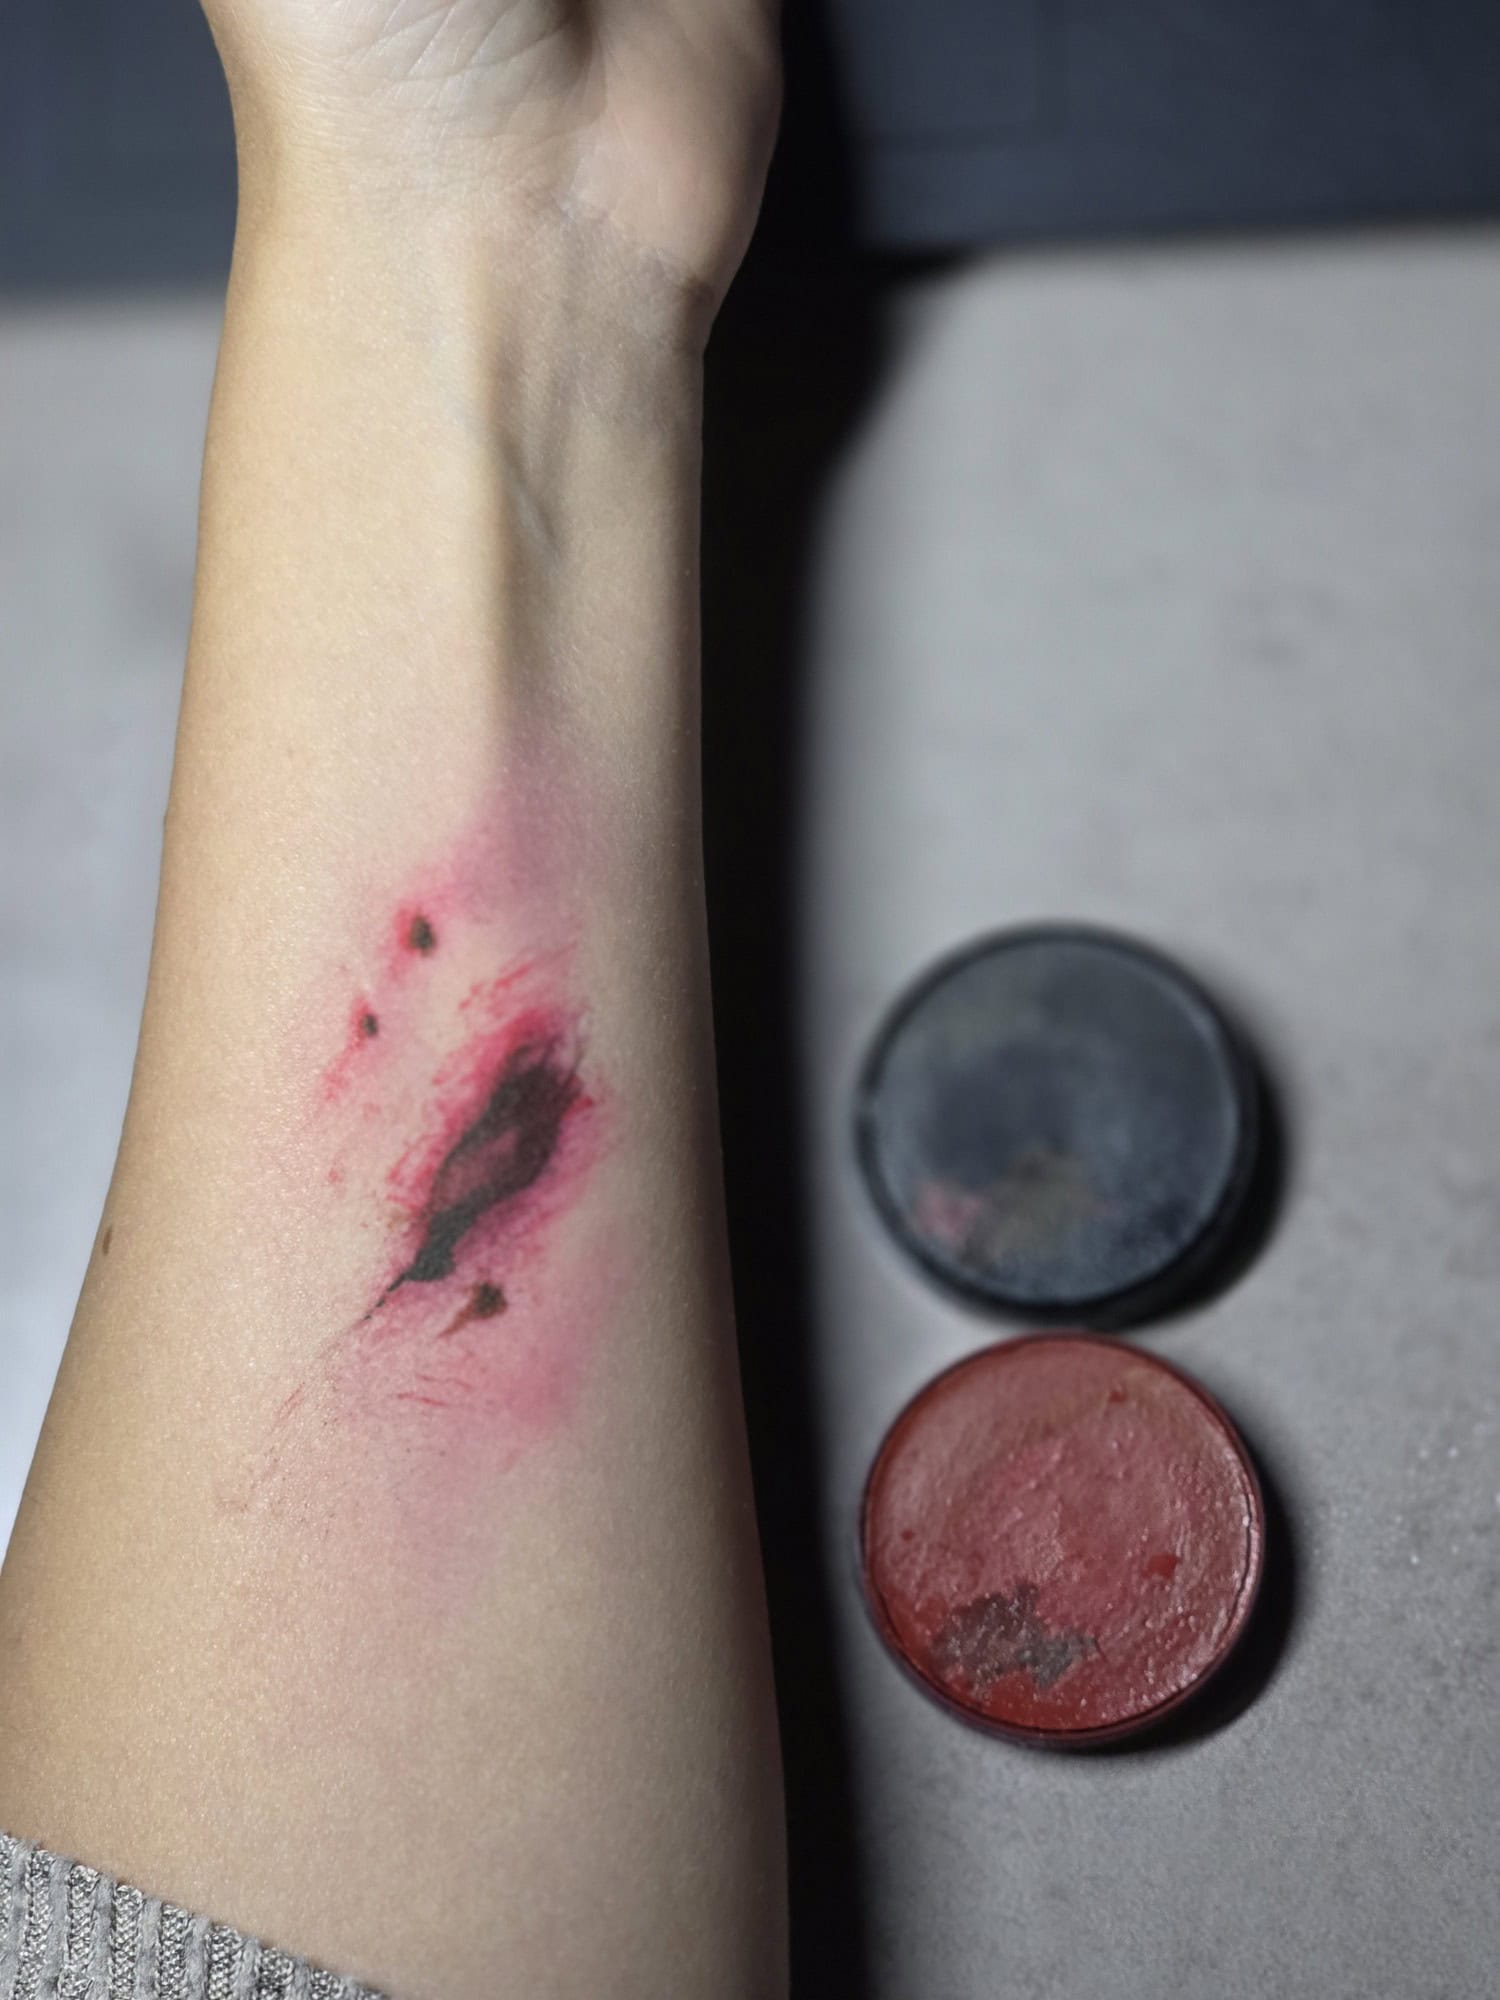
Step 3: Create the Wound
Using a small detail brush, paint the central wound shape with dark red or burgundy.
Keep the line irregular rather than perfectly smooth. Make some areas slightly wider and others narrower.
Now add a very thin darker line through selected sections of the center. This creates the illusion that the wound has depth.
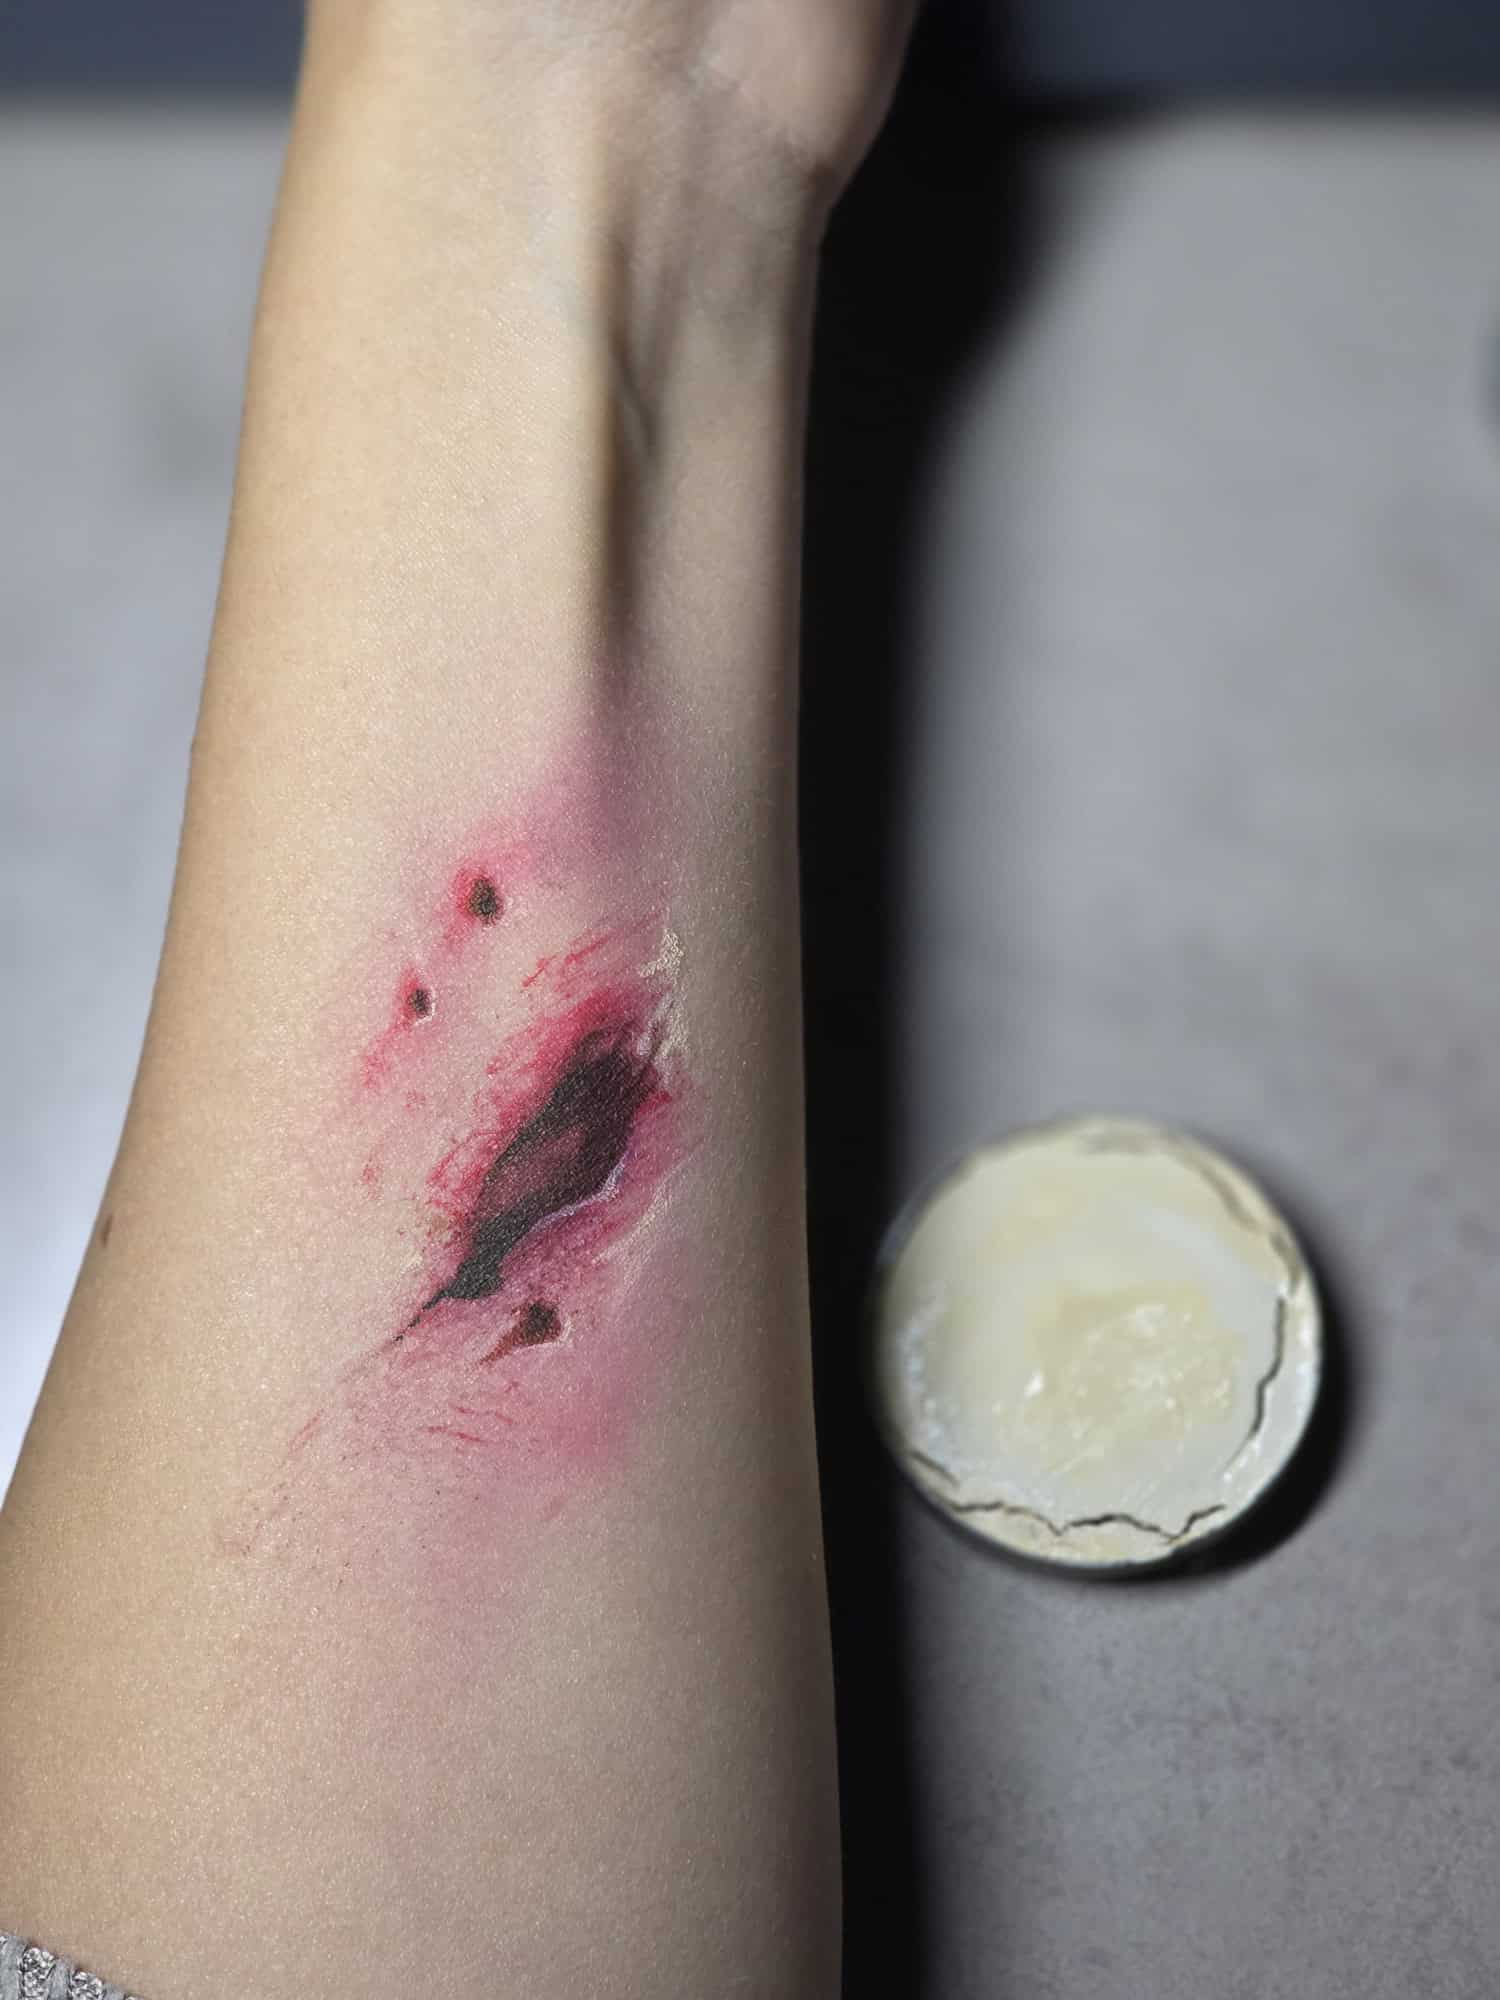
Next, place a fine light highlight along one side of the wound. The combination of a darker center and lighter edge helps create dimension without needing prosthetics.
Don’t outline the entire wound in black. Strategic shadows usually look more convincing than a heavy continuous outline.
Step 4: Add Blood and Final Details
Once the structure is complete, decide how dramatic you want the result to be.
For a simple painted wound, deepen a few red areas and stop there.
For a more theatrical Halloween design, add small amounts of cosmetic-grade fake blood around selected sections of the wound.
You can also stipple a little red, purple, or brown around the surrounding skin to break up the smoothness.
Check the effect from a normal viewing distance before adding more. Often, a wound looks more realistic when some areas remain subtle.
How to Paint Realistic Cuts
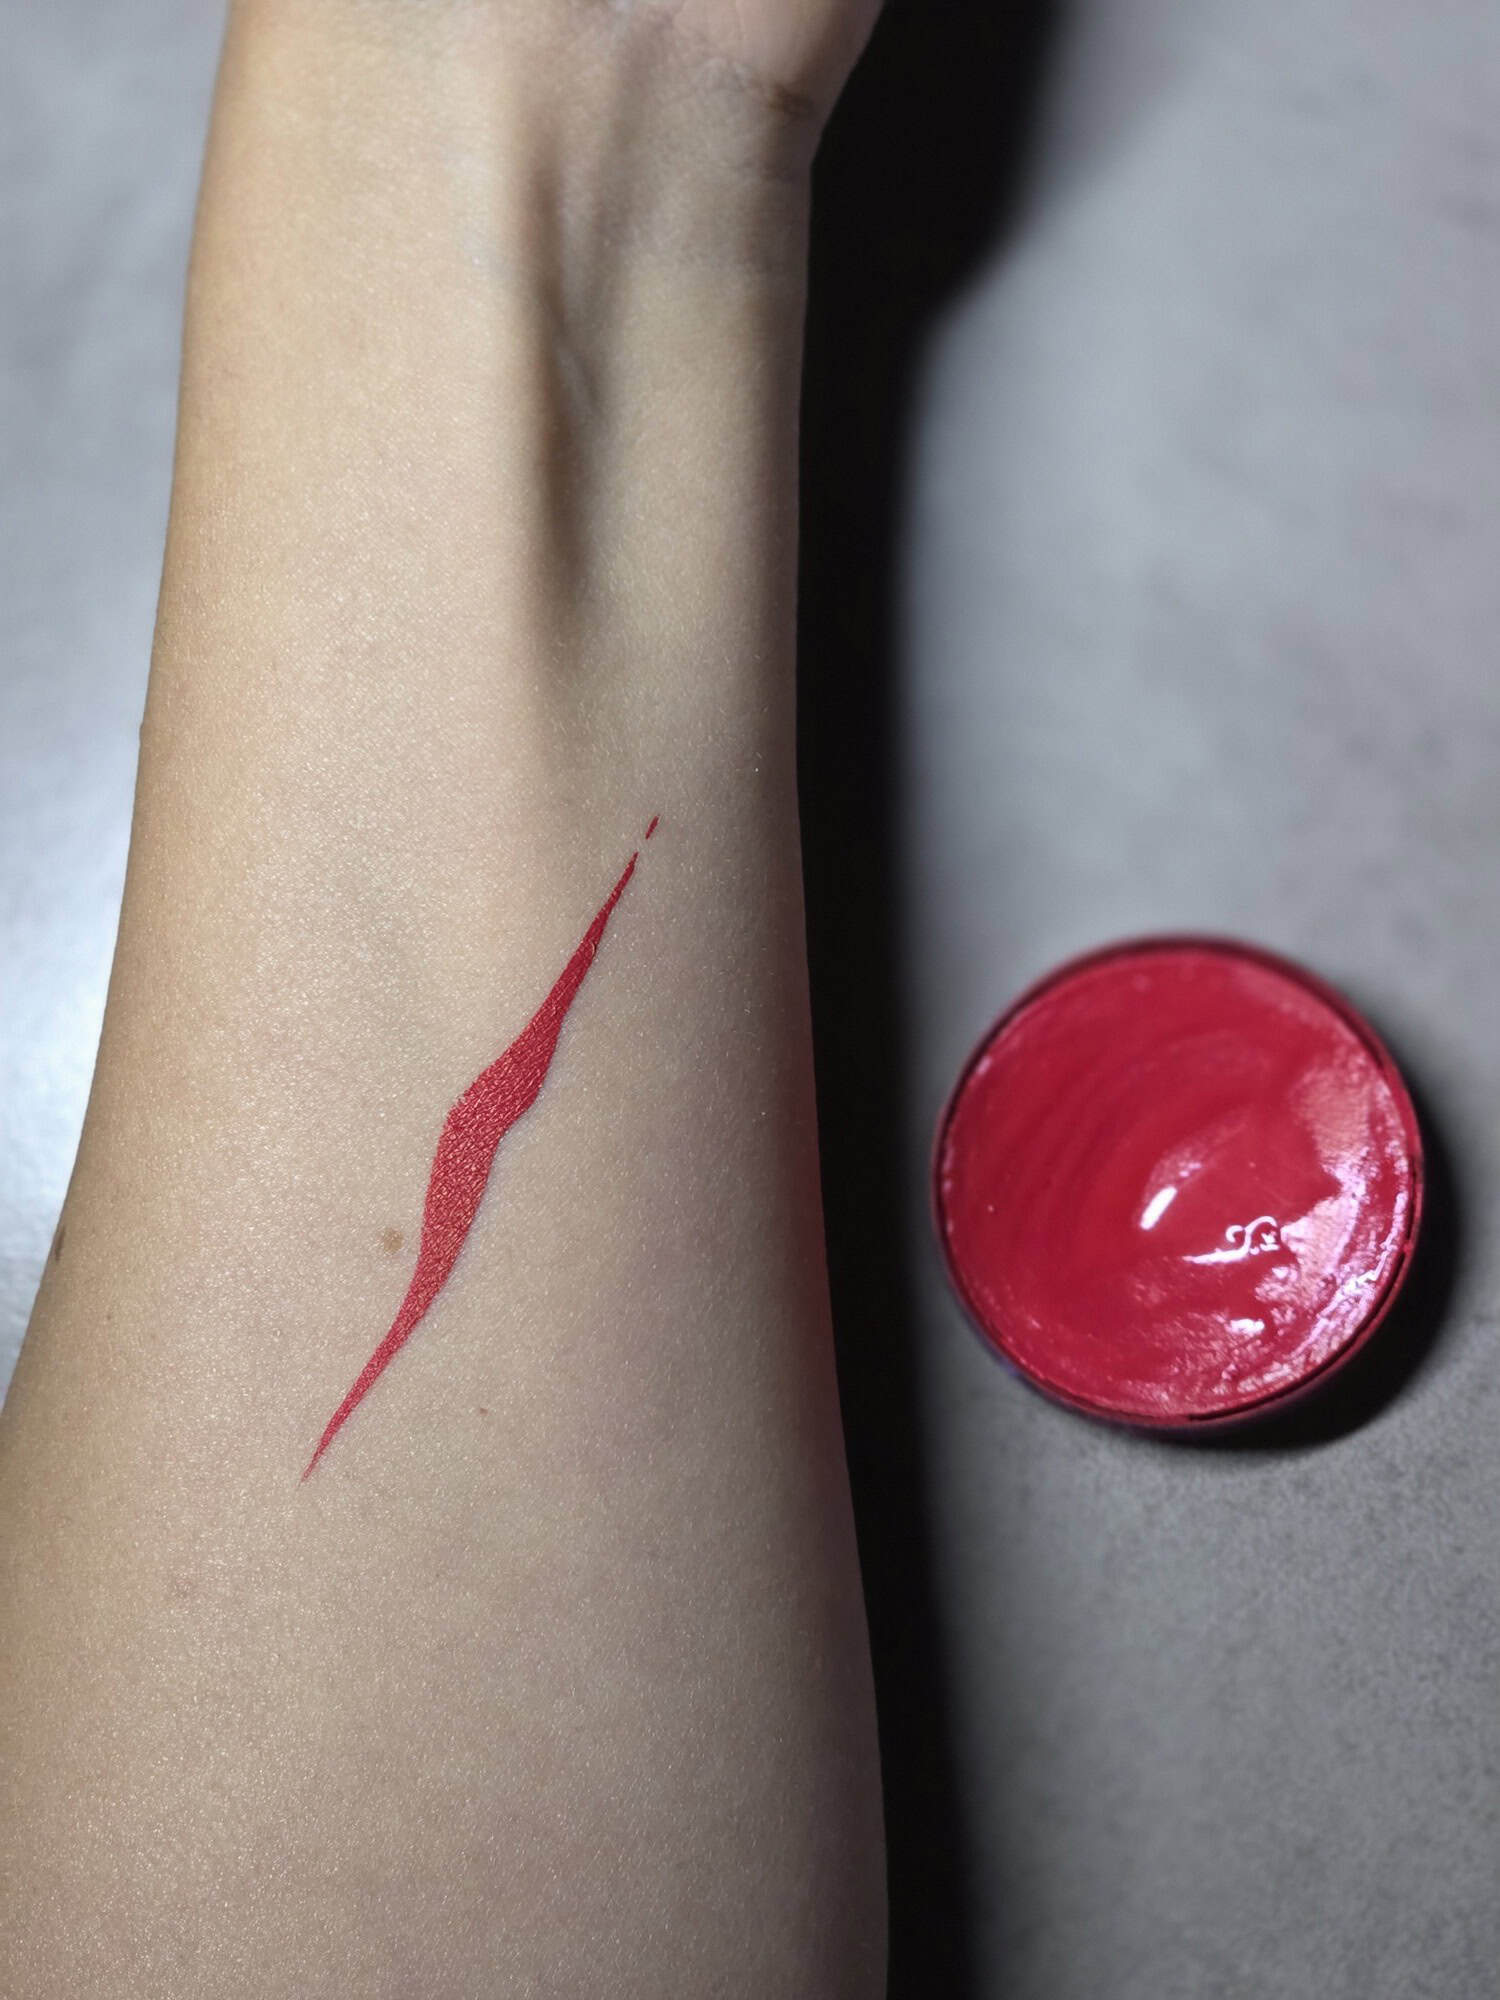
A fake cut face paint design uses the same principles as a larger wound, but on a much smaller scale.
The most important thing is creating the illusion that the cut sits inside the skin rather than simply drawing a red line on top of it.
Start with a thin, irregular dark red line.
Add a tiny amount of burgundy, dark brown, or black through the deepest section of the cut.
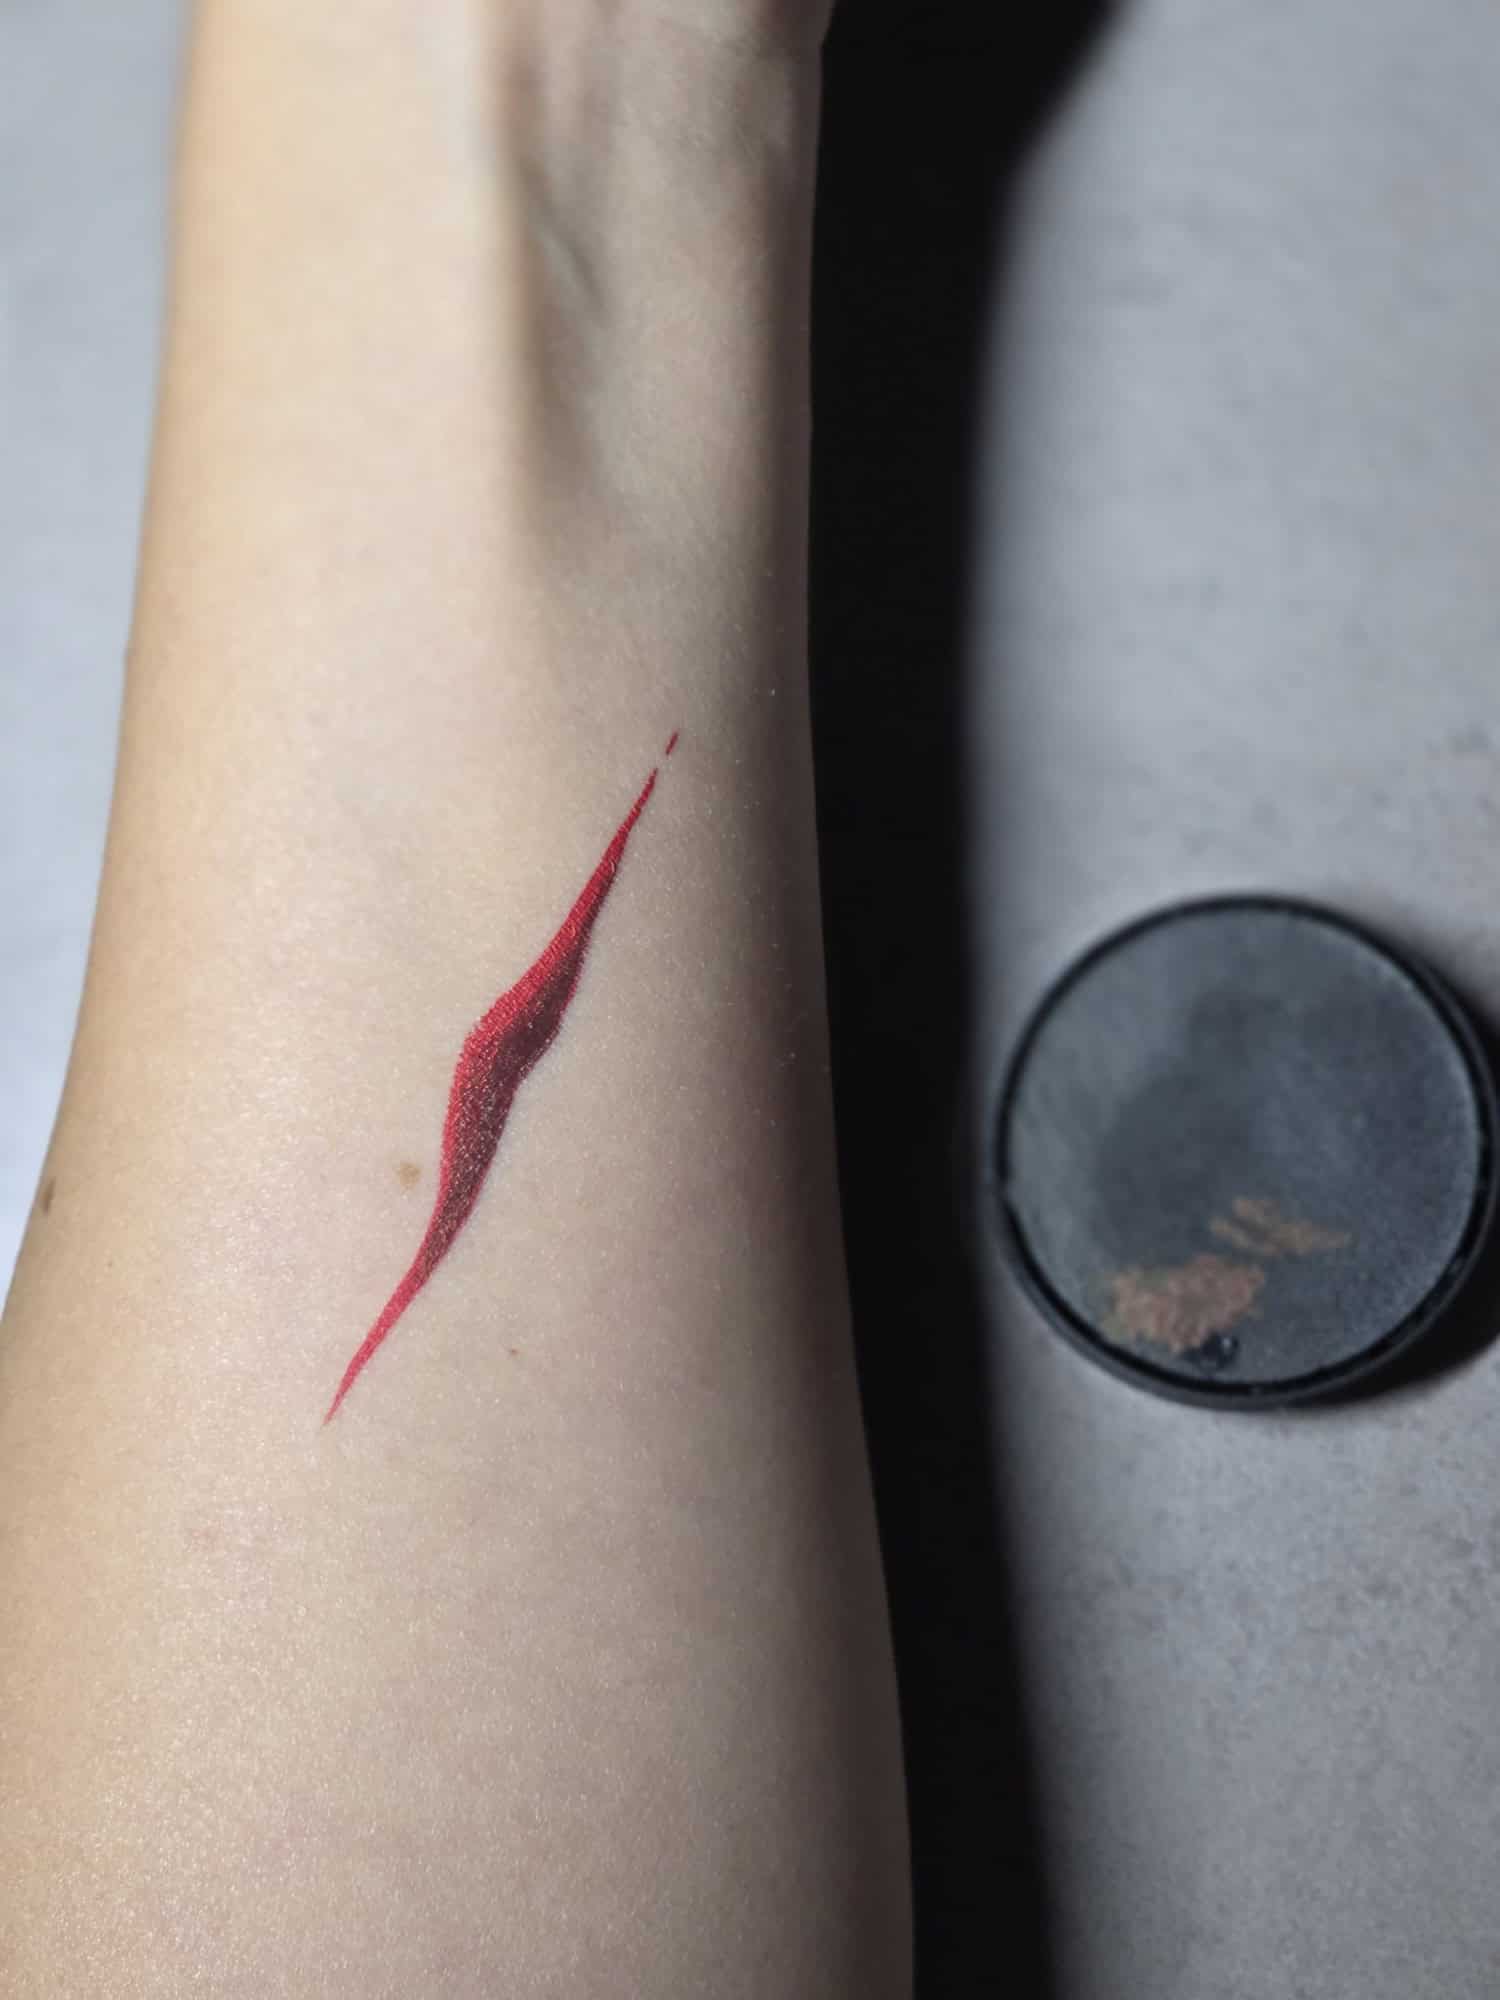
Then place a fine white, pale pink, or skin-toned highlight just beside one edge.
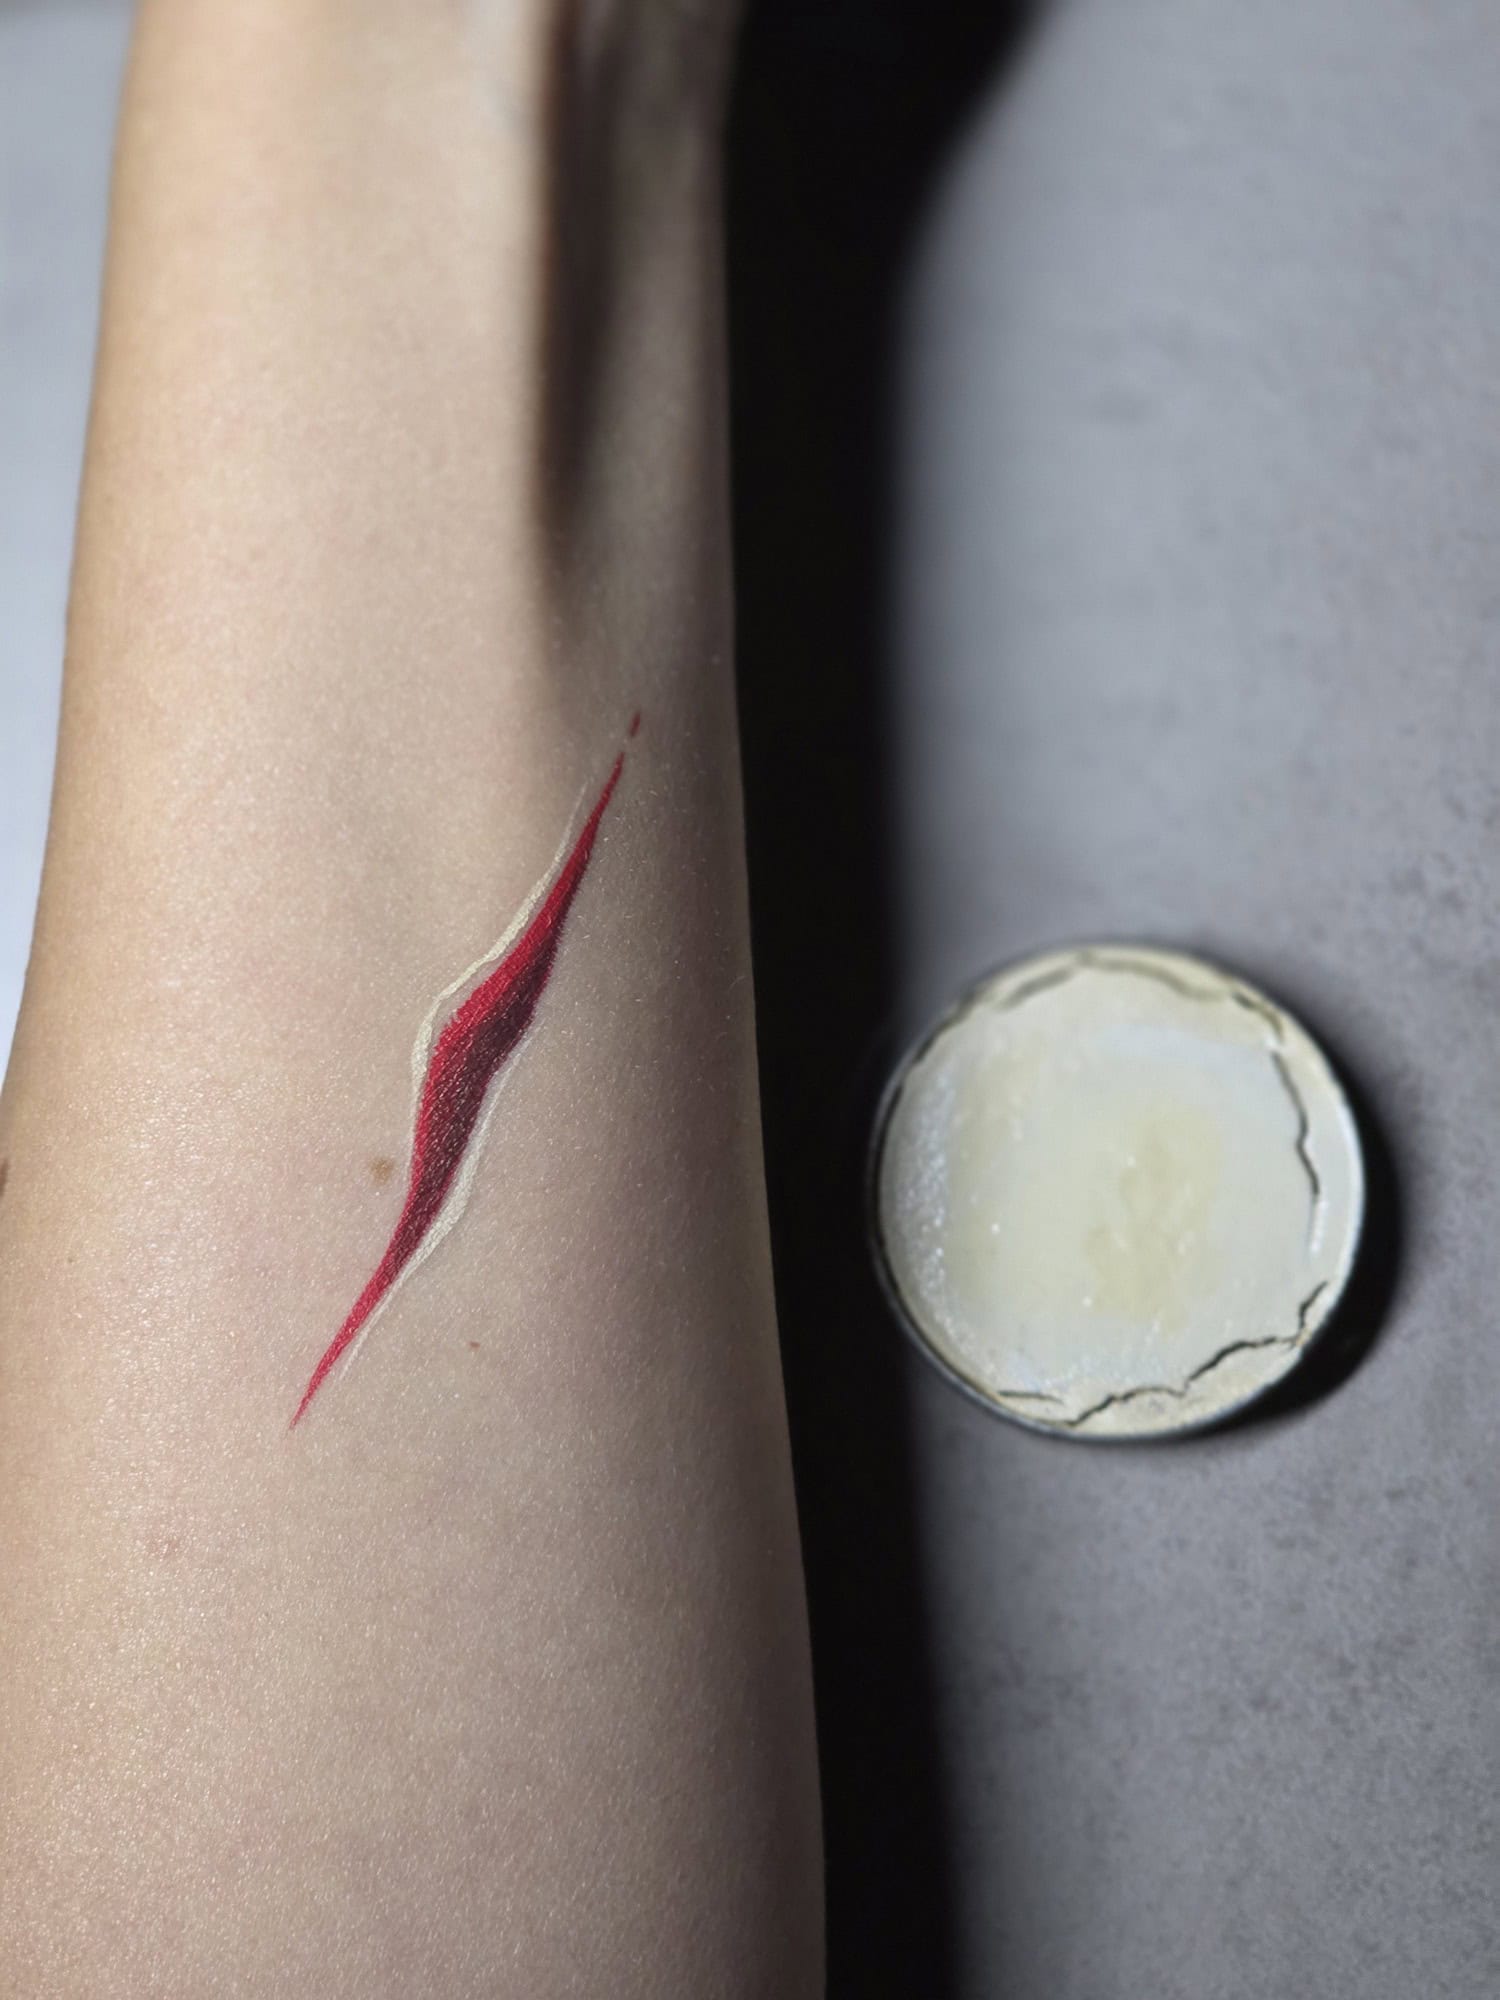
This small contrast makes a surprisingly big difference.
Next, soften a little red or purple around the cut to suggest irritation or bruising.
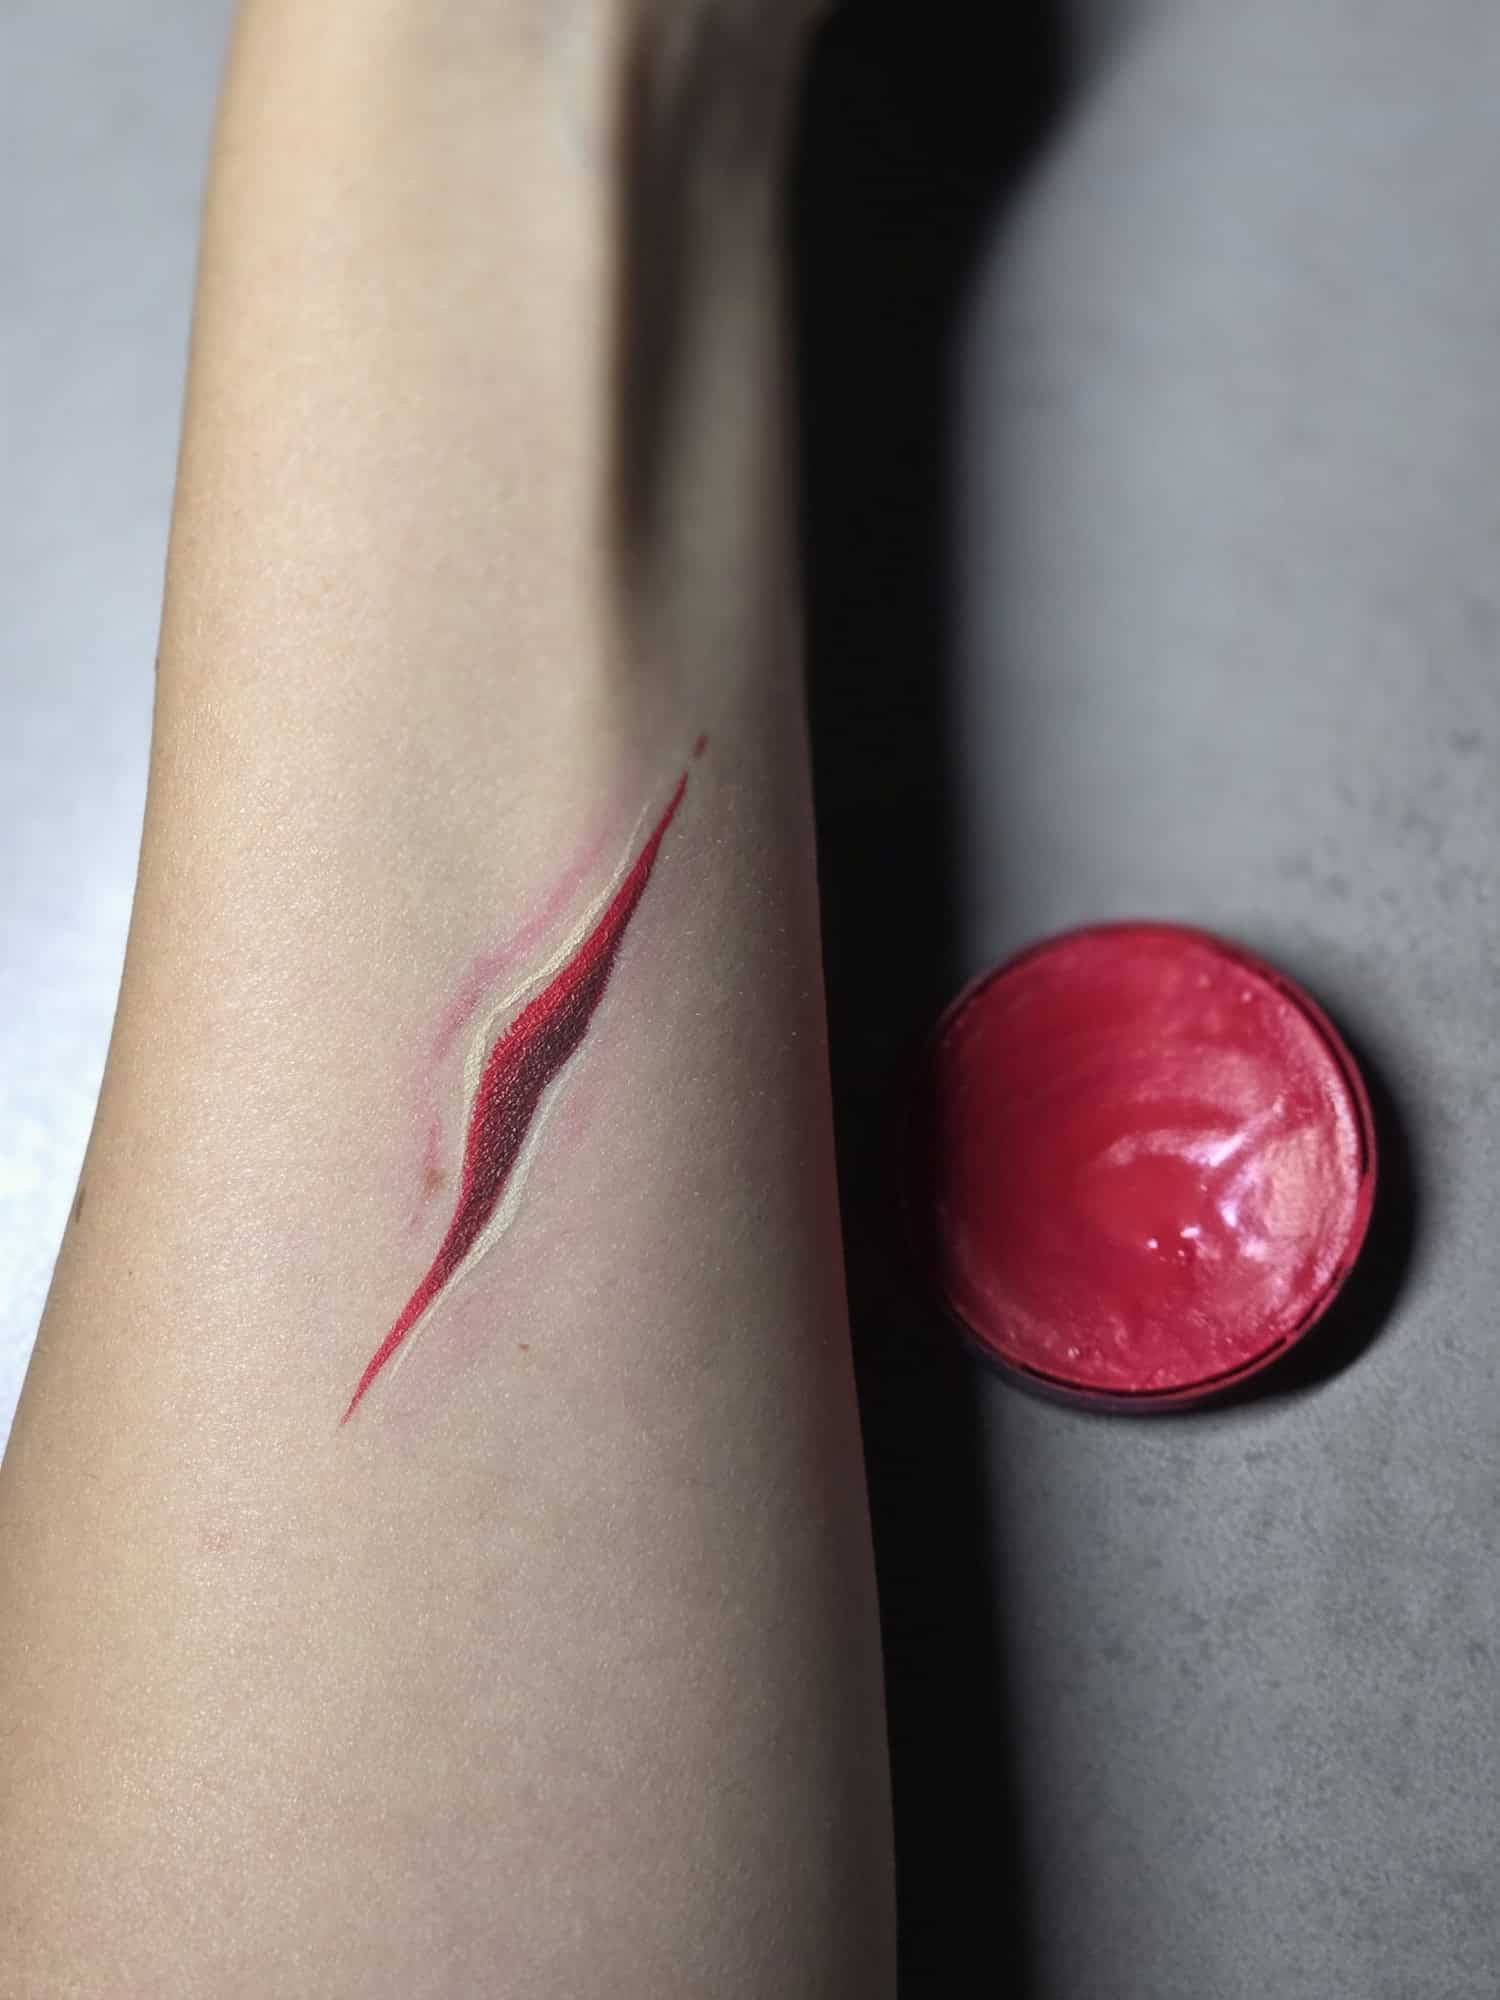
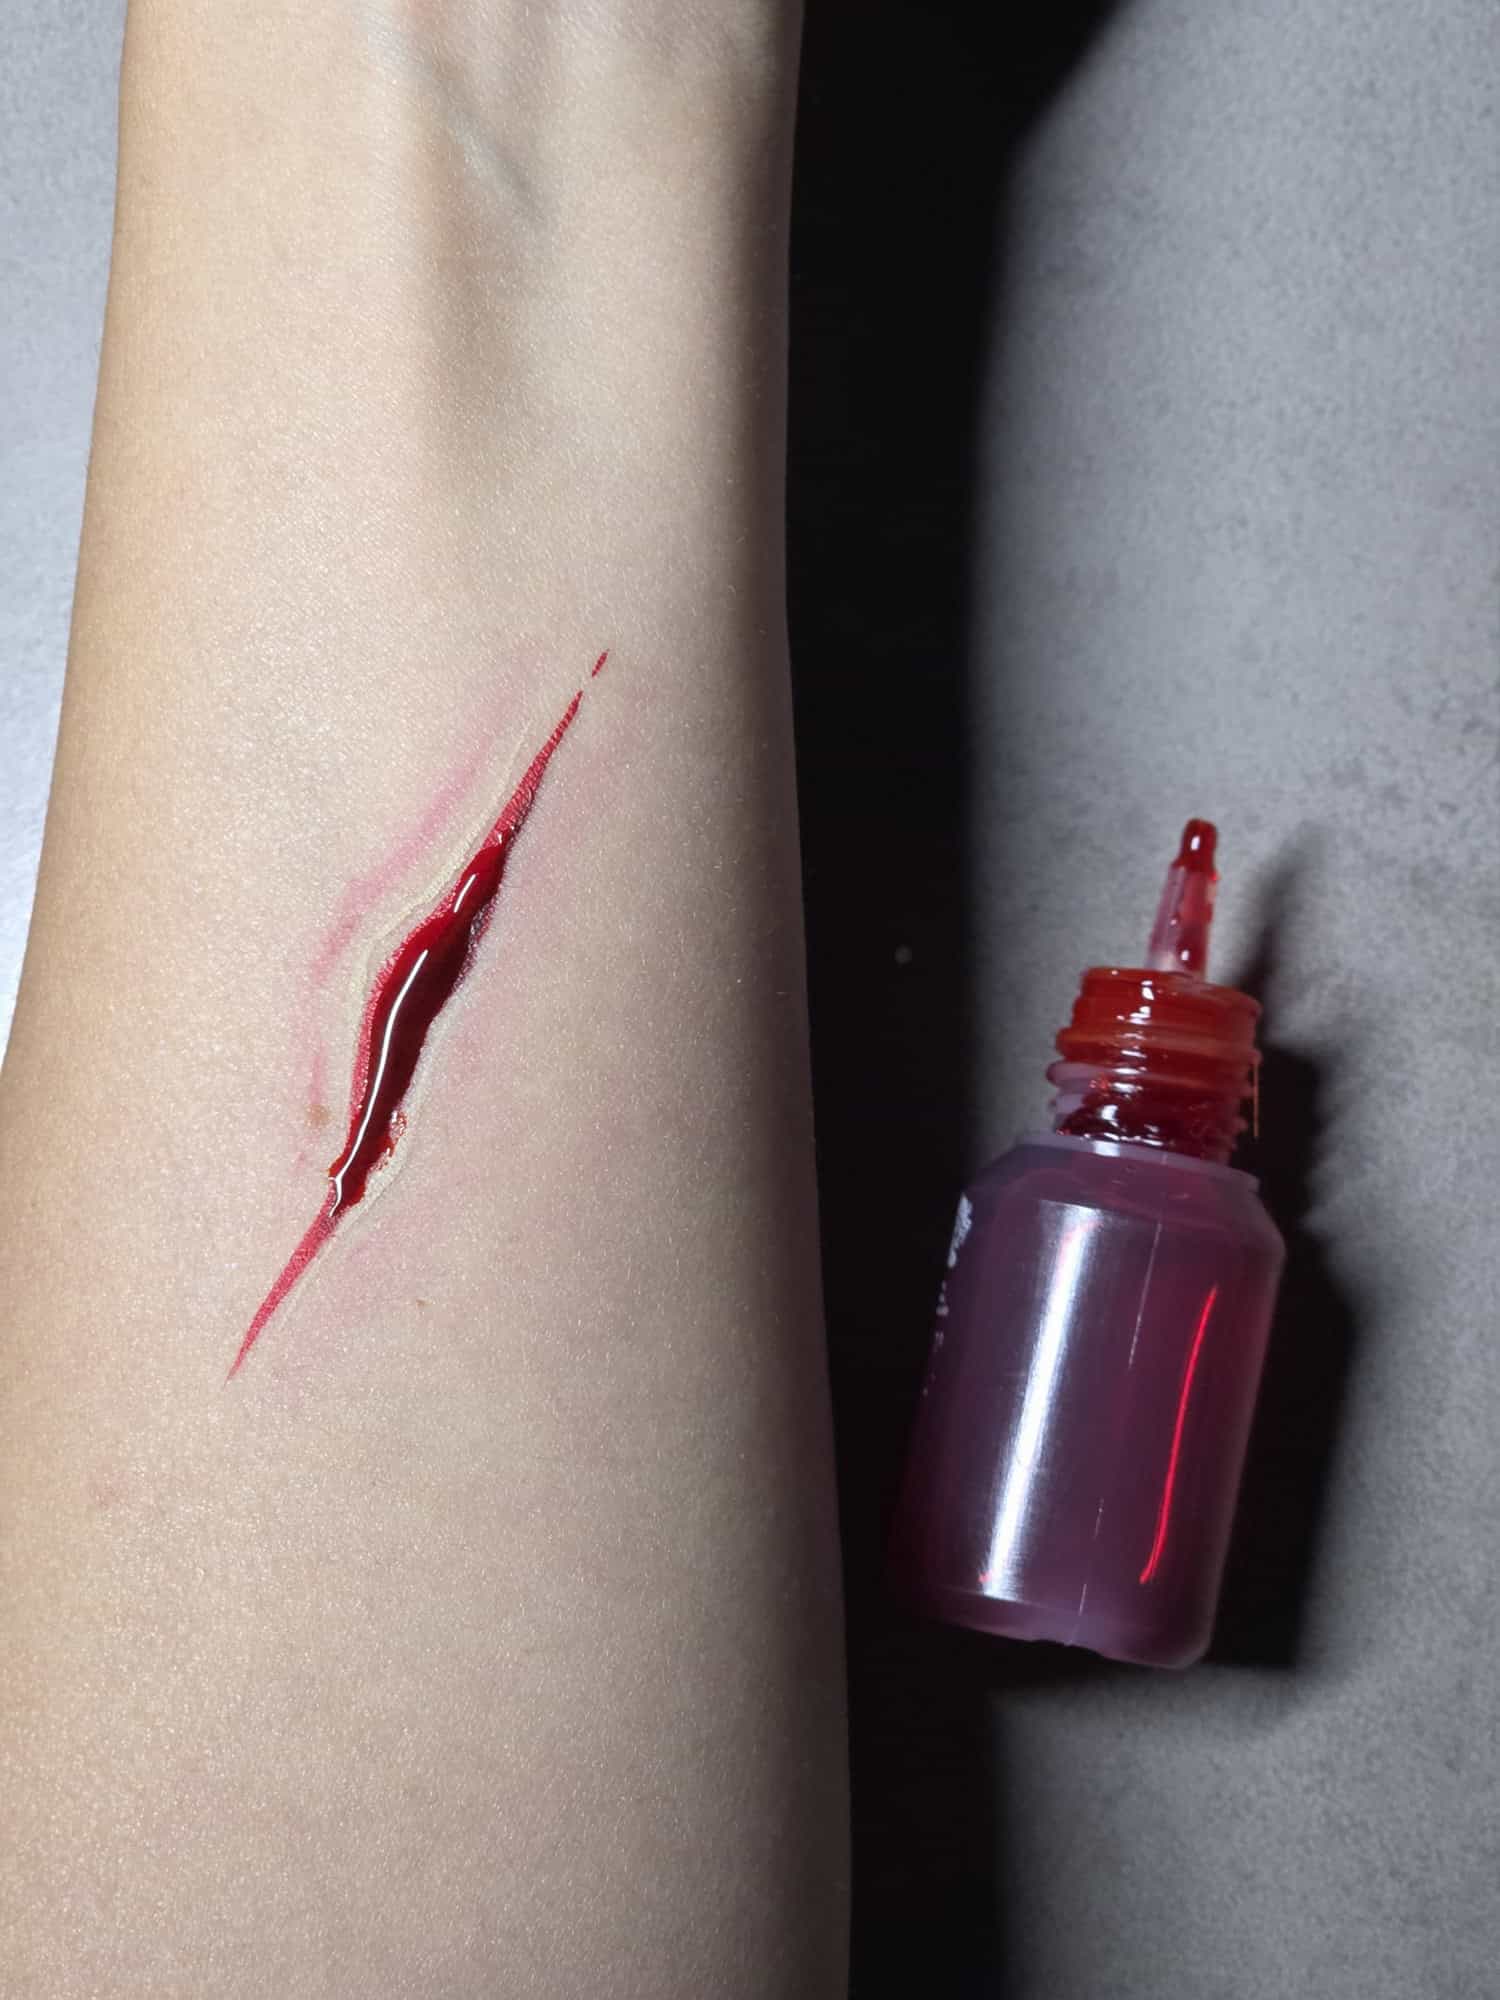
For multiple scratches, vary the length and direction of each line rather than painting three identical parallel marks.
Quick Fake Cut Formula
For a fast Halloween version, remember:
Red line → darker center → light edge → soft redness around it
That simple formula can work for scratches, monster claw marks, zombie cuts, stitched wounds, and other fake cuts for Halloween makeup.
If you want the cut to appear older, reduce the bright red and introduce more purple, brown, yellow, or muted green around the surrounding area.
How to Create a Fake Bruise with Face Paint
A good bruise face paint effect is all about layering translucent colors.
The biggest mistake is painting one solid purple circle.
Realistic bruising usually contains several colors with soft, uneven edges.
Begin with a light red or pink layer around the area you want to bruise.
Add purple and blue closer to the center, concentrating the darker colors in only a few places.
Then soften the edges with muted yellow, brown, or a small amount of green.
The transition might look something like:
deep red/purple → blue → softer red → yellow/green around selected edges
You don’t need every color in every bruise. The age and style of the effect will influence the palette.
Fresh-Looking Bruise
Use more:
- Red
- Purple
- Blue
Keep the yellow and green minimal.
Older-Looking Bruise
Use more:
- Muted purple
- Brown
- Yellow
- Green
Keep the center irregular and avoid creating a perfectly circular shape.
A sponge works particularly well for fake bruise face paint because it helps create broken, uneven color rather than hard edges.
Pro Tip: Use very small amounts of paint when creating bruises. Transparent layers are much easier to control than one heavy application.
How to Combine Wounds, Cuts and Bruises for a Halloween Look
Once you understand each technique individually, you can combine them into one complete Halloween injury makeup design.
Start by deciding which effect should be the focal point.
For example, you could create one larger wound on the forehead, add two or three smaller scratches across one cheek, and finish with bruising around the temple or jaw.
Keeping one element dominant helps the final design feel intentional rather than crowded.
You can also use these techniques to strengthen an existing Halloween character.
For Frankenstein, add stitched wounds and bruising around the forehead and temples.
For a mummy, add cuts or discolored skin between the painted bandages.
For zombies, combine damaged-looking skin with deep bruises, scratches, and darker shadows.
A vampire design might only need a pair of bite marks with subtle bruising around them.
And a monster can have exaggerated claw scratches across the cheek.
The techniques stay the same; you simply adjust the colors, placement, and level of detail to suit the character.
Easy Halloween Wound Face Paint for Beginners
You don’t need advanced SFX skills to create a quick Halloween wound.
For an easy wound face paint, keep the design small and focus on contrast.
Start with one irregular dark red shape.
Add a little deeper red or burgundy through the center.
Place a thin white or pale highlight along one side.
Then lightly sponge red and purple around the surrounding skin.
Finished!
You can create a similar quick bruise by sponging a little purple and red onto the skin and softly blending yellow around selected outer edges.
For beginner face painters, it’s better to create one simple, controlled effect than attempt an extremely detailed wound before you’re comfortable with blending and linework.
5-Minute Halloween Injury Effect
For busy Halloween events, try:
One fake cut + one small bruise + a few scratches
This gives you a recognizable Halloween effect without taking over the entire face.
You can also add it to another quick design, such as a zombie, Frankenstein, skeleton, or monster.
Halloween Wound Face Painting Ideas
Once you understand the basic wound, cut, and bruise techniques, you can adapt them into many different Halloween designs.
Zombie Wounds
Combine grey or green skin with deep red wounds, dark bruising, and irregular scratches.
Vampire Bite
Paint two small puncture marks and add subtle redness or purple bruising around them. A tiny amount of cosmetic-grade fake blood can finish the effect.
Monster Scratches
Create three irregular cuts running in roughly the same direction. Vary their length and spacing so they don’t look mechanically identical.
Stitched Wound
Paint a narrow wound first, then add small black or dark brown stitch marks crossing it. Highlighting and shadowing around the scar can add more dimension.
Bloody Cut
Keep the painted structure of the cut visible and add a small amount of cosmetic-grade fake blood only after the shading is complete.
Bruised Eye Effect
Layer purple, red, blue, and small amounts of yellow around the surrounding area while keeping all products a safe distance from the eye itself.
Frankenstein Wound
Combine a painted scar with stitches, green skin, and purple bruising. This creates a natural connection with our Frankenstein Face Paint Tutorial.
Mummy Wounds
Place cuts and bruising in the exposed areas between painted bandages. See our Mummy Face Paint Tutorial for the complete mummy design.
These techniques can also be used alongside skulls, witches, zombies, and other designs from our Halloween Face Paint Ideas collection.
Special Effects Wound Face Paint vs. Regular Face Paint
You can create convincing Halloween wounds using regular professional face paint alone.
Face paint is especially useful for events where speed matters because you can create the illusion of cuts, bruises, and scars using color, shadows, and highlights without building additional texture.
SFX wound face paint techniques may use extra products like wax to create raised or three-dimensional effects. These can be useful for theatrical Halloween looks, photography, or detailed character work.
But more products don’t automatically create a better design.
Learning how to control color, blending, highlights, and shadows will improve both your regular face painting and your special effects work.
For many children’s events and fast Halloween bookings, painted effects may also be much more practical than elaborate prosthetics.

Halloween Wounds & Bruises Face Painting FAQ
How do you make fake wounds with face paint?
Start by creating soft redness and discoloration around the area. Add a dark red irregular wound shape, deepen selected parts with burgundy or a small amount of black, and use light highlights along one edge to create dimension. Cosmetic-grade fake blood can be added at the end if desired.
How do you make a realistic cut with face paint?
Create a thin irregular red line, add a darker shade through parts of the center, and place a fine highlight beside one edge. Blend a little red or purple around the surrounding skin so the cut looks integrated into the face rather than drawn on top.
How do you paint a realistic bruise?
Layer several low-opacity colors rather than using one solid shade. Start with soft red, add purple or blue in selected deeper areas, and blend yellow, brown, or green around parts of the edges. Keep the shape irregular and the transitions soft.
What colors do you use to make fake bruises?
Red, purple, and blue work well for fresher-looking bruises. Yellow, green, and brown can help create an older-looking effect. You don’t need to use every shade in every bruise, subtle variation usually looks more convincing.
Can you create Halloween wounds without SFX makeup?
Yes. Face paint alone can be used to create convincing wounds, cuts, bruises, scratches, and scars. Strategic highlights and shadows create the illusion of depth even when the design is completely flat.
What face paint is best for fake cuts and wounds?
Use professional, skin-safe face and body paints from reputable manufacturers. Reds, burgundy, purple, brown, black, and white are particularly useful for cuts and wounds, while blue, yellow, and green can help create bruising and discoloration.
Keep Developing Your Halloween Face Painting Skills
Once you understand how shadows, highlights, and color placement create the illusion of depth, you can use these techniques across countless Halloween designs.
A simple monster can become injured. Frankenstein can gain realistic stitches. A mummy can reveal bruised skin beneath the bandages. And a basic zombie can become much more dimensional with just a few well-placed wounds and cuts.
Inside Artists Studio, you can follow more complete tutorials, practice these techniques in more detail, and learn new designs alongside other face painting artists.
Continue the Full Wounds, Cuts & Bruises Tutorial in Artists Studio →
