
Share this post:
Face Painting for Beginners
Ready to dive into face painting for the very first time? Whether you’ve been asked to volunteer, want to wow the kids at a birthday party, earn extra cash, or just explore a fun new hobby, this complete beginner’s guide has you covered. We’ll help you discover the best face paint brands, what to include in your starter kit, and provide step-by-step tutorials for quick, easy, and beautiful designs. Look no further — your face painting journey starts here!
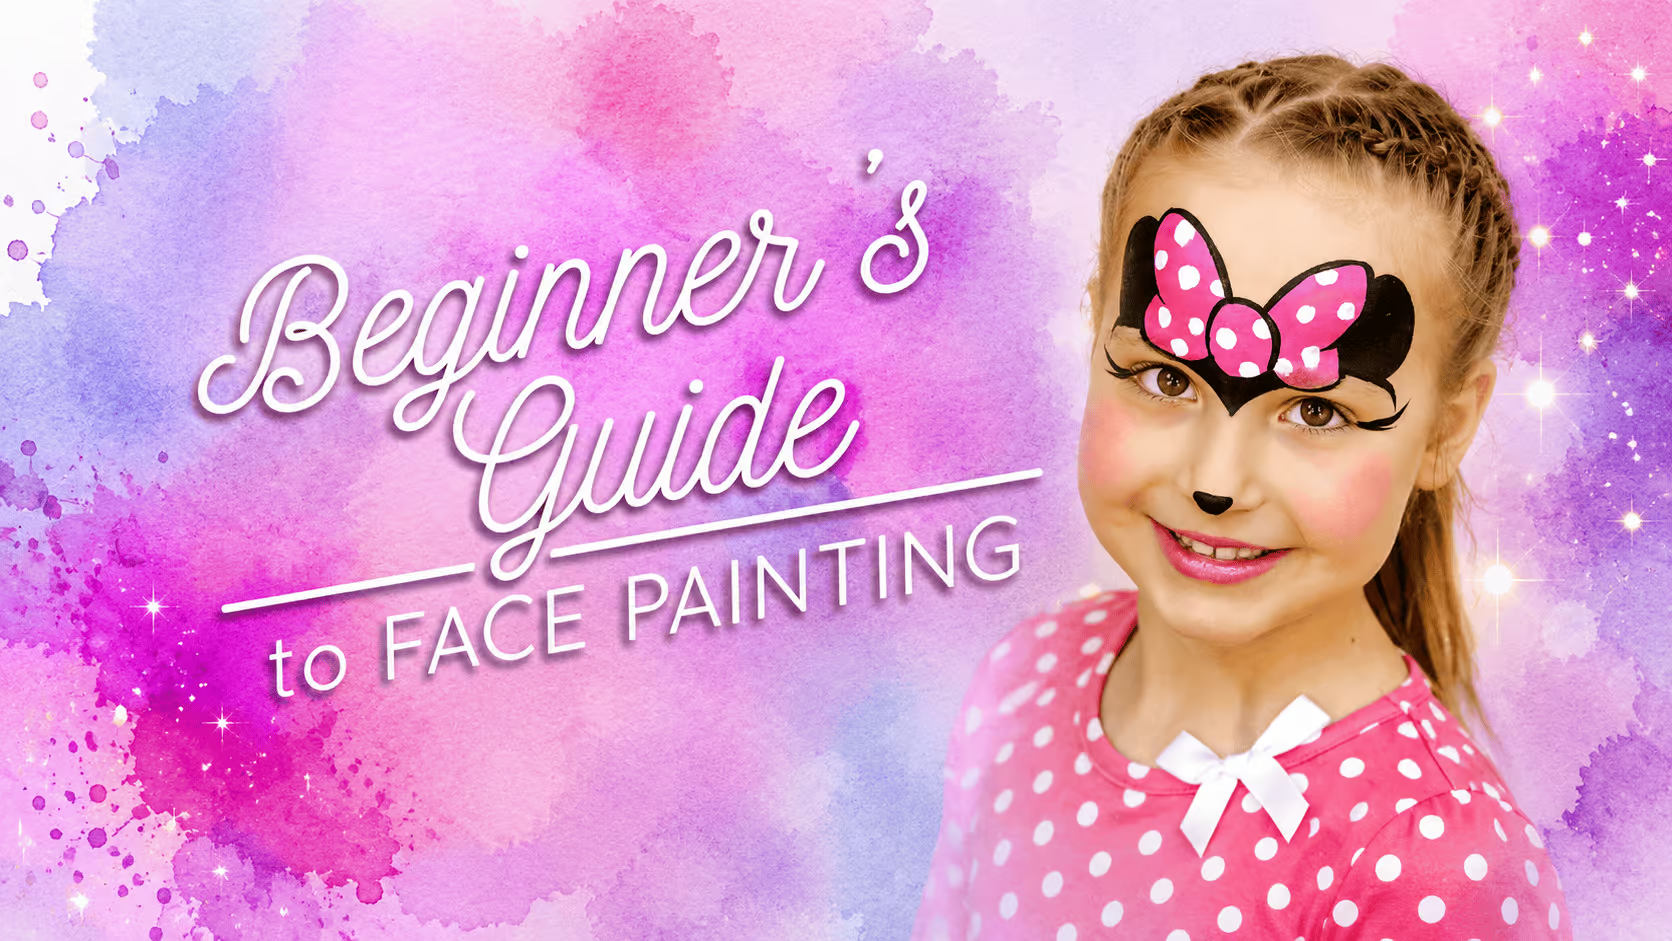


Face painting is an accessible, joyful art: low barrier to entry, high instant reward.
Whether you’re a volunteer, a parent, a hobbyist, or a performer, in a few practiced steps you’ll be able to create eye-catching looks that delight kids (and adults)!
🎯 Who is this guide for:
- First-time volunteers & event helpers
- Parents wanting memorable birthday faces
- Aspiring hobbyists who want reliable results
- Performers adding quick character makeup
Grab your Beginner’s Face Painting Kit: Everything you need for instant, amazing results!
Order Today
Build your first face-painting kit 🎨🖌️
Everything you need (and what to avoid)
Gather the right tools so you can paint with confidence from day one. A thoughtfully chosen starter kit sets the foundation for smooth application, crisp linework, and happy clients.
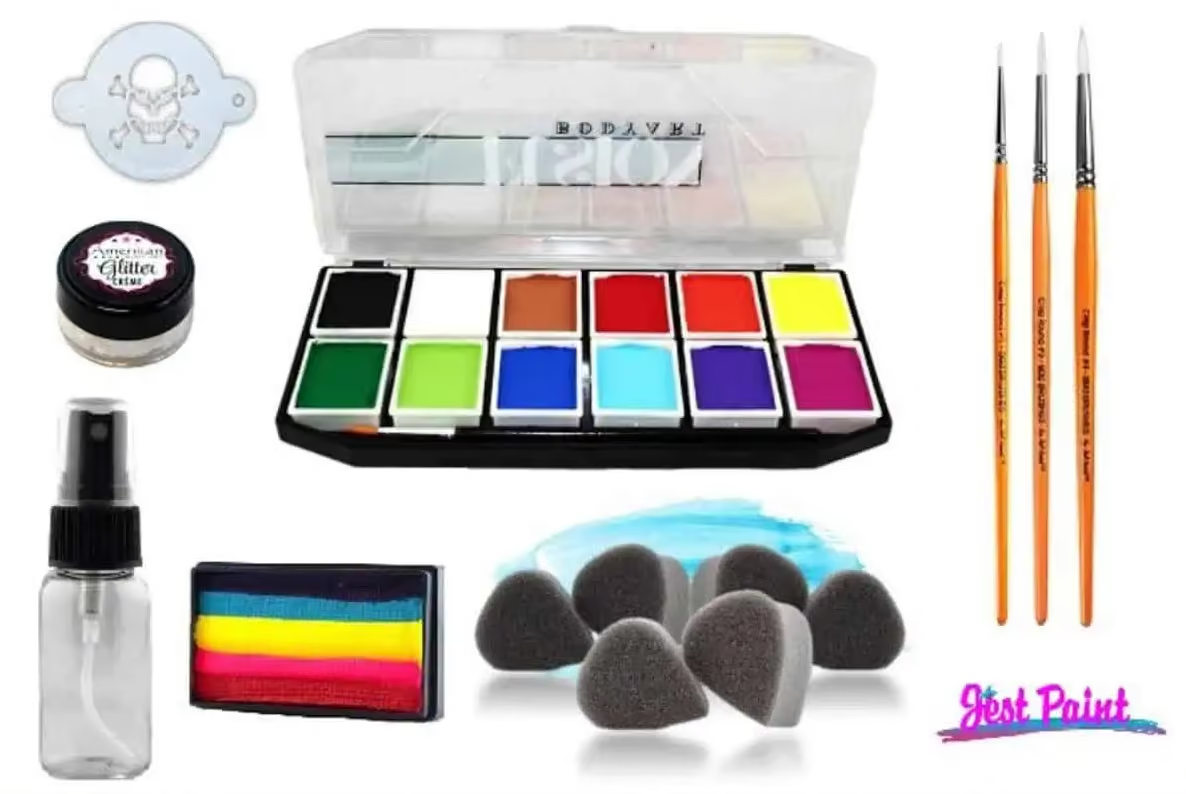
Grab your Beginner’s Face Painting Kit 🎨🖌️
Everything you need for instant, amazing results!
✅ Includes brushes, sponges, white & black paints, and starter colors
✅ Perfect for beginners looking to start painting confidently
Order your Beginner Kit here
✅ Essential supplies (starter checklist):
🌈 Paints
The core of every face painter’s kit is professional-grade, water-activated paints. These paints are either glycerin-based (softer, creamier) or wax-based (denser, more opaque). Both are skin-safe when you buy from reputable brands, following CSPA, FDA, EU, and Australian safety standards.
Remember that each brand offers three types of paints:
- Regular paints — matte colors
- Metallic or pearl paints — shimmery, reflective shades
- Neon (UV) paints — vibrant matte colors that glow under UV light
Think ahead!
If you’re planning a look for a specific occasion, whether it’s Halloween, a costume, or a theater production, make sure you’ve got the exact colors you’ll need ahead of time to bring your design to life.
🎨 How to Choose Colors
There are a few essentials every beginner should invest in:
- White for linework (30 g or 45 g pot) — for highlights, swirls, and detailing.
✅ Recommended brands: Party Xplosion, Wolfe FX, Diamond FX, Kryvaline, Cameleon, Face Paints Australia (FPA), Fusion Body Art / TAG
These are wax-based or hybrid formulas that hold a sharp tip, making them perfect for crisp lines. - Black for linework (30 g or 45 g pot) — for outlines and contrast.
✅ Recommended brands: Party Xplosion, Wolfe FX, Diamond FX, Kryvaline, Cameleon, Face Paints Australia (FPA), Fusion Body Art. TAG.
Their deep pigmentation and quick-drying consistency make them ideal for detailed linework without bleeding. - A palette of 6 or 12 colors — great for experimenting and learning without buying full-size pots. You can choose palettes made up of regular, metallic, or UV paints depending on your goals.
Optional Paint Additions:
🌈 One large rainbow split-cake for sponging — speeds up rainbow bases and is a hit with kids.
🖌️ One small split-cake for one-stroke designs with a brush — perfect for quick gradients.
✨ One pearl (metallic) white — excellent for eyelids and soft highlights; gives smooth coverage without cracking.
🧪 Paint Brand Comparison — What to Buy (and Why)
Not all paints are created equal. Here’s why the brands above consistently rank best among professional painters:
- Wolfe FX / Diamond FX / Fusion / PartyXplosion / Kryvaline / FPA / Cameleon / TAG
🌟 High opacity & pigmentation → fewer layers needed.
🖌️ Excellent linework performance → wax content gives a “snap” for sharp edges.
💧 Even activation → easy to control consistency with just water.
✨ Bold, vibrant colors that stay true on the skin.
👩🎨 Reliable coverage → no patchiness, ideal for both base coats and detail work.
- TAG | Superstar | Mehron Paradise
🖤 TAG → wax-based formula, firm texture ideal for crisp lines and detailed designs.
🧼 Superstar → softer, glycerin-based formula, creamy consistency perfect for sponging and blending large areas.
🌈 Mehron Paradise → similar to Superstar, soft and creamy, great for smooth blends and beginner-friendly application.
🌟 TAG is best for sharp edges and linework, while Superstar and Mehron Paradise are excellent for base coats, gradients, and gentle blending.
- Global Colours & Kryolan Liquid Paints
💧 These are liquid formulas rather than dry cakes. While safe, they’re trickier to control and don’t give the same crisp linework. Many artists avoid them unless cakes aren’t available locally.
🚫 Paints to Avoid: What NOT to Use
Safety comes first — especially when painting on children. Stick to professional-grade face paints and avoid these common pitfalls:
- Non-cosmetic grade paints – craft, acrylic, gouache, or watercolor paints are not skin-safe and can cause irritation.
- Snazaroo (beginner grade) – widely available in craft stores but low pigmentation, streaky coverage, and prone to cracking.
- Other unsafe paints – alcohol-activated paints, cheap face paints that don’t meet CSPA, FDA, EU, or Australian standards, or any products not specifically designed for skin application.
Tip: Always buy professional face paints from reputable stores to ensure safe, vibrant, and long-lasting results.
Check out the dedicated guide on Best Face Paints to find even more suggestions!
🌍 Where to Buy Face Paints by Country
Australia
Canada
Netherlands
United Kingdom
United States
🖌️ Brushes
You can’t start painting without good basic tools. For beginners, five brushes are enough to create a huge variety of designs:
- #1 round brush — tiny details
- #3 round brush ×2 — thin outlines and swirls (one reserved for white, one for black)
- #4 round brush ×2 — building shapes and outlining full-face designs (again, one for white, one for black)
- 1-inch flat brush — for split-cake rainbows and large strokes
- ½-inch filbert — for eyelids, ears, and rounded shapes
Can You Use Craft Brushes for Face Painting?
Yes, but with caution. For flat and filbert brushes used in large, non-detailed areas (like rainbows or eyelids), budget-friendly craft brushes may work—as long as they are synthetic and used only on the skin.
Linework is the key technique for beautiful face painting, so if you can afford a set of professional brushes, we recommend you check out these brands: KingArt 7950 series, Paint Pal swirl series, Alyiah round and ultra round, and Bolt brushes.
🧽 Sponges
Sponges are a must-have for any face painter. They let you cover large areas quickly, smoothly, and more evenly than brushes. For safe face painting, always use one sponge per child, so stock up from the start!
The best option is the classic half-circle sponge, which also comes as a full circle, you can cut in half to get two. You’ll find them from many reliable face painting brands (check our shop list above).
For extra flair, add petal-shaped sponges to your kit. Their unique design makes creating butterfly wings, flowers, and other crowd-pleasers effortless. With the right sponges, your work will be faster, safer, and more impressive every time.
💦 Water container + spray bottle
A good water container is more important than it looks—it keeps your brushes clean, speeds up your work, and helps your setup look tidy and professional.
A three-pot washing system is the most popular: one main container with a sanitizing and washing product such as Brush Bath by Silly Farm; a second with plain water to rinse brushes; and a third with clean water for activating paint with clean brushes.
Change your water regularly between clients.
You can buy brush cleaning tubs with 3 compartments or use three separate containers.
Tip: Plastic or metal is best—durable, safe, and kid-friendly, unlike glass. While opaque containers hide muddy-looking water.
Alongside the tub, always keep a fine mist spray bottle (about 200 ml / 7 oz) in your kit. It’s essential for wetting sponges, activating paints with clean water, and keeping them at the perfect consistency.
With this simple combo, your face painting will stay smooth, fast, and stress-free.
🪞 Mirror (plastic), wet wipes, soft towels, paper towels
A sturdy plastic mirror is a must-have for step-by-step face painting. Kids are naturally curious and may grab or knock it, so a plastic option (or one with a protective plastic coating) keeps everyone safe by preventing shards if it breaks.
Plastic mirrors are lightweight, easy to clean, and widely available online or at major craft stores. Having a mirror handy lets children see their designs as you work, adds to the fun, and keeps your workflow smooth and professional.
✏️ Stencils
Stencils are a game-changer for beginner face painters. They make designs faster, neater, and perfect for freehand beginners.
Find them in all shapes, textures, and themes—affordable options are available online or in craft stores, including popular party designs like Frozen or Transformers.
Quick, easy, and fun, stencils help you wow kids with professional-looking results every time.
Check out our Ultimate Face Painting Stencils Buying Guide for more details and find out what other professional stencils we recommend!
✨ Cosmetic-grade glitters
Glitter adds sparkle and fun to any face painting design—but safety comes first. Always use cosmetic-grade glitter, available at face painting shops or makeup departments.
Avoid craft glitters: they can contain metal particles that may scratch the eyes, cause allergic reactions, or stain skin. Cosmetic-grade glitter is safe, vibrant, and perfect for creating dazzling, kid-friendly designs every time.
📃 Face paint choice board
A face paint choice board keeps your designs organized and helps clients pick their favorites.
Beginners don’t need a full portfolio—start with a simple word board or menu-style board to showcase ideas, inspire creativity, and update designs easily.
Ready-made options, like beginner-friendly menu boards available on Etsy, make it simple to display your colors and designs professionally while growing your skills.
Set up a clean, safe, and comfortable workspace 🧼
Keep it clean, keep it safe! Your setup should be inviting, efficient, and above all, hygienic.
Good hygiene isn’t just about looking professional; it keeps your paints in top shape and your clients healthy and happy. Whether you’re painting a few faces or working at a busy event, clean tools and smart hygiene routines are non-negotiable.
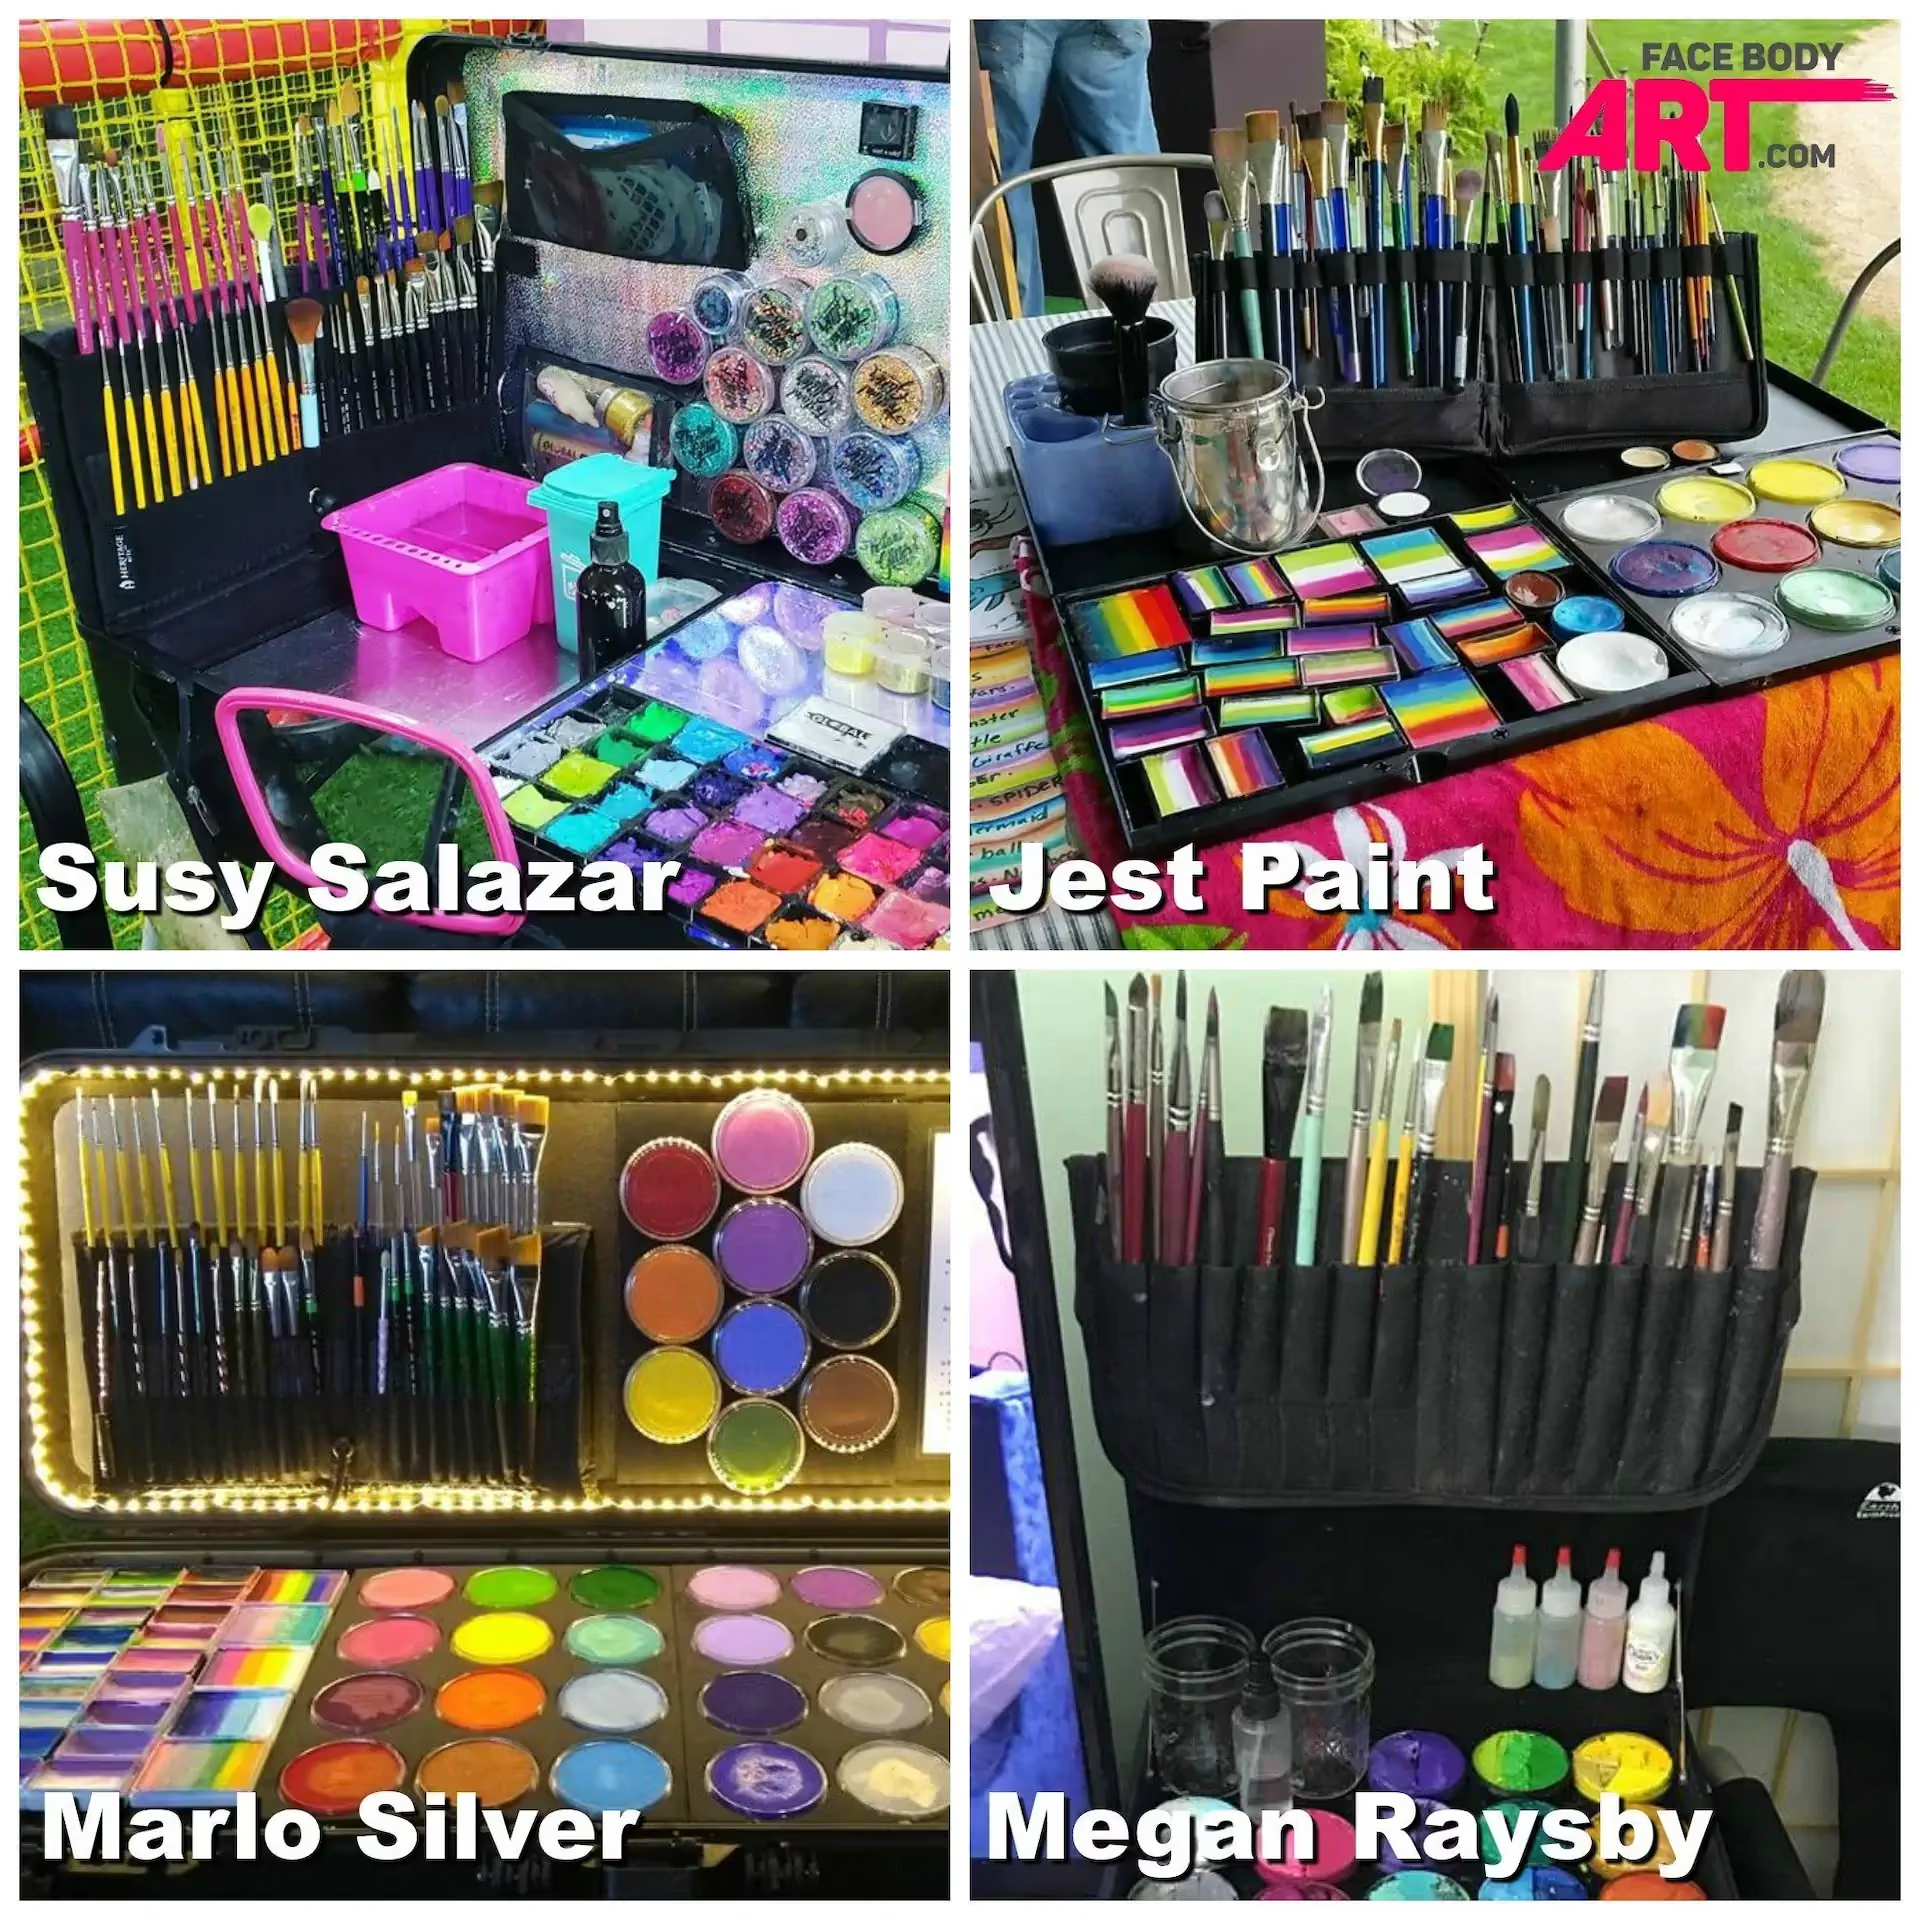
🧰 Storing Your Paints — Keep Them Protected
Your paints deserve a clean, safe home!
- Keep paints away from dirt, moisture, and germs. Stored properly, they can last for years (although we recommend always checking the manufacturer’s instructions for recommended use-by dates)
- A sturdy carrying case makes transport easier and keeps everything organized. Many artists use small suitcases, makeup cases, gun or scrapbooking cases.
- Always close lids securely and store paints in a cool, dry place between gigs.
Tip: Hunt for budget-friendly cases at second-hand shops, resale platforms, or online marketplaces.
🧽 Taking Care of Your Paints — Wipe & Refresh
Clean paints = better colors + longer life
- After each gig, wipe the surface of your paints with a wet wipe or clean, slightly damp sponge.
- Use gentle circular motions for single colors, or wipe along the stripes for split cakes.
- Let the paints air dry fully before storing to prevent mold or odors.
🖌️ Brush Care Basics — Clean, Dry, Sharp
Happy brushes = smooth lines and swirls
- Never leave brushes soaking in water; it bends bristles and ruins the shape. ❌
- Always wash brushes individually with soap and warm water after every gig.
- Let them air dry flat or hanging with bristles facing down.
- Don’t store brushes upright while wet — water can seep under the ferrule (the metal ring) and loosen the glue.
- Once dry, sanitize brushes before the next job.
- Use brush holders or wallets so bristles don’t touch and stay in perfect shape. 🧼
✨ Sanitizing Brushes During the Job: The Three-Pot System
The gold standard of on-the-job hygiene!
The three-pot washing system is widely used by professional face painters to keep brushes clean between clients:
- 🧴 Pot 1: Wash & Sanitize
- Contains a sanitizing product (e.g., Brush Bath by Silly Farm).
- This is where you first wash off paint and disinfect the brush.
- Contains a sanitizing product (e.g., Brush Bath by Silly Farm).
- 💧 Pot 2: Rinse
- Plain water to rinse off the sanitizer and any leftover paint.
- Plain water to rinse off the sanitizer and any leftover paint.
- 🌊 Pot 3: Fresh Water for Painting
- Clean water for activating paints with your newly cleaned brush.
- Clean water for activating paints with your newly cleaned brush.
Optional: A 4th pot can be used as a “pre-wash” for heavily loaded brushes to keep the main three pots cleaner.
🔄 Change your water regularly. Muddy water doesn’t look professional, and clean pots show clients that you take hygiene seriously.
After cleaning, lightly dry your brushes on a clean towel to remove excess water, then place them in a clean holder until the next use.
🧼 Brush Care After the Gig: Deep Clean & Sanitize
Your end-of-day ritual to keep brushes like new
- Wash every brush separately under warm running water with soap.
- Let brushes air dry flat or hanging overnight.
- Sanitize brushes using Brush Bath (works even when diluted) or Beauty So Clean (effective on dry brushes).
- Don’t store brushes wet or with bristles touching each other.
- Use a brush wallet to protect clean brushes between jobs. 🖼️
🧽 Sponge Hygiene — One Sponge per Face
Soft tools need serious cleaning too!
- Use one sponge per child (this is legally required in some regions). ☝️
- Never leave sponges soaking in water during work.
- After the job, wash sponges with antibacterial soap under running water or place them in a special bag in the washing machine/dishwasher at 90 °C (194 °F).
- Let sponges dry fully on a clean towel overnight.
- Sanitize using Brush Bath or Beauty So Clean.
- Always store sponges dry and never in airtight containers — moisture can lead to bacteria and mold growth. ❌
Learning How to Face Paint: Overview
Use brushes and sponges effectively 🖌️🧽
Once you’ve gathered your supplies and nailed the hygiene basics, it’s time for the fun part — learning to paint! This is where you’ll discover how to activate your paints, control different consistencies, and use brushes, sponges, and split cakes like a pro. Proper technique is the difference between beginner-level doodles and jaw-dropping designs.
💦 Activating Face Paint — Get the Perfect Start
Good activation = smooth application
- Lightly spritz the paint with clean water or drip a few drops from your brush.
- Create a small well in the center of your cake by swirling your damp brush down to the plastic. This gives you a ready pool of paint to work with and prevents the edges from going gooey.
Tip: New paints may need extra water at first — especially wax-based paints (like regular or neons). Glycerin-based paints, on the other hand, soften quickly and reach a creamy consistency almost immediately.
- Gently rotate your brush until it’s fully loaded, keeping the tip sharp.
- Adjust the amount of water and activation time to get the right consistency for each color.
Core techniques every beginner should master 🎯
Learn the building blocks: lines, dots, blends, and one-stroke magic.
🧪 Working with Paint Consistencies — Control is Key
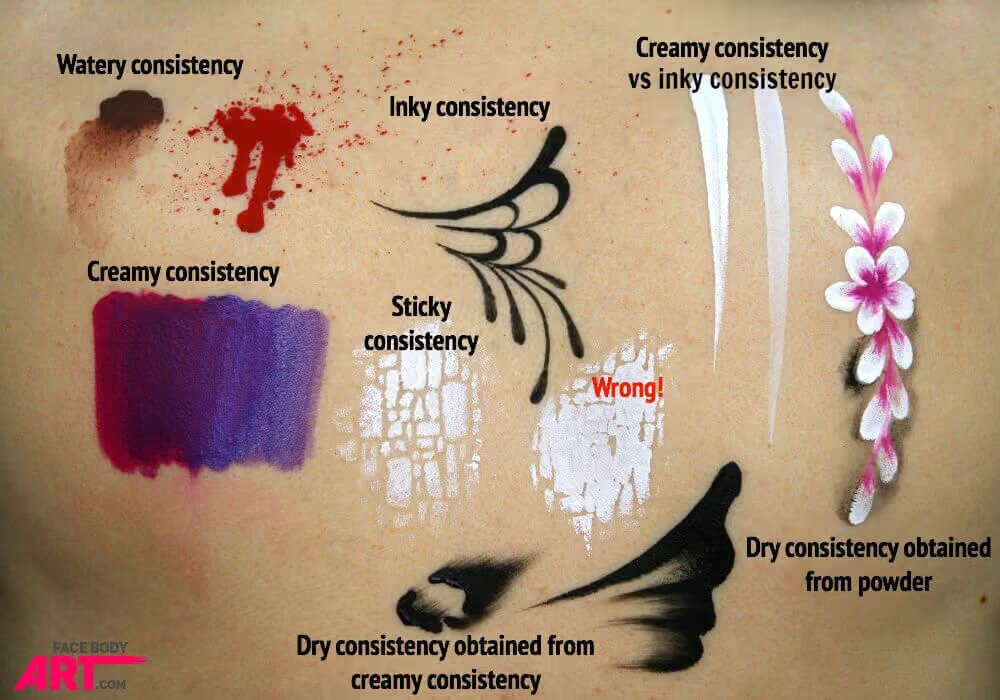
Five consistencies every painter should know
Understanding paint consistencies is the foundation of professional-quality designs. Different effects need different textures:
- 💧 Watery: Great for splashes, drips, blood effects, or painting soft shadows.
- ✍️ Inky: Slightly more watery than creamy; ideal for linework with black or dark colors.
- 🍦 Creamy: The most commonly used consistency — unlocks vibrant colors, crisp white lines, and smooth coverage.
- 🩹 Sticky: Perfect for stenciling, giving clean edges without bleeding.
- 🌫️ Dry: Used for dry brushing and textured effects like fur or shading.
🖌️ Brush Basics: Precision Meets Art
The right brush = clean, professional lines
Invest in high-quality round brushes — they make a dramatic difference in your linework.
- Always hold your brush perpendicular to the skin for sharper lines.
- Use the right size for the job:
- #1 round → tiny details
- #3 round → outlines & swirls
- #4 round → shaping and thicker strokes
- #1 round → tiny details
- Flat 1-inch brushes are your rainbow and split cake heroes 🌈.
- Filbert ½-inch brushes are ideal for petals, eyelid colors, and rounded shapes.
- Rotate the brush as you load it with activated paint up to the ferrule — be gentle to keep the bristles in shape.
👉 Remember the Paint consistency? It matters here:
- Use creamy for white linework and solid colors.
- Use inky for black or colored outlines.
🎯 Thick-to-thin control: The most beautiful lines are sharp at the ends and thick in the middle. Vary brush pressure to achieve this effect. It takes time — don’t be discouraged if your lines aren’t perfect right away.
Check out our dedicated Best Brushes for Face Painting article for exact suggestions on brush brands.
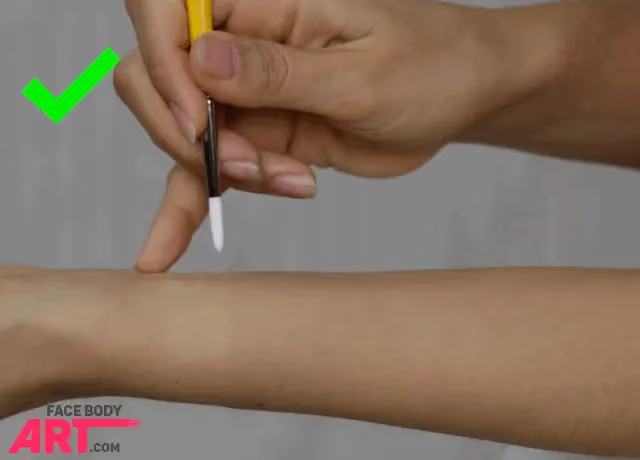
➿ Six Must-Know Line Types
Linework is the backbone of face painting
Practice these six essential line types regularly to boost your precision and confidence:
- Regular teardrop
- Reversed teardrop
- Thin–thick–thin line
- Swirl
- Double swirl
- Tiger line
Struggling with messy lines? Don’t stress, we’ve got you! ✨ Linework is the secret to flawless face painting, and our FREE 3-Day Improve Your Linework Workshop will help you level up fast.
Learn proven techniques, practice like a pro, and watch your designs transform.
Claim your spot!
🎨 Core Skills
Solid Base Coating — A smooth, even base makes everything pop. Use glycerin-based paints and a damp sponge for best coverage.
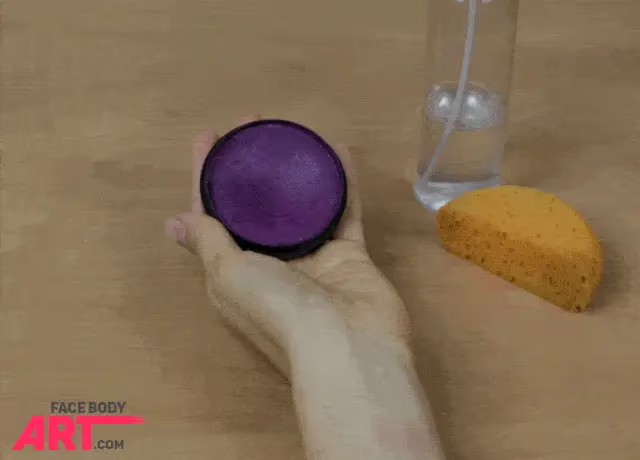
Blending Colors — Create smooth transitions by sponge blending, dry brushing, or using soft-edged brushes like filberts.
Highlights & Shadows — Use white for brightness, black/dark colors for depth. Start simple (white dot on eye) and build from there.
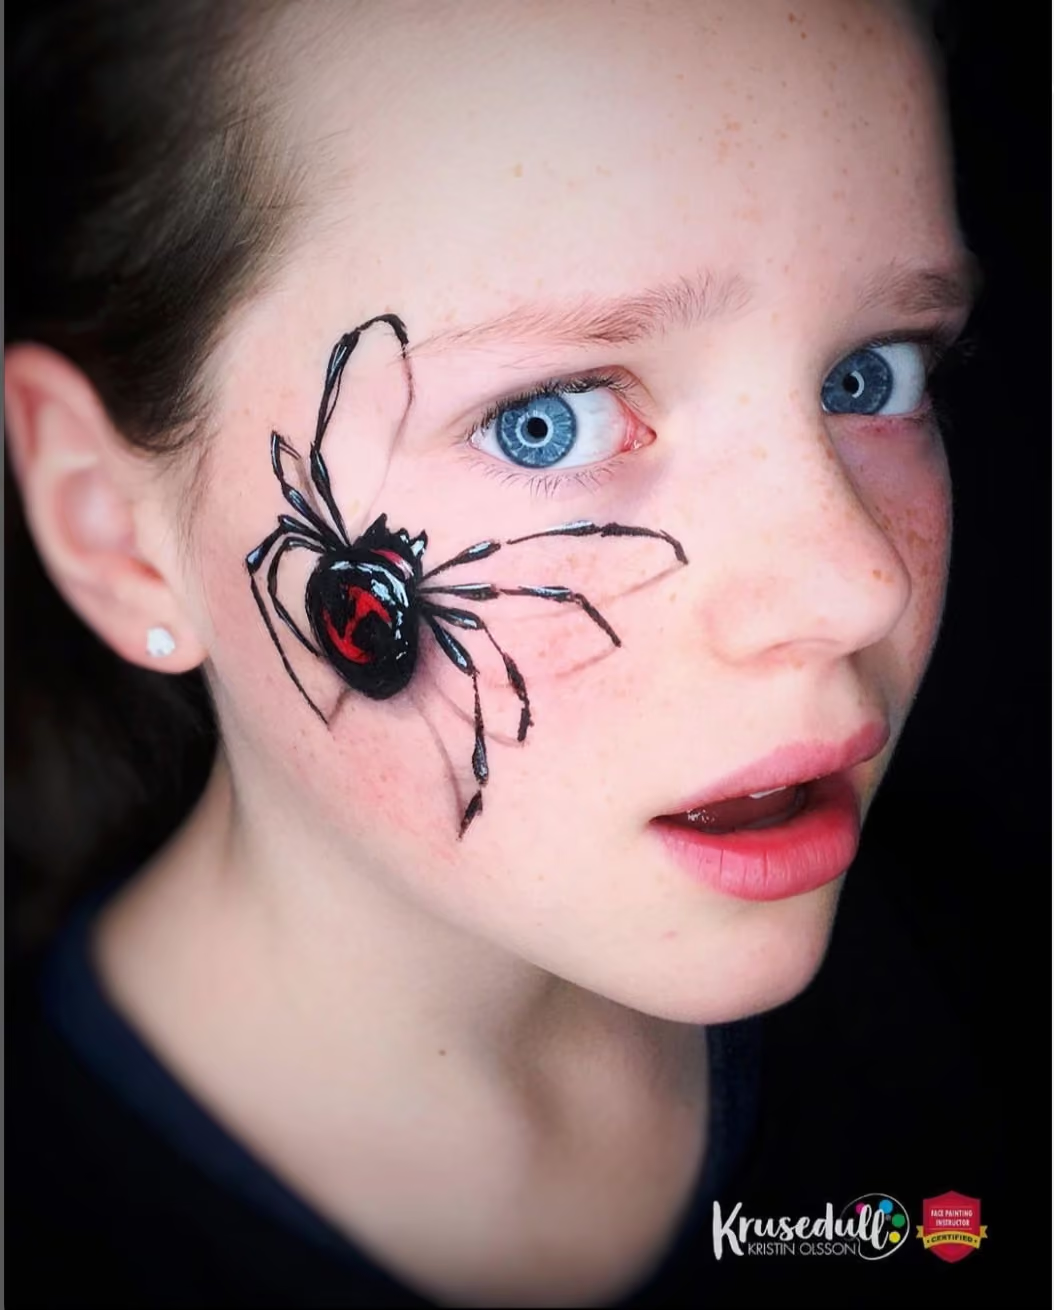
Textures & Patterns — Dab a dry sponge for stippled effects, use stencils for sharp patterns, or splatter for blood/sparkle effects.
Fine Details — Use quality fine-tipped brushes (#0-#1) for veins, thin lines, and delicate features.
Glitter & Sparkle — Add cosmetic-grade glitter for magic. ✨ (Never craft glitter—it can damage eyes!)
Smart Stencil Use — Use dry paint consistency, hold stencil steady, and dab instead of brush for crisp results.
Design Placement — Consider facial features as guides. Use focal points to create balanced, harmonious designs that work WITH the face.
🧽 Sponge Techniques
The secret weapon for beautiful bases and blends
Sponges are essential for covering large areas and blending colors seamlessly. To ensure an even application, follow these steps:
- Spritz the paint and the sponge lightly — the sponge should be moist but not dripping.
- Rotate the sponge between your hands to distribute moisture evenly.
- Dip one tip into the single paint color and rotate the sponge along the cake surface until the paint dries on the container — this indicates the right load.
- If the paint is still wet when you remove the sponge, you’ve added too much water. If it resists, spritz again.
- Dab, don’t drag the sponge onto the skin for smooth, even application.
- Rotate the sponge as you apply for seamless coverage.
Bonus tip: Petal-shaped sponges are perfect for creating beautiful butterfly designs.
Check out our Sponge Buying Guide for more tips on all the types of sponges and how to use them.
🌈 One-Stroke Magic with Split Cakes
Instant wow factor in a single brush stroke
A split cake is a block of multiple colors arranged side by side. By loading a flat brush or sponge across it, you pick up all the colors in one go, creating a beautiful blended gradient.
- Perfect for quick rainbows, butterfly wings, masks, and floral effects.
- Larger one-strokes make it easy to cover more area with a blended color using a sponge.
- Mastering split cakes dramatically speeds up your designs while boosting the “wow” factor.
💡 Pro Tip: Practice daily — even 10–15 minutes adds up! The more you master these fundamentals, the faster and more professional your work becomes.
Check out our Ultimate Face Painting Ideas Guide for design inspiration and step-by-step tutorials to practice.
Paint your first beginner-friendly designs 🦋🐯🌈
Follow easy steps to create wow-factor looks in minutes.
🎨 Starter designs
- Butterfly 🦋
- Tiger 🐯
- Kitty 🐱
- Puppy 🐶
- Rainbow Mask 🌈
- Skull 💀
- Unicorn 🦄
- Superhero 🦸
- Princess 👑
- Dragon 🐉
🪄Quick step-by-step design template
- Base → sponge 1–2 colors
- Shape → block wings/ears
- Details → dots/stripes
- Linework → crisp black/white
- Highlights → white dots + glitter ✨
Discover the most loved face painting designs! Our Ultimate Face Painting Ideas Guide has favorites for boys, girls, Halloween, Christmas, themed parties, and so much more.
Practice safe face painting on real skin 🧴🧒
Keep kids safe and parents reassured — safety comes first.
❌ When to say no
Fever, cold sores, rashes, wounds, visible infection.
✅ Skin safety
- Separate sponges per child
- Avoid painting the mouth or too close to the eyes
- Only use cosmetic-grade paints
🧼 Removal
For water-activated paints, always use a liquid soap first to loosen the paint, then wipe with a damp cloth and wash the face as normal.
For stains: apply coconut oil, then wash again.
Don’t Miss Out: Subscribe today to receive expert tips and tricks, fresh face painting ideas, step-by-steps, and more.
Sign Me Up 🚀
Practice with purpose: Your beginner growth plan 📈
Improve faster with structured drills and mini goals.
👉🏼 Keep a design log (date, time, notes). 📓
👉🏼 Practice 10 cheek designs, 5 speed faces. 🎨
👉🏼 Track hours and live practice. ⌛
For extra practice, follow along with tutorials on our YouTube channel
Troubleshoot mistakes — fast fixes 🛠️
Quick solutions to common beginner slip-ups.
👎🏼 Smudging → wait for layers to dry 👍🏼
👎🏼 Colors bleeding → reduce water 👍🏼
👎🏼 Weak colors → creamier load 👍🏼
👎🏼 Messy lines → retrace with thin white 👍🏼
Keep it fun — occasions and variations 🎉
Match designs to the season or event for extra smiles.
- Halloween 🎃 = skulls, monsters, ghosts
- Christmas 🎄 = snowflakes, reindeer, elves
- Birthdays 🎂 = princess, unicorns, superheroes, game characters
- Sports ⚽ = flags, sports teams’ colors, and logos
Resources & printables (what to prepare for your kit)
Handy sheets you can download and keep in your kit for every job
- Beginner Kit Checklist ✅
- Hygiene Setup Sheet 🧴
- Paint Consistency Chart 🎨
- Blank Face Charts 📝
- Practice log template 📓
Face-painting tips for your first gig
Practical dos & don’ts 🎭
Small tricks to survive and shine at your first event!
✅ DO
- Dress comfy
- Bring snacks & water
- Prepare 10–15 mastered designs
- Stay friendly and calm and have fun!
- Wear comfortable shoes (never heels)
- Take stretching breaks throughout your gig
- Prepare your cash float & payment system (Square/PayPal)
- Set clear workspace boundaries for kids
- Reassure nervous children with kindness
- Keep your workspace tidy
- Pee before you start 😄
❌ DON’T
- Wear a strong perfume
- Paint sick kids
- Panic or rush big designs
- Force a crying child to be painted (tears ruin paint)
- Assume kids won't touch your equipment — protect your workspace
- Leave your equipment unattended
- Panic if something goes wrong (stay calm, find a solution)
- Be too hard on yourself
Thinking about turning face painting into a career? Don’t stop here! Our online Beginner’s Course, led by world-class instructors, will give you the confidence and skills to start strong.

Frequently Asked Questions ❓
Clear answers to what beginners ask most often.
❓ Q: How long does it take to get good?
✔️ A: It depends on your practice and focus. Most beginners can confidently paint simple designs within a few weeks, but mastering more advanced techniques usually takes months of practice and learning from tutorials or classes.
❓ Q: Can I start with just a few tools?
✔️ A: Of course! Brushes + sponges + white/black + 3 colors.
❓ Q: What paints are safe for kids?
✔️ A: Cosmetic-grade, water-based paints, sold by reputable face painting stores only.
❓ Q: How to prevent smudges?
✔️ A: Use proper consistency + dry layers.
❓ Q: Do I need insurance?
✔️ A: Yes, if you are charging money for your designs, some countries will require you to have insurance. Some countries do not require insurance for face painters.
