
Share this post:
3 Very Cool Spiderman Face Painting Ideas
Halfway through my studies at the International Face Painting School Olga challenged me to create my own Spiderman face paint design. The idea of having to create a ‘new’ Spiderman really scared me, but it inspired me even more. So much more than I started sketching right away and even tried one sketch on my son the same day… And it became one of my exam designs!
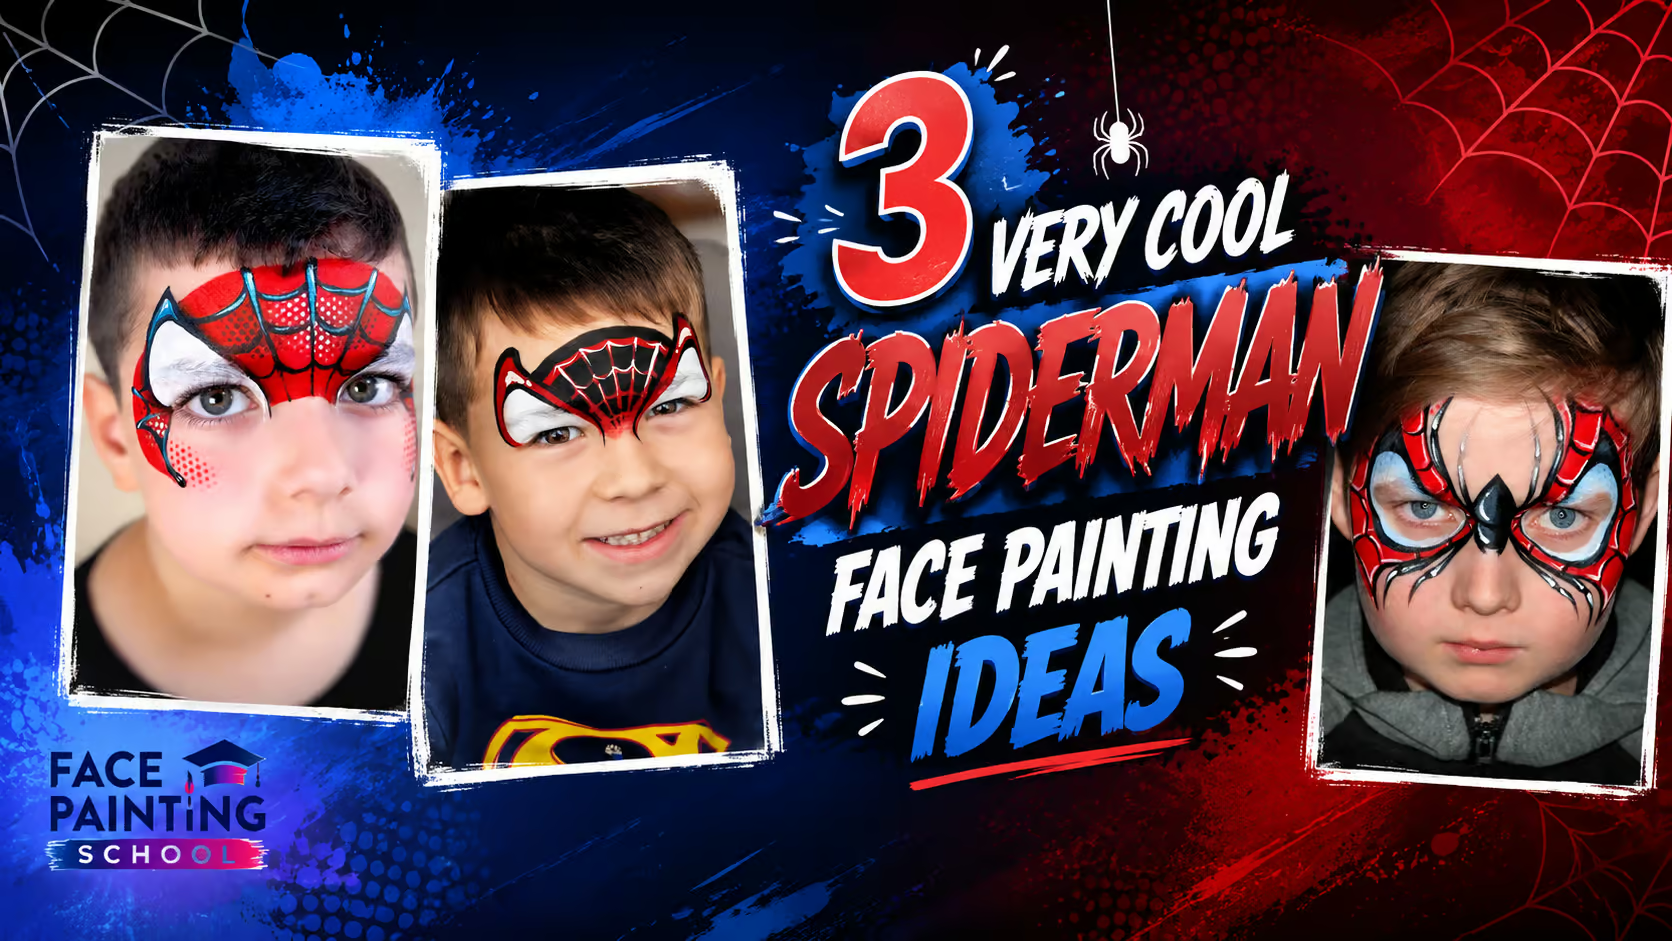

Full-Face Spiderman Design by Annabel Hoogeveen
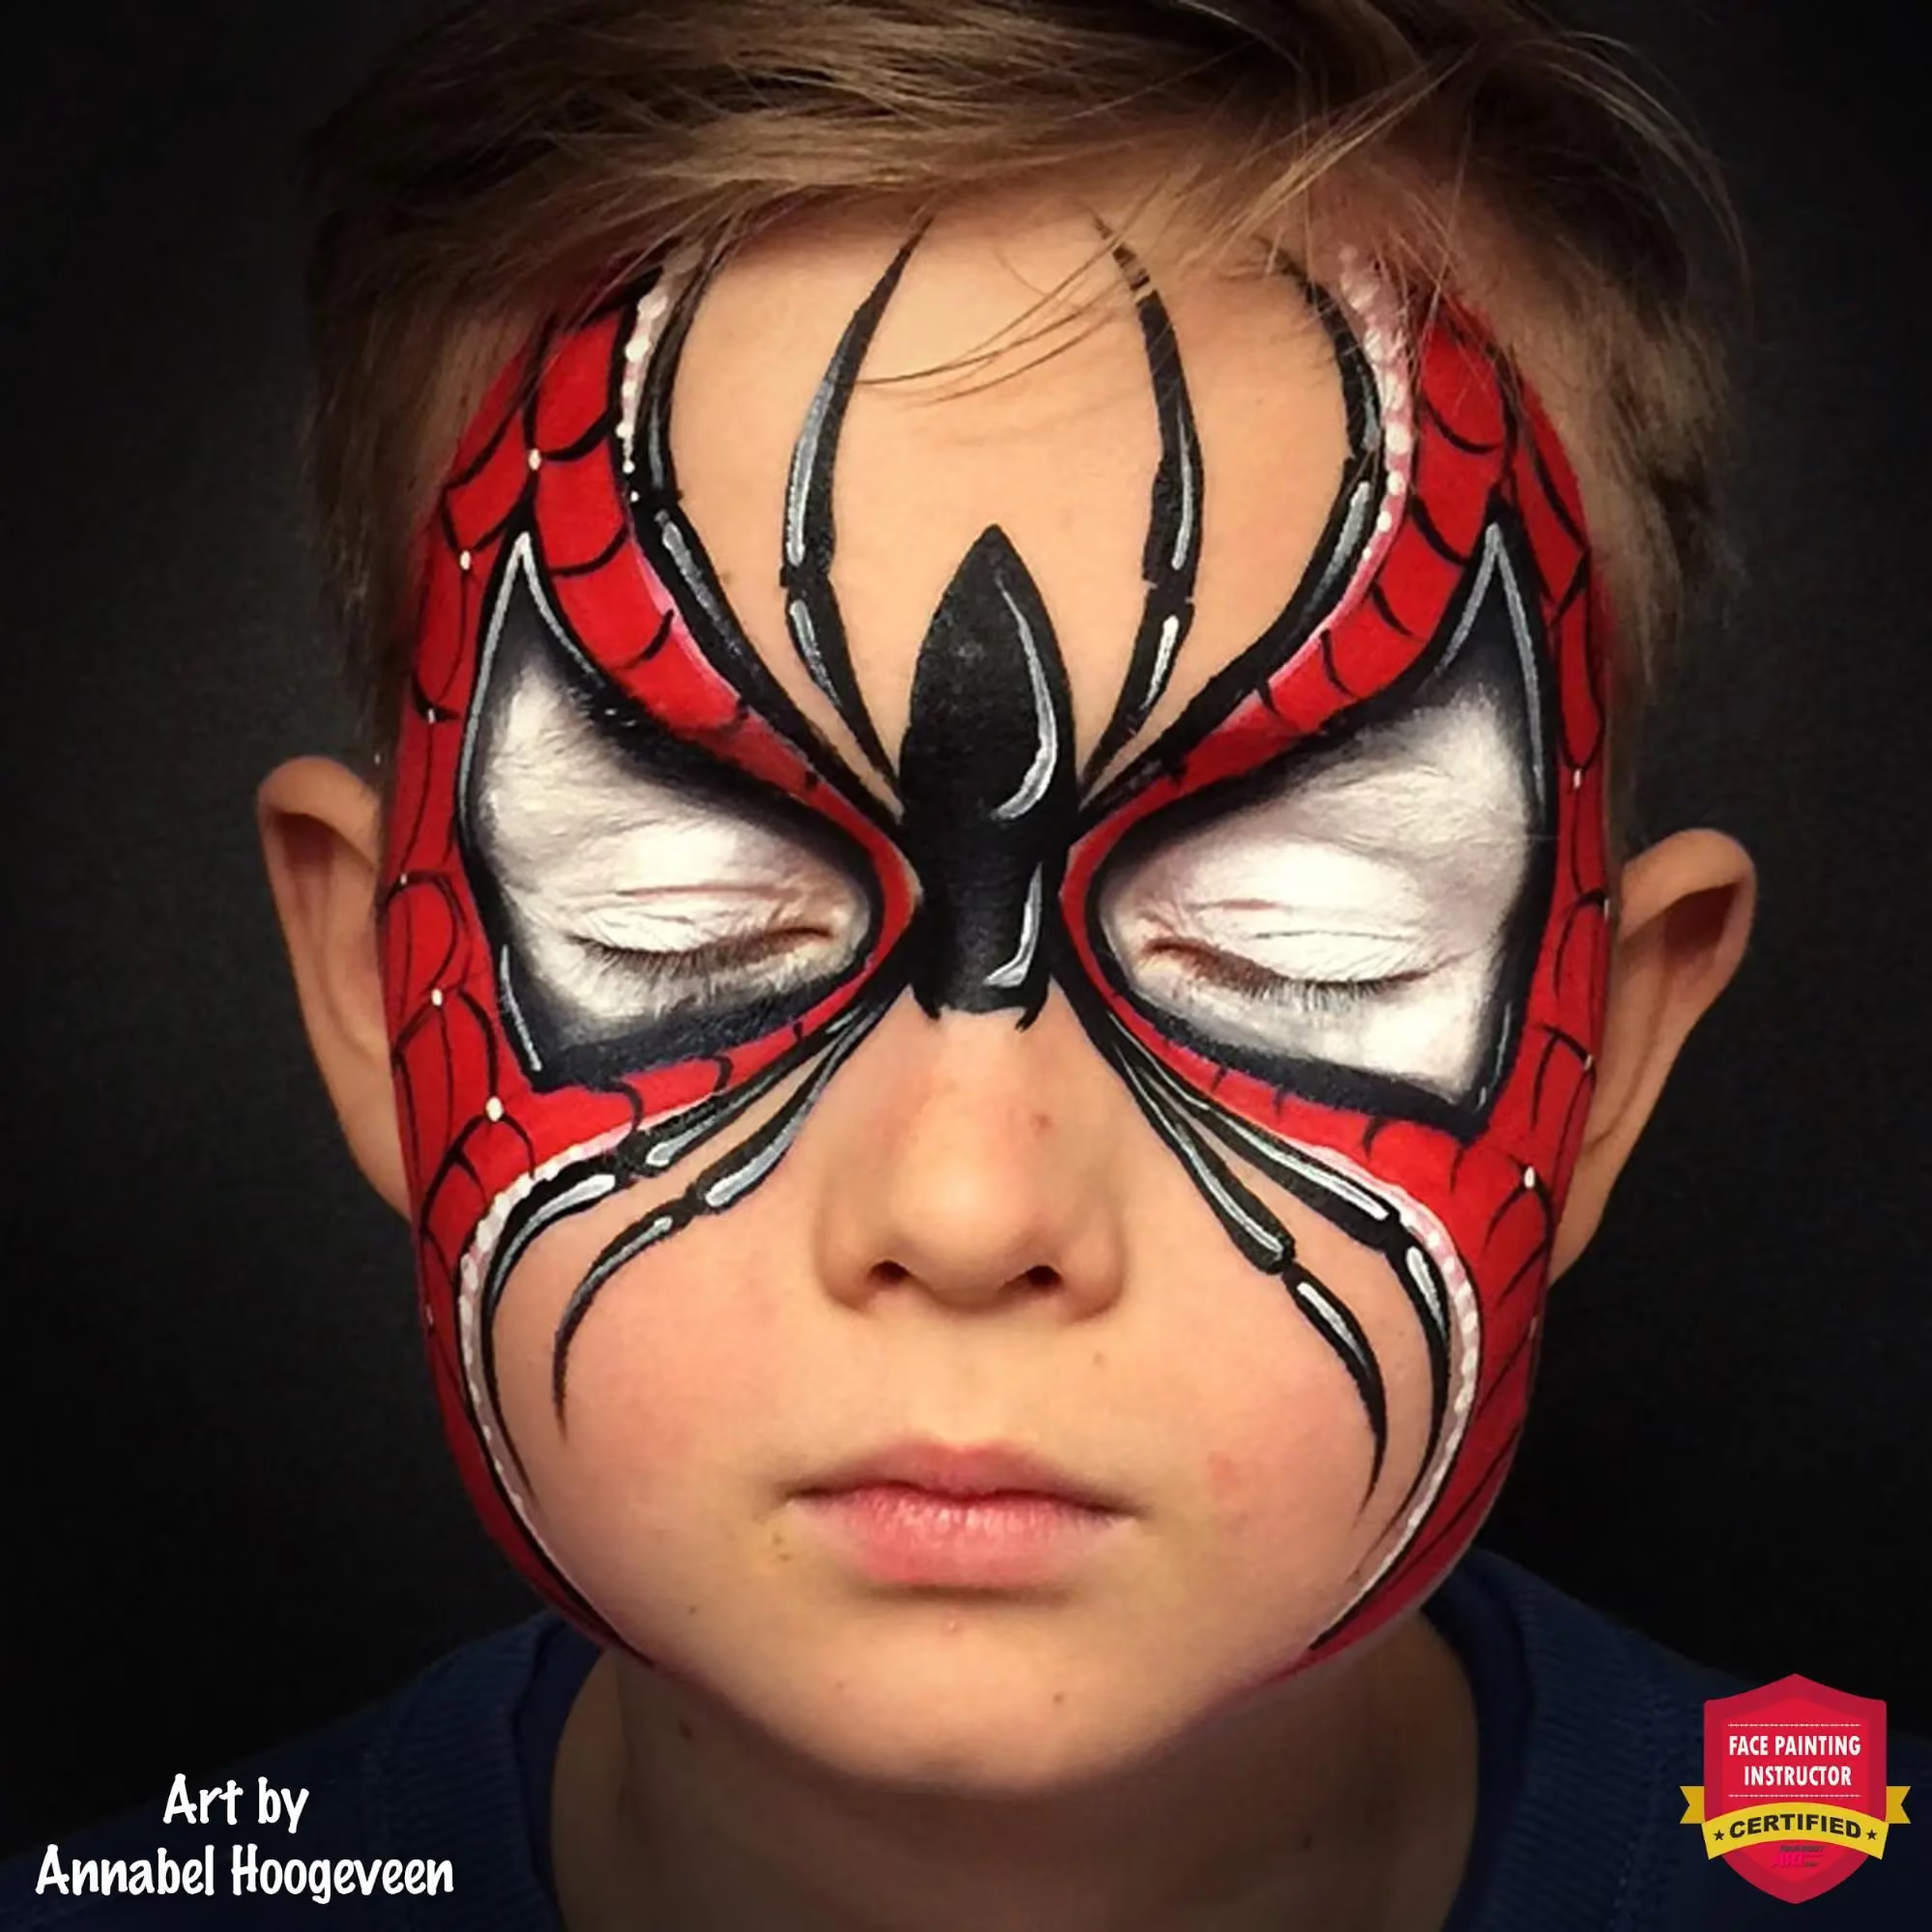
Annabel’s exam piece for graduation at the International Face Painting School.
In this tutorial, I will show you a similar and improved design. I made it smaller, used a different way of highlighting and left the eyes open (because my son really doesn’t want his eyes to be painted anymore 🙂) and made them more round too. But the structure of the design is all the same.
The two different versions will give you the opportunity to choose the size and details you like most and implement them in your own easy Spiderman face paint design. 😘

- Global Funstroke Melbourne
- Mehron Beach Berry Red
- PartyXplosion Black (or your favorite Waxy black such as Wolfe, Diamond FX, or Fusion)
- PartyXplosion White (or your favorite Waxy white such as Wolfe, Diamond FX, or Fusion)
- Ultimate Graffiti Eyes Stencil Kit (DISCONTINUED; Alternative: BAMS #1206 “Dots”)
- KingArt Round Brush #4
- KingArt Round Brush #3
- Kryolan Dreamblend Wide Chisel brush (Alternative: a large filbert such as Mehron Wide Chisel filbert #816)
Did you know that you can have the best job in the world full of art, smiles, and joy? Become a professional face painter today! We’ll show you how!
Step 1: Spiderman Base
The eyes of Spiderman have a very distinct shape, although they changed a lot throughout history. But the main features are always the same: the highest point is on the outside and the bottom contour is not flat but has a slight angle. A kind of triangle that has fallen to the side.
If you are not sure about the eye shape it is always best to sketch them first, using a small round brush (#2 or #3) and watery white paint.
Normally I don’t sketch the eyes anymore, especially not when I am painting an entire white eye. But, in this case, I did, because I wanted to use a (blue) split cake for the eyes, so I needed to know the exact shape.
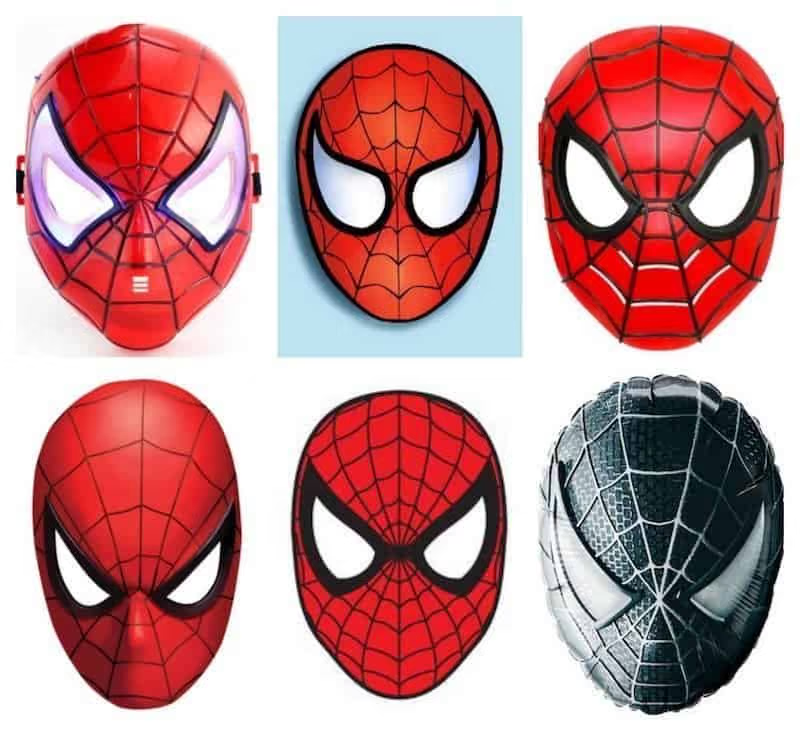
Here’s a collage of various eyes shape from the online Face Paiting Course that our students are encouraged to practice during their studies. Once you learn the main rule about the shape, you will never forget it!
After sketching the eyes, I loaded a wide chisel brush with the two lightest colors of a blue split cake and painted a narrow band of color inside the eyes.
I rounded off the top and varied the width of the band depending on the place, to create nicely shaped holes for the eyes. I used a chisel brush instead of a flat brush because I wanted a soft contour and not a hard line.
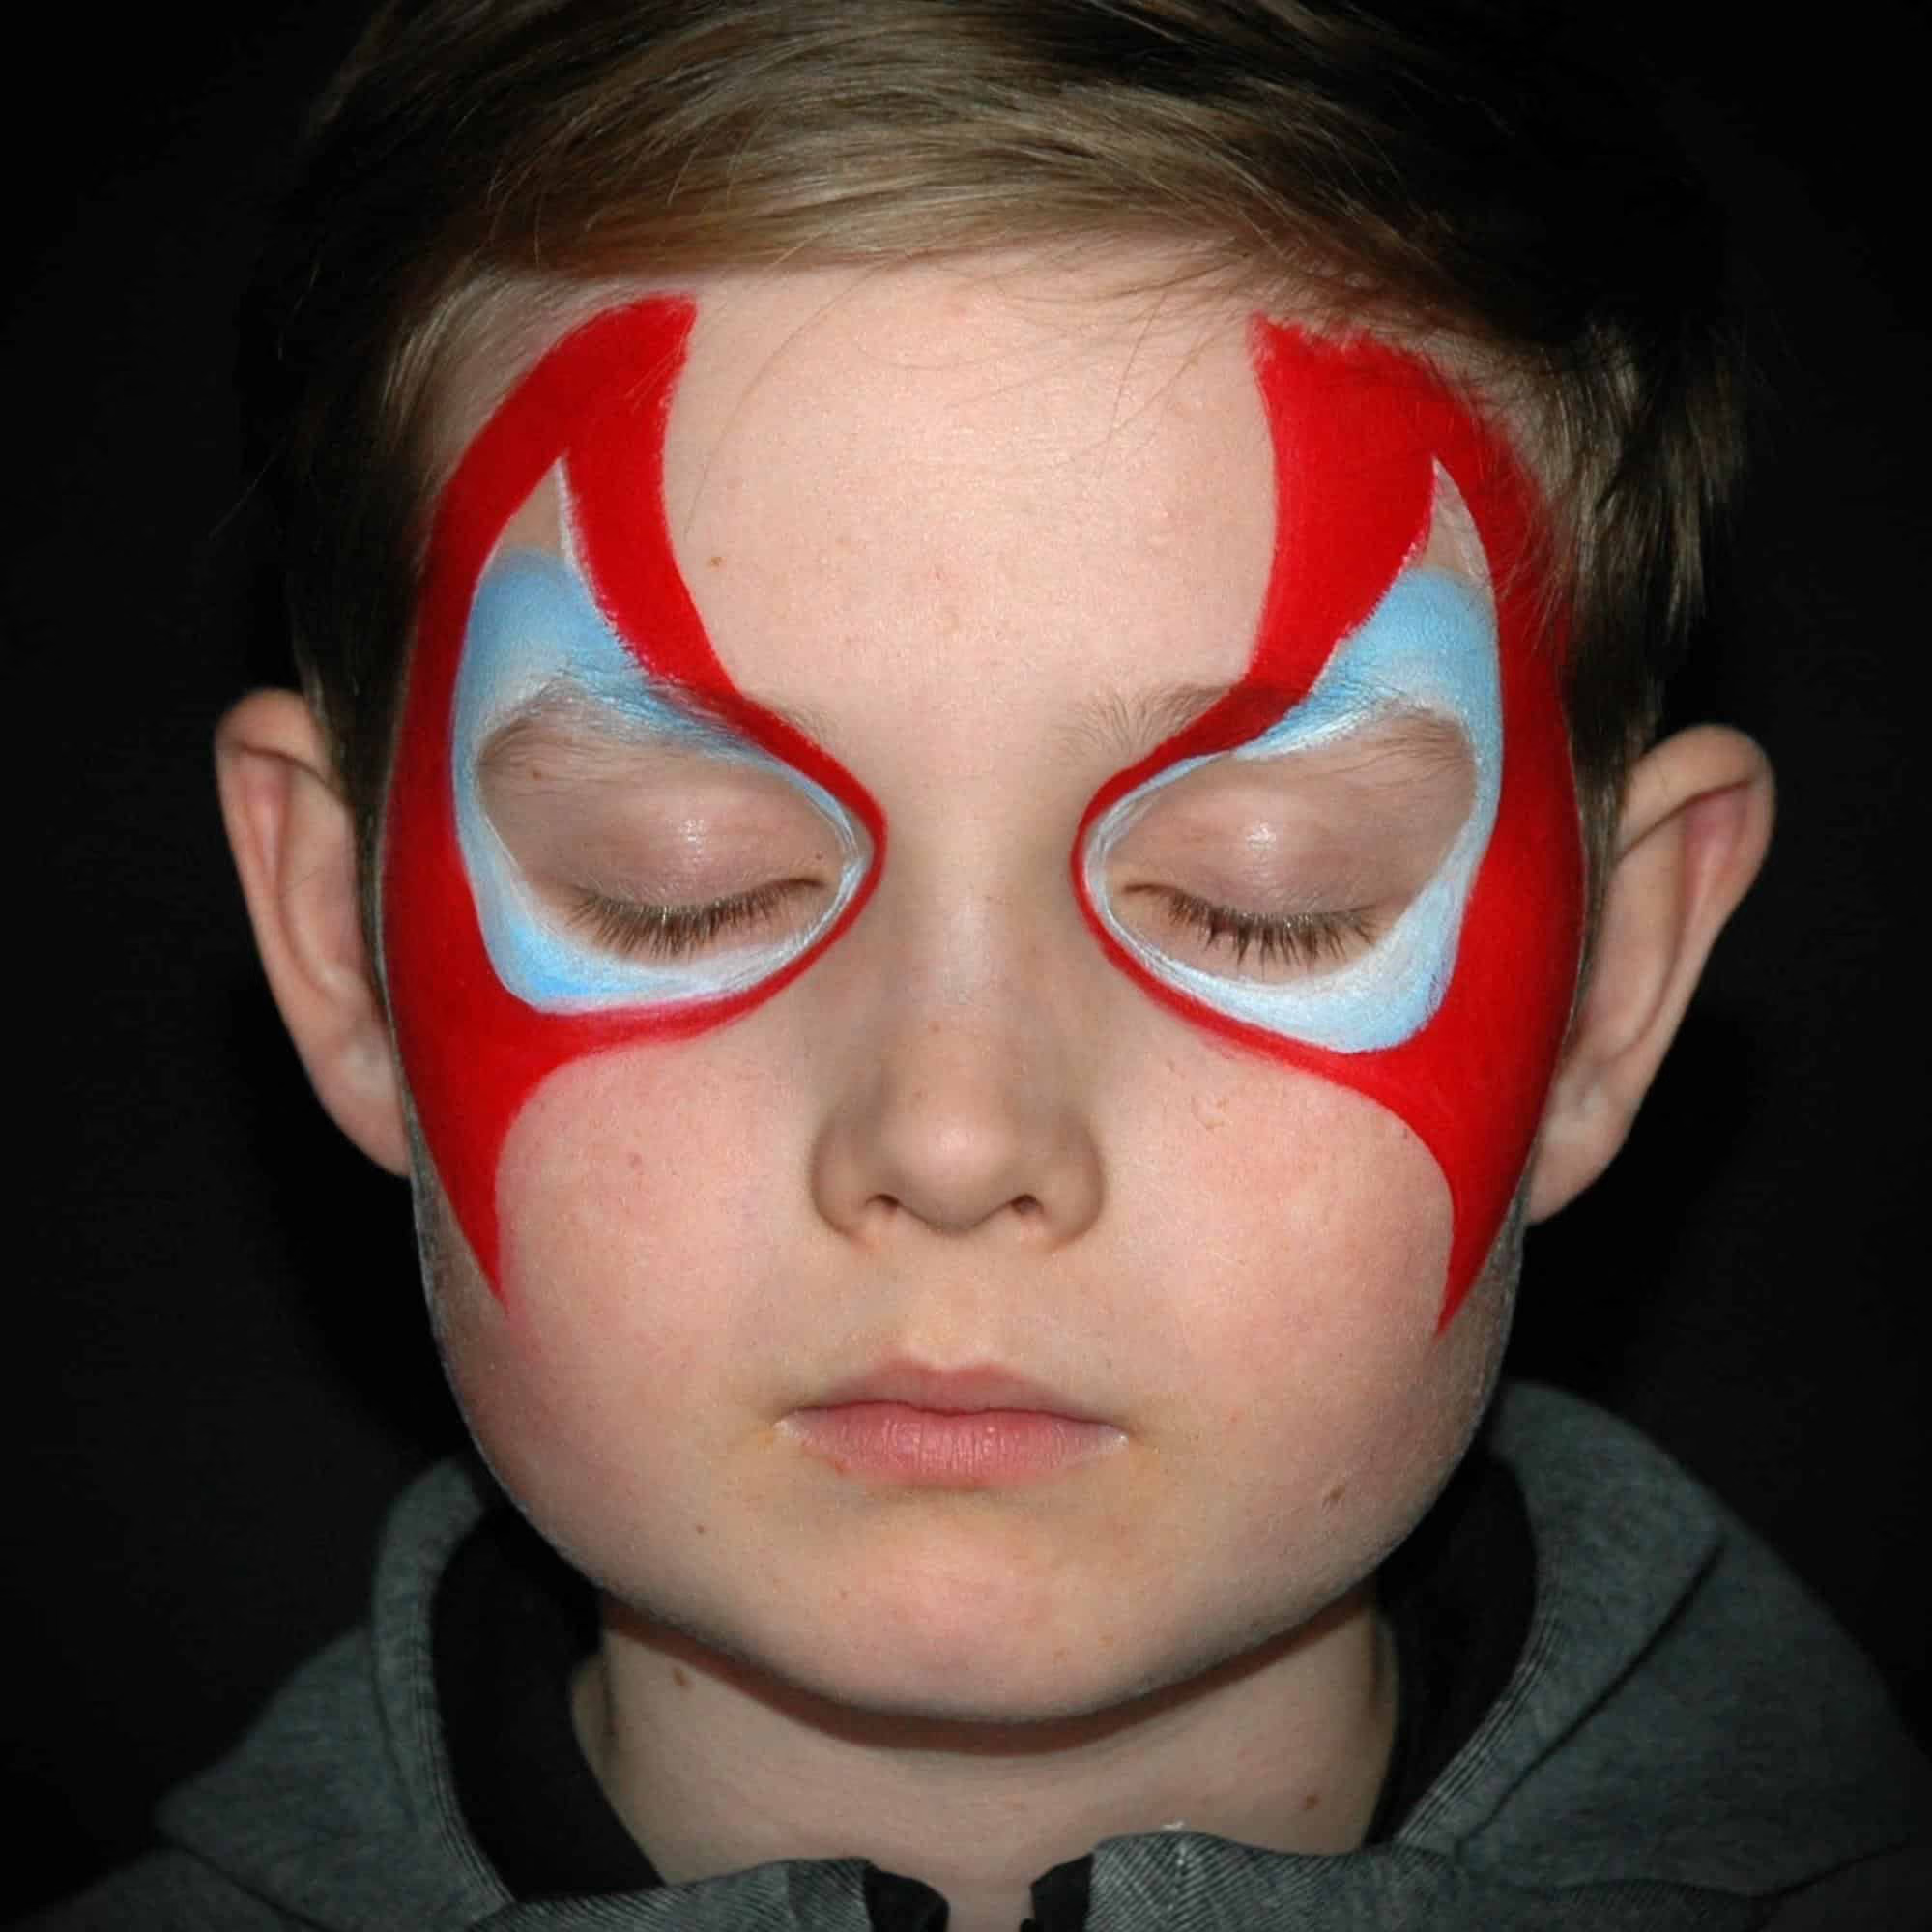
Next, I loaded the same brush with bright red paint and drew the red base of the mask. I curved the contours so they would suit the shape of the face.
The most important thing when painting this red base is keeping enough space in the center for the spider legs. If you make it too narrow in the middle, the legs will be too close to each other and especially near the nose that looks really odd.

Tip: Click here to download this super useful “Top 10 products a face painter needs” handout! It’s FREE!
Step 2: Add Texture and Spider Details
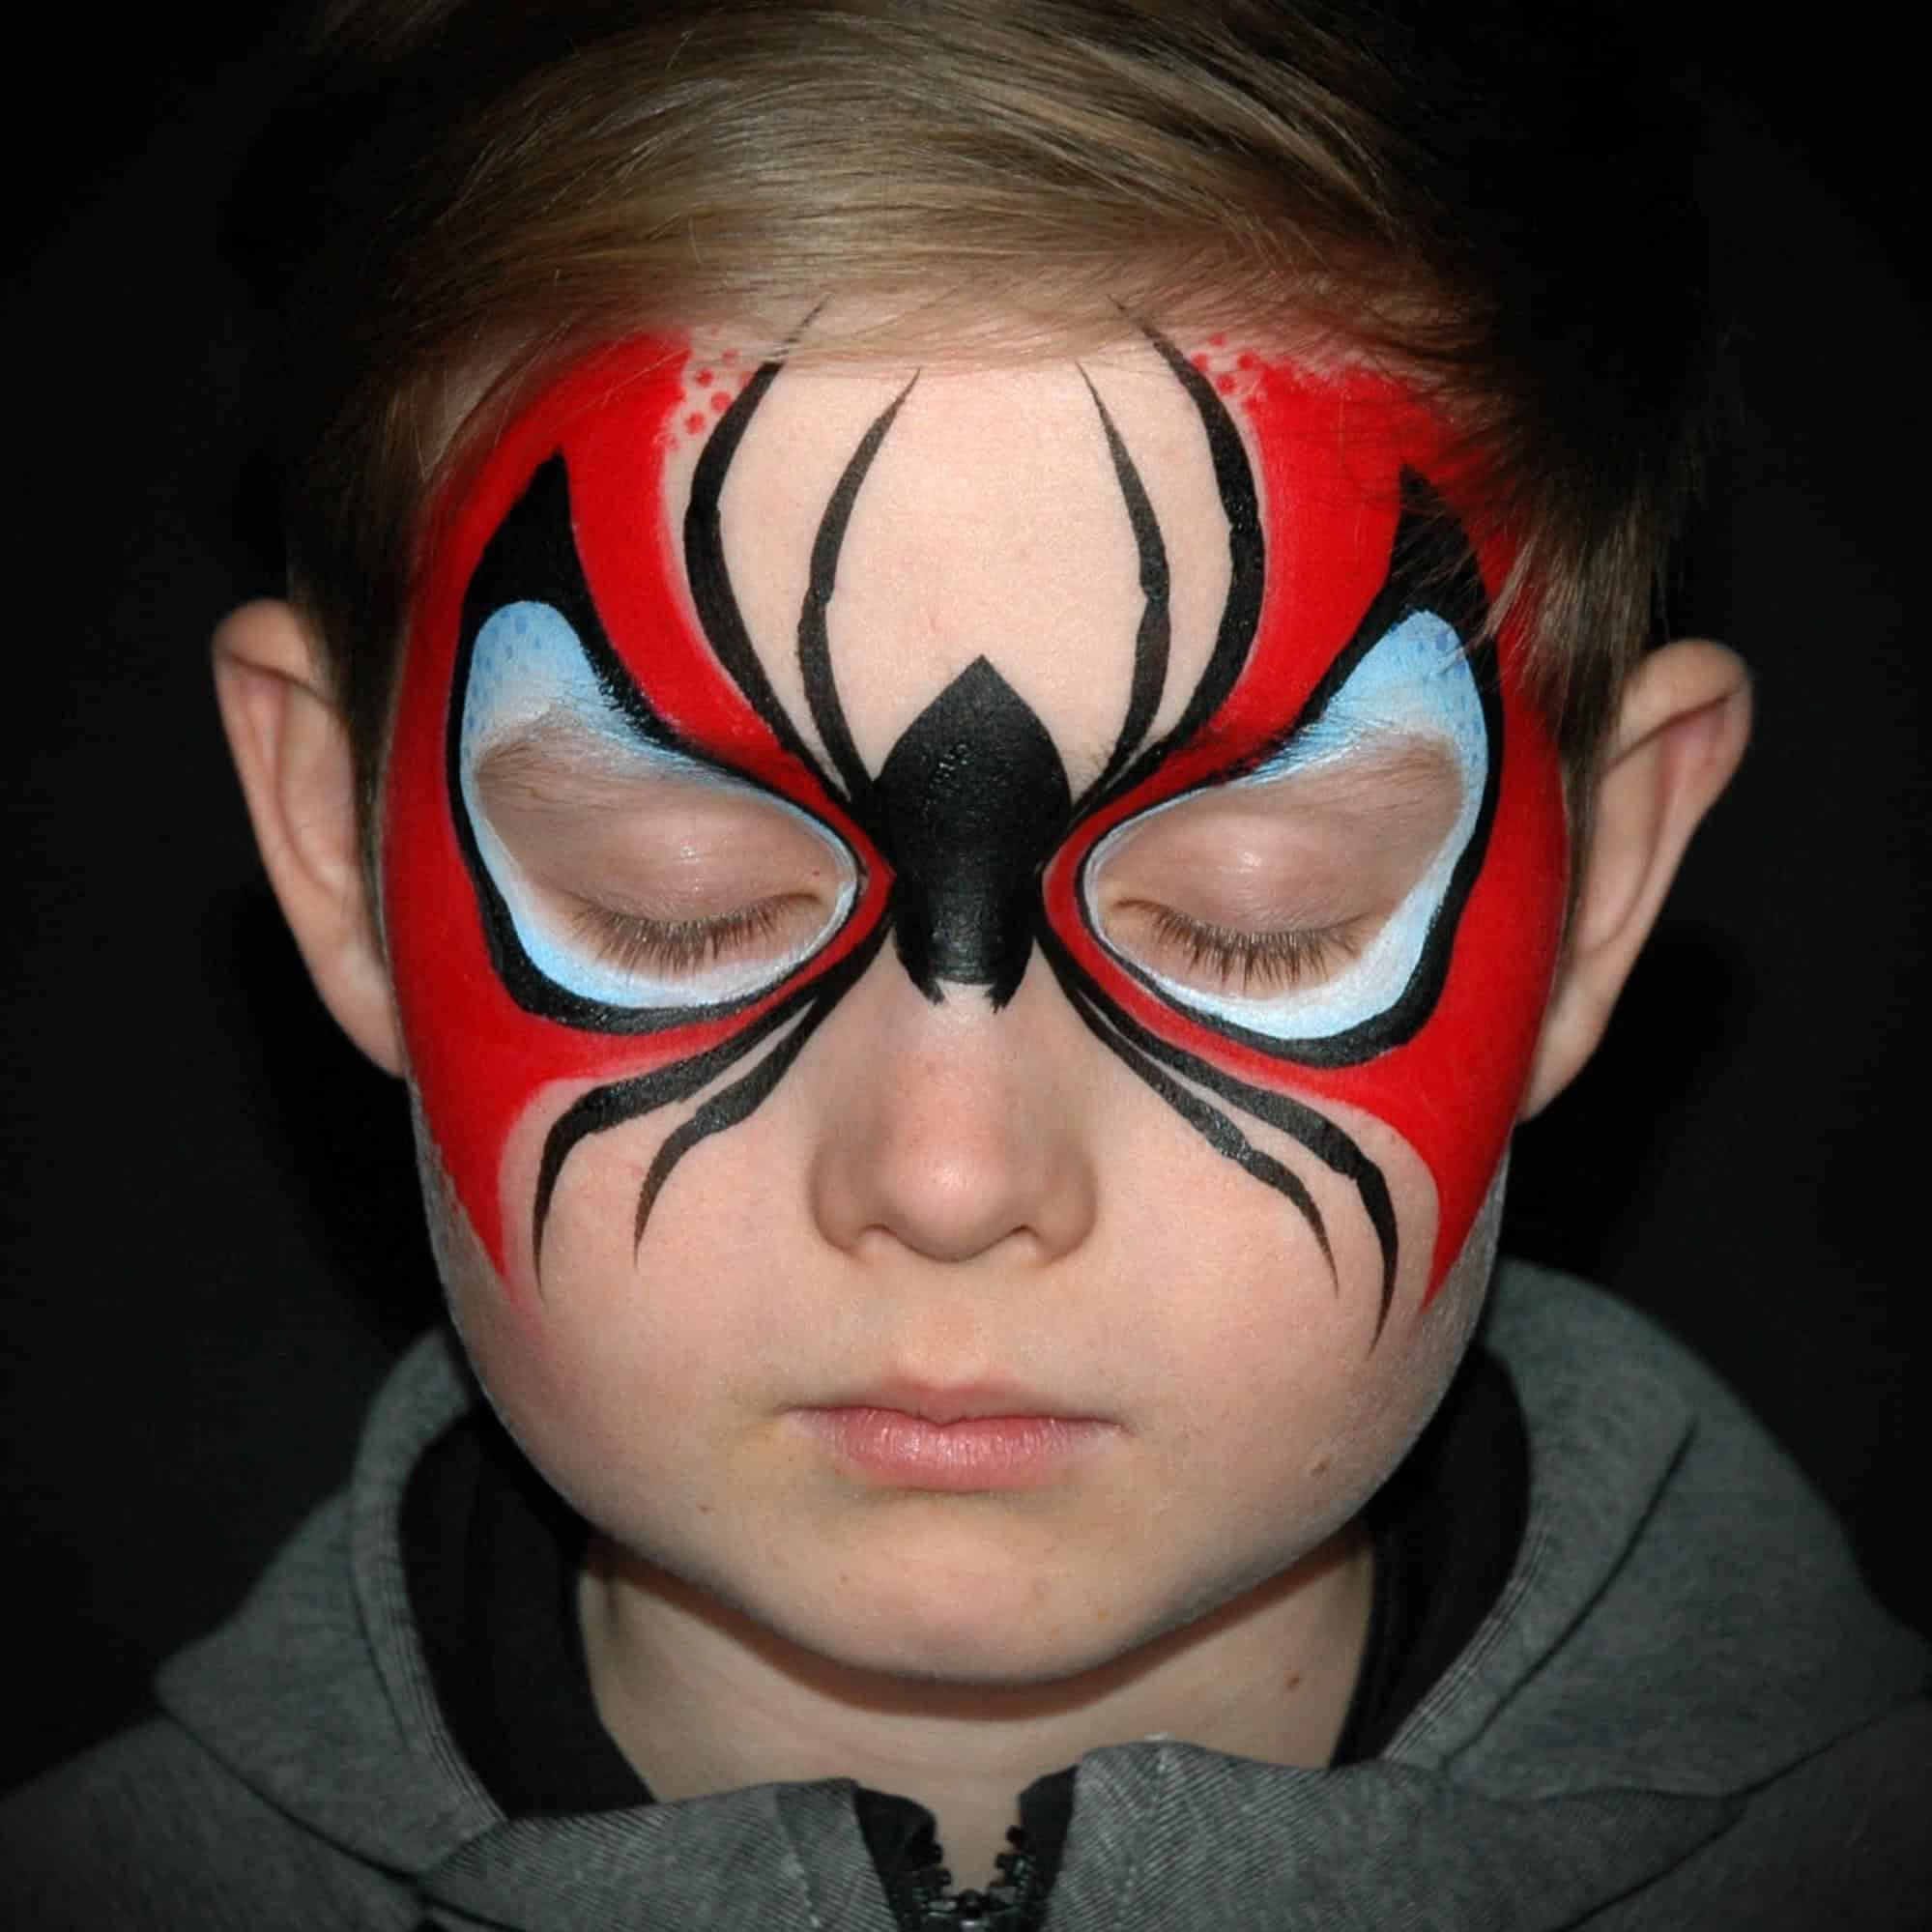
The next step in making a Halloween spiderman face painting is to use a (dot) stencil. I added some blue dots in the eyes and red dots on the forehead and cheek using the same paints I used before, all that to balance the design.
After adding the dots I loaded my favorite brush, a Loew Cornell #4, with regular black and outlined the eyes. Like I said before, the eyes have a very distinct shape. The width of the black outline e.g. varies and the top is pointy on the outside but rounded on the inside.
Want to know more about best face painting brushes? Check out our Free Guide!
Next, I drew a spider in the middle of the design, using the same brush and paint. The placement of the spider is so that the separation between head and body is in the central focal point and all the legs are directed to that same point.
Step 3 (Optional): Add Faint Highlights
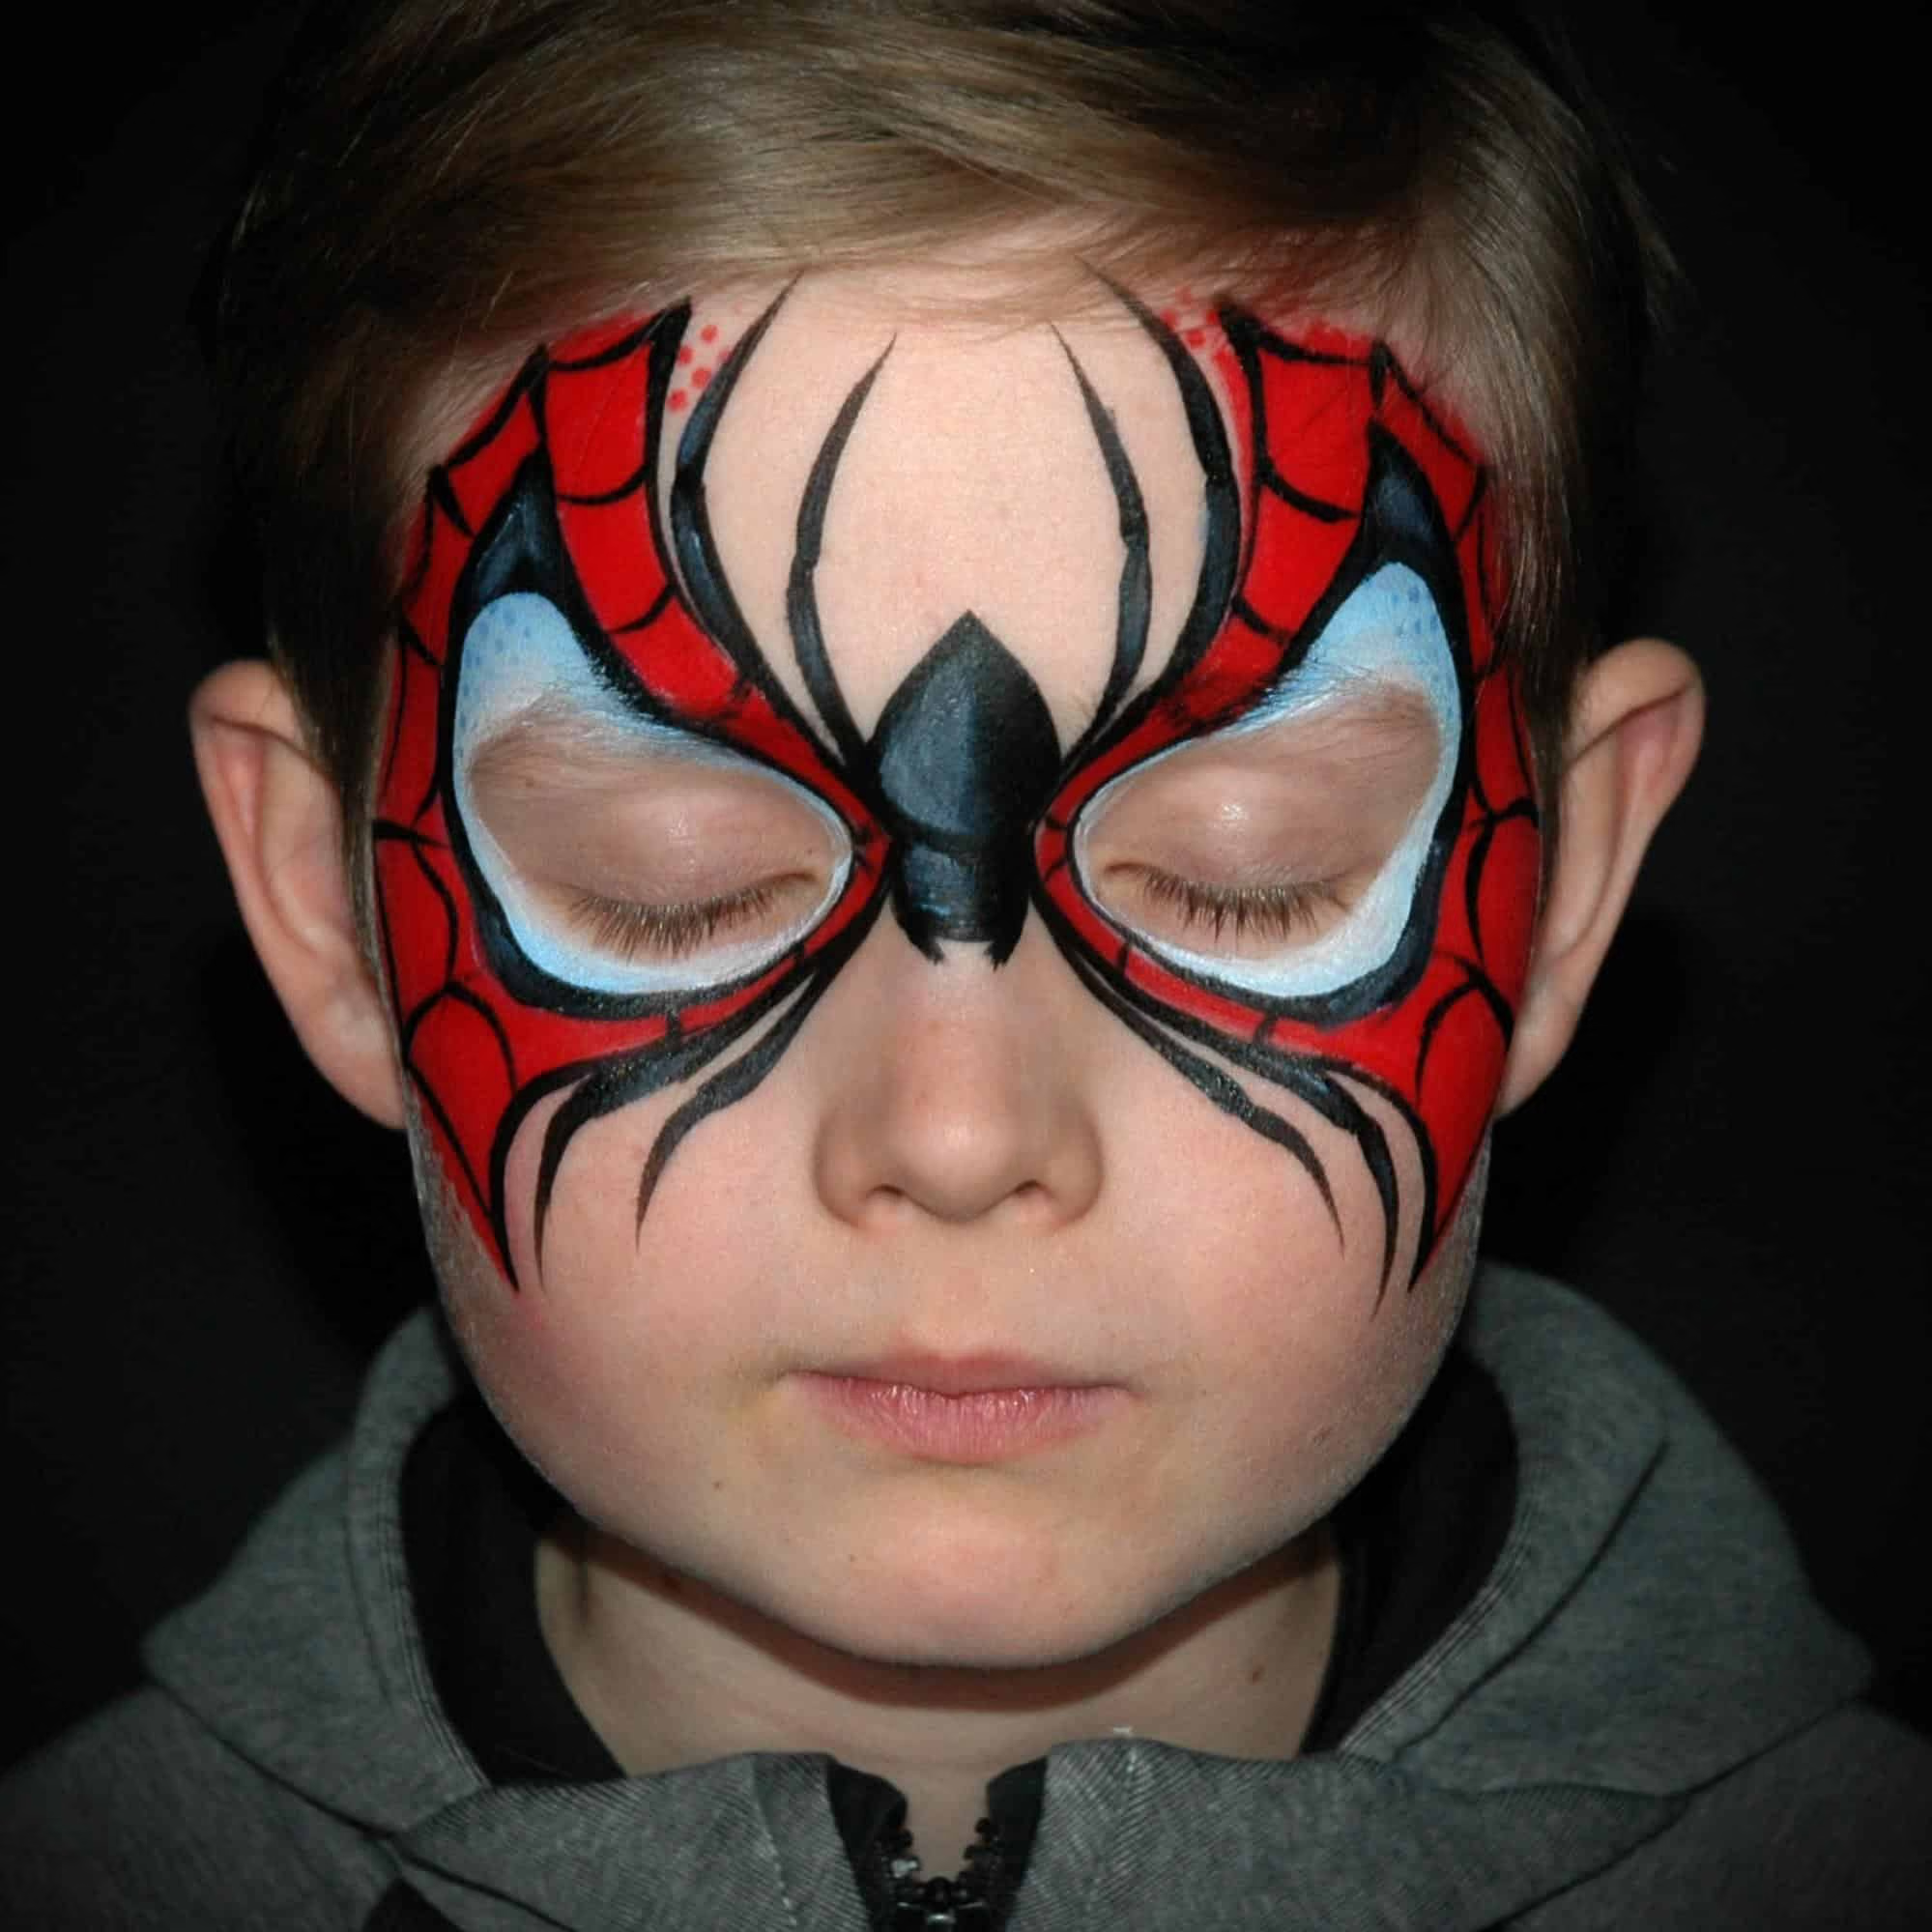
To add a bit more depth to the spider and the eyes, I painted some faint highlights on the black parts, using the same split cake and chisel brush I already used for the eyes and dry paint consistency.
Tip: Did it happen to you to mess up design because your paint was too wet, or not creamy enough? Learn how to work with different paint consistencies from our blog post and achieve amazing results with your artwork
Step 4: Extra Touch
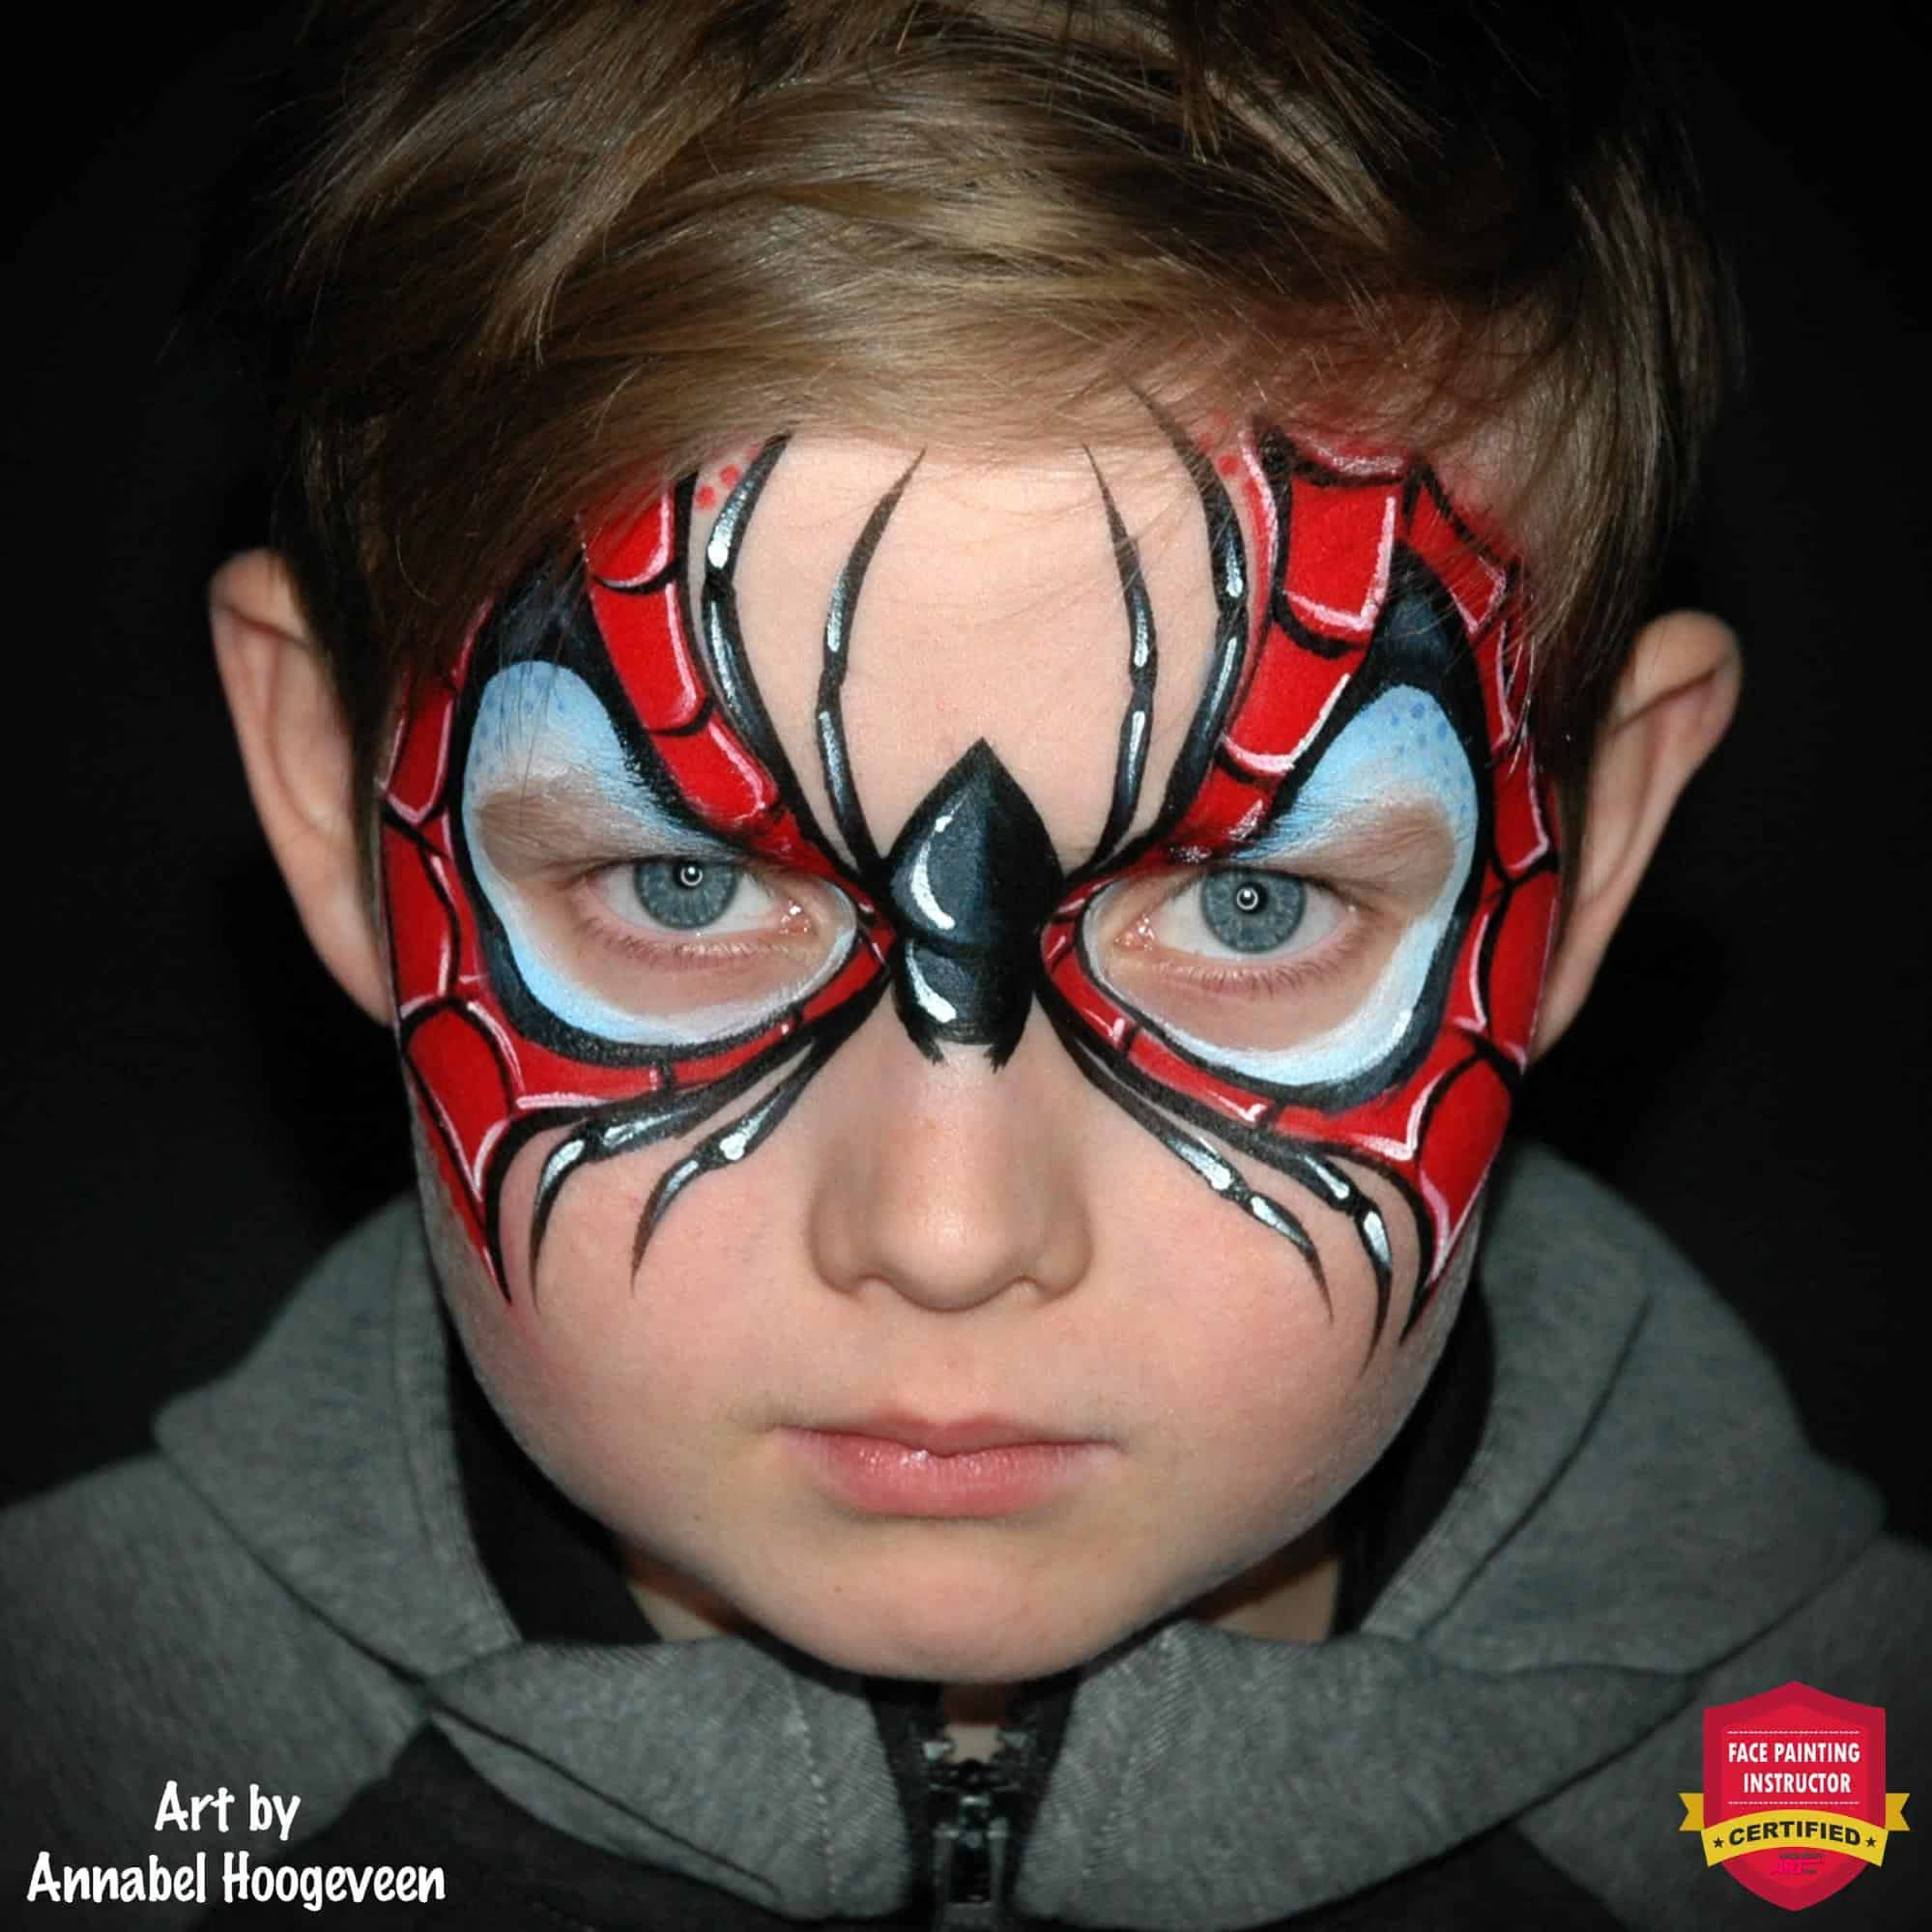
There isn’t a lot of white in this design, because the eyes aren’t covered completely. But our halloween Spiderman makeup really needs white. So we add white highlights.
In this case, I highlighted the web and spider using a round brush #3 and regular white paint.
As you can see, I didn’t place all the highlights in the right spots (and my son wasn’t exactly in the mood to correct it 😉). But it really doesn’t matter much. It is great if you do, but if you don’t, it is okay too. Children don’t see details like these and the reason we face paint is to make them happy, right?
Tip: And if you have your first gig coming up soon and you are freaked out of where to begin, check out our “You Booked Your First Gig” post for valuable advice and get fully prepared. 💪
So, even if you have made mistakes, just smile and say that they look absolutely amazing! That will put a big smile on their face (unless they are not really in the mood for face painting 😄).
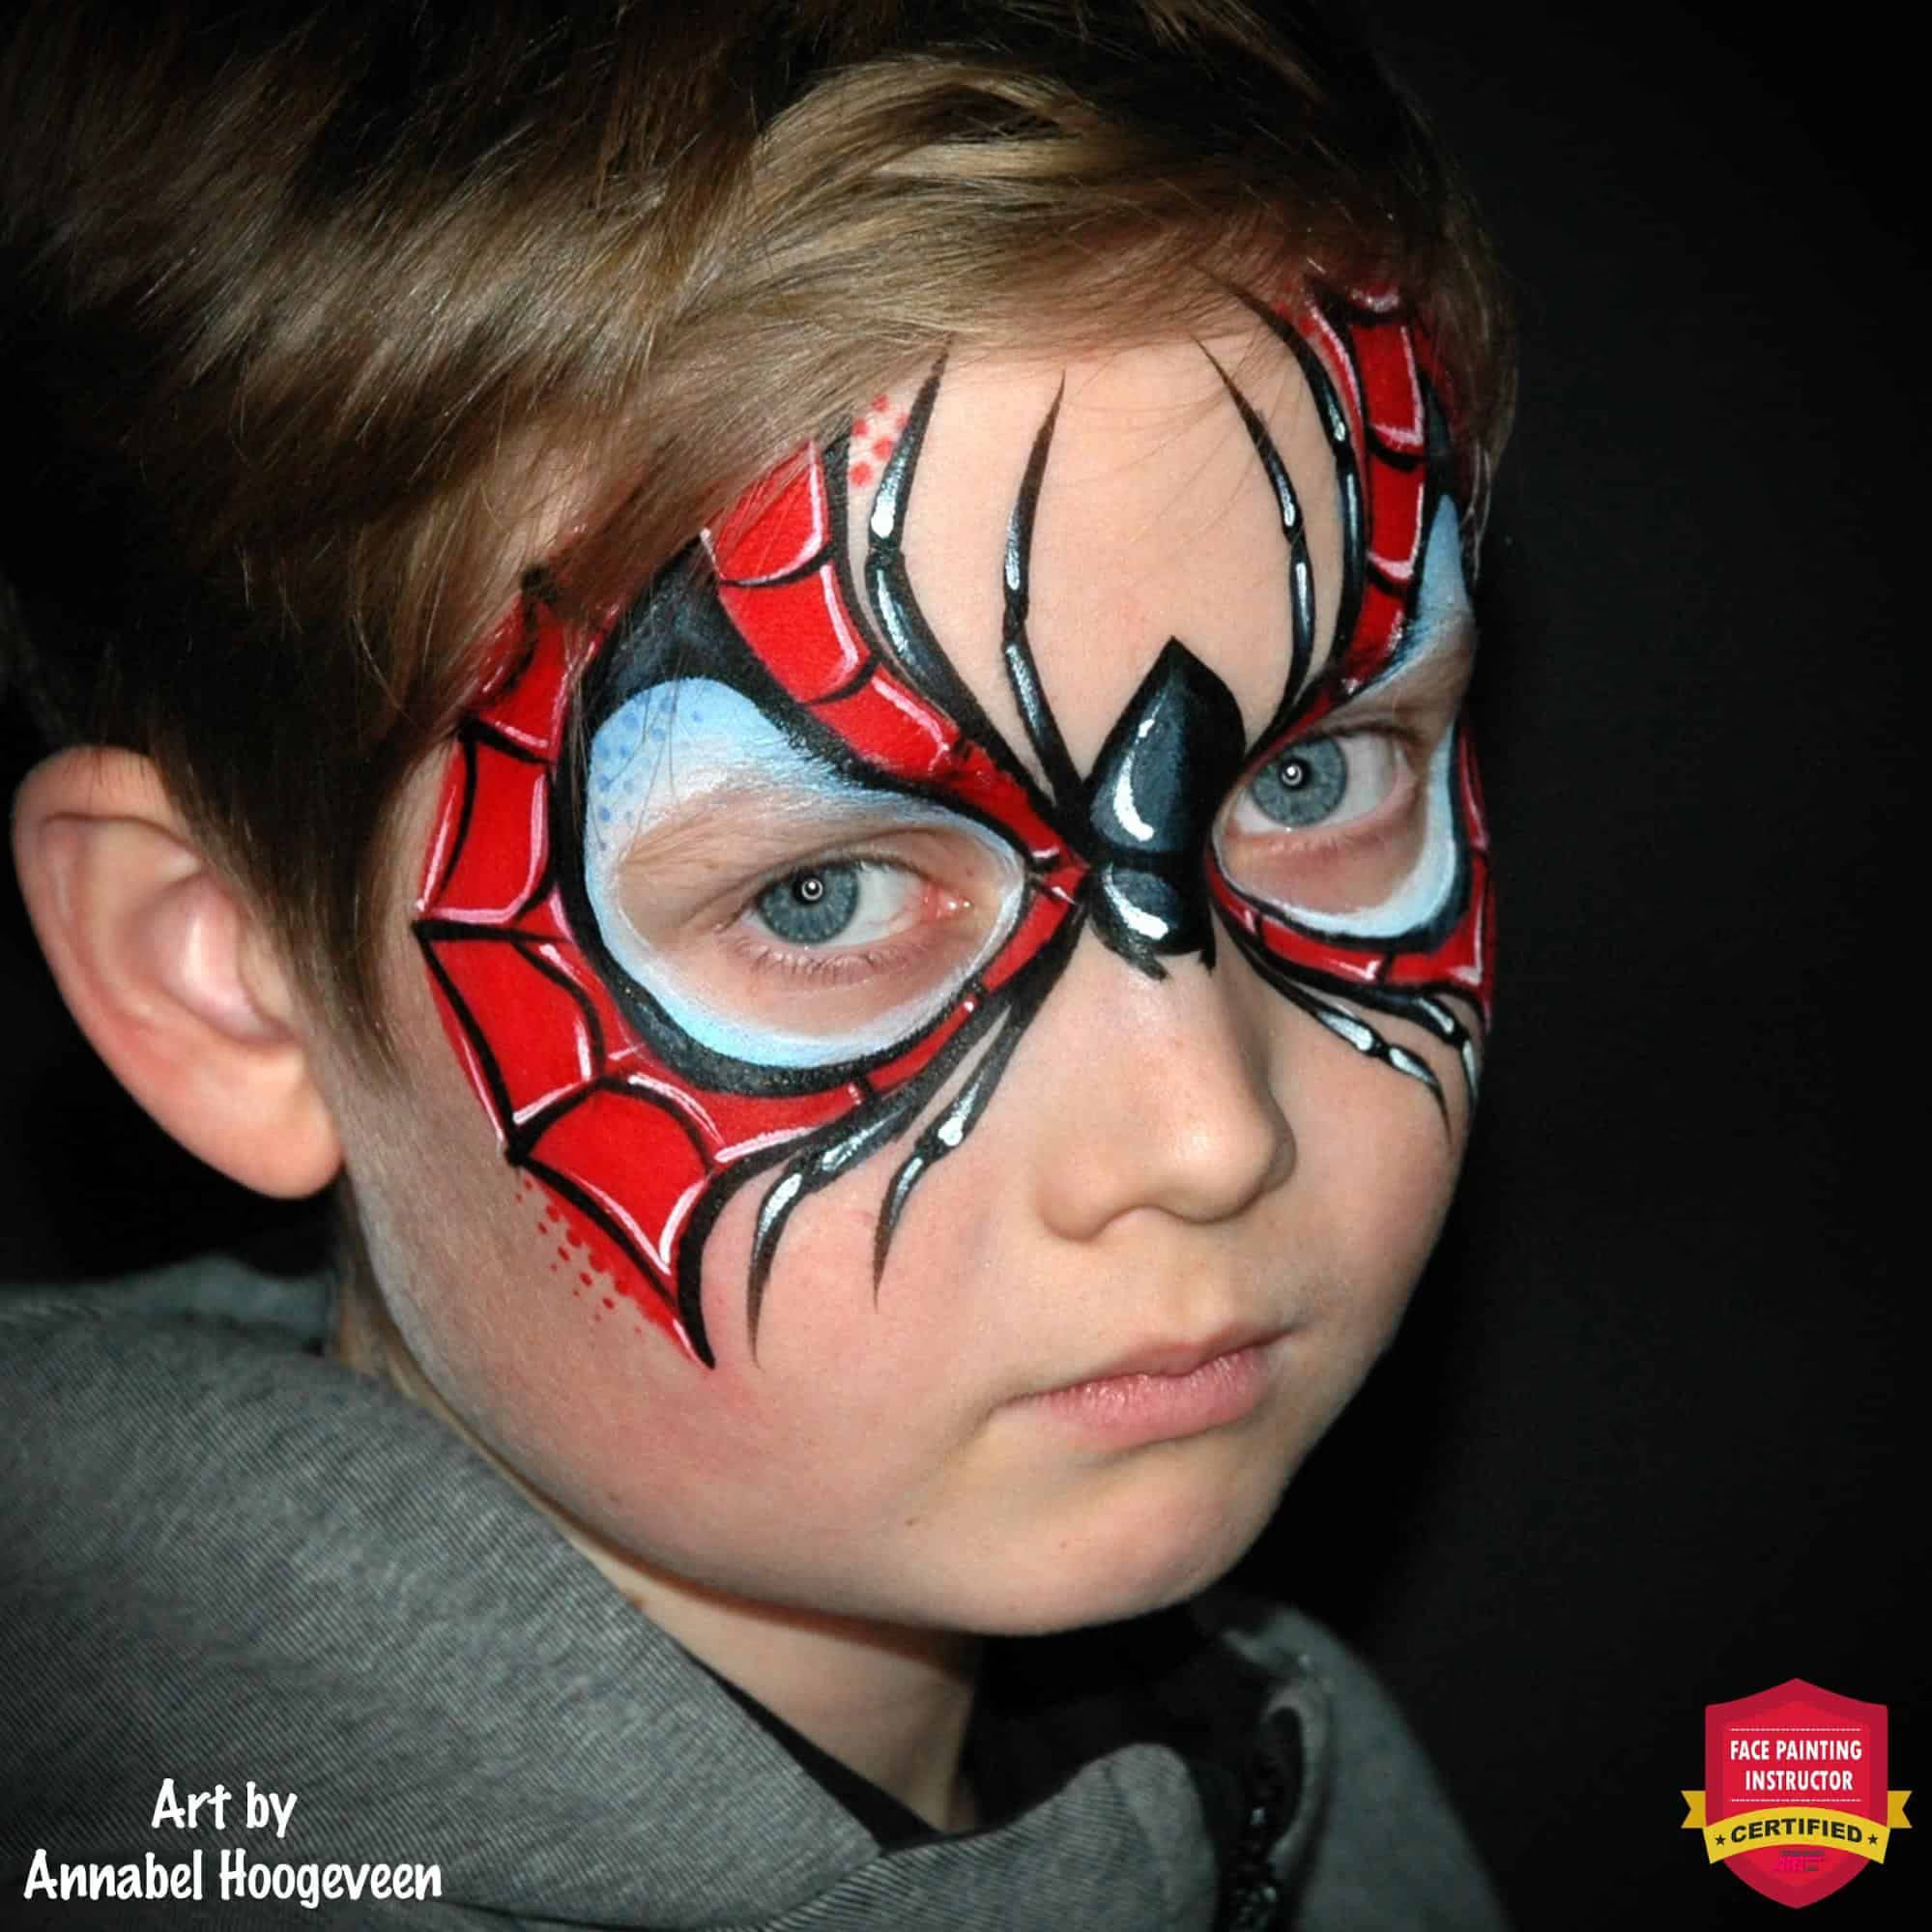
He’s now ready to roll with his Halloween spiderman face paint!😎 And one more side view…
Additional Info:
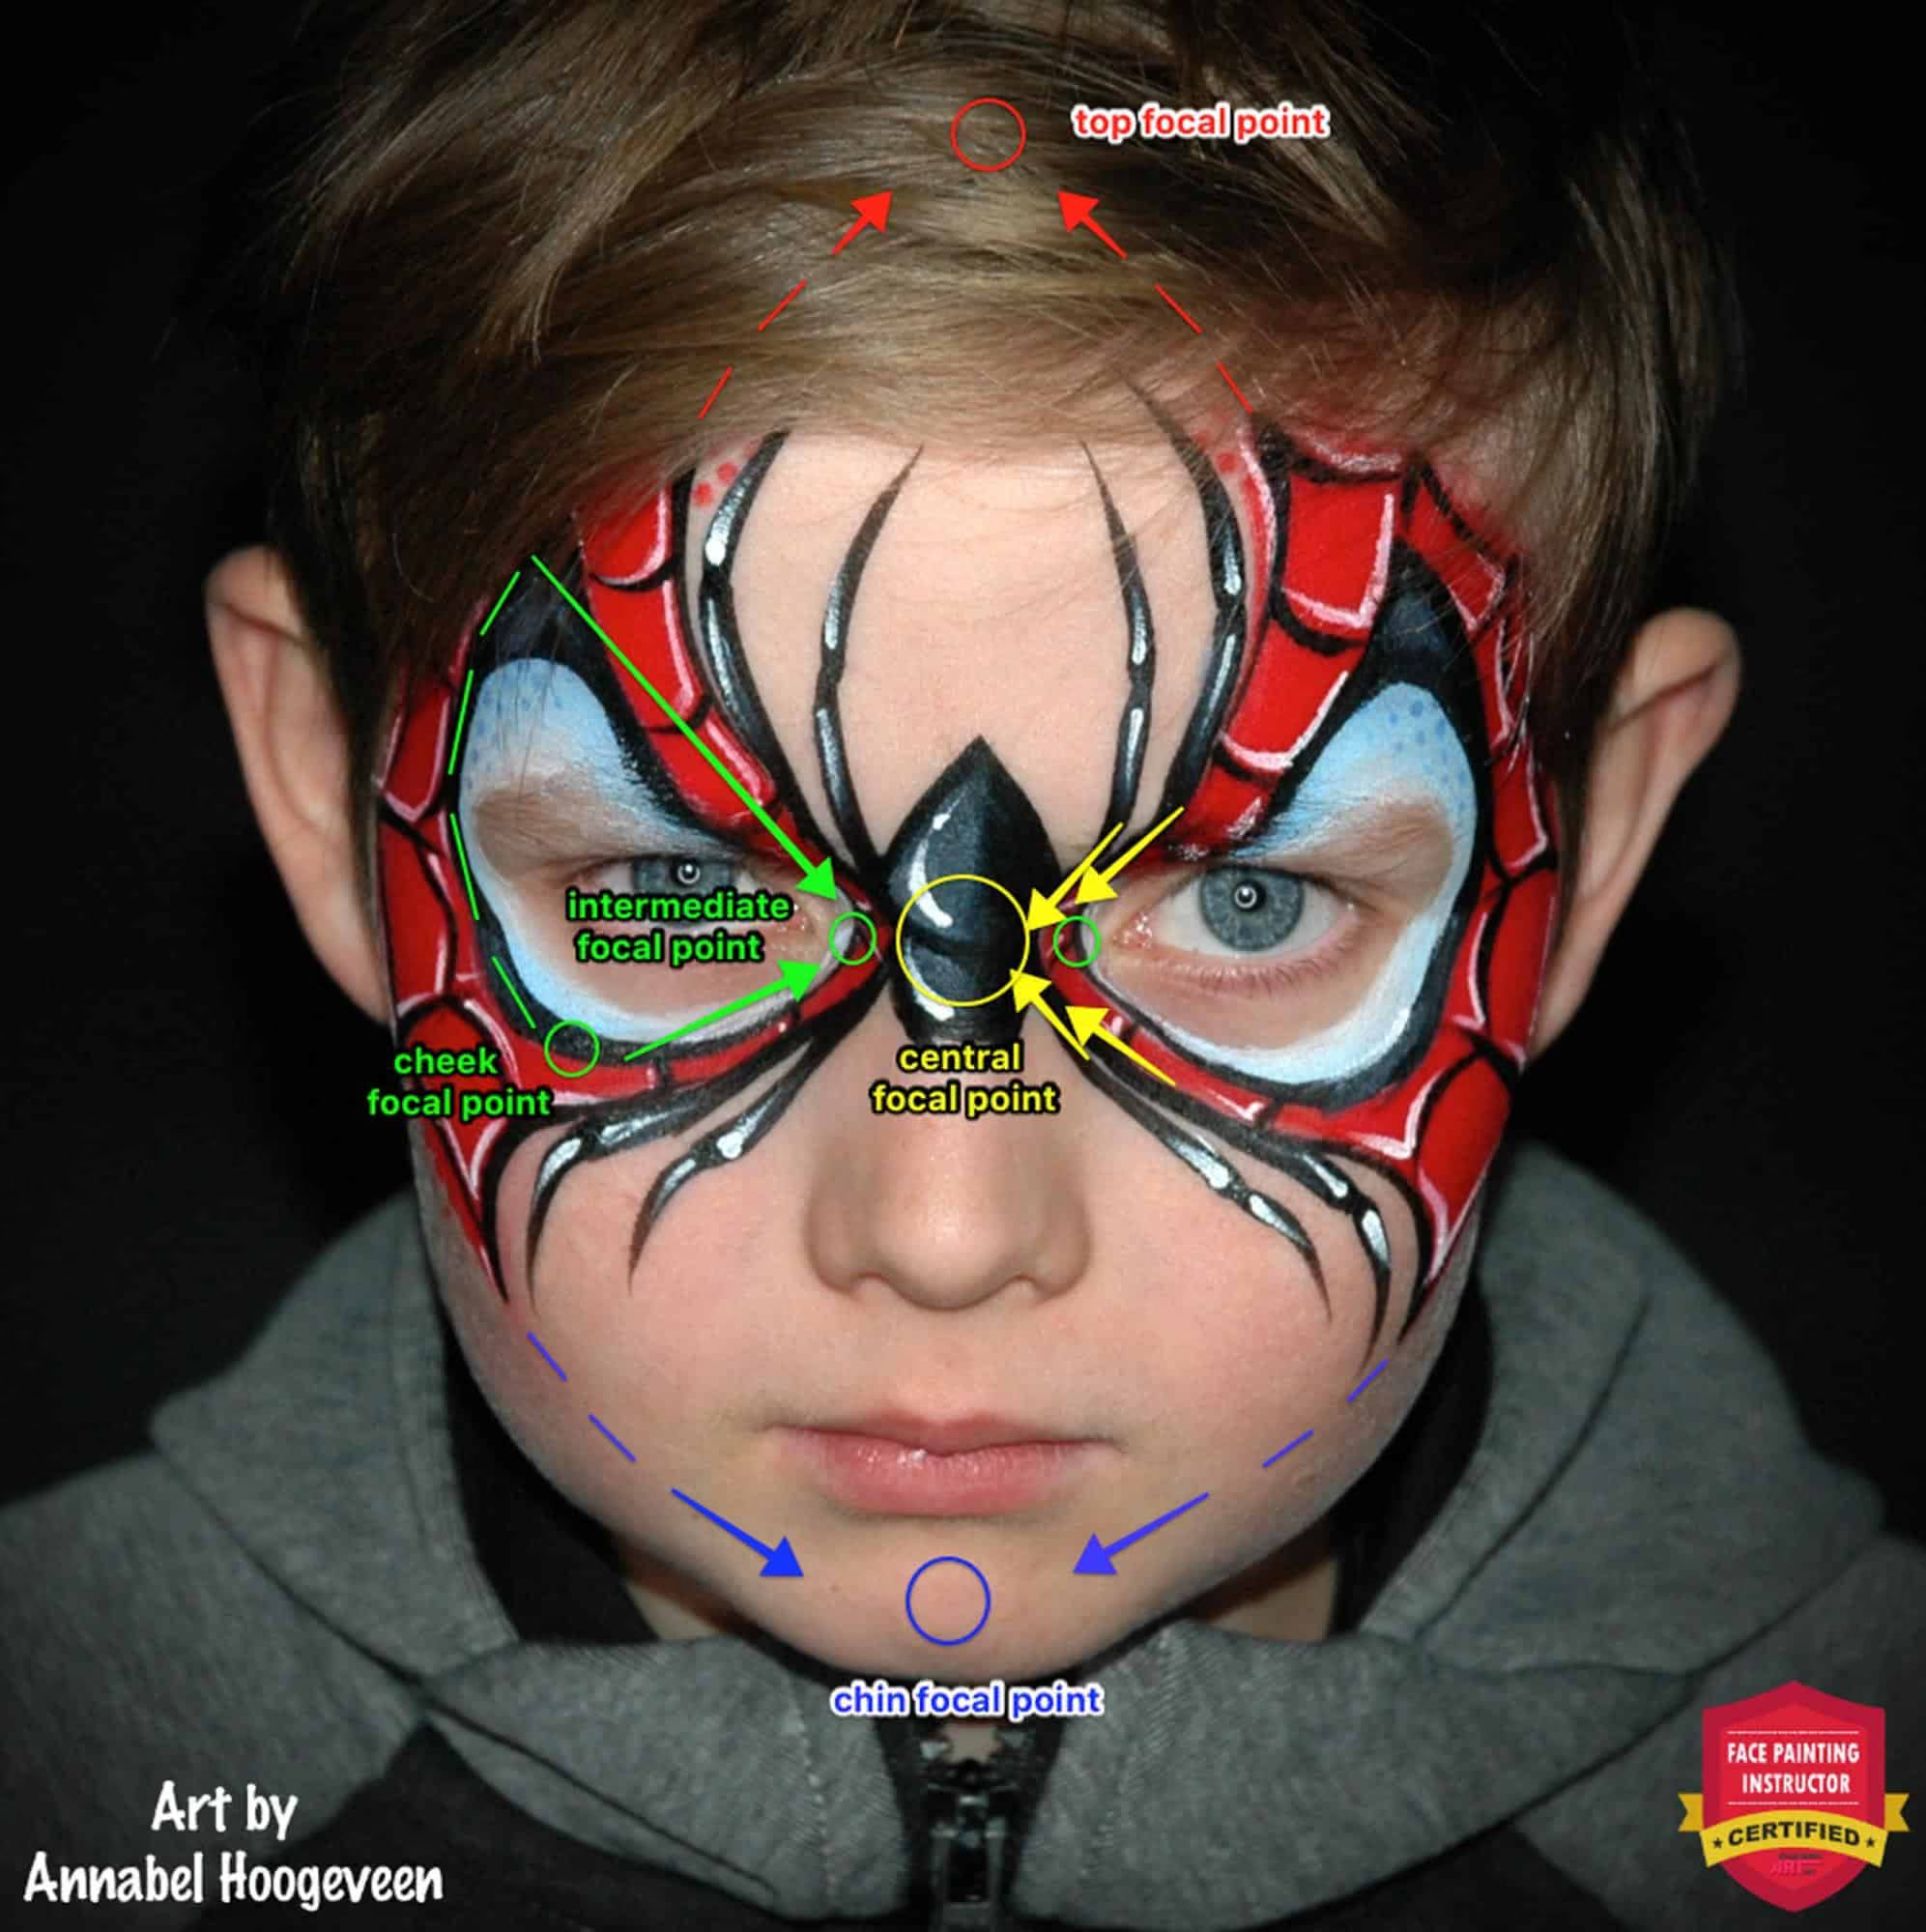
For the best placement of the different elements in this design, you can rely on the focal point theory.
As you can see in the picture below, I used a lot of them: the central FP for the position of the spider and his legs (and the direction of the cobweb wires!) and the intermediate and cheek FP’s for the shape and placement of the eyes.
But I also used the chin and top focal point to determine the shape and direction of the mask and web.
We’ll teach you how in this FREE “Improve Your Linework in 3 Days” Online Workshop!


Fast & Easy Spiderman Face Paint Tutorial by Milena Potekhina
The Spider-Man design offers numerous variations — this version by Milena Potekhina is great for both beginners who need a go-to OTJ design and experienced artists who are ready to try something new to keep a request they’ve been painting for years fresh!
Tip: Read to the end to catch the special step that makes these highlights so spectacular!

- Colors:
- Red by MAG (Alternative: Beach Berry by Paradise Mehron)
- White by PXP (or your favorite waxy white such as Diamond FX, Wolfe, or Fusion)
- Black by PXP (or your favorite waxy black such as Diamond FX, Wolfe, or Fusion)
- Ziva blue by Superstar
- Split-cake “Dragon” by TAG
- Brushes:
- Big drop by Paint Pal
- Shader brush 1/2 by Aliyah (Alternative: The Face Painting Shop 1/2” Angled brush)
- Round petal 2 943-2 by Kingart
- Stencils: BAM 2035 (Alternate: BAM 1206)
- Sponges: Finger dauber sponges (one each for white, black, and red)
Need supplies? Check out our comprehensive Buying Guide for Face Painters to get the best products for your professional kit.

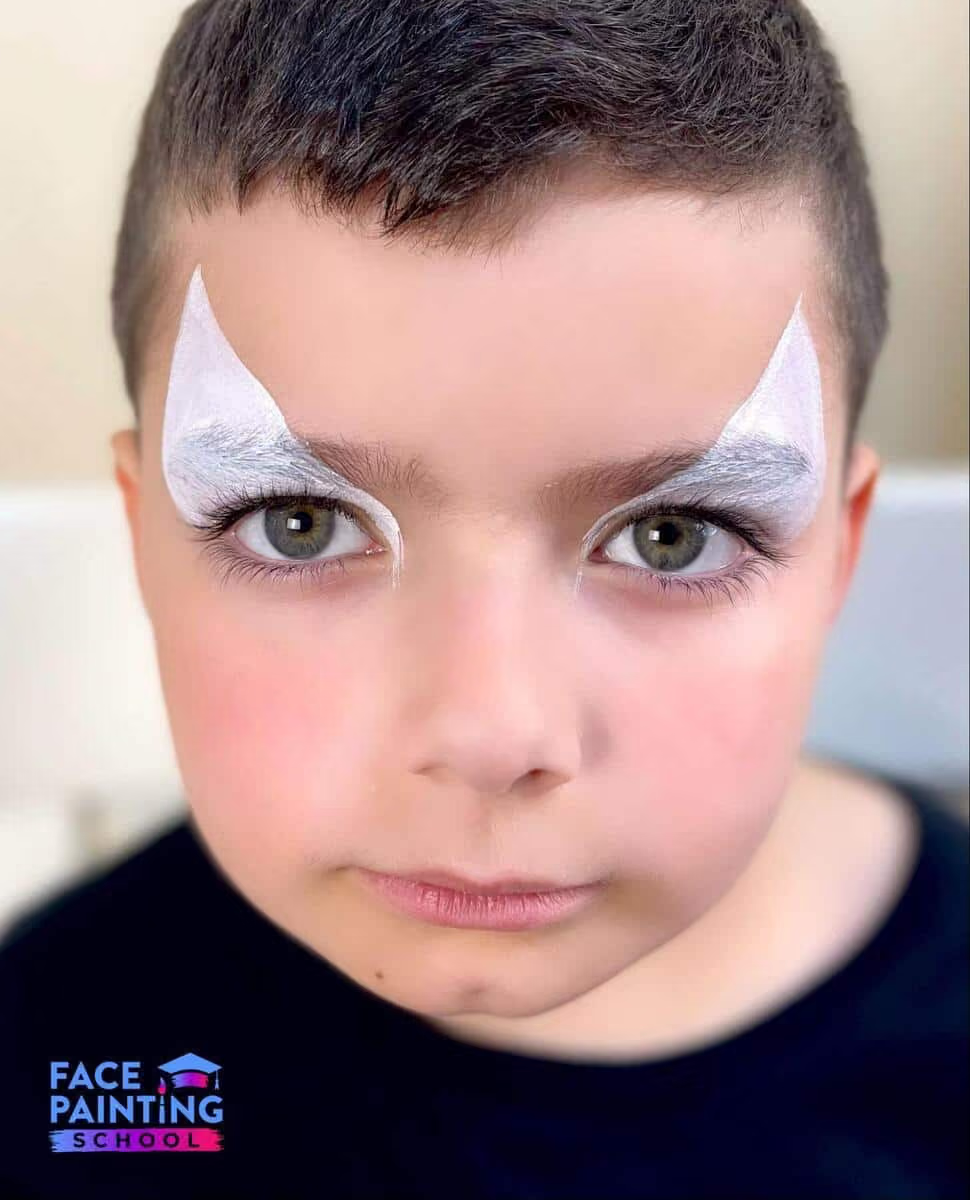
Step 1: Create the White Eye Base
Using the Paint Pal Big Drop brush, draw eye sockets. Gently, almost without pressing the brush, paint the child’s eyelid. It’s better to start by making a stroke slightly above the lash line to assess the boy’s reaction.
Check if he can keep his eyes closed and endure the eyelid painting procedure. If the child, especially a boy (as they can be quite sensitive), can’t keep his eyes closed, then the eyelid should not be painted. Otherwise, the paint might get into the eyes.
If everything goes well, and you manage to paint the eyelid, the next step is to draw a straight line from the inner corner of the eye at a 45-degree angle.
Then, from the upper point, draw a curved line to the outer corner of the eye. Finally, fill the entire eye socket with white color.
Step 2: Red Mask Base
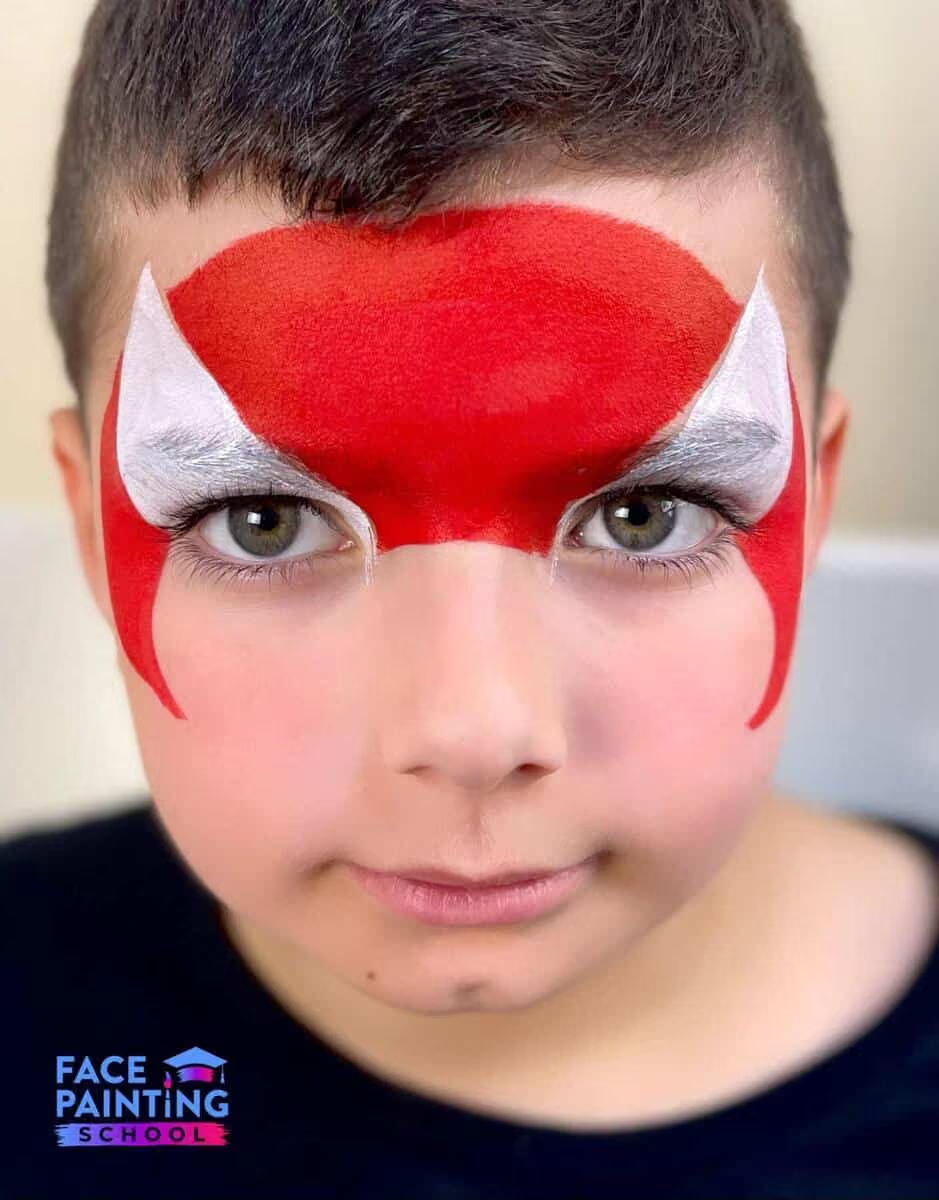
I like to fill in the forehead and temple area with a flat angled brush (1/2) because this brush allows covering a large surface with color at once. This significantly saves time during the process.
Take care around when painting with red near the white eye-areas so the colors don’t bleed together.
The shape should fill in the forehead and end on the nose in a clear line across the nose connecting the two focal points at the inner eye corners. It looks nice to curve this line slightly upward on the bridge of the nose, but not too much.
On the sides, outline the white carefully again ending in the outer corner of the eye. Create a curved line down to a point at the cheek focal point and connect this back up to complete the mask shape. Keep a curve in all these lines as they are the starting point for where the spiderwebs will go.
Tip: Start with the left side, then the right, to ensure both sides are symmetrical and on the same level. Check out “7 Steps for Symmetrical Face Painting Designs” for more!
Step 3: Add Shadow Details
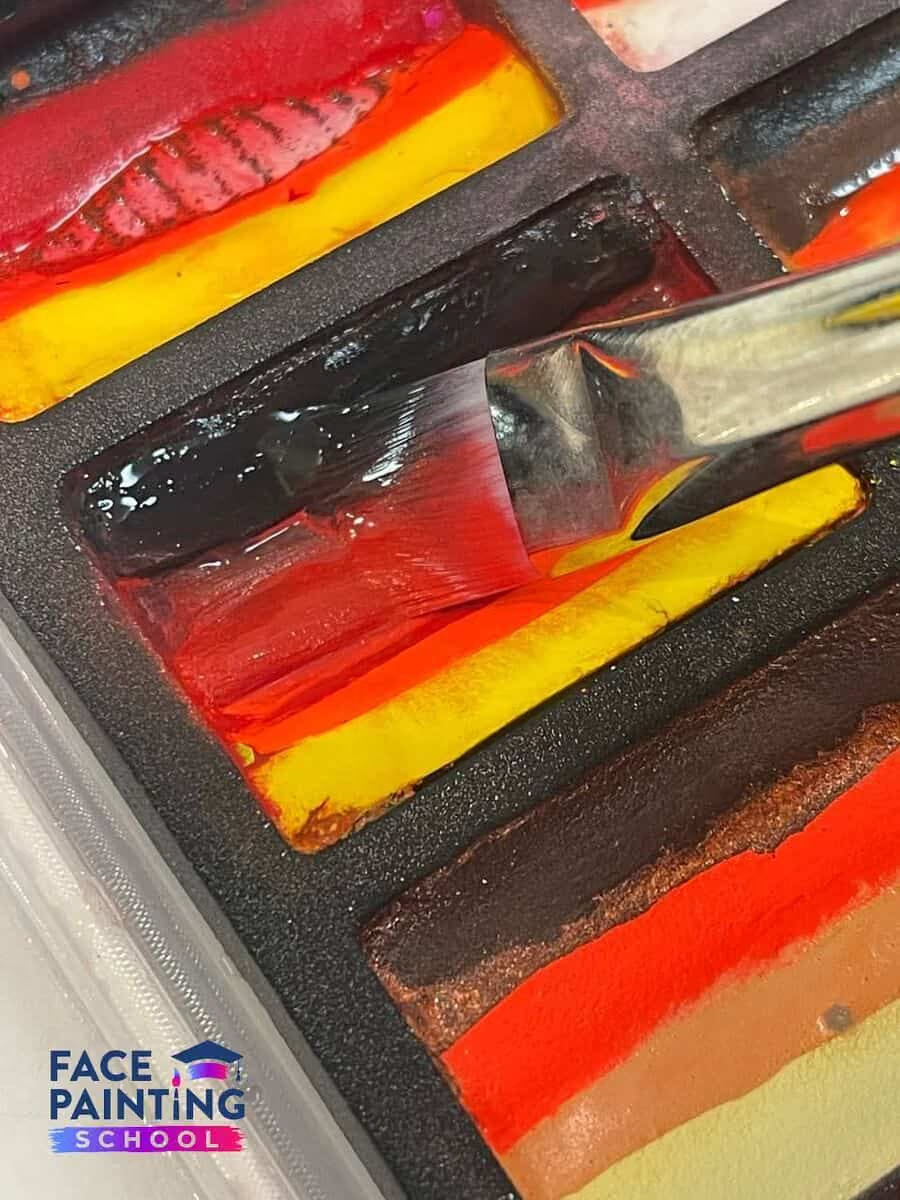
With an angled brush and any split cake that from red to black, draw the border between the white eyes and the red background.
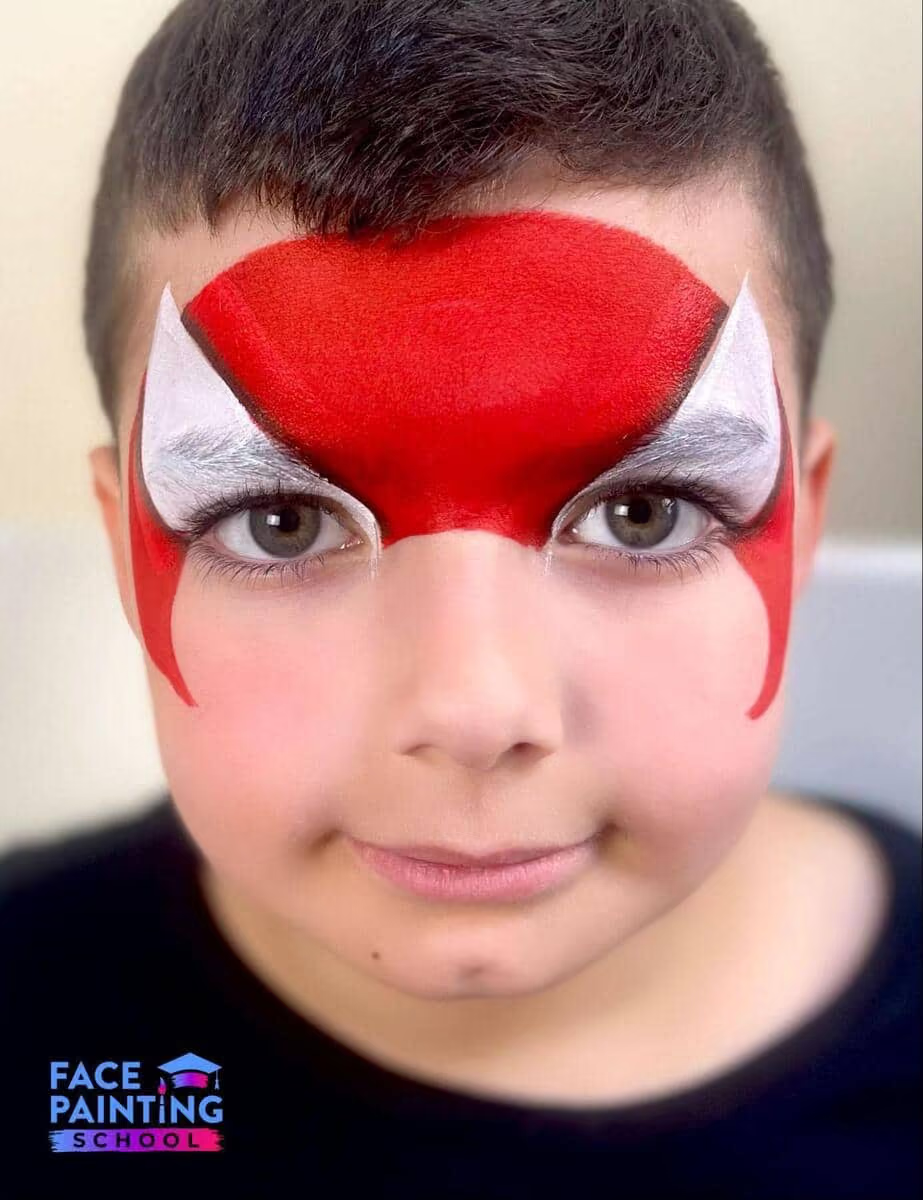
Tip: Using a one-stroke (pictured below) will give a softer gradient effect from red to black and add some wonderful shading to your design. If you don’t have a one-stroke, you can skip this step as we’ll outline the eyes later in black, but the mask won’t have as much of the 3D effect.
Step 4: Add Stencil Details
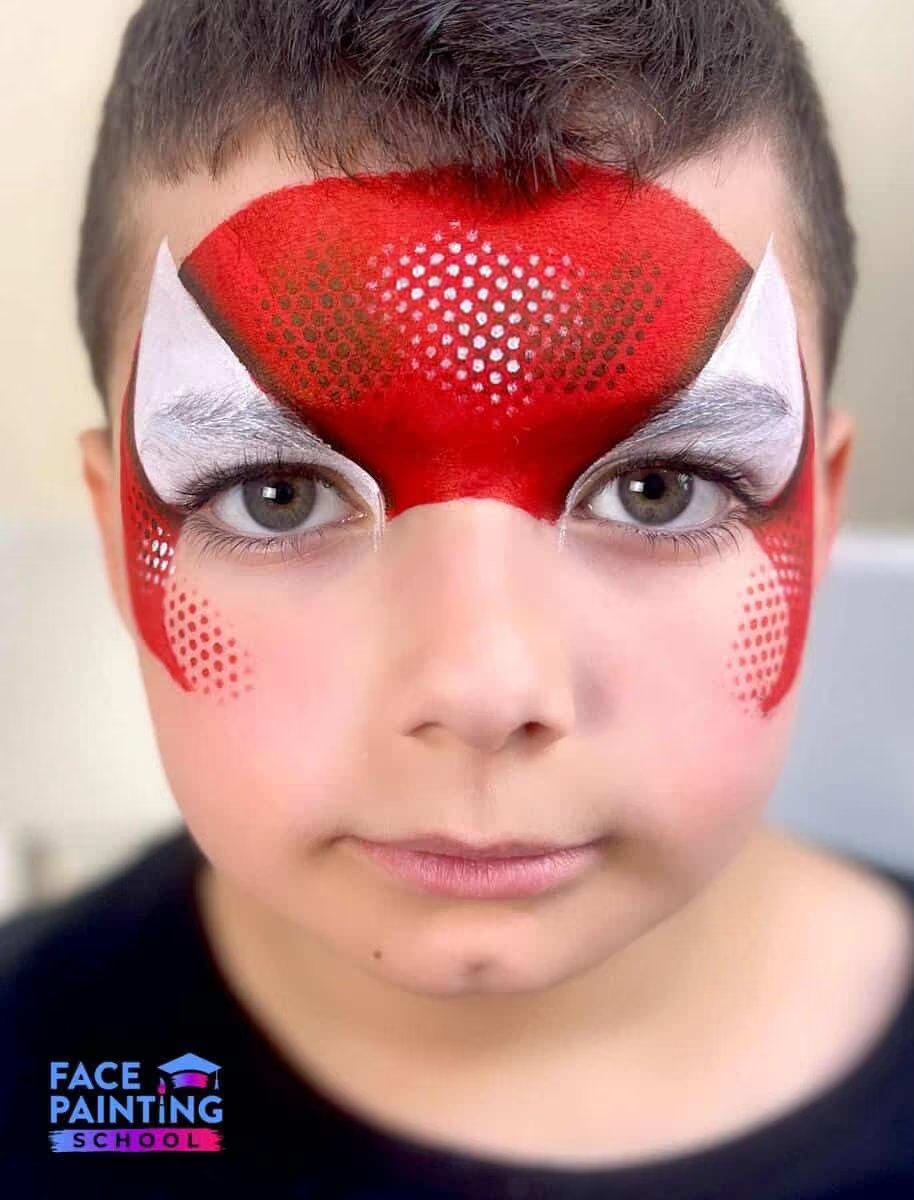
Using stencil BAM 2035 and a finger sponge, I apply dark red dots on the red background (I mixed the split cake red and black on my finger sponge to achieve dark red) on the sides of the forehead and on the temples, as shown.
Next, I add white dots in the center of the red background, thus creating the texture of the mask.
By placing the white dots on the spots where light would hit most directly and dark dots on the part that would be more shadowed, we’re also creating dimension and shading.
Also, with the base red color, you can add blush dots to the upper part of the cheeks. This will give the mask softer boundaries.
Tip: Wondering what the secret is to painting vibrant designs like this? Today we’re sharing our Top 7 Tips for Vibrant Face Painting Designs with you
Step 5: Add Black Outlines
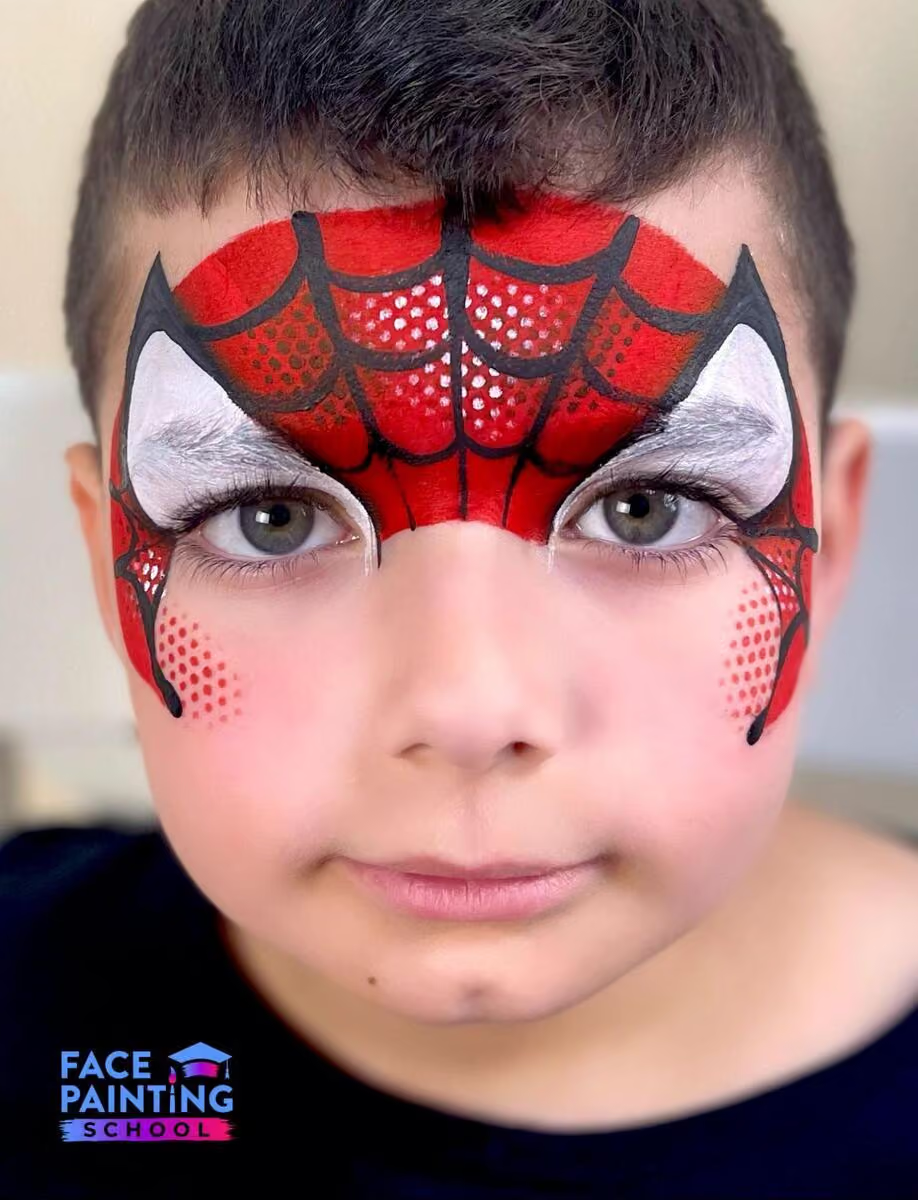
Using brush #2 and black paint, draw the spider web and outline the eye sockets, as shown. Use the focal points as your guide for where to direct the tips of your lines.
The outer linework should all converge at the outer corner of the eye.
Step 6 (optional): Add Highlights
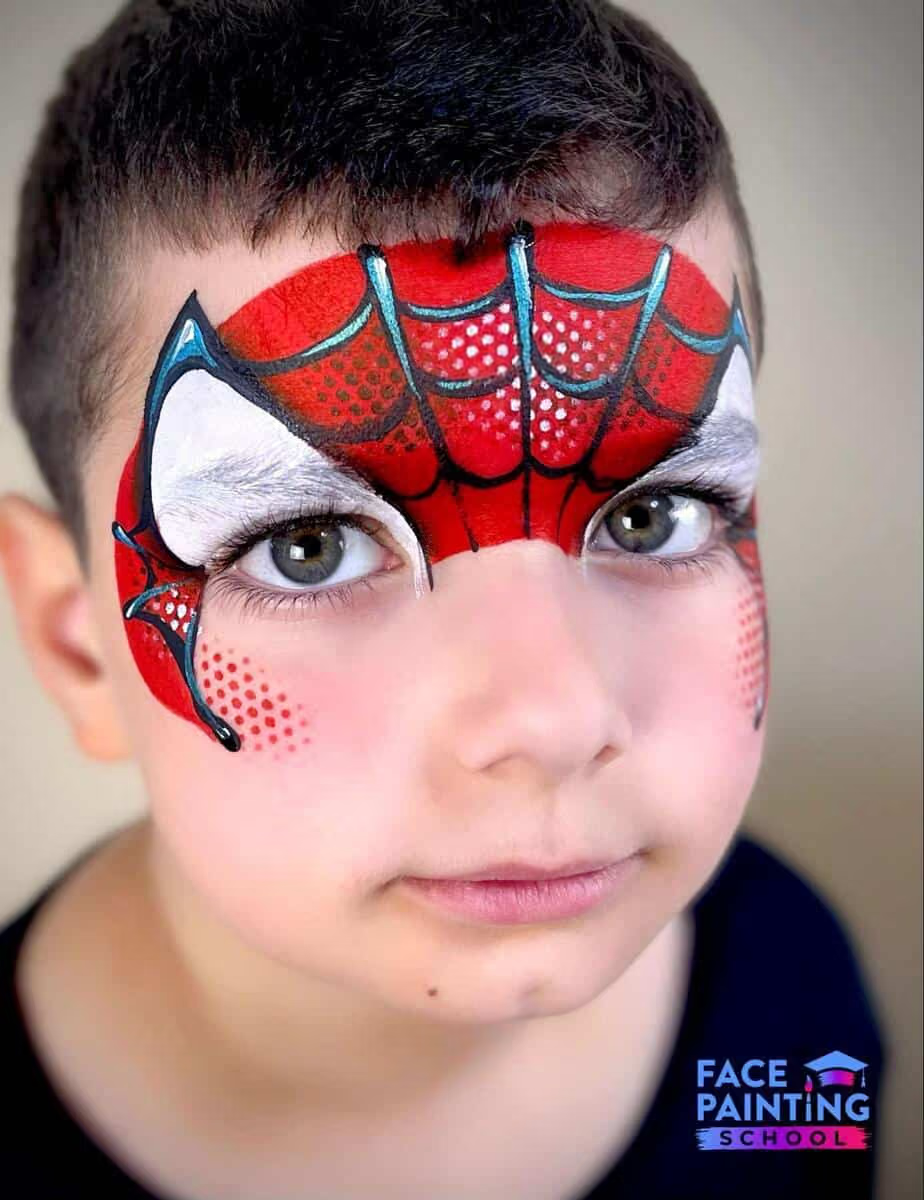
With brush #2 and SuperStar Ziva Blue pearl paint, draw highlights on the spider web and around the eye sockets. The contrast of the blue color is very eye-catching.
For an even brighter POP of highlight, add highlights with white paint on top of the pearlescent ones.
And now, take a step back and look at your finished design.
POW! WOW! SUPER!
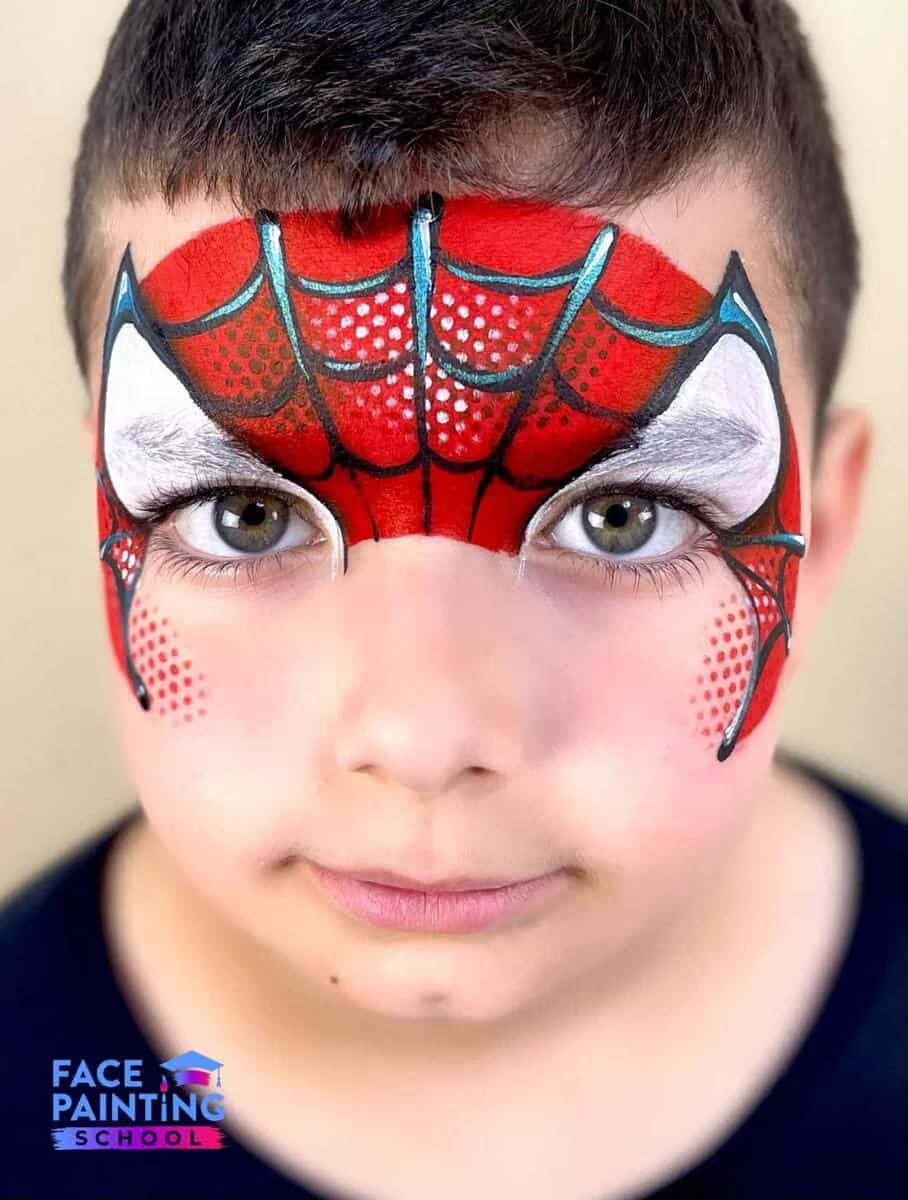
I hope you’ve enjoyed this design tutorial! If you have any questions, feel free to email us or ask in the comments below! And when you try it out, we’d love to see your work. Tag us @facepaintingschool 🤩
Get inspired with loads more superhero designs to delight your clients in our Ultimate Face Painting Ideas Guide! You’ll also find other boy favorites, the most popular girl designs, fast OTJ options, and more! We’re not kidding about this being the Ultimate inspiration resource!

Not sure what Ghost Spider looks like? Check out this Ghost Spider Tutorial by Simona Rad for a matching themed design of the very popular new Spider Girl.
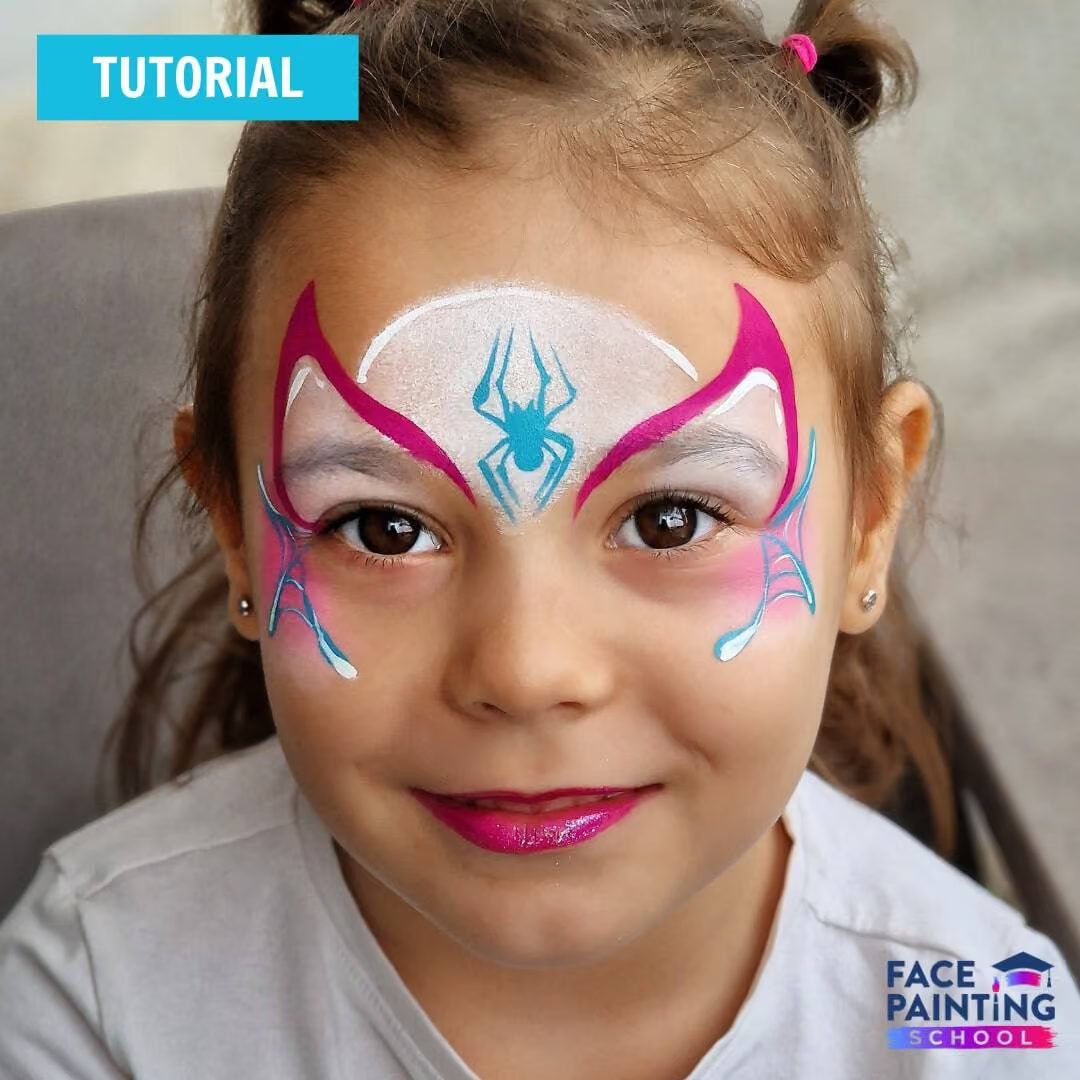
“Spin” Miles Morales Spiderman Face Paint by Simona Rad
So, what’s the solution?
This article offers a clever and easy-to-implement workaround. Keep reading, and you’ll be smiling the next time you’re tasked with the Black Spider-Man design!
Let’s get started!
- DFX blue sponge – trimmed
- Eulenspiengel clown white (or other glycerin based white like Paradise White by Mehron or Line White by Superstar)
- DFX Red
- DFX White
- DFX Black
- Liner brush no.1 Sparkling Faces (Alternative: Blazin’ Brush liner no.1)
- Pointer Brush no.4 Sparkling Faces (Alternative: Blazin’ Brush liner no.4)
- Art Factory Filbert Brush ⅜”
- OOH stencil – S10
Step 1: White Eye Base
White base. Using one side of the sponge loaded with glycerin white, we create the classic Spider-Man eyes shape on the eyelids and with a small peak above the eyebrow.
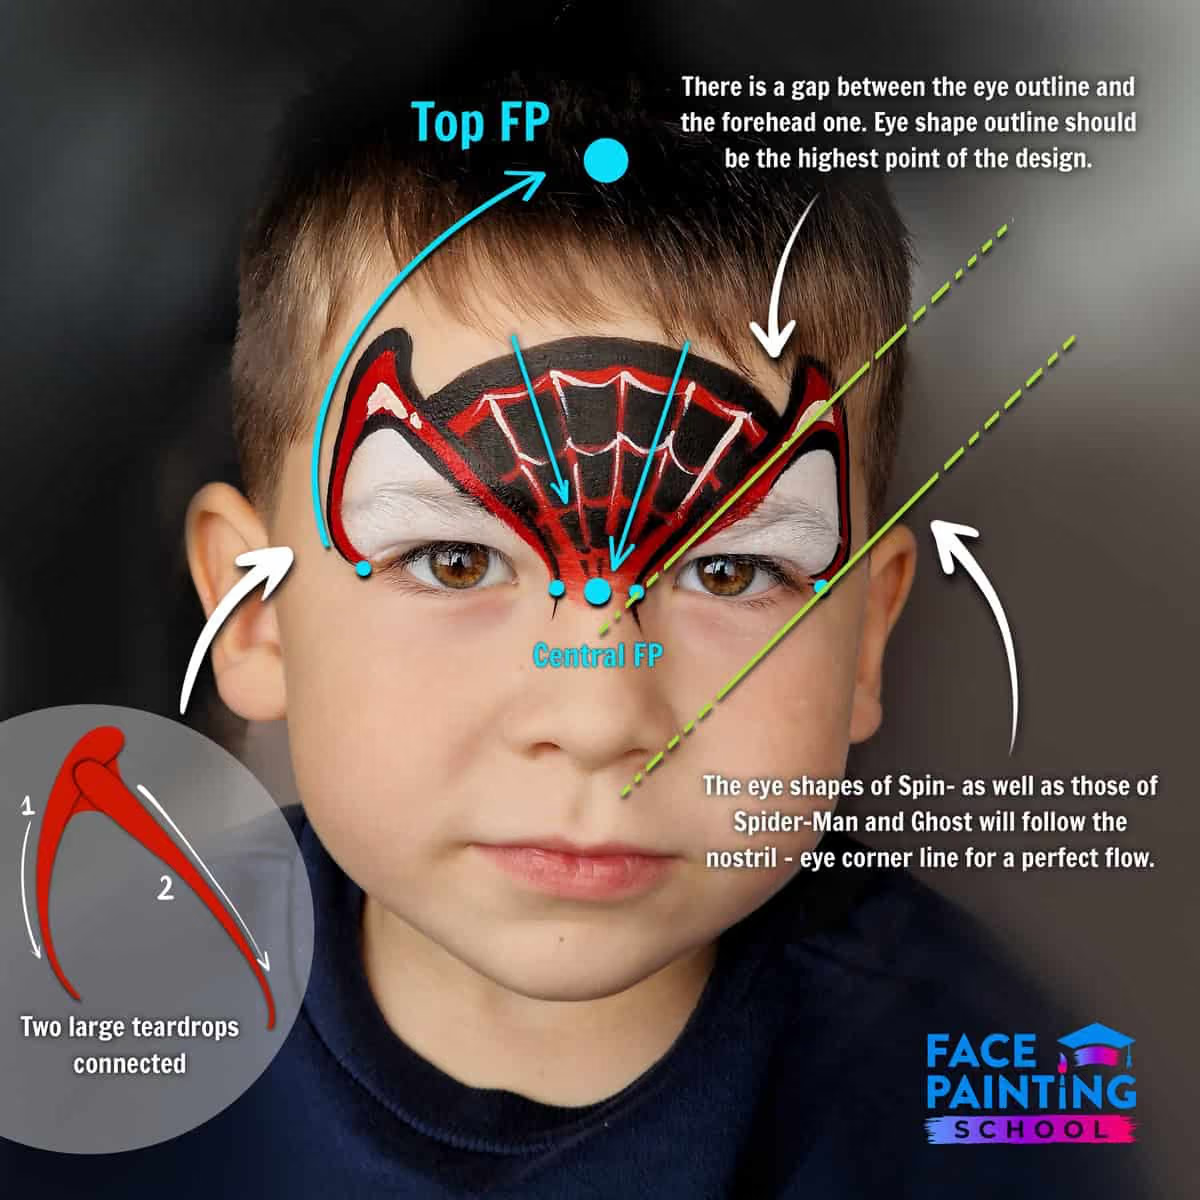
These shapes will be placed at a 45° angle and will go no further down than the outer corners of the eyes.
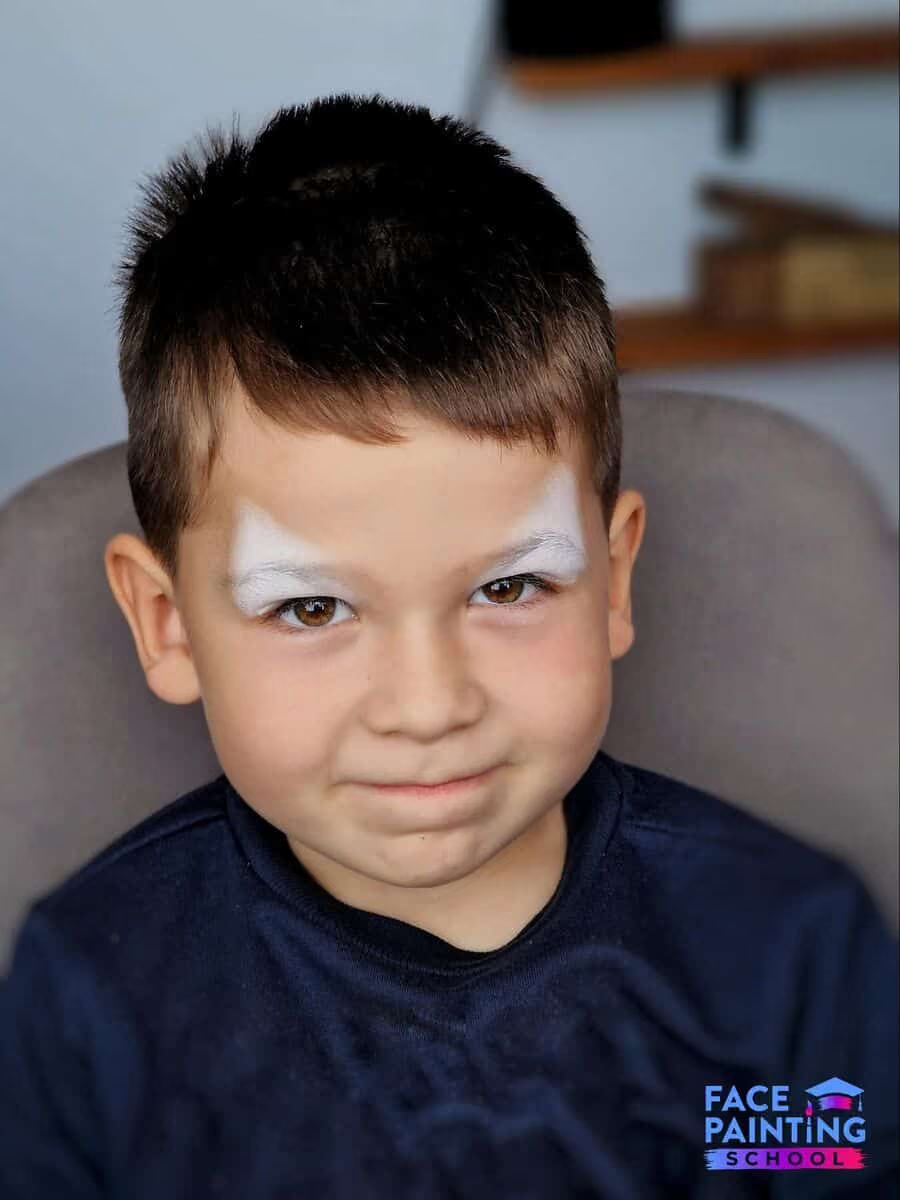
Tip: Glycerin-based white paint will feel more comfortable over the eye area, which can make a big difference to the child’s experience! For more top tips like these that will help you stand out as a real Pro, read our Professional’s Guide for Face Painters.
Step 2: Red Outline
Red outline. Using a slightly big round brush we will outline the white eye shapes in red! We are using a larger round brush so we can do this step with only a few brush strokes!
Each eye outline is in fact made out of 2 large teardrops – they connect at the top of the eye shape and the teardrop closer to the ear is extending towards the focal point from the top of our model’s head.
The thin ends of these 2 teardrops will be oriented towards the inner and outer corner of the eye.
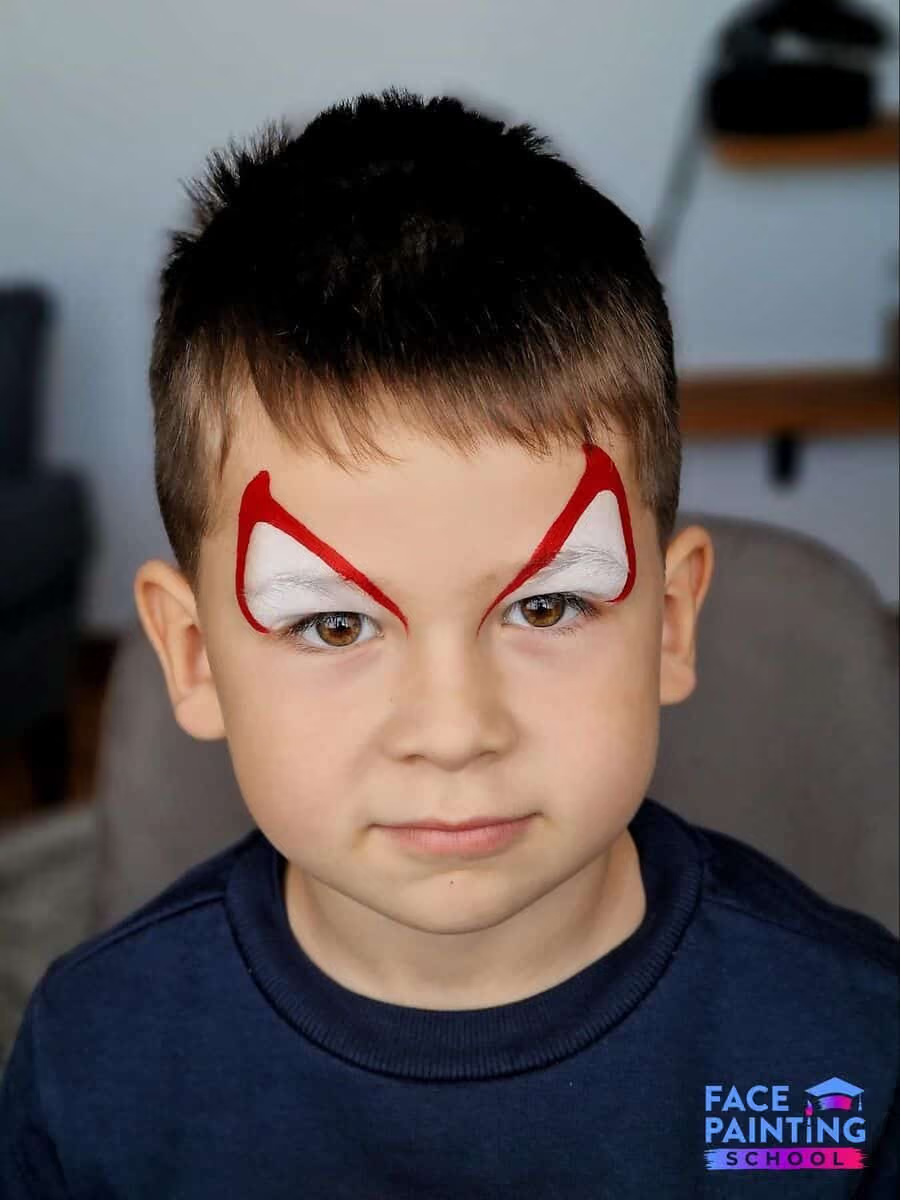
Step 3: Red Mask Base
Red base. Yes! You read it correctly. We will use the regular red base we are all already used to for Spiderman designs.
For this, we load the filbert brush with red and connect the red outlines through a bridge shape stroke done with the full width of the brush.
This way we will already cover a large area of the forehead in red. We want a quick design so the fewer strokes we use, the better.
Just pay attention to the top of the mask. There should be a gap left between the eye outline we just made and the red base we’re painting now.
Also, let the eye outline be the highest point of the design, so even the center of the base we’re painting now should not go higher than the eye outline which frames the forehead.
By the time we fill in the entire base with red, the paint left on the brush will be of a dry consistency and we will be able to fade it away nicely towards the nose.
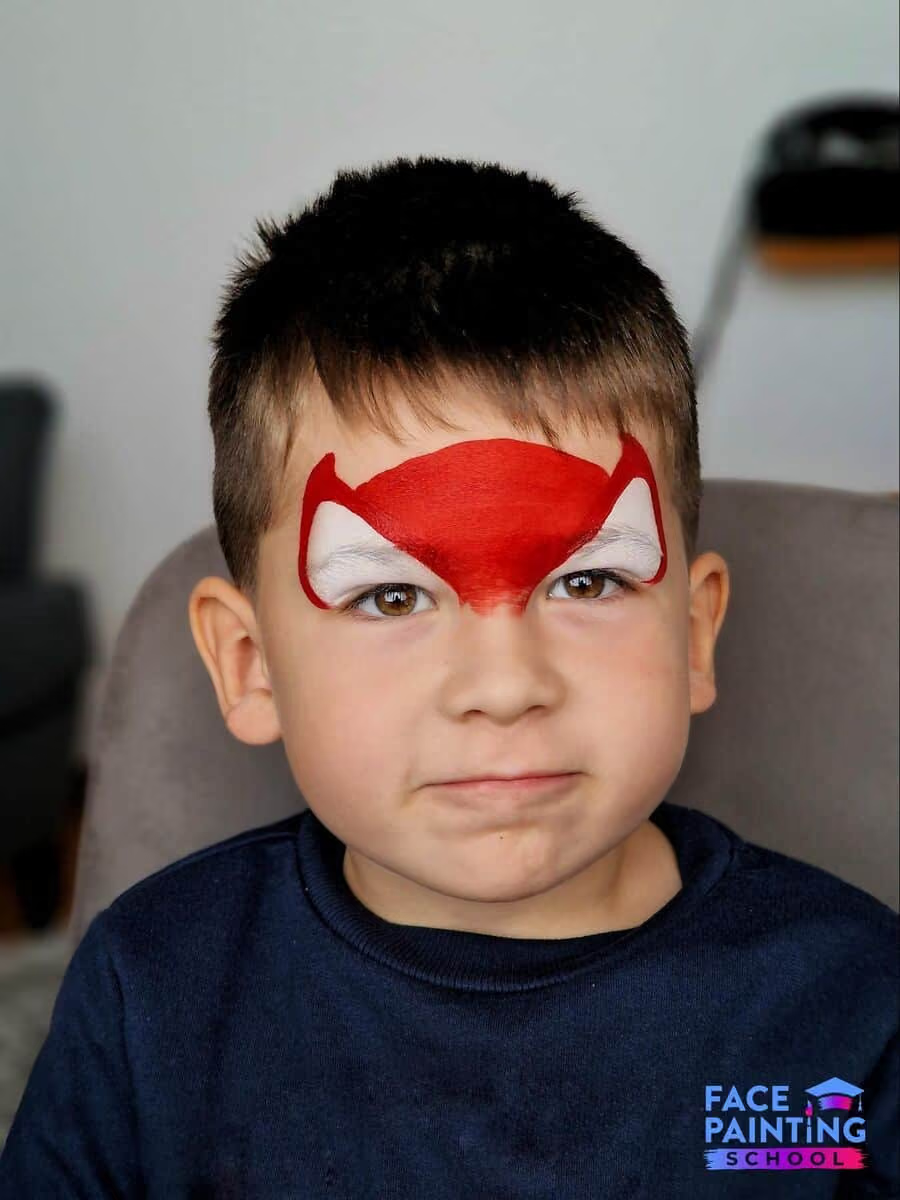
Wow, Pow, Kachow! Looking for more Super Heroes!? Our World’s Best Face Painting Ideas for Any Occasion guide has the greatest team of Super designs for face painters. Find inspiration, video tutorials, tips, and more!
Step 4: Spider Web Stencil
Spider web. Here is my super trick! Usually we paint the actual spider web, but for this trick to work, we will actually paint the negative space of a spider web. In order to do that, we use a stencil.
I modified a side of my stencil to have fewer lines by simply cutting off every other piece of the spiral using a sharp cutter. Of course this step is optional!
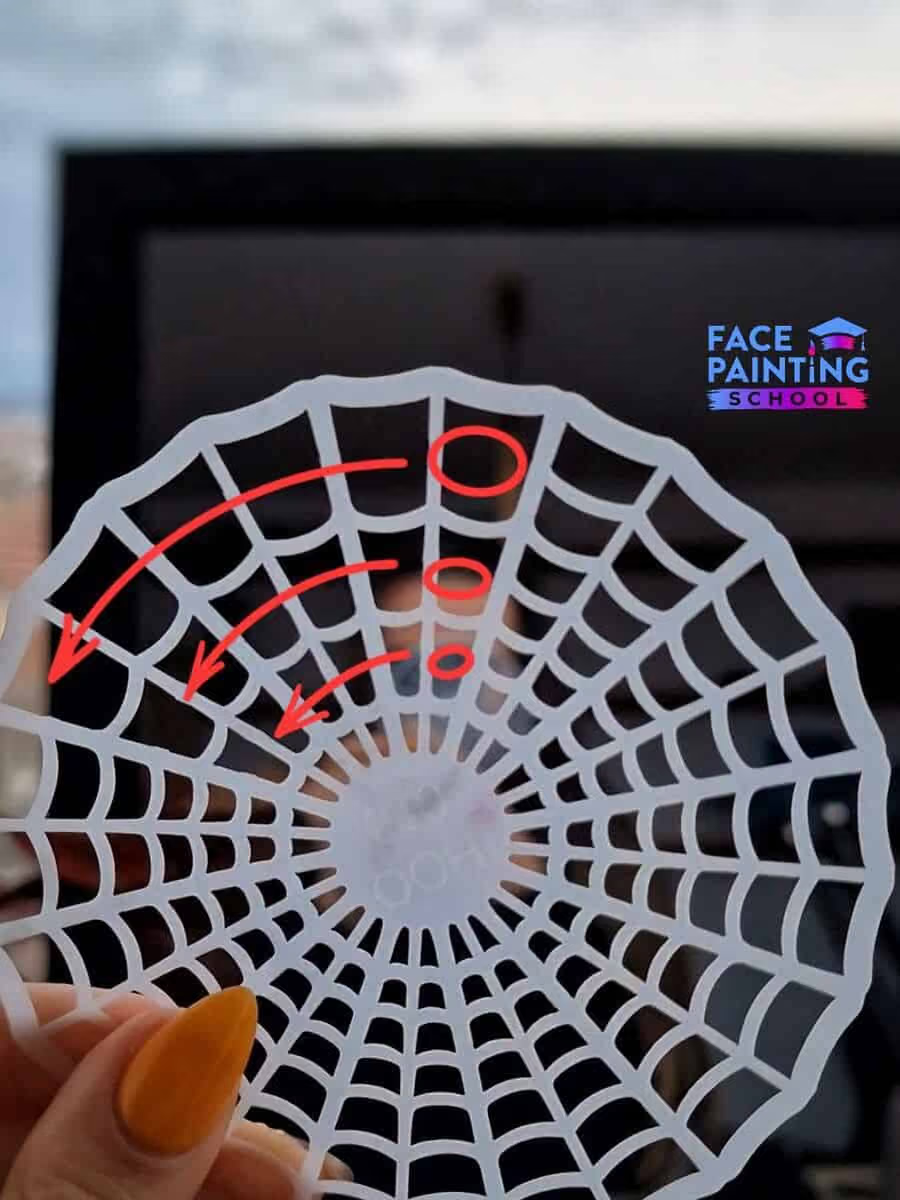
This time we are not using a finger dauber for stencilling as we want to cover a larger area in a short amount of time, so we will work with a normal sponge loaded with black.
Tip: If you have trouble stenciling without daubers, you probably haven’t mastered paint consistency yet! This detailed overview on paint activation and the 5 consistencies we use in face painting could be everything you need to nail stenciling once and for all.
Place the stencil between the eye shapes having its bold edge lower than the edge of our red base.
When applying the black, we will go over that bold edge and frame the entire spiderweb nicely.
Be careful and work as clean as possible around the eye shapes but don’t worry if it is not perfect – we will take care of the details in the next step!
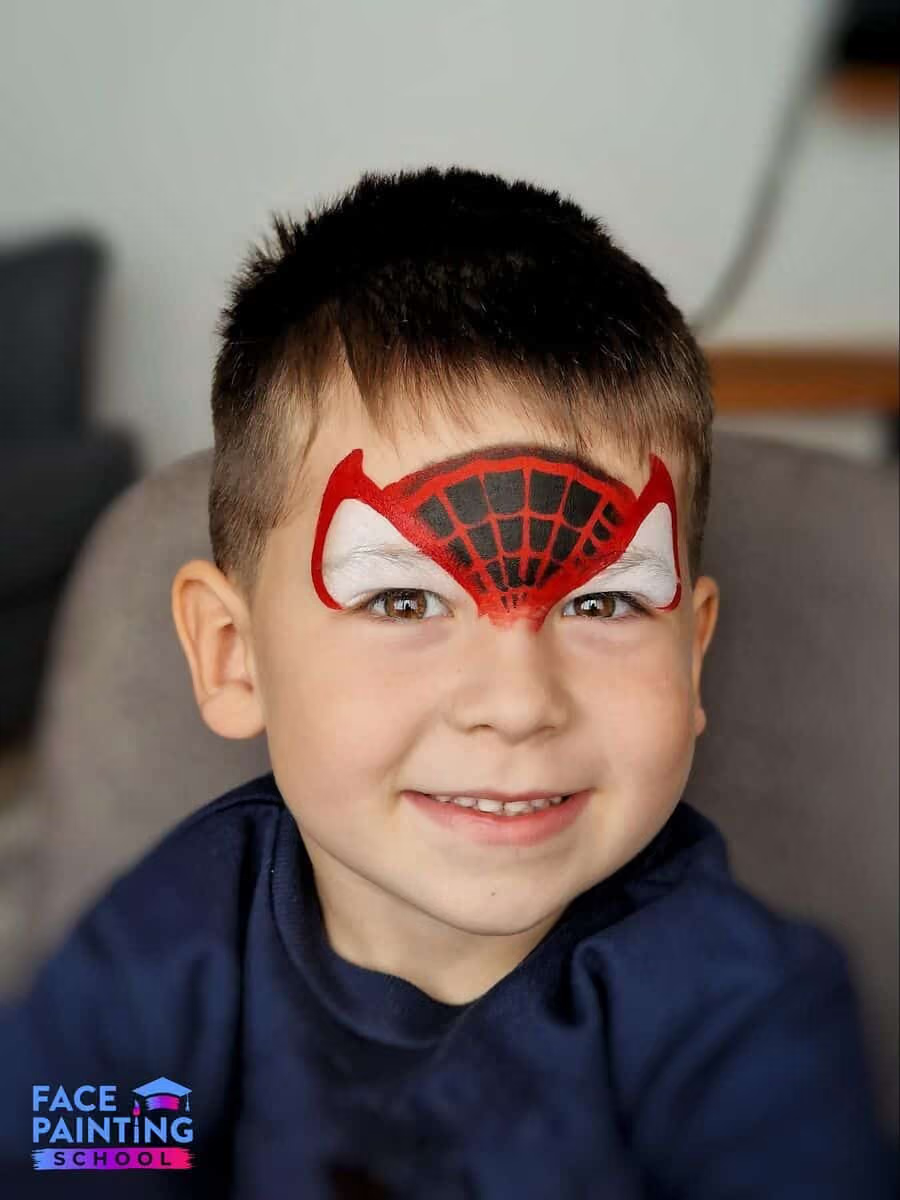
Step 5: Black Linework
Black outline. Using the large brush again, this time loaded with black, we will outline the eye shapes and the spider web for a neat effect and to make the red stand out even more.
For the eye shape outline we will use a thin to thick to thin kind of line for a better flow. And we can say it’s ready!
I would personally stop here as I love the deep colours effect and somehow this version is closer to the Spin character, but if you want to, you can add white highlights in the next step!
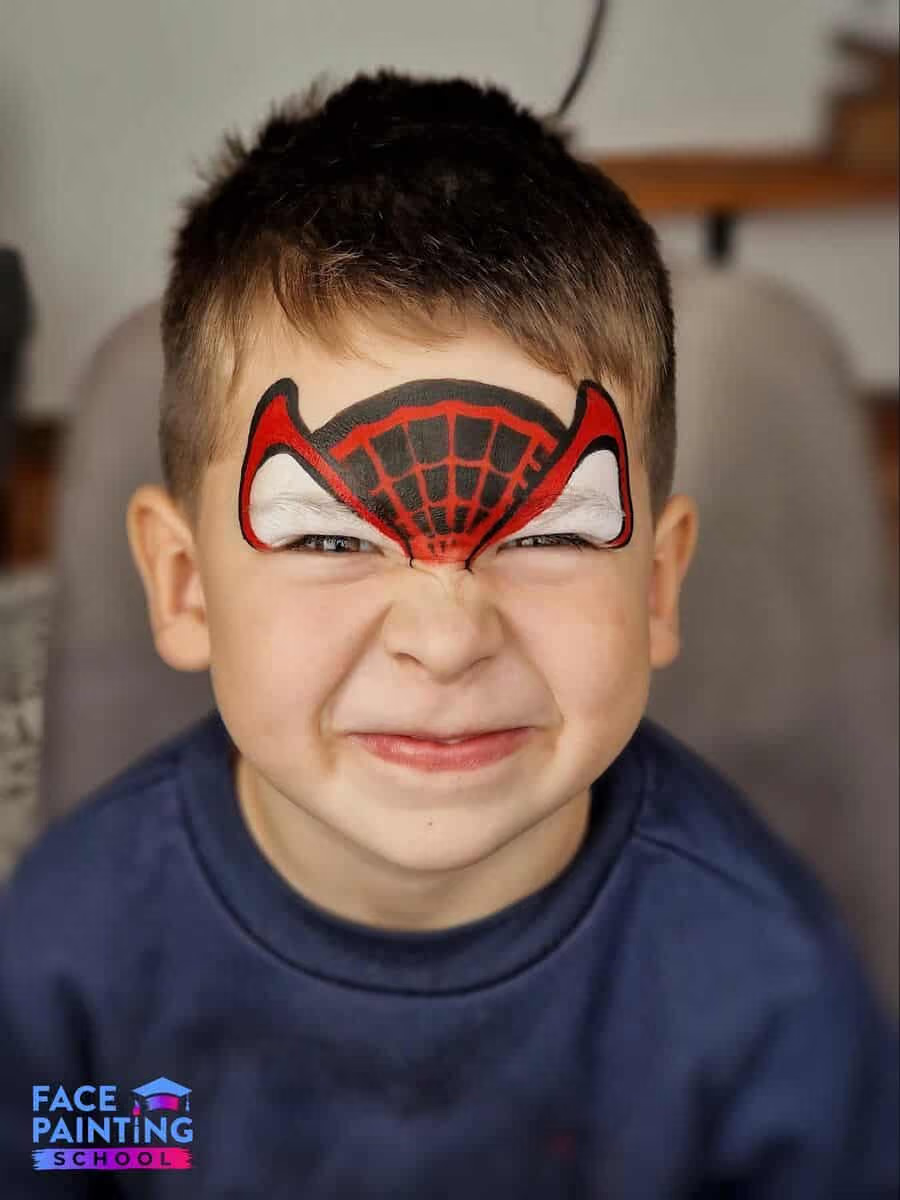
Step 6 (optional): White Highlights
White highlights. This step is completely optional, but if you choose to add the highlights, make sure the red and the black are completely dry before applying the white strokes.
I made the mistake of using too big a brush for the highlights (a round no.3) – yes, we all make mistakes like this! I’d recommend using your favourite liner or small round brush for this step, mine is a Sparkling Face liner no. 1. Load the brush with creamy white.
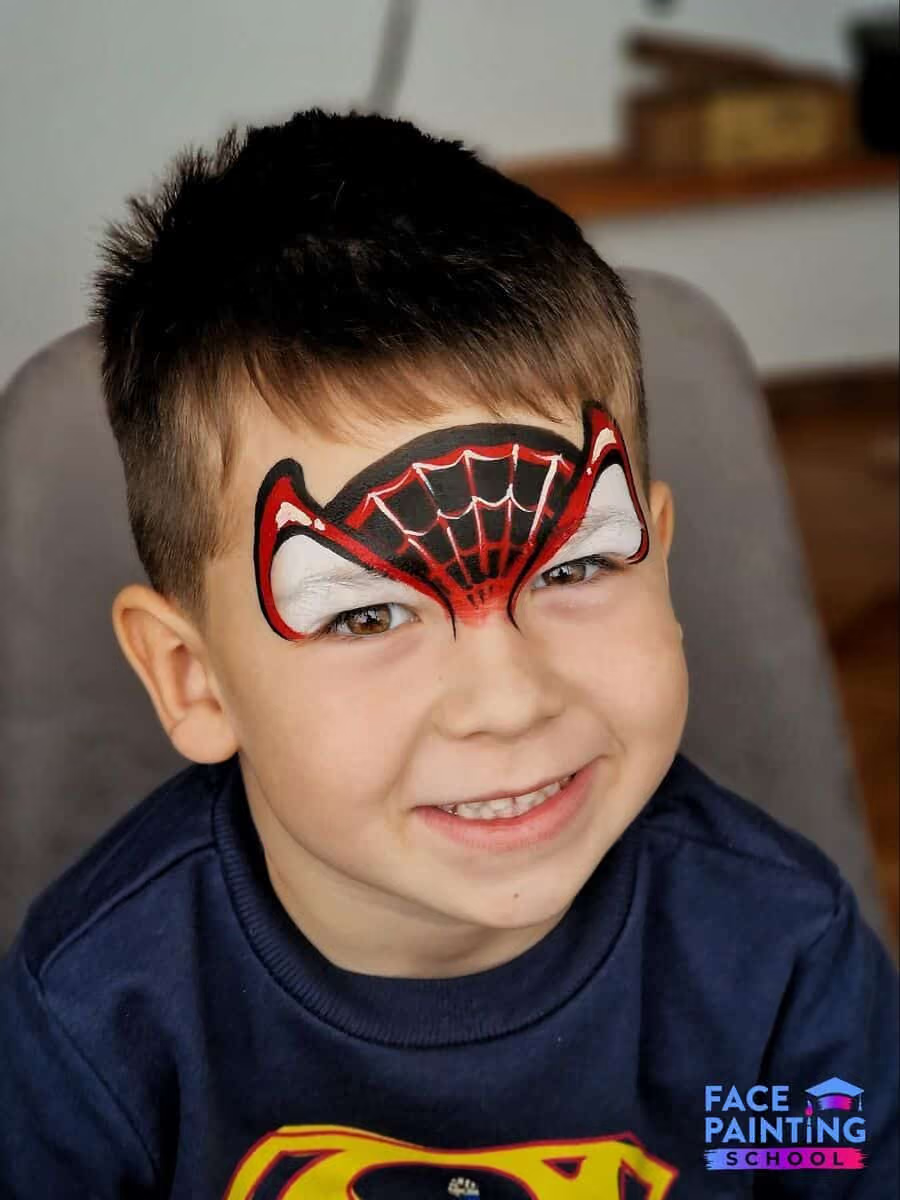
If there is too much water in the white paint, it will re-activate the red and they will mix in an unwanted way.
If the paint is too dry, we will not be able to obtain clean and delicate strokes.
If you’re a beginner, don’t hesitate testing your brush on your hand before starting to paint on the face.
Have you taken our 3-Day Linework Workshop yet? It is a game changer for achieving beautiful white lines in your designs! Try it out today for FREE!
WOW! Our super design is complete!
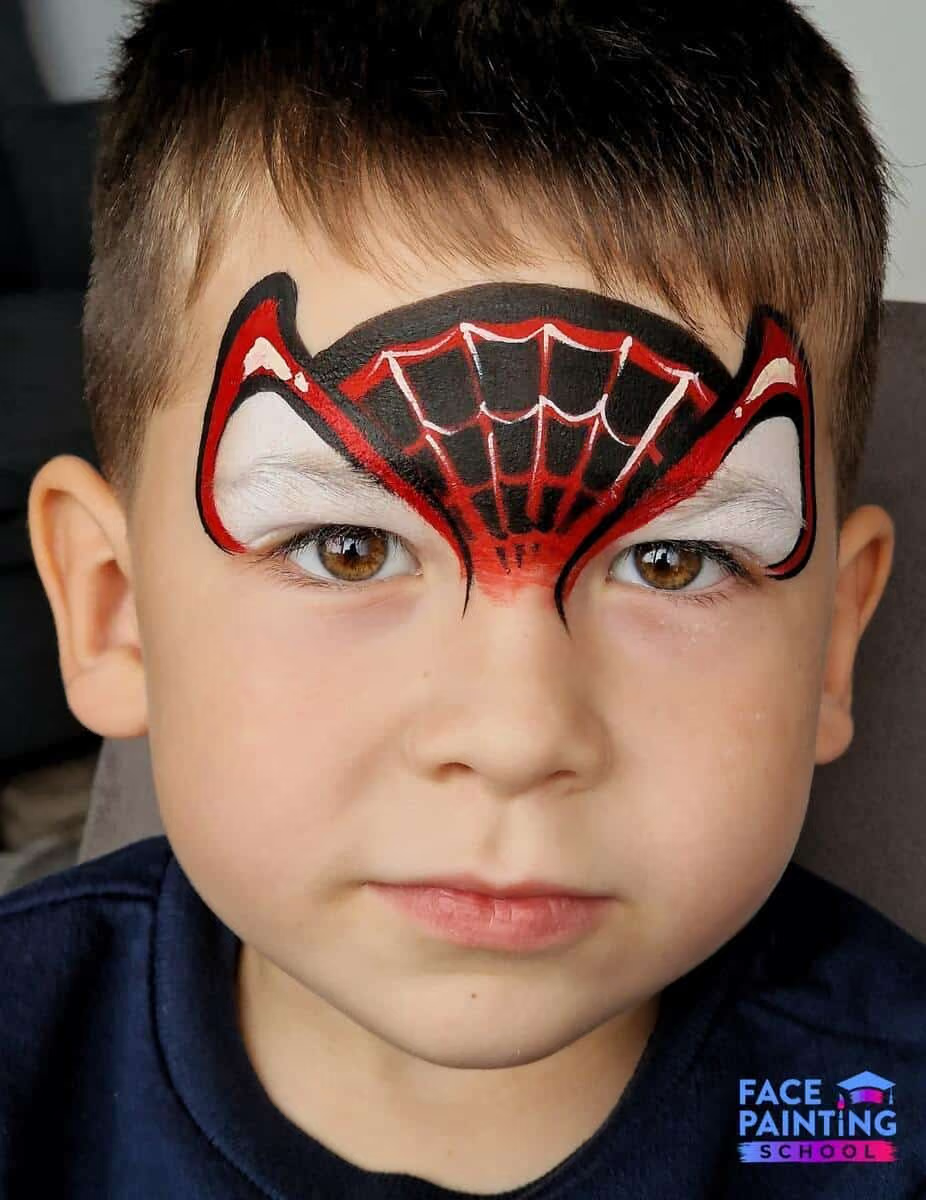
Have you imagined a Spin design can be done this easily? And even better…this fast? Now you know a super trick!
Be prepared to calm down the worried kids that will see you’re starting to paint a red Spin and teach them that it’s always good to trust the process!
Additional info:
Oh no! The next kid it’s a girl who wants to be Spin’s friend – Ghost? Don’t worry! We’ve got you covered! Check out this Ghost Spider Tutorial by Simona Rad for a matching themed design of the very popular new Spider Girl.
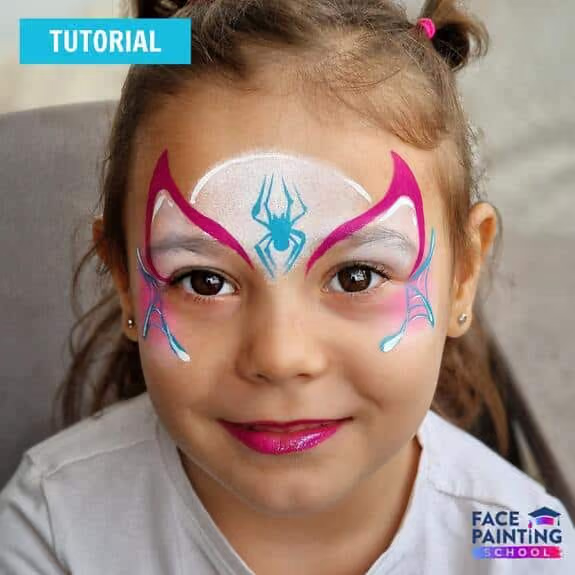
Whether you’re painting Spiderman, Spin, or the Ghost Spider, we hope you like these simple, easy, but high quality designs!
Don’t forget – we need to practice a design several times before being able to paint it in record time during an event!
Because of the similar elements, these designs will all get faster the more you do any of them. Now, that’s a speed win!
Tip: Interested in learning more speedy designs? This post is for you: In A Flash ⚡️ Ideas, tutorials, and inspiration for super quick line-buster designs!
If there’s anything on your mind, don’t hesitate to ask. Should you choose to dive into the excitement and experiment with this amazing design, feel free to tag me.
I’m excited to see the unique creations you come up with! You can contact me/tag me on Instagram: @radsimona17
Want to learn more Superhero designs? We have a whole playlist of design tutorials on our Youtube: @facepaintingschool. You can start watching now ;)
