
Share this post:
Mummy Face Paint Tutorial for Halloween
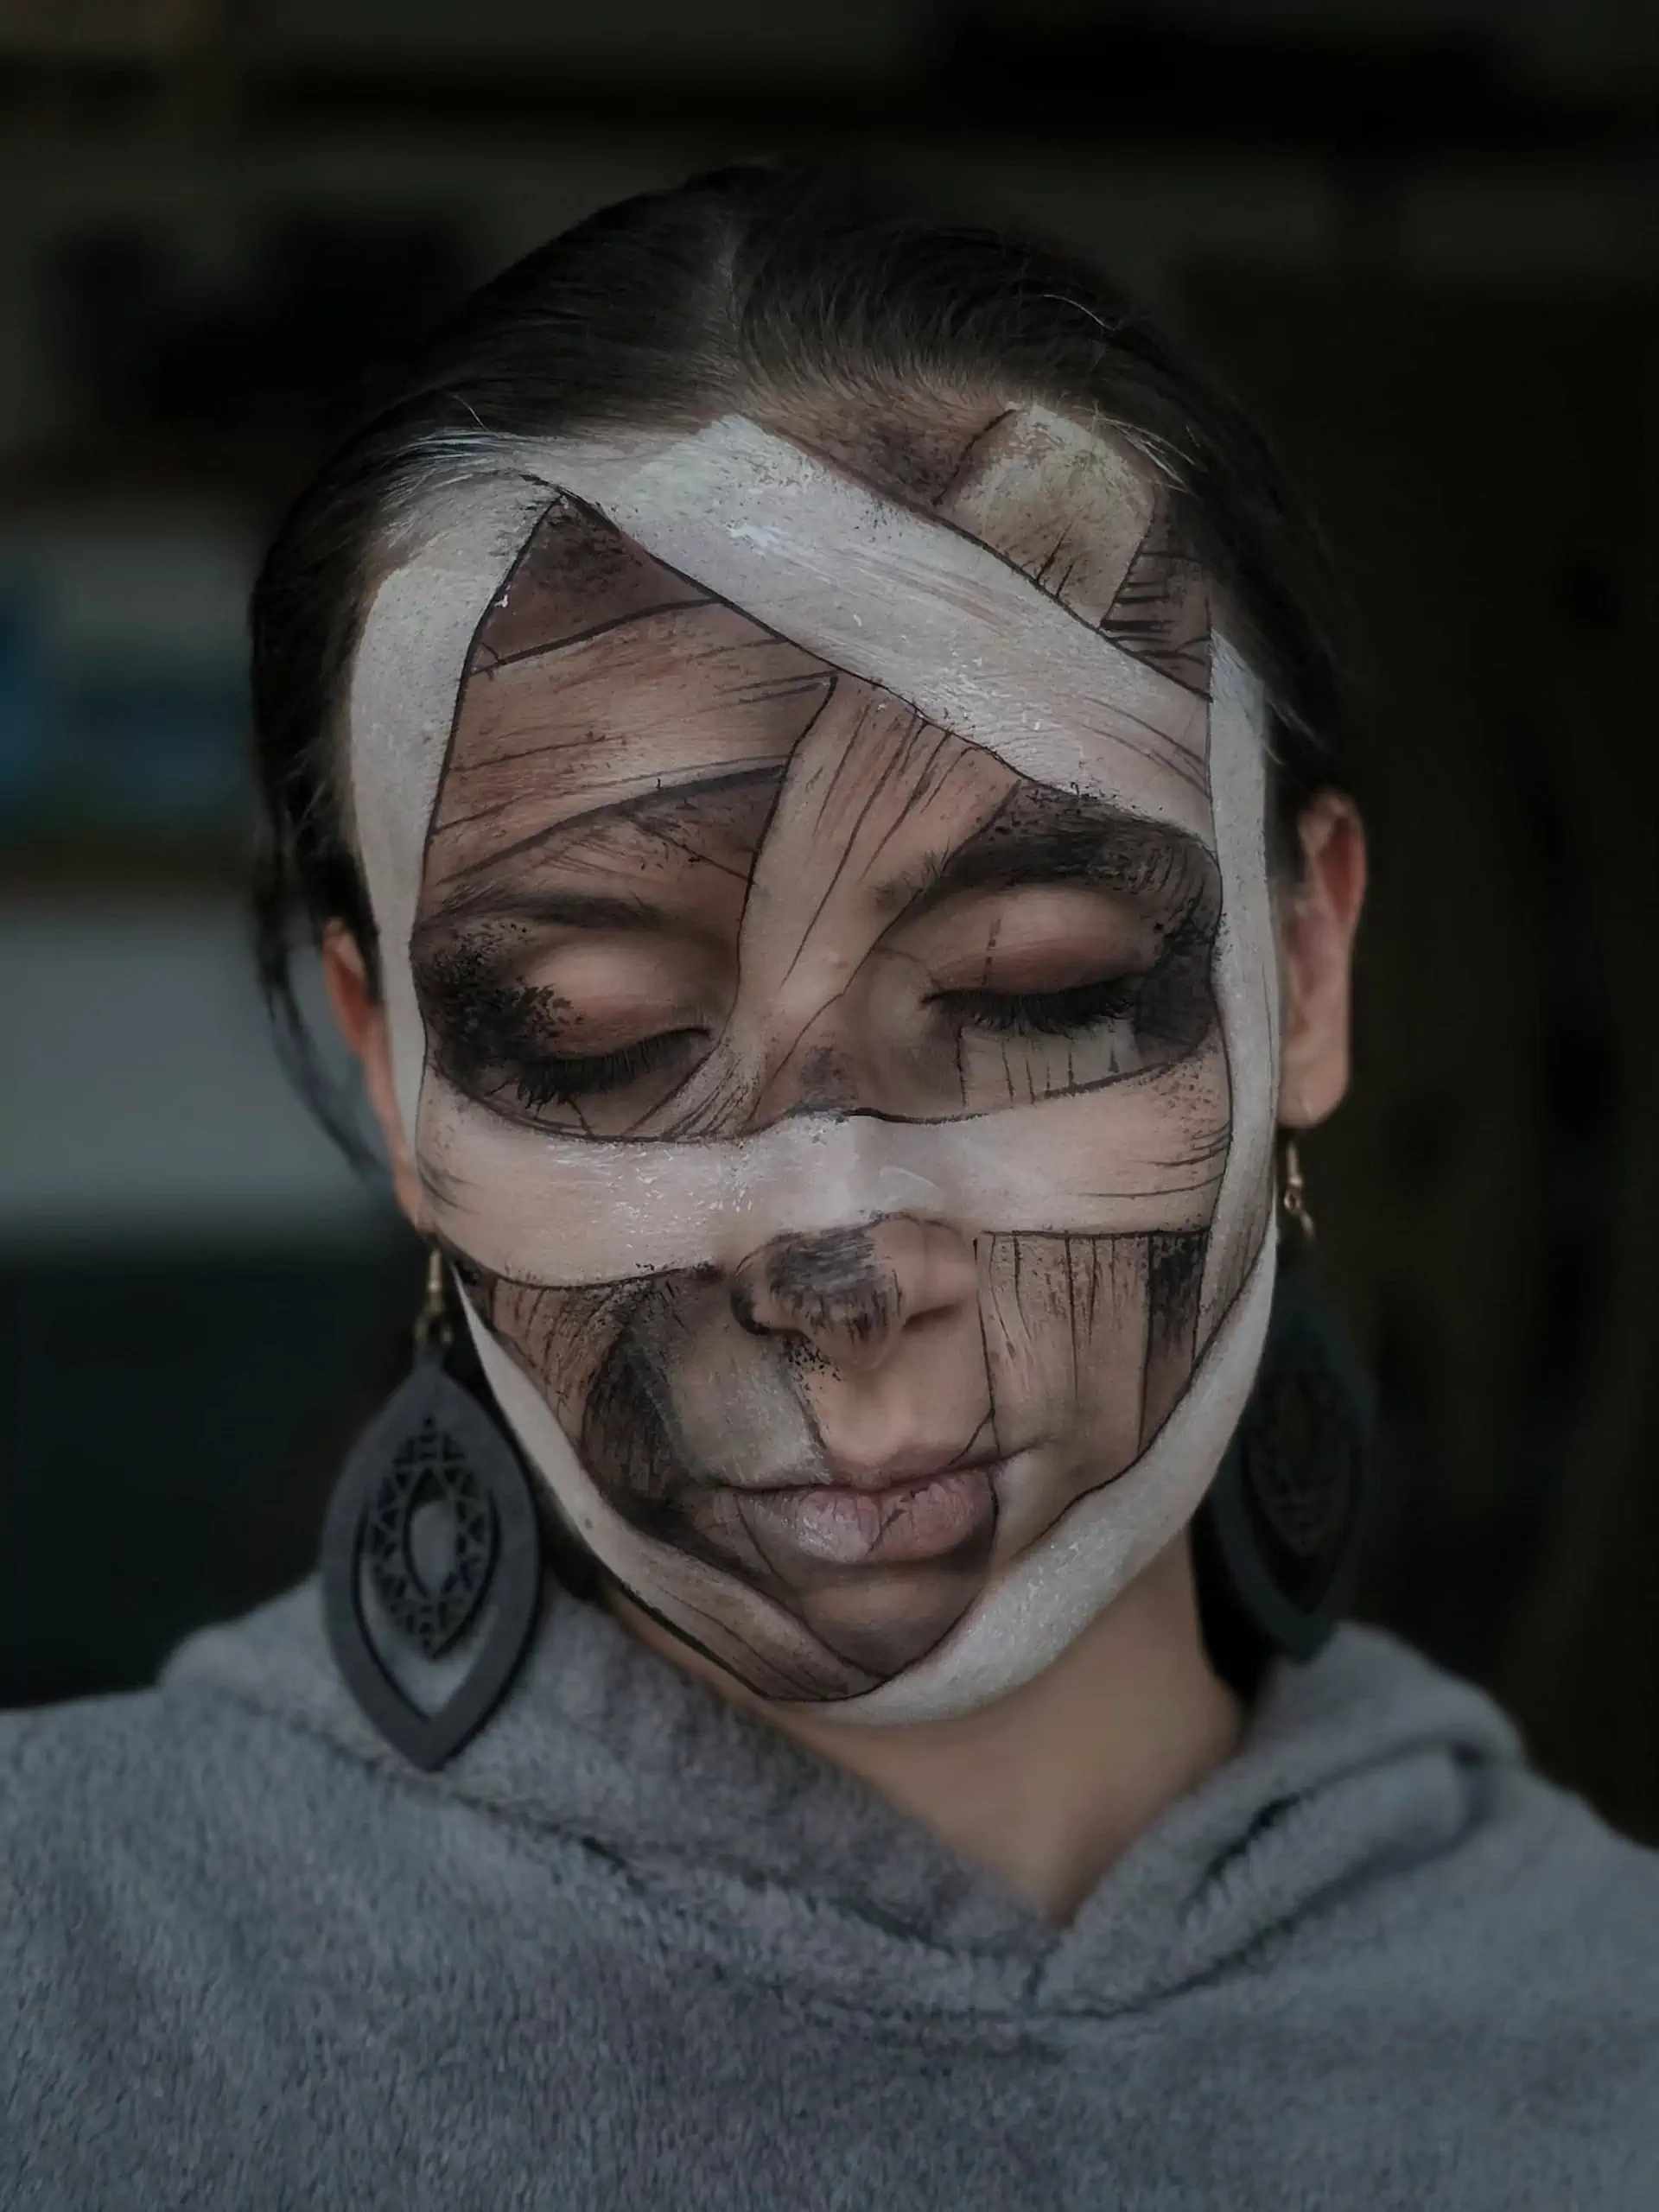
A mummy is one of those Halloween characters that can be as simple or as dramatic as you want it to be. With a pale base, a few painted bandages, and some carefully placed shadows, you can create a recognizable mummy face paint in just a few steps.
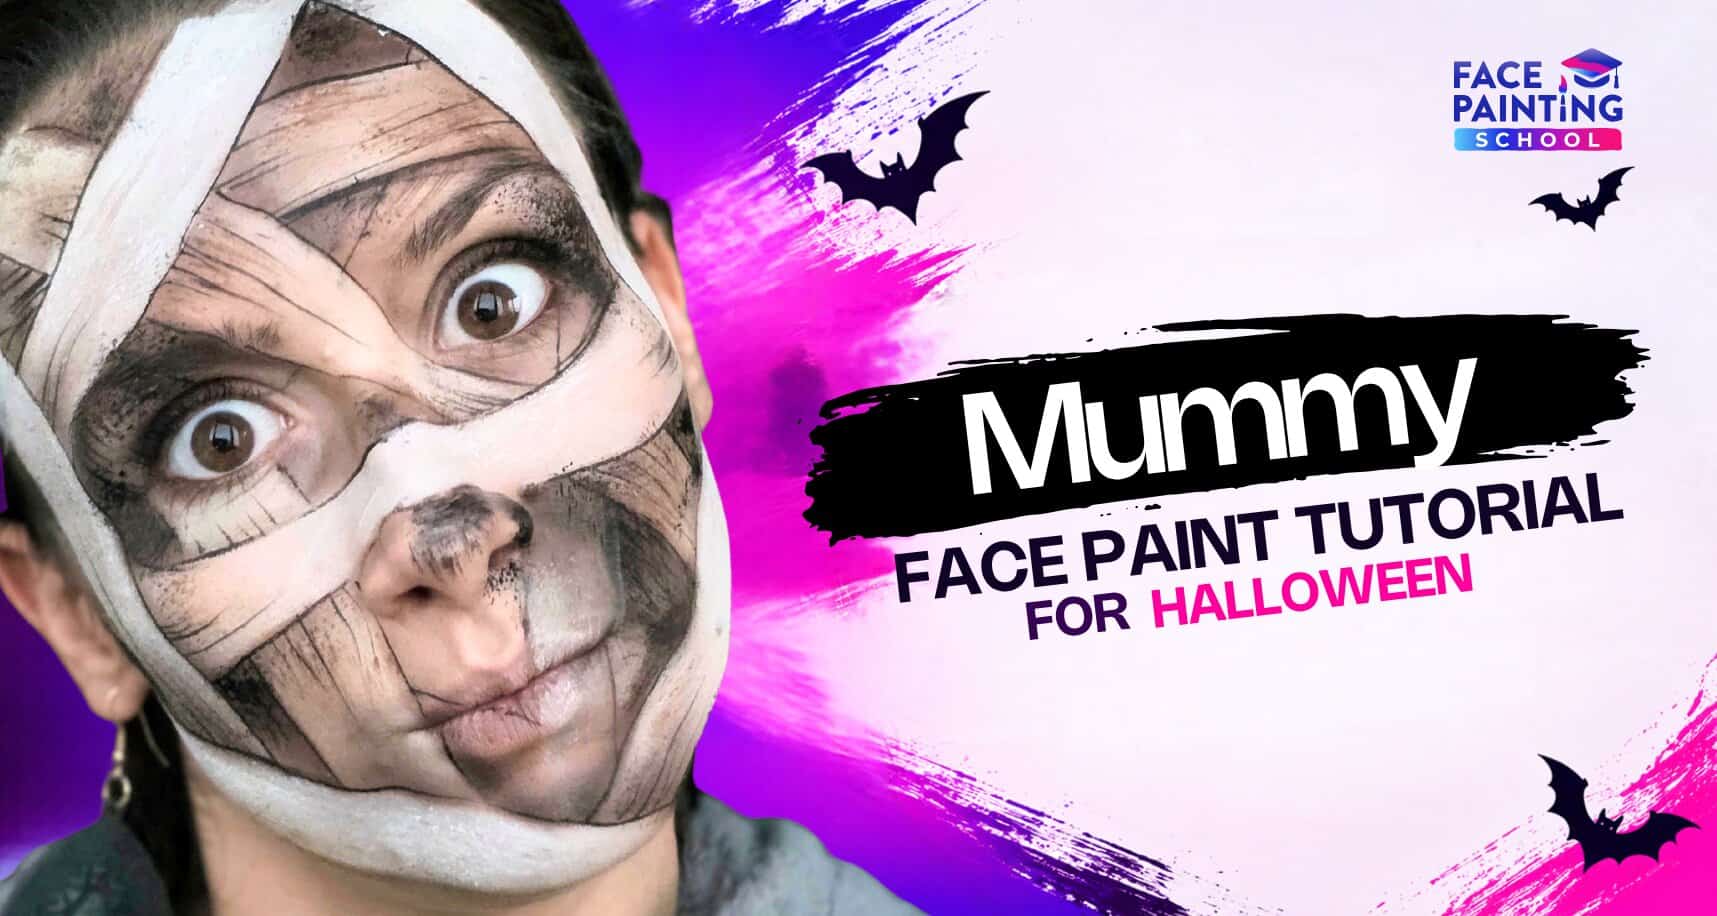

In this tutorial, we’ll show you how to build a classic Halloween mummy face paint look, starting with the base and bandages before adding shadows, texture, and more dramatic monster details. You can keep the design light and playful for children, simplify it for a quick party design, or transform it into a darker Egyptian or zombie-inspired mummy.
Whether you’re creating easy mummy face painting for a busy Halloween event or a more detailed mummy costume face paint, the same basic structure gives you plenty of room to experiment.
What You Need for Mummy Face Painting
You don’t need a huge palette to create an effective mummy design. Most of the look comes from contrast between pale bandages and darker shadows.
For this tutorial, prepare:
- White or off-white face paint
- Grey face paint
- Black face paint
- Brown or beige face paint
- A face painting sponge
- Flat square brush
- A small round brush
- Optional red face paint or cosmetic-grade fake blood
For a more theatrical mummy Halloween makeup look, you can also use muted green, purple, or dark brown tones to create bruising, dirt, and aged skin.
If you’re building your kit, this is also a good opportunity to explore our guides to face paints, face painting brushes, sponges, and complete face painting kits.
Always use professional, skin-safe products designed specifically for face and body painting.
How to Paint a Mummy Face Step by Step
The secret to convincing mummy face painting is layering. The bandages should look like they overlap, while the shadows between them create the illusion of depth.
You can follow the full tutorial for a detailed Halloween design, or simplify the same technique for a faster version.
Step 1: Create the Mummy Base
Begin by applying a pale base using white, light grey, beige, or a combination of the three.
You don’t necessarily need a perfectly even layer. In fact, a little variation can help the mummy look aged and dusty rather than freshly painted.
Use a sponge to cover the forehead, cheeks, chin, and other areas where you want the mummy skin or bandages to appear.
If you want a softer design for children, keep the base lighter and cleaner. For a scarier mummy, add small amounts of grey, beige, or brown around the edges to create a weathered look.
Step 2: Paint the Bandage Shapes
Now create the feature that makes the design instantly recognizable.
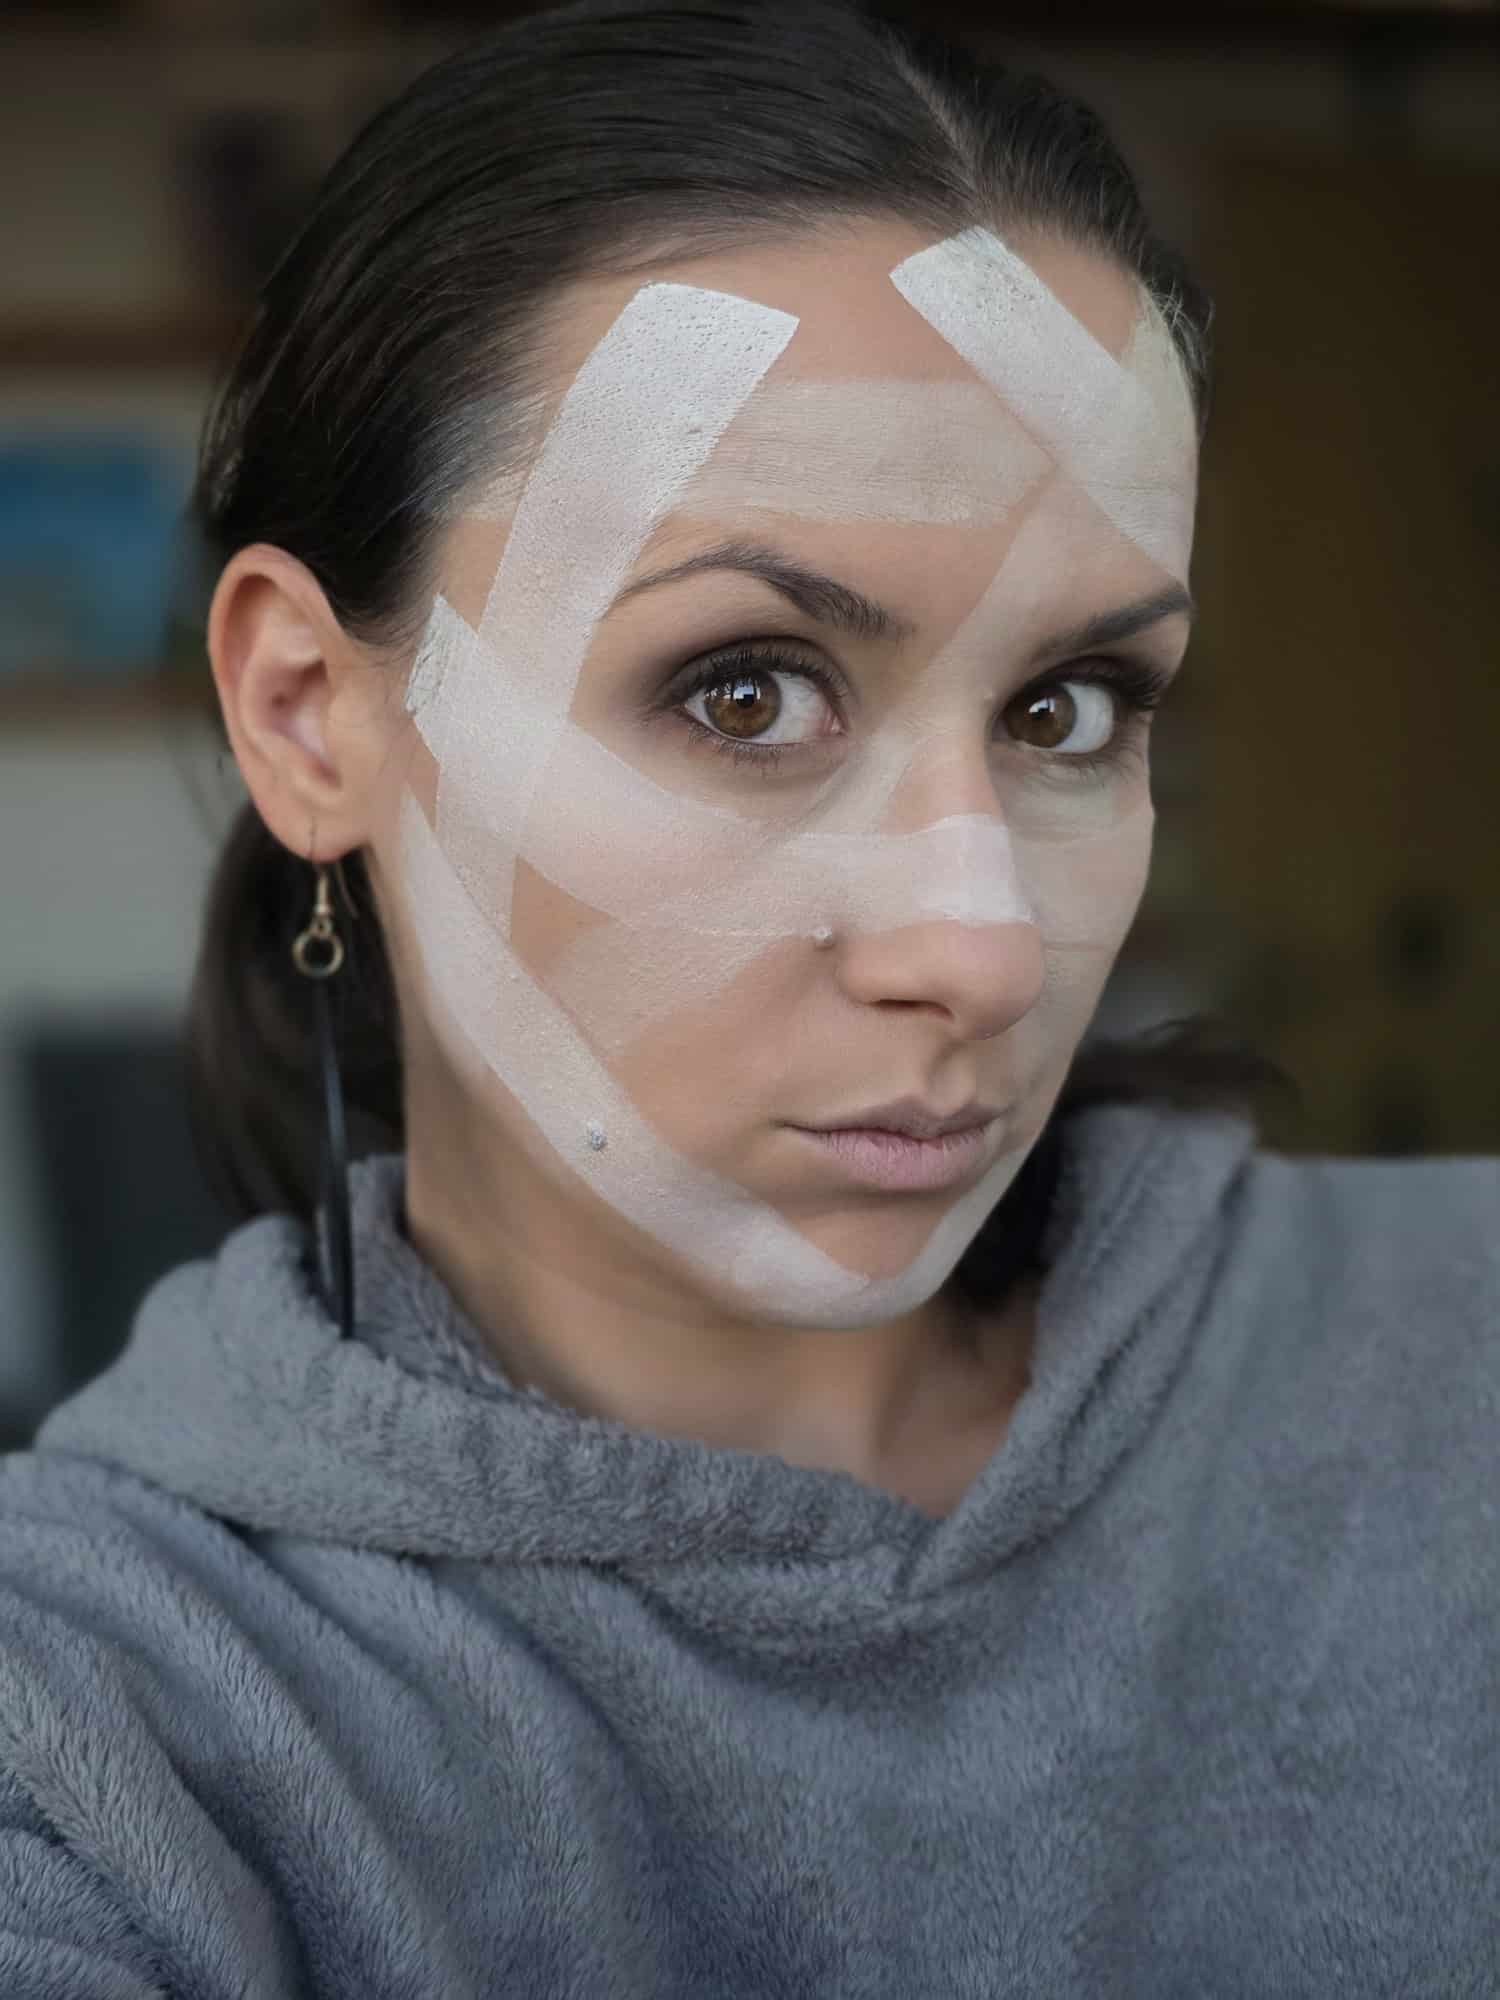
Using white, off-white, or pale beige face paint and a flat brush, paint several overlapping bandage shapes across the forehead, cheeks, and jawline.
Avoid making every strip perfectly straight or evenly spaced. Slightly uneven bandages look much more natural and give the design movement.
Let some strips overlap one another and change direction around the face.
You can leave small gaps between the bandages where darker skin, shadows, or wounds will show through later.
Step 3: Add Shadows Between the Bandages
This is where the flat painted strips begin to look layered.
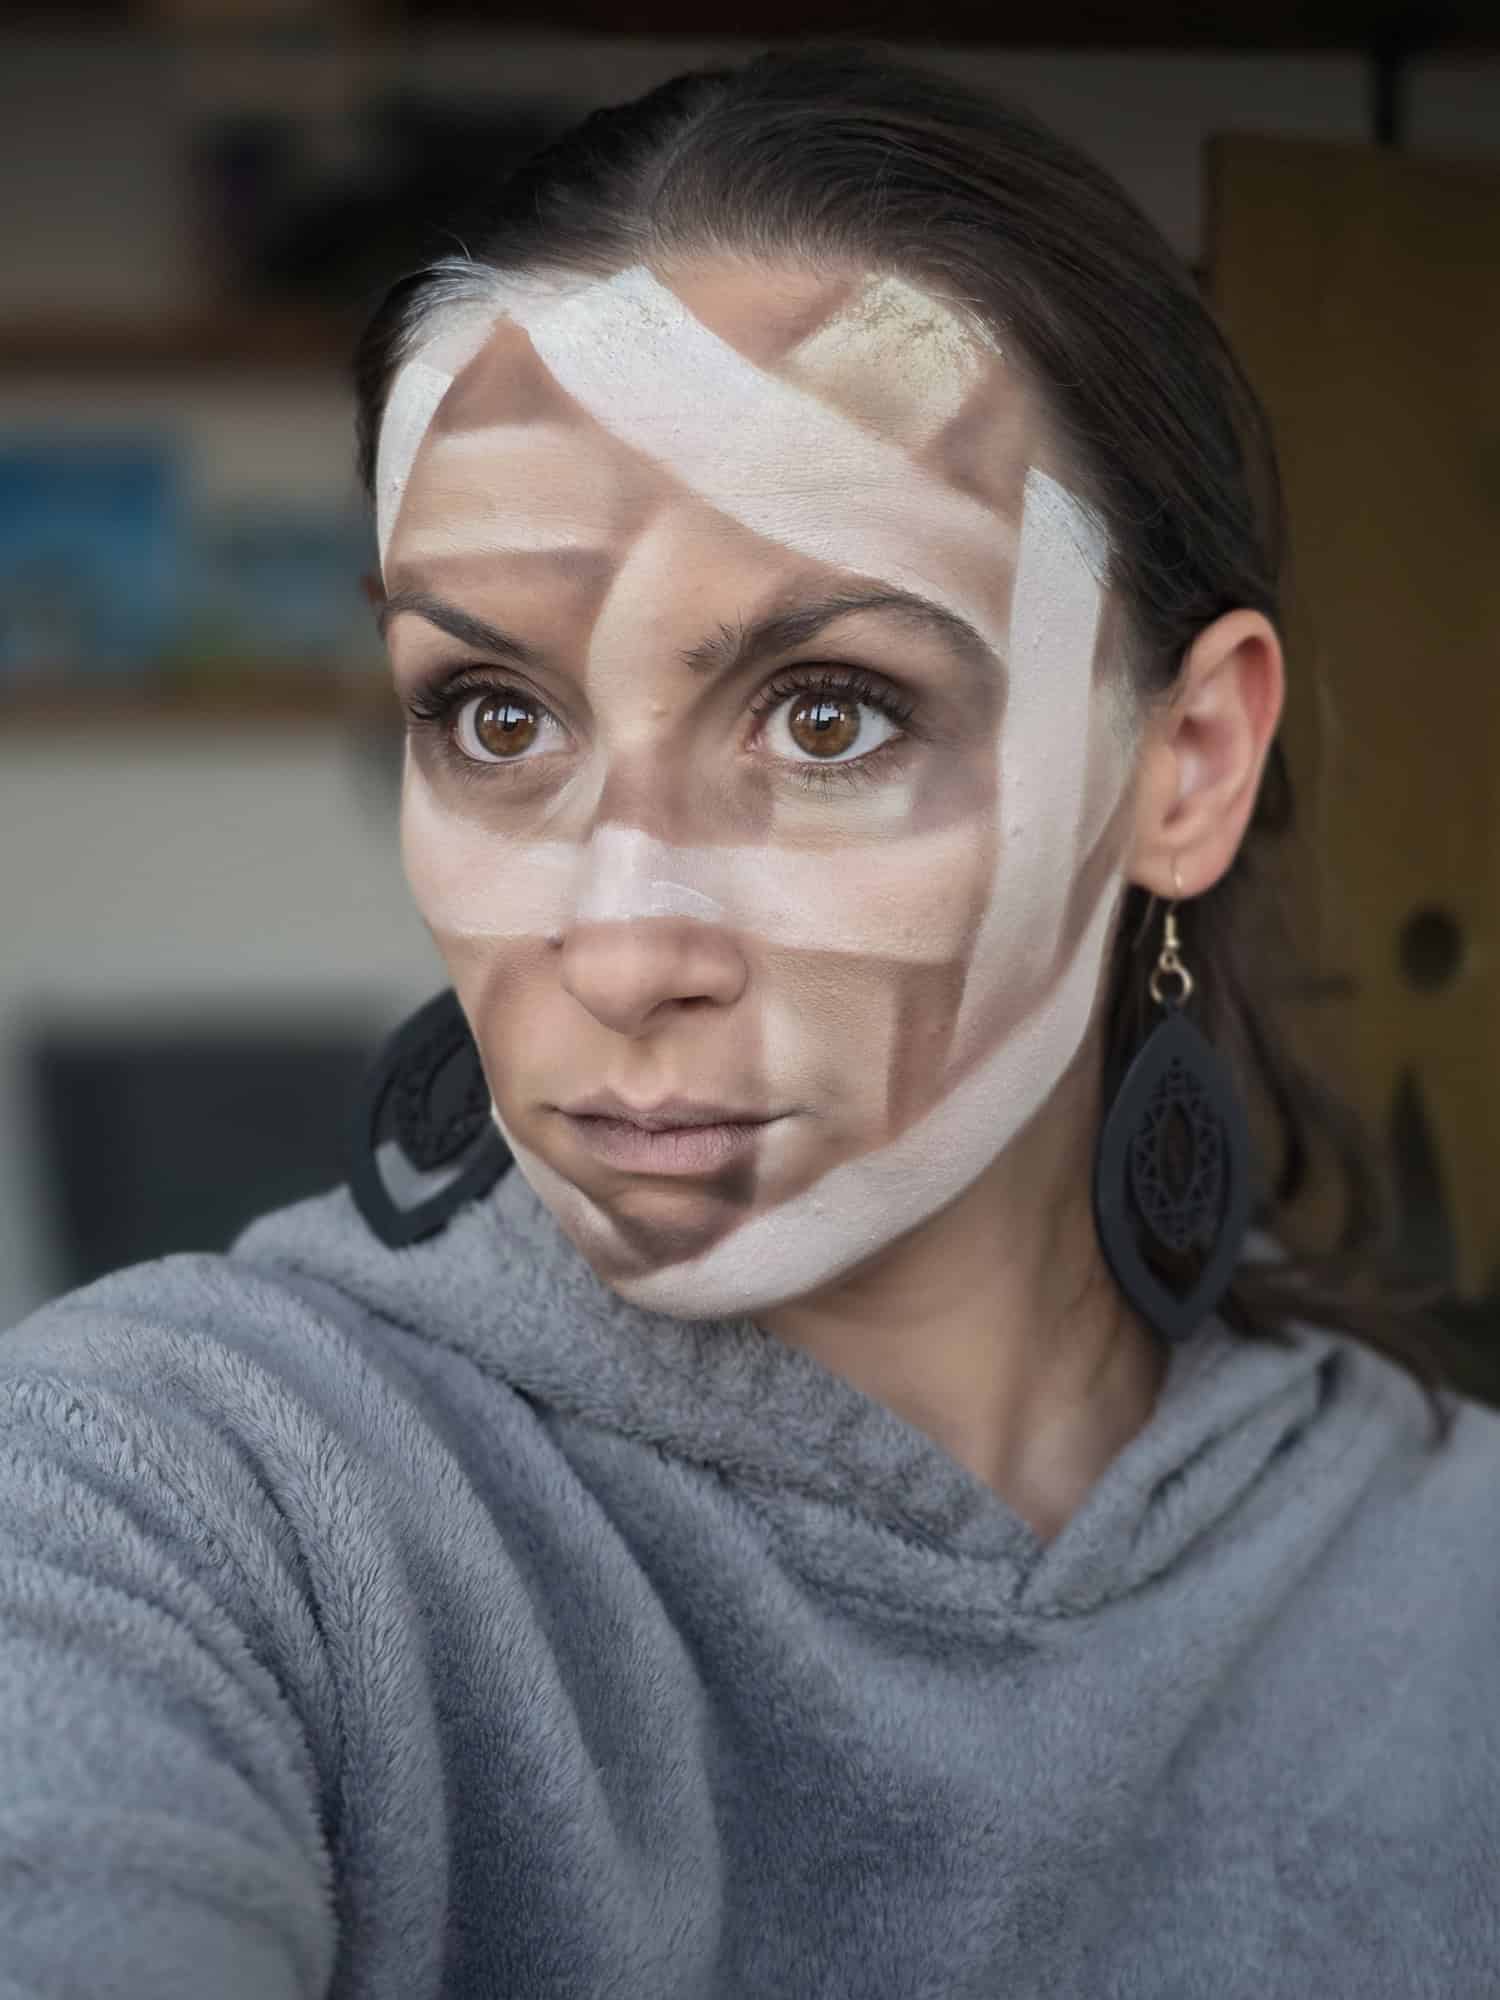
Using grey, brown, or a small amount of black, add shadows underneath selected bandage edges.
You don’t need to outline every strip. Focus on the places where one bandage appears to sit on top of another.
Blend the shadow slightly so it feels like part of the design rather than a hard line.
For an old, dusty mummy look, brown and beige work especially well. For something darker and scarier, introduce grey or black.
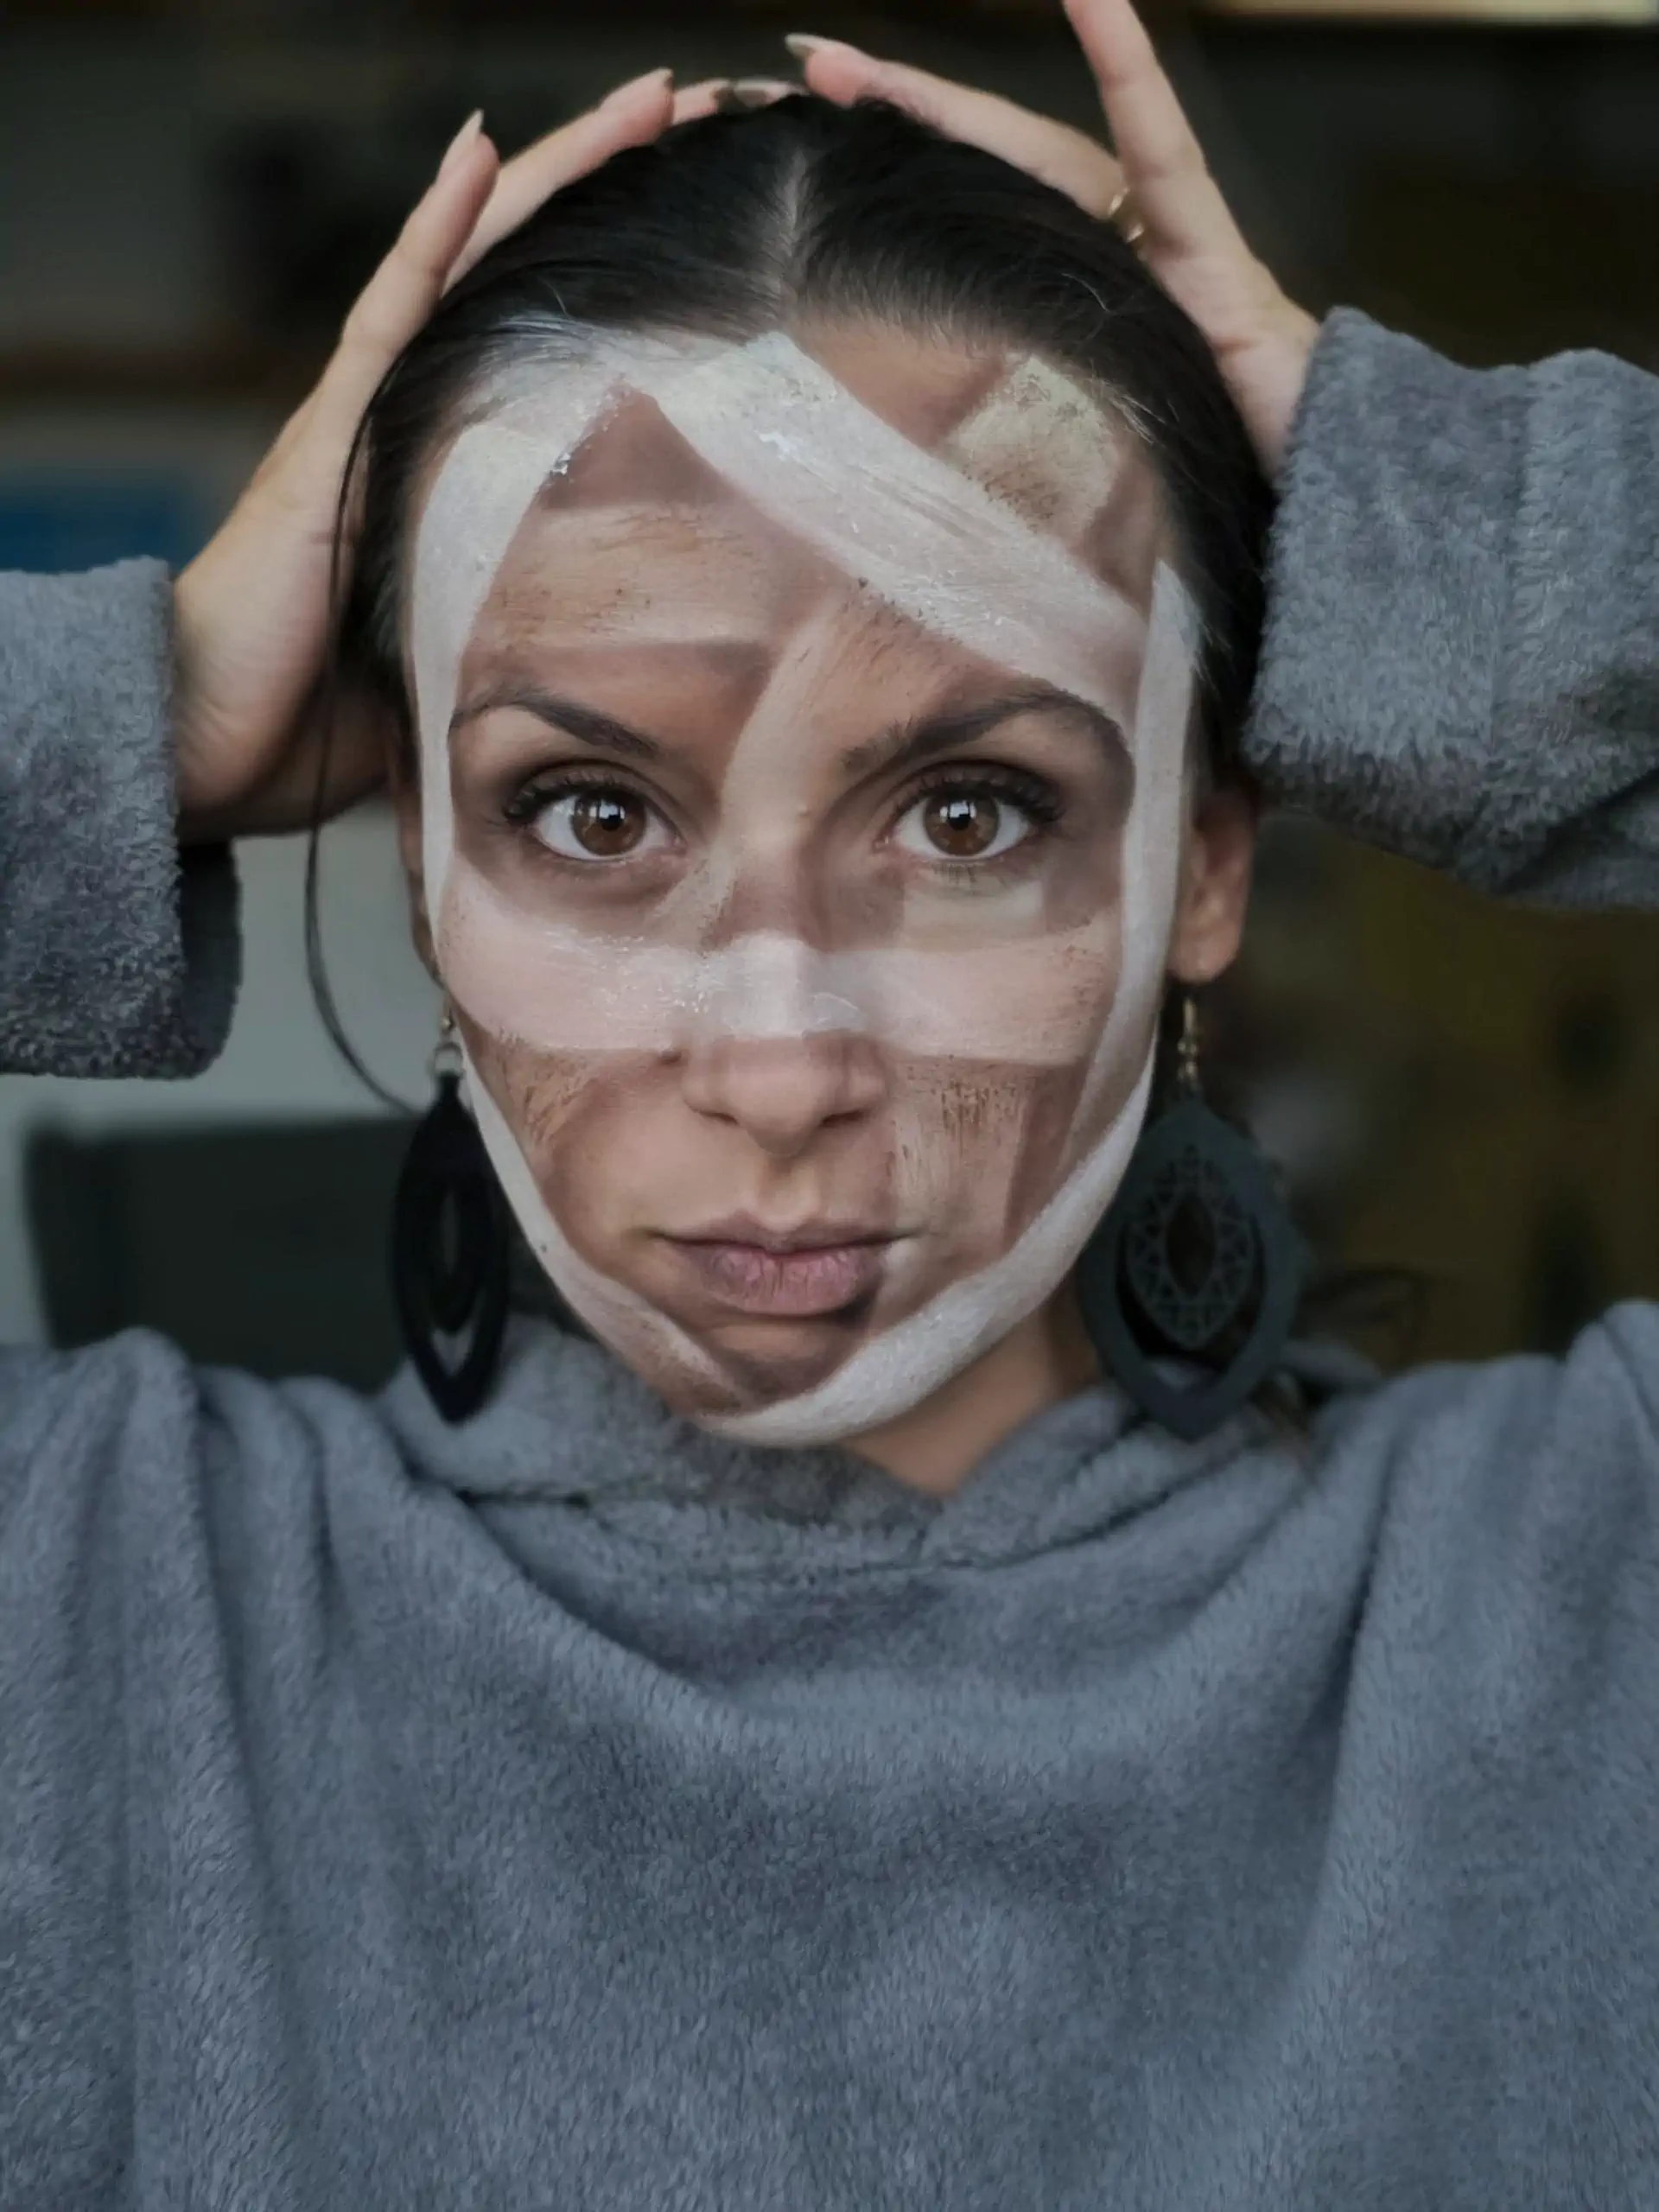
Pro Tip: Place shadows consistently on the same side of each bandage whenever possible. This creates a more believable sense of depth.
Step 4: Define the Eyes
Dark eyes instantly make a mummy look more dramatic.
Use grey, black, brown, or purple to deepen the eye sockets, keeping the strongest color closest to the crease and blending outward.
For children, you can keep the shading light and leave plenty of clean space around the eyes.
For a scary Halloween mummy face paint look, darken the eye area much more to create a sunken, ancient appearance.
You can also extend some shadows toward the bridge of the nose or temples to make the face look more skeletal.
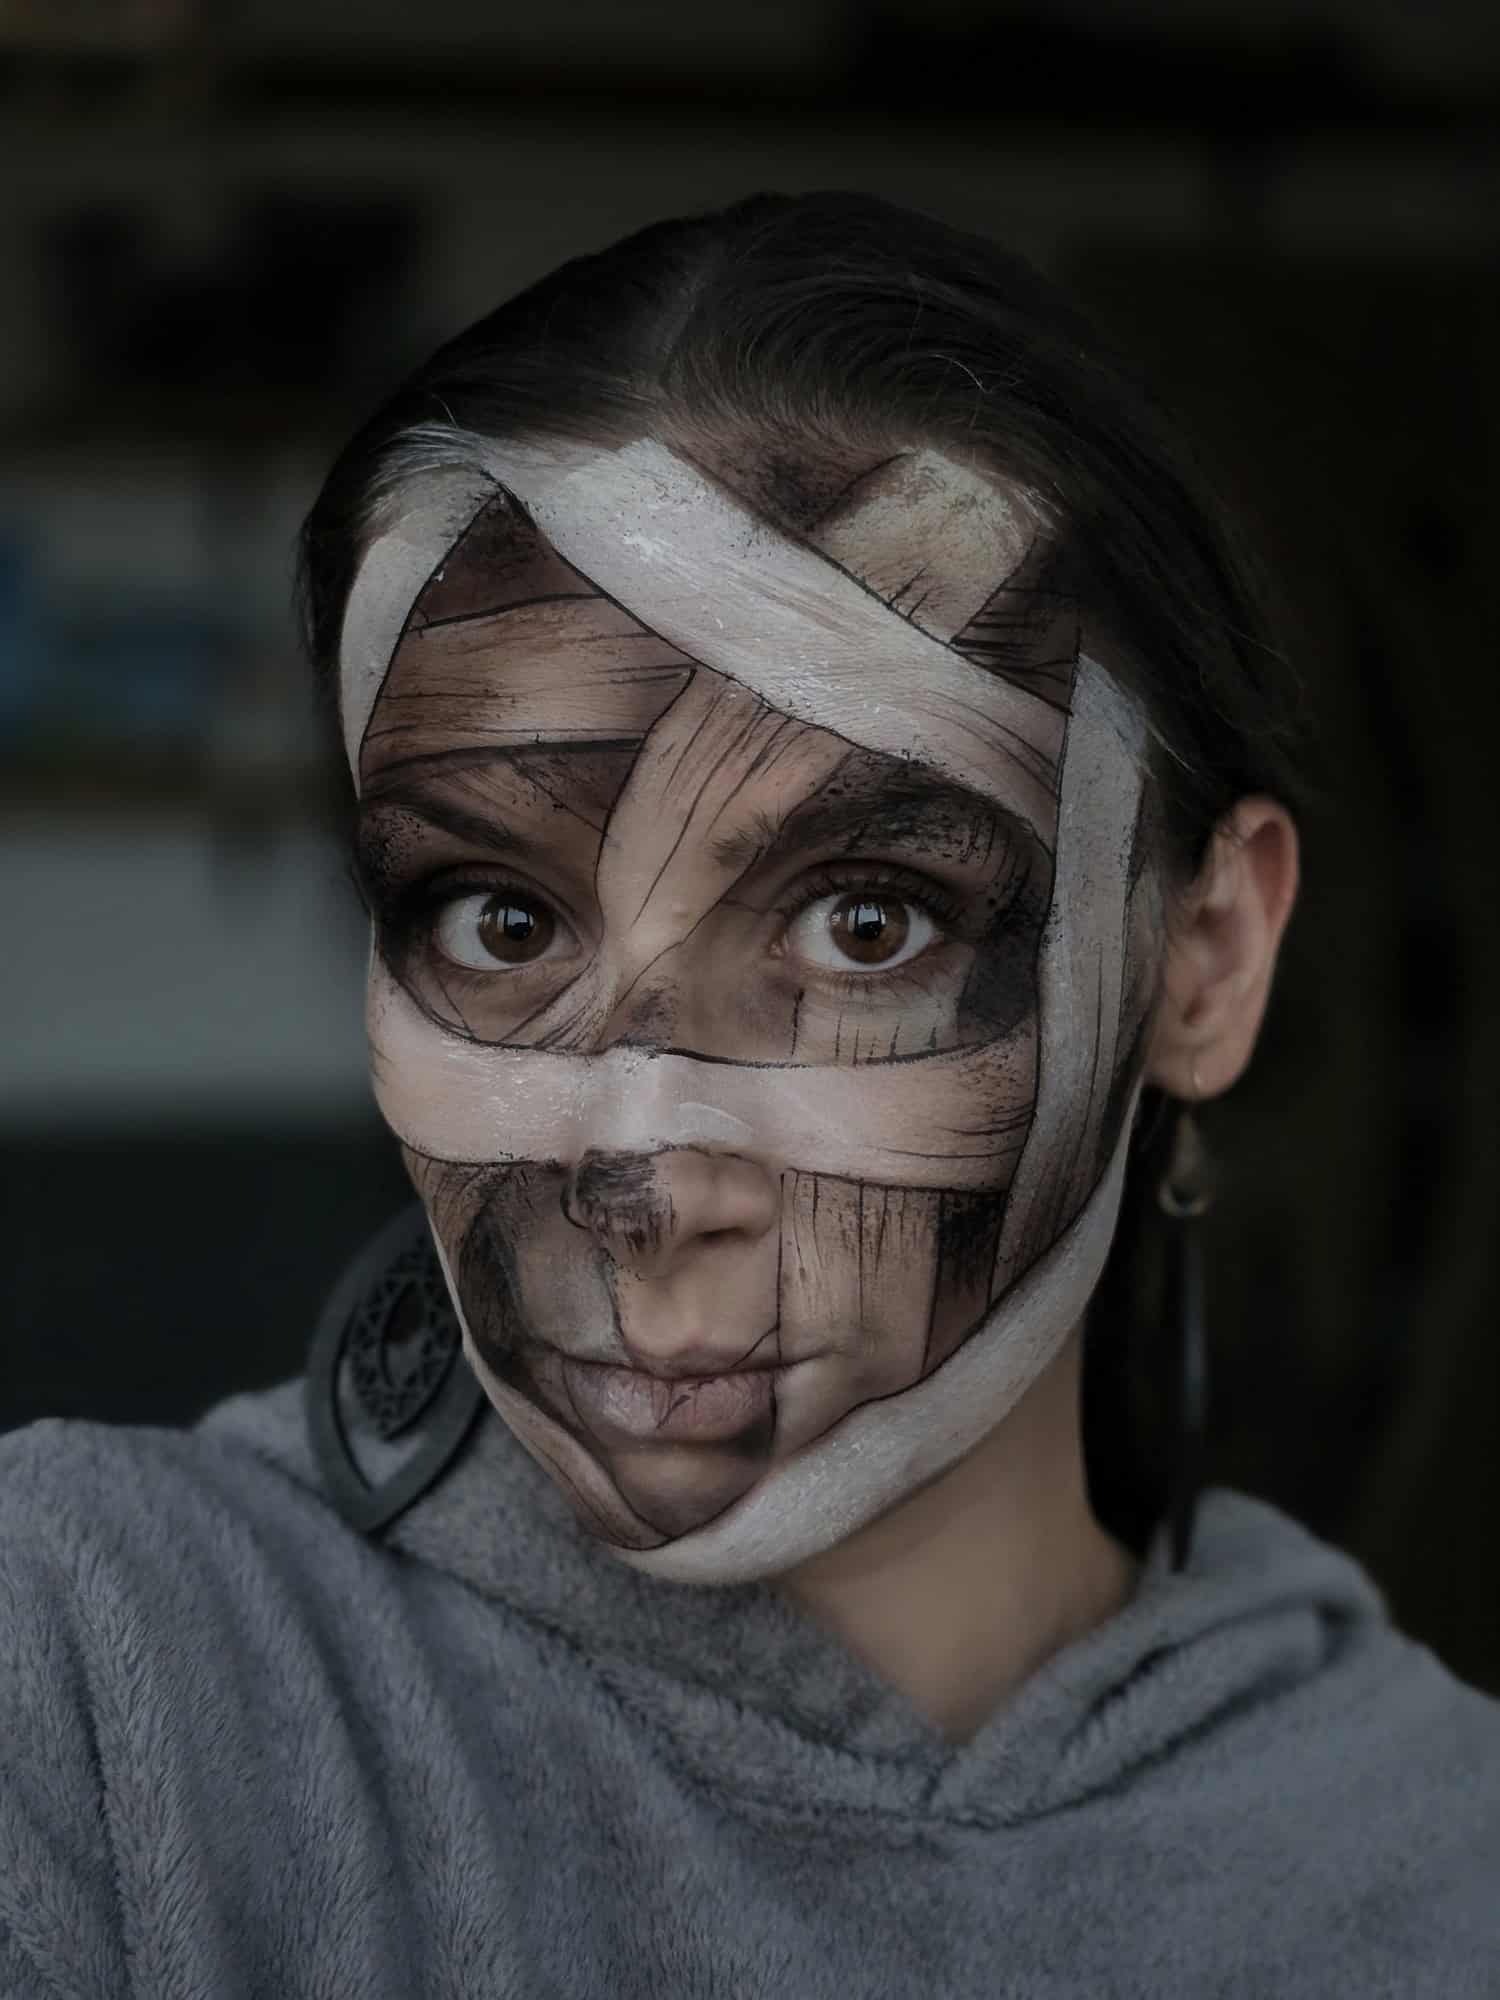
Step 5: Add Cracks, Wrinkles, and Texture
A mummy shouldn’t look too fresh!
Use a small round brush to add fine cracks, wrinkles, and irregular lines between or around the bandages.
You can create dry-looking skin with short, broken strokes in grey, brown, or black.
Avoid drawing lots of identical straight lines. A mixture of thin cracks, small shadows, and irregular marks will look much more natural.
For extra texture, sponge a little beige, brown, or grey over selected areas to make the bandages appear dirty and aged.
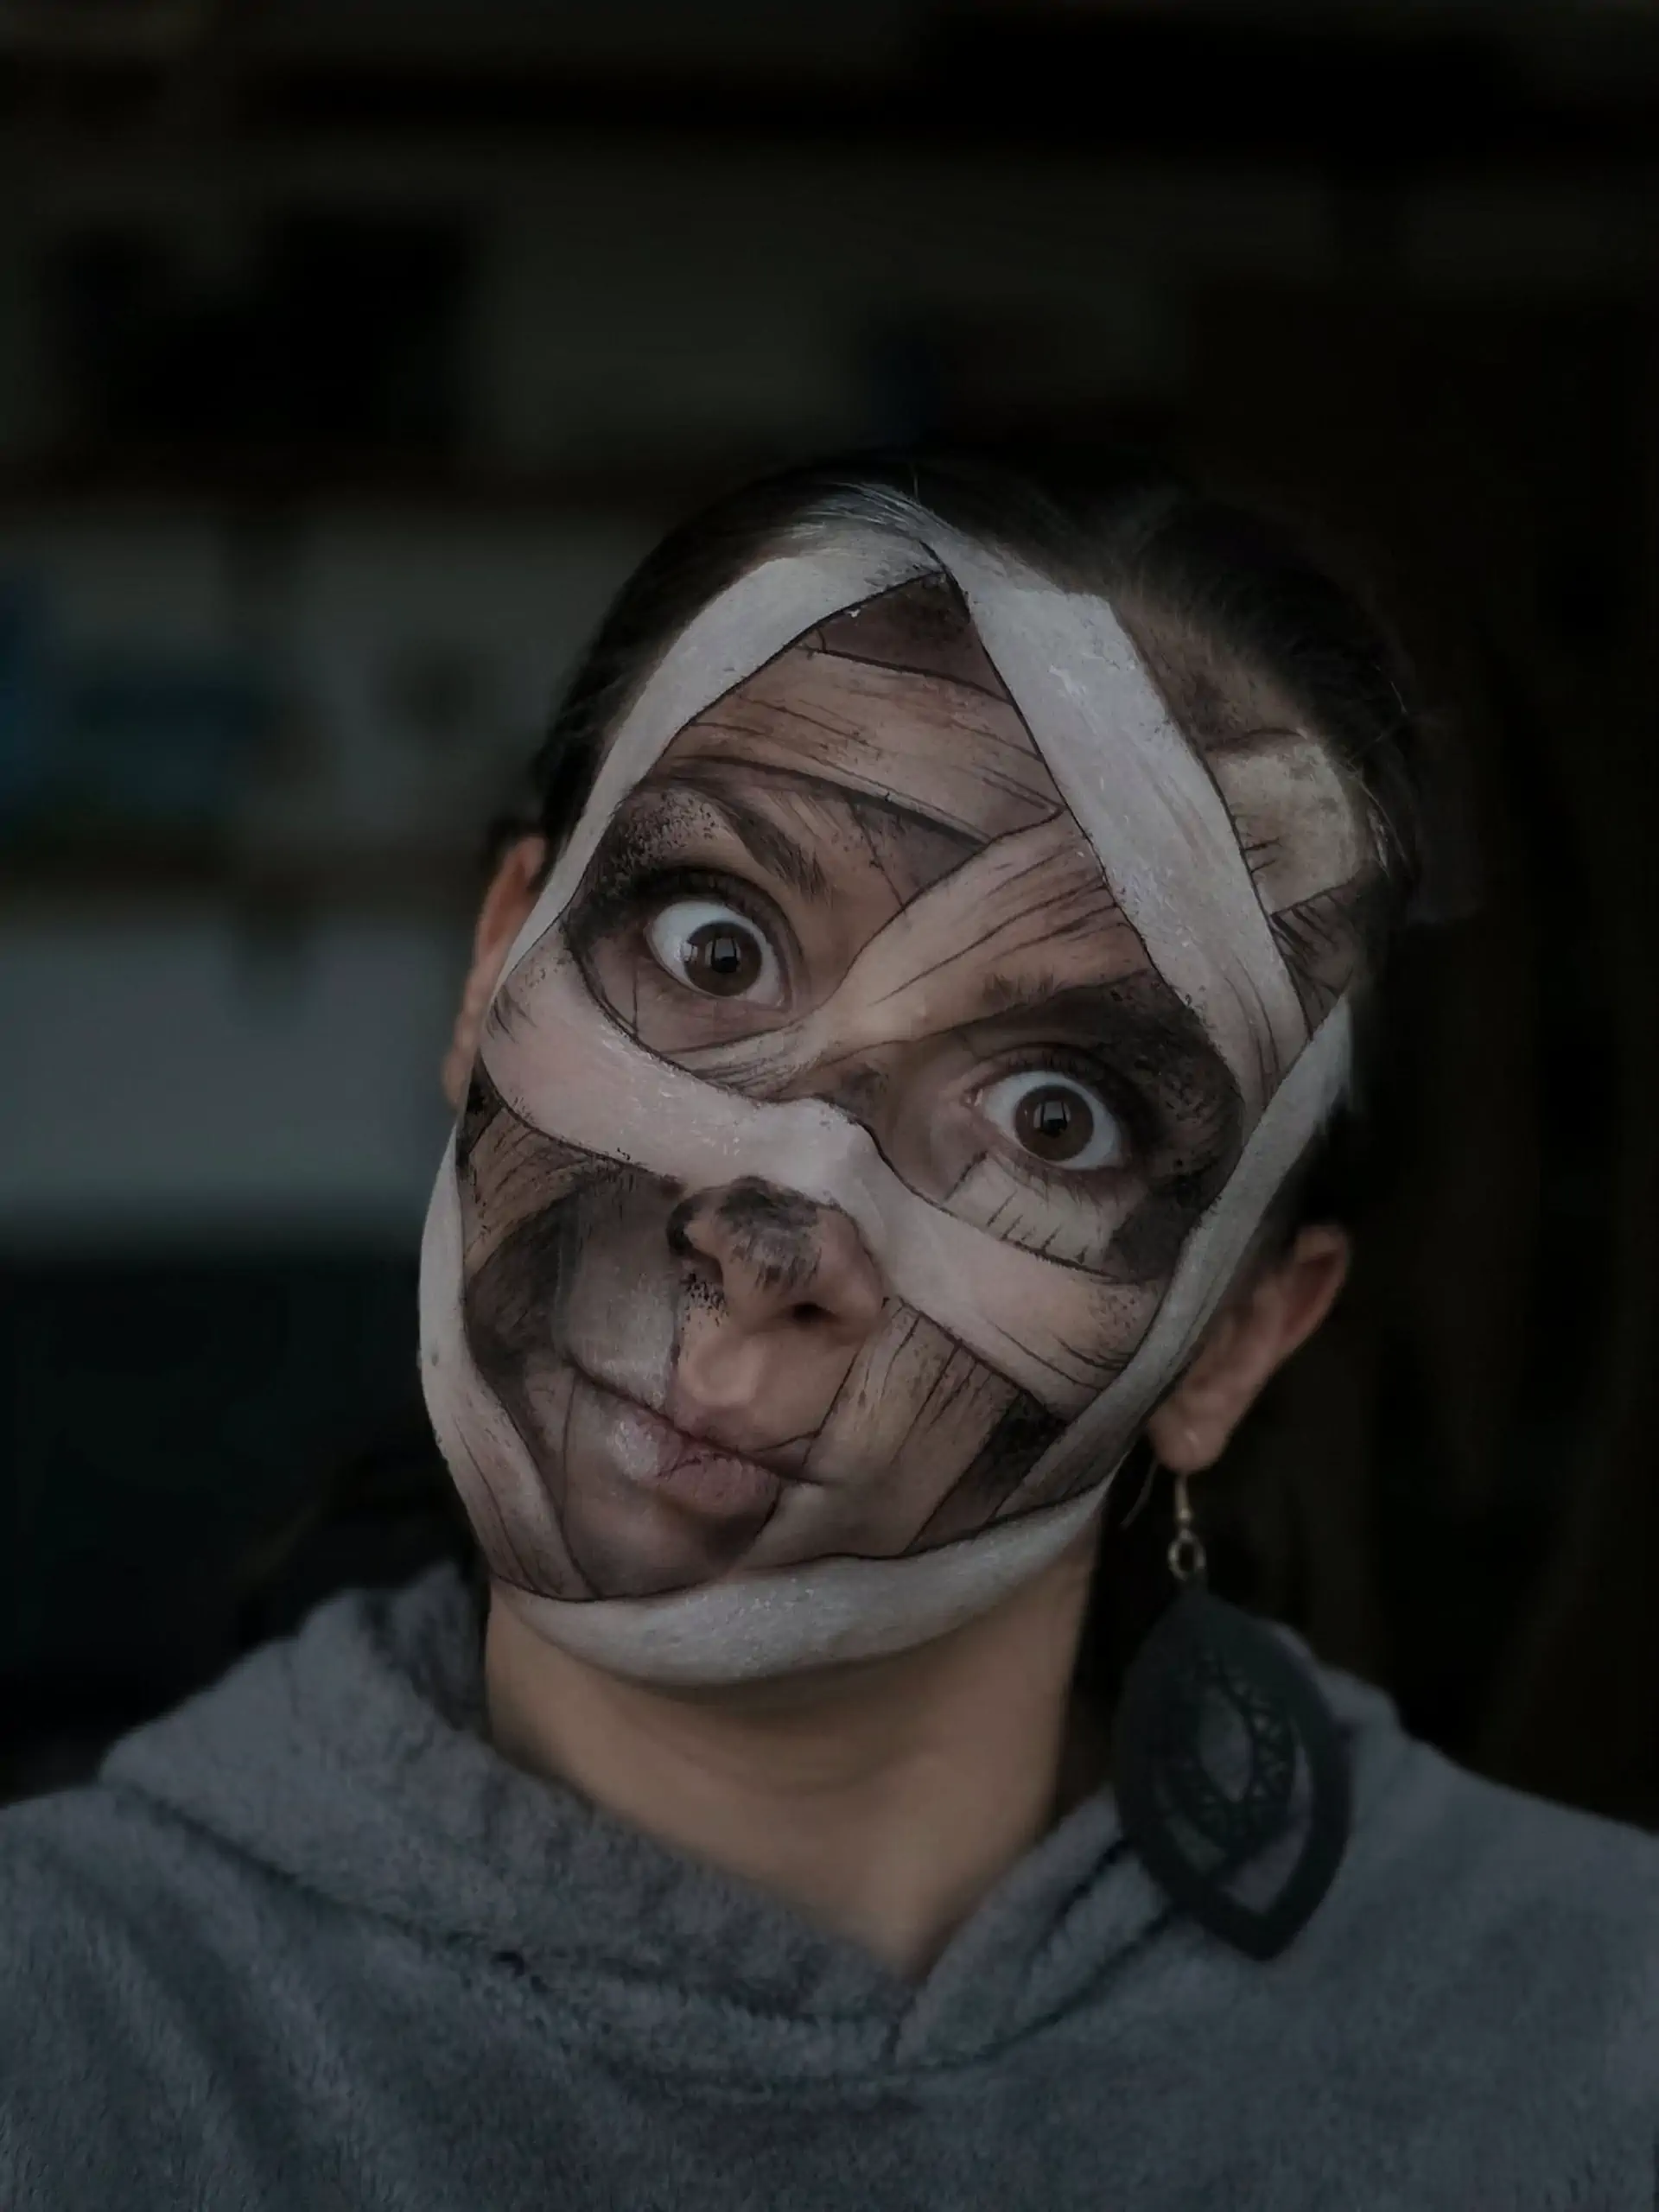
Step 6: Add Final Highlights and Details
Finish the design by adding white highlights along the top edges of some bandages.
This creates contrast with the darker shadows underneath and gives the wraps more dimension.
You can also add deeper shadows where necessary, refine the eyes, and introduce small details such as cracks, stitches, wounds, or dirt.
For a family-friendly mummy, stop here.
For a scarier Halloween version, add small amounts of red, bruising, or cosmetic-grade fake blood between the bandages.
Take one final look at the whole design before adding more. Strong contrast and a few well-placed textures usually work better than covering every part of the face with details.
And there you have it, your mummy is ready to rise! 👻
Easy Mummy Face Paint for Beginners
If you need something faster, a simple mummy face paint can still look very effective.
You only need four main elements:
Pale base + dark eyes + bandage lines + grey shadows
5-Minute Mummy Face Paint
Start with a light white or grey base.
Add a little black or grey around the eyes.
Next, roughly define the bandage strips across the forehead and one side of the face.
Finally, add a few grey shadows underneath the strips.
That’s it.
You don’t need detailed cracks, wounds, or advanced blending to make an easy mummy face paint recognizable.
For beginners, focus on clean bandage shapes and clear contrast between light and dark areas before worrying about extra texture.
Halloween Mummy Face Paint
If you want your mummy to feel more theatrical, build on the basic tutorial with darker tones and messier textures.
Deepen the eye sockets, add dirty brown shadows to the bandages, and create more cracks around the forehead and cheeks.
You can also introduce bruised purple or grey-green tones to make the skin underneath look old and lifeless.
For a more dramatic mummy costume face paint, extend some painted bandages toward the neck or combine the face design with real costume wraps.
Small amounts of red or cosmetic-grade fake blood can make the character feel much scarier, especially if you place them between the bandages rather than across the entire face.
The key is to keep the bandage structure visible. If you add too many wounds or dark details, the design can start looking more like a generic zombie than a mummy.
Egyptian Mummy Face Paint
An Egyptian mummy face paint gives you a completely different direction.
Instead of using only grey, beige, and black, bring in metallic gold, turquoise, or blue for a more decorative look inspired by ancient Egyptian imagery.
How to Create an Egyptian Mummy Face Paint
Start with the classic mummy base and bandage structure.
Then add stronger black eyeliner or elongated eye shapes to give the design an Egyptian influence.
Gold details can be placed around the forehead, temples, or between selected bandage shapes.
You can also add turquoise or blue accents around the eyes or forehead.
For a more decorative version, include small hieroglyphic-inspired symbols or geometric details.
The important thing is to keep enough mummy texture and bandage structure so the character still reads clearly.
You can make this version elegant, spooky, or somewhere in between.
Zombie Mummy Face Paint
A zombie mummy face paint combines two classic Halloween characters into one much darker design.
Start with the same bandages, but make the exposed areas of skin look decayed.
Use grey, green, brown, and purple around the cheeks, eyes, and gaps between the wraps.
Add bruising, wounds, cuts, or small areas of exposed-looking skin beneath the bandages.
A little fake blood can help, but you don’t need much. The combination of damaged skin, sunken eyes, and dirty wrappings already creates a strong zombie effect.
To make your zombie mummy look more realistic, add painted wounds, bruises, and cuts between the bandages using techniques from our Wounds, Cuts & Bruises Face Paint Tutorial.
Mummy Face Paint Ideas
Once you understand the basic structure, you can create many different mummy variations without changing the core technique.
A classic mummy uses pale bandages, grey shadows, and dark eyes. An easy mummy keeps those same features but removes most of the shading and texture.
For younger children, you can make the character cute rather than scary by using softer shadows, larger shapes, and fewer dark details.
A scary mummy can include deep eye sockets, dirty wraps, cracks, bruising, and wounds.
An Egyptian mummy can incorporate gold, blue, turquoise, or decorative eye details.
You can also experiment with a zombie mummy, a half-face mummy design, a bloody mummy, an ancient dried-out mummy, or even a mummy-skeleton hybrid.
For a more playful option, try a mummy princess with pale wraps, gold details, and softer eye makeup.
You don’t need a separate technique for every variation. Start with the same bandage structure and change the color palette, shadows, and details to suit the character.
Simple Mummy Face Paint for Kids
For younger children, less is often more.
Use a pale white or beige base and keep the eye area relatively open.
Paint only a few large bandage strips rather than covering the entire face.
Use soft grey shading instead of black wherever possible, and skip blood or realistic wounds.
You can also make the expression friendlier by leaving the eyebrows and mouth natural.
A few well-placed bandages and soft shadows are usually enough to create a fun, simple mummy face paint design without making it too dark or intimidating.

Mummy Face Painting FAQ
How do you paint a mummy face?
Start with a pale white, grey, or beige base. Paint overlapping bandage strips across the face, then add grey or brown shadows underneath selected edges. Darken the eyes, add cracks and texture, and finish with white highlights to make the bandages look layered.
What colors do you need for mummy face paint?
White, grey, black, and beige or brown are the most useful colors for classic mummy face paint. You can also add purple or green for bruising, red for wounds, and gold or turquoise for an Egyptian-inspired mummy.
How do you make easy mummy face paint?
For a simple version, use a pale base, darken the eyes slightly, paint several white bandage strips, and add a few grey shadows underneath them. You can skip the detailed texture, wounds, and advanced shading.
How do you paint mummy bandages on the face?
Use a medium brush to create broad white or beige strips that overlap and change direction across the forehead, cheeks, and jaw. Add darker shading underneath selected edges and white highlights along the opposite side to create depth.
How can I make mummy face paint look scary?
Darken the eye sockets, use dirty brown and grey shading, add cracked skin, bruising, wounds, or fake blood, and make the exposed skin between the bandages look aged or decayed.
How do you create an Egyptian mummy face paint?
Begin with a classic mummy design, then add black Egyptian-inspired eye shapes, gold forehead details, turquoise or blue accents, and optional decorative symbols. Keep the bandage structure visible so the design still reads clearly as a mummy.
How do you make a zombie mummy face?
Combine mummy bandages with zombie-style skin. Use grey, green, purple, and brown around the exposed areas, deepen the eye sockets, and add wounds or bruises between the wraps. Small amounts of fake blood can make the design even more dramatic.
Continue Learning Inside Artists Studio
Once you understand how to build the base, bandages, shadows, and texture, you can adapt this mummy design into dozens of different Halloween looks.
Inside Artists Studio, you can follow more tutorials, practice more advanced techniques, and discover new designs from other face painting artists.
Continue the Full Mummy Tutorial in Artists Studio →
