
Share this post:
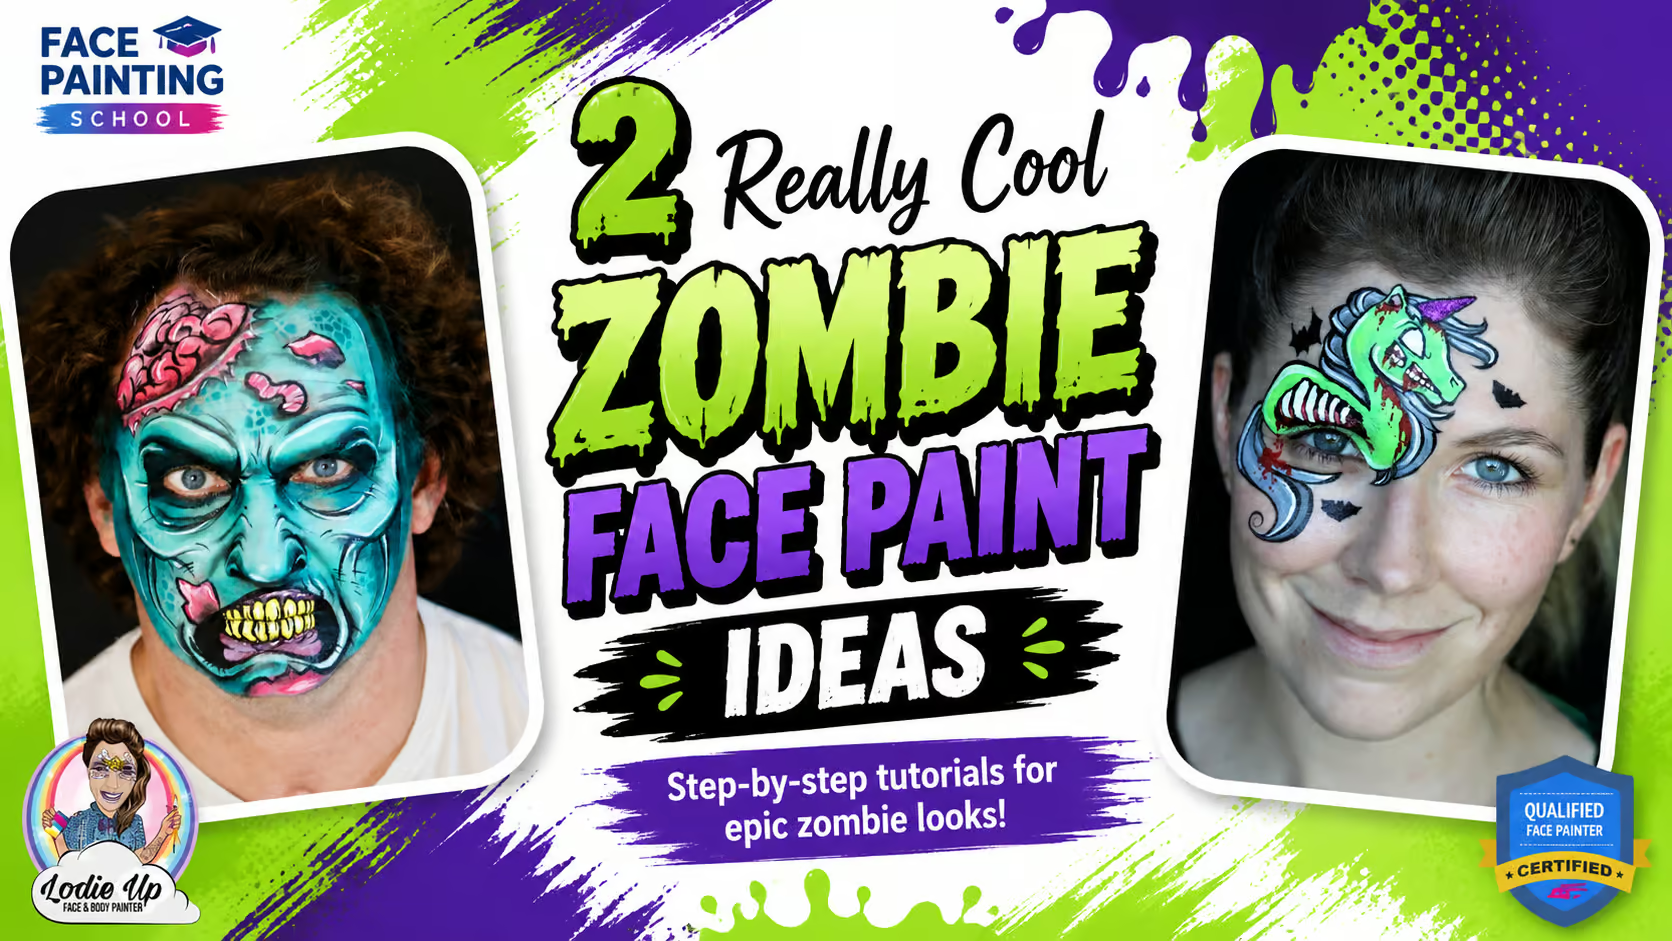
2 Really Cool Zombie Face Paint Ideas
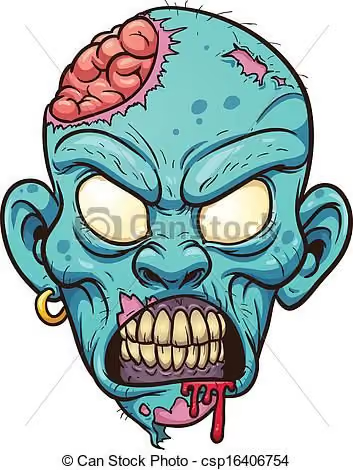
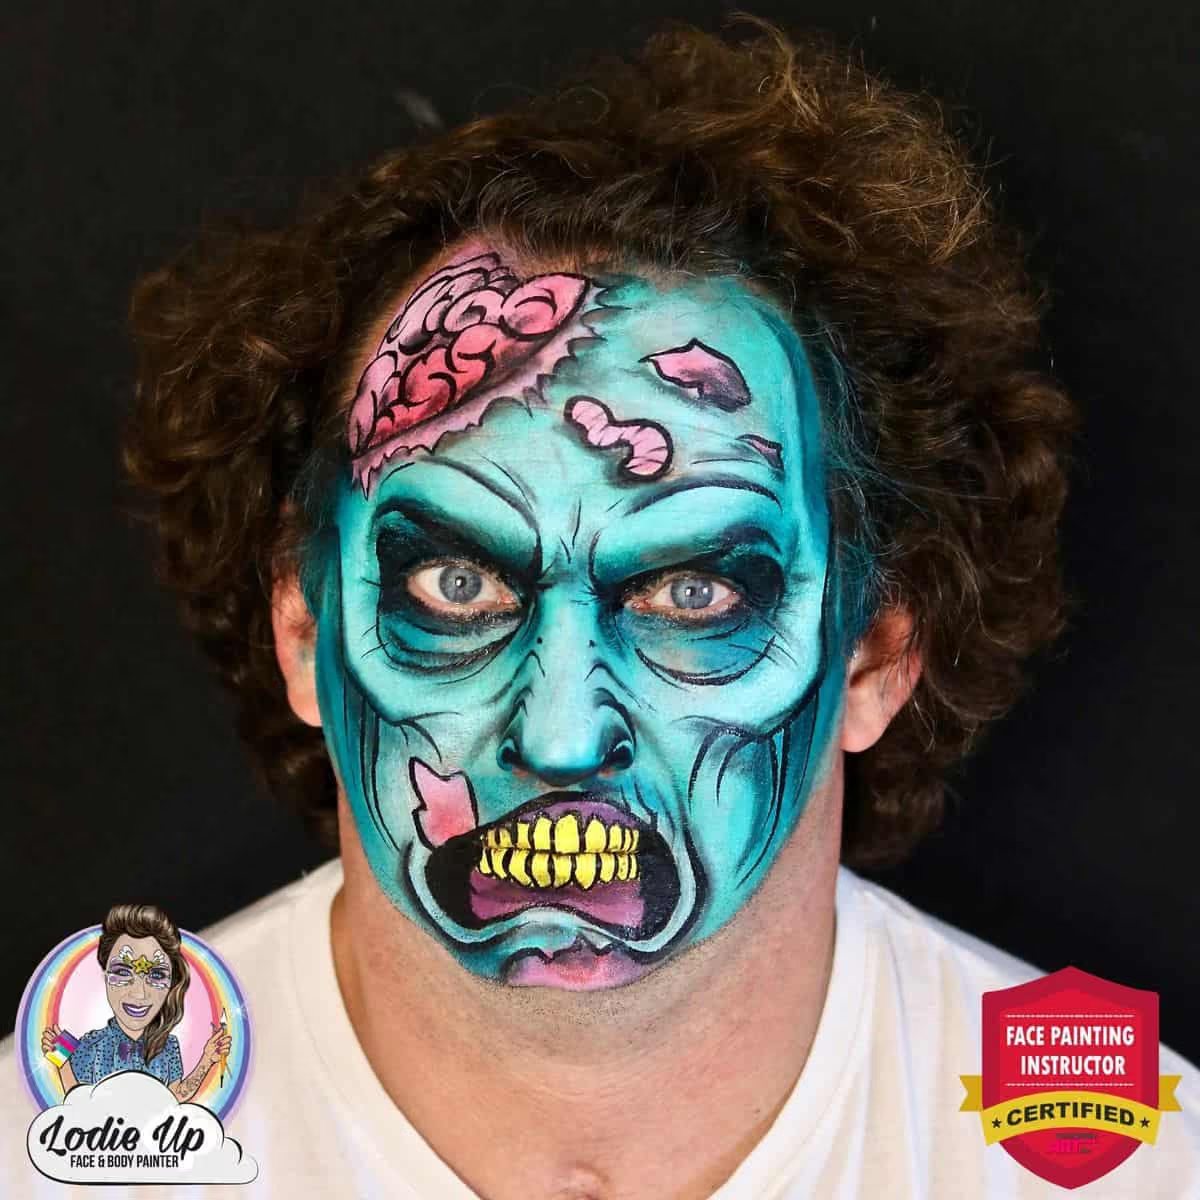
Finally, it’s Halloween time and that means I can bring to life the idea of the easy zombie face paint design that came to my mind recently! When googling for “zombie cartoon” images I stumbled upon this image below and I instantly fell in love with it! You all know that I love painting in cartoony style and I thought that adapting this inspiration image into face painting would be super fun! And I think it turned out in quite a nice zombie Halloween makeup design, that is also very easy to reproduce. And I hope it will serve you well this Halloween season! 😘

Get Your Beginner Zombie Face Paint Kit Here
Zombies come in every shape, size and style. If cartoony isn’t your thing, you can find other great ideas for zombie face paint in our Ultimate Halloween Face Paint Inspiration Guide!

- Ivory 017 by Superstar (Alternative: Almond 016 by Superstar)
- Teal 209 by Superstar
- Petrol blue 173 by Superstar
- Bubblegum 105 by Superstar
- Red 135 by Superstar (Alternative: Carmine Red 128 by Superstar)
- Bright Yellow 044 by Superstar
- Purple 038 by Superstar
- White Interferenz by Kryolan (I used Kryolan white, but you could use other glycerin-based white like Superstar line white)
- Paraffin white by Fusion Bodyart
- Strong black by Fusion Bodyart
- UV neon by Fusion Bodyart
- Paint Pal little drop by Sillyfarm
- KingArt round brush 3
- Half Yellow Sponge
- Stencil #230 by Diva Stencils
- Finger dauber
Feeling confused with what tools you need to start face painting? Check out this Ultimate Face Painting SUPPLIES Guide! Direct links to the best face painting materials — all in one place!
Beginner’s Zombie Face Paint Tutorial
Step 1: Start Sketching Your Zombie Face Paint
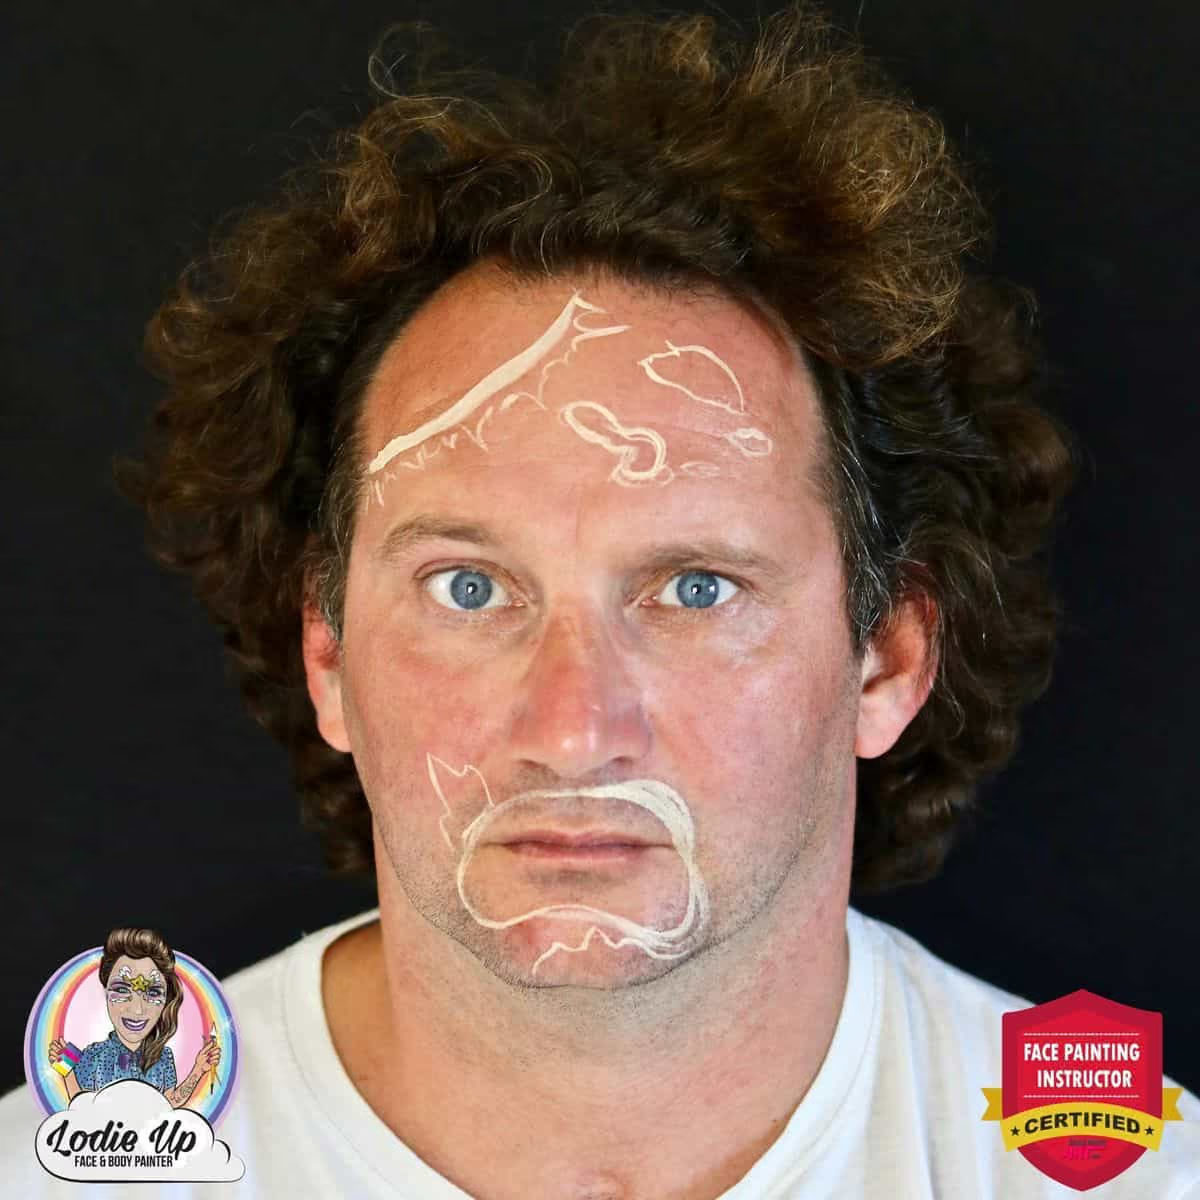
First I use a beige color and a round brush to delimit the sections of my design: the brain, the mouth area and the tears. I know many artists use white for this.
But I highly recommend using a light skin color for this purpose! It is much easier to remove from the skin and it blends better with the colors that we’ll apply later on top.
Step 2: Main Colors on the Background
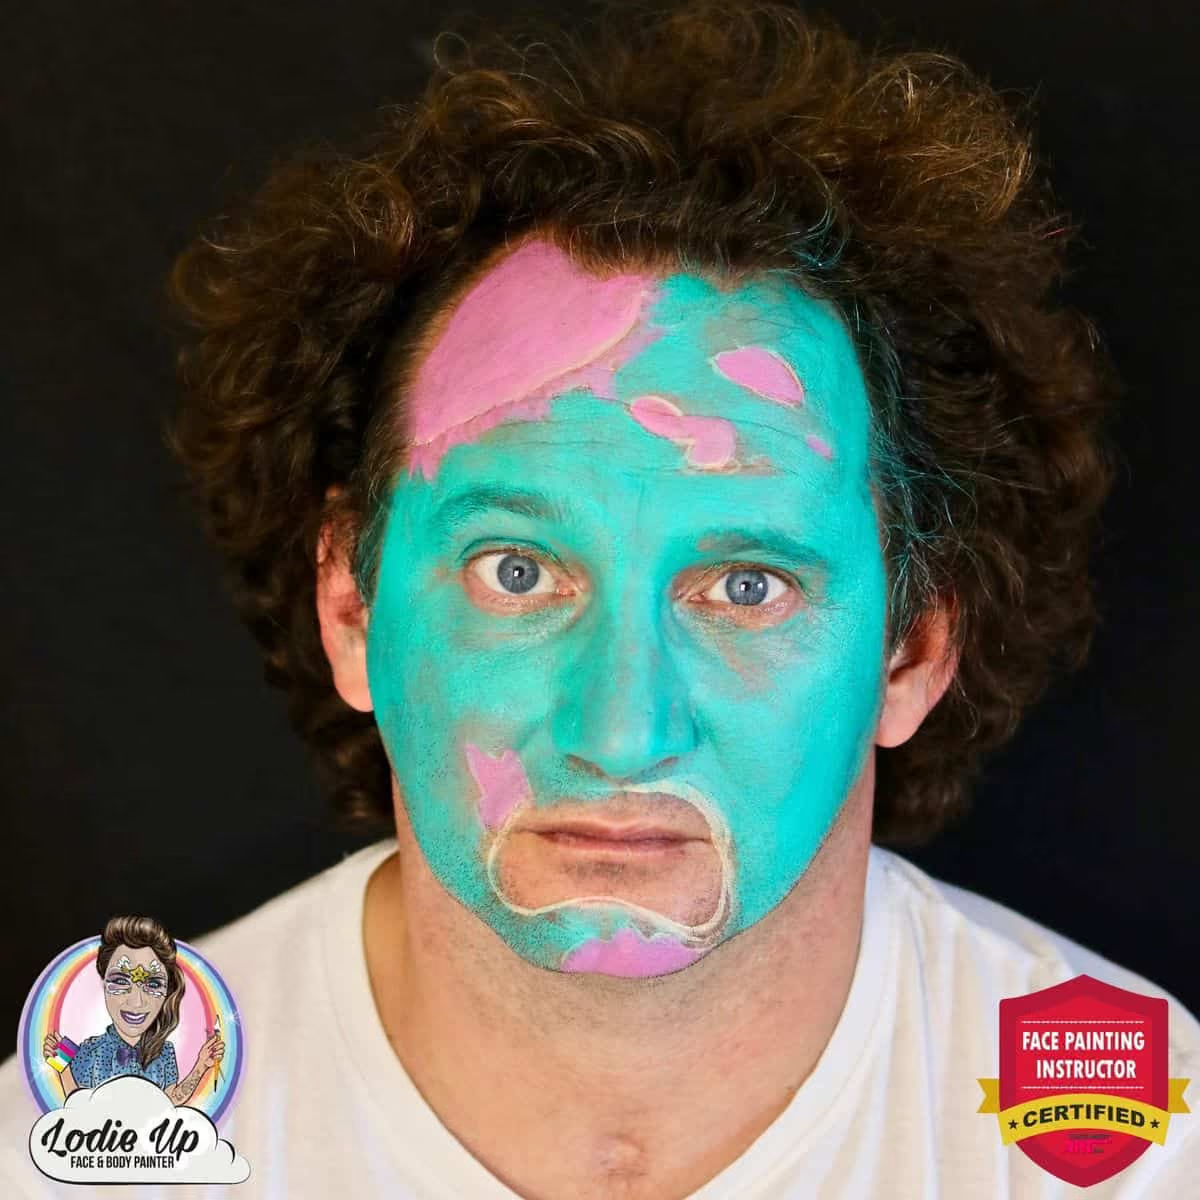
The next step is super easy! Now we just have to fill in the areas we’ve delimited with color! I am using a half-circle yellow sponge for the teal skin and a little drop brush with bubblegum pink for the brain and torn areas.
Tip: Don’t know where to begin learning how to face paint? Check out our Ultimate face painting Guide for Beginners!
Step 3: The Shading
To make the face more dimensional and less flat we need to add shadows. Zombies have very deep shadows on their faces. Because, you know, they are dead and that means that the skin is pulled down by the gravity from their bones.
To make the process of finding the right places for the shadows it’s really important that you study the anatomical structure of the face, palpating the prominent bony part and finding the hollow areas.
I placed the shadows under the cheekbones, on the temples, around the eyes, under the nose and a little bit on the chin.
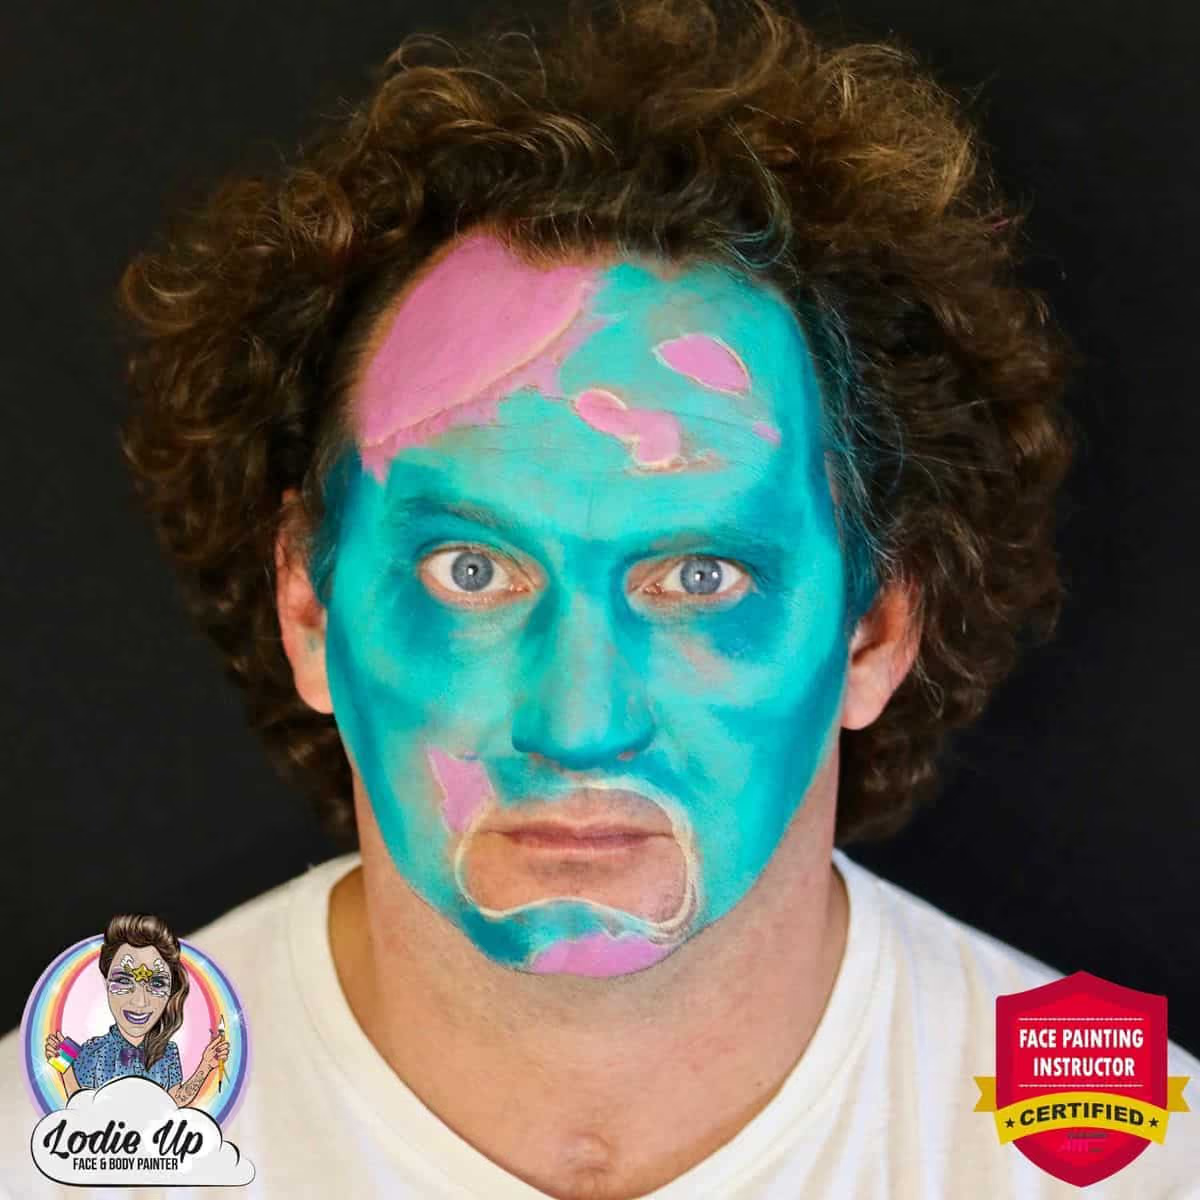
Step 4: Halloween Zombie Face Paint Highlights and Coloring
Now let’s add the highlights to make the contrast even greater! I am using Kryolan interference white, which is a very soft and creamy glycerin-based white — perfect for blending!
The placement of the highlights also coincides with the classical skull structure, therefore they go above the eyebrows, on the forehead, on the cheekbones, on the bridge of the nose and a little bit on the jaw.
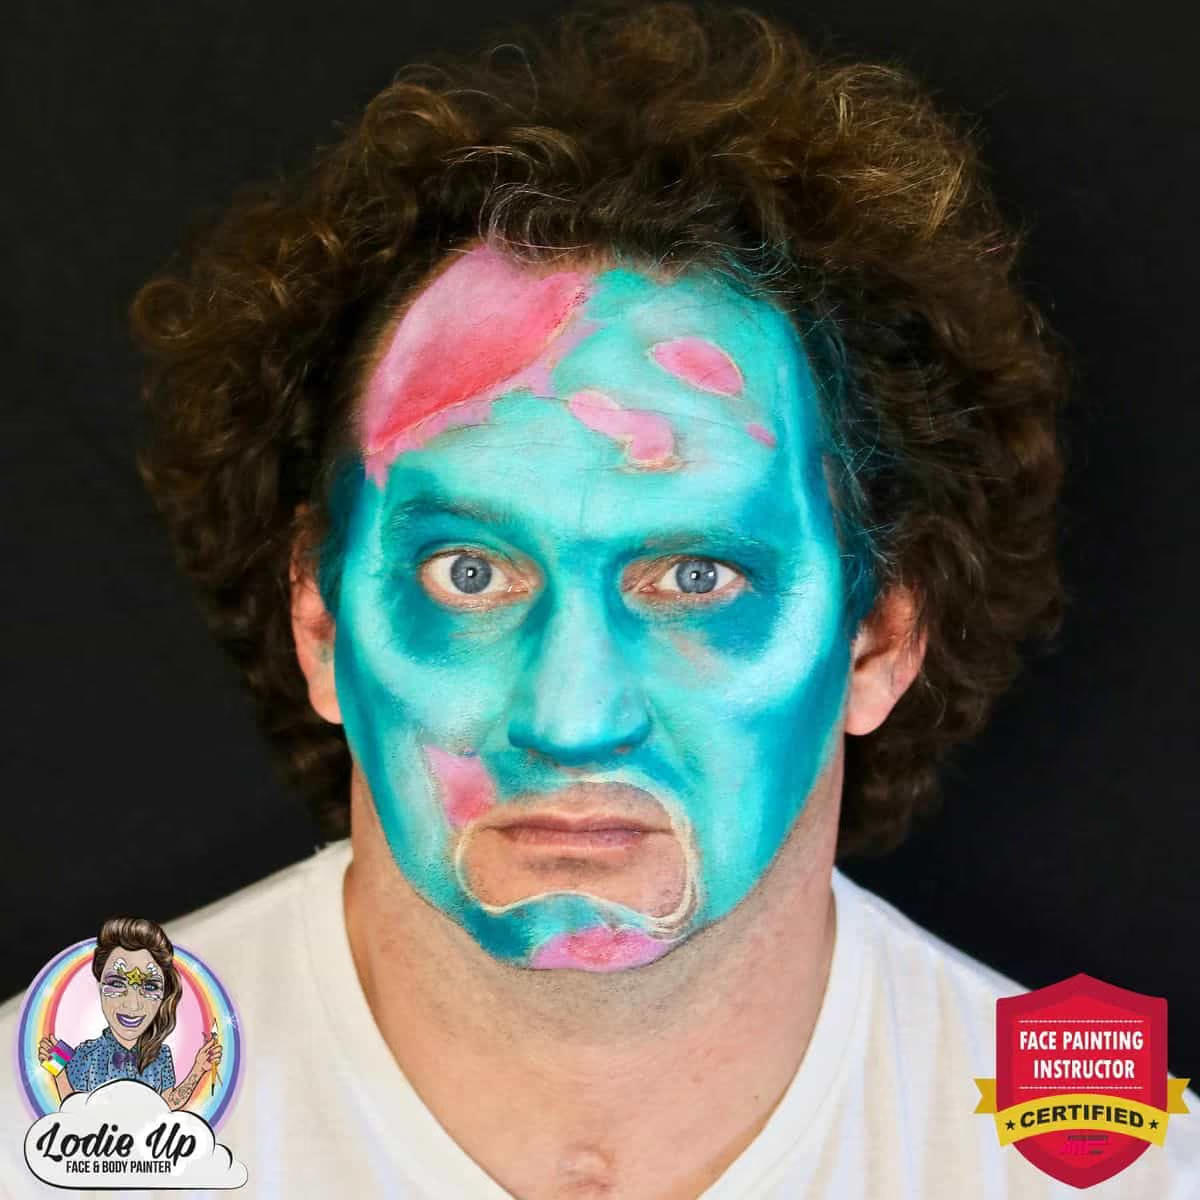
Tip: Find out more about glycerin-based paints, wax-based paint and other types of paints, as well as what they serve for best and where to get them in our special Ultimate Guide on Face Paints.
Step 5: The Teeth
It’s very important to remember that the teeth in a skull (and in a zombie with a torn mouth) won’t be extended on the cheeks!
If you look at a skull picture, you can actually see that there is just a narrow area in the front of the mouth that is occupied by the teeth arcades.
I used yellow paint for the rough background of the teeth, purple for the gums and black on the sides to make the teeth look protruding even more to the front and the side areas look even deeper and lacking flesh.
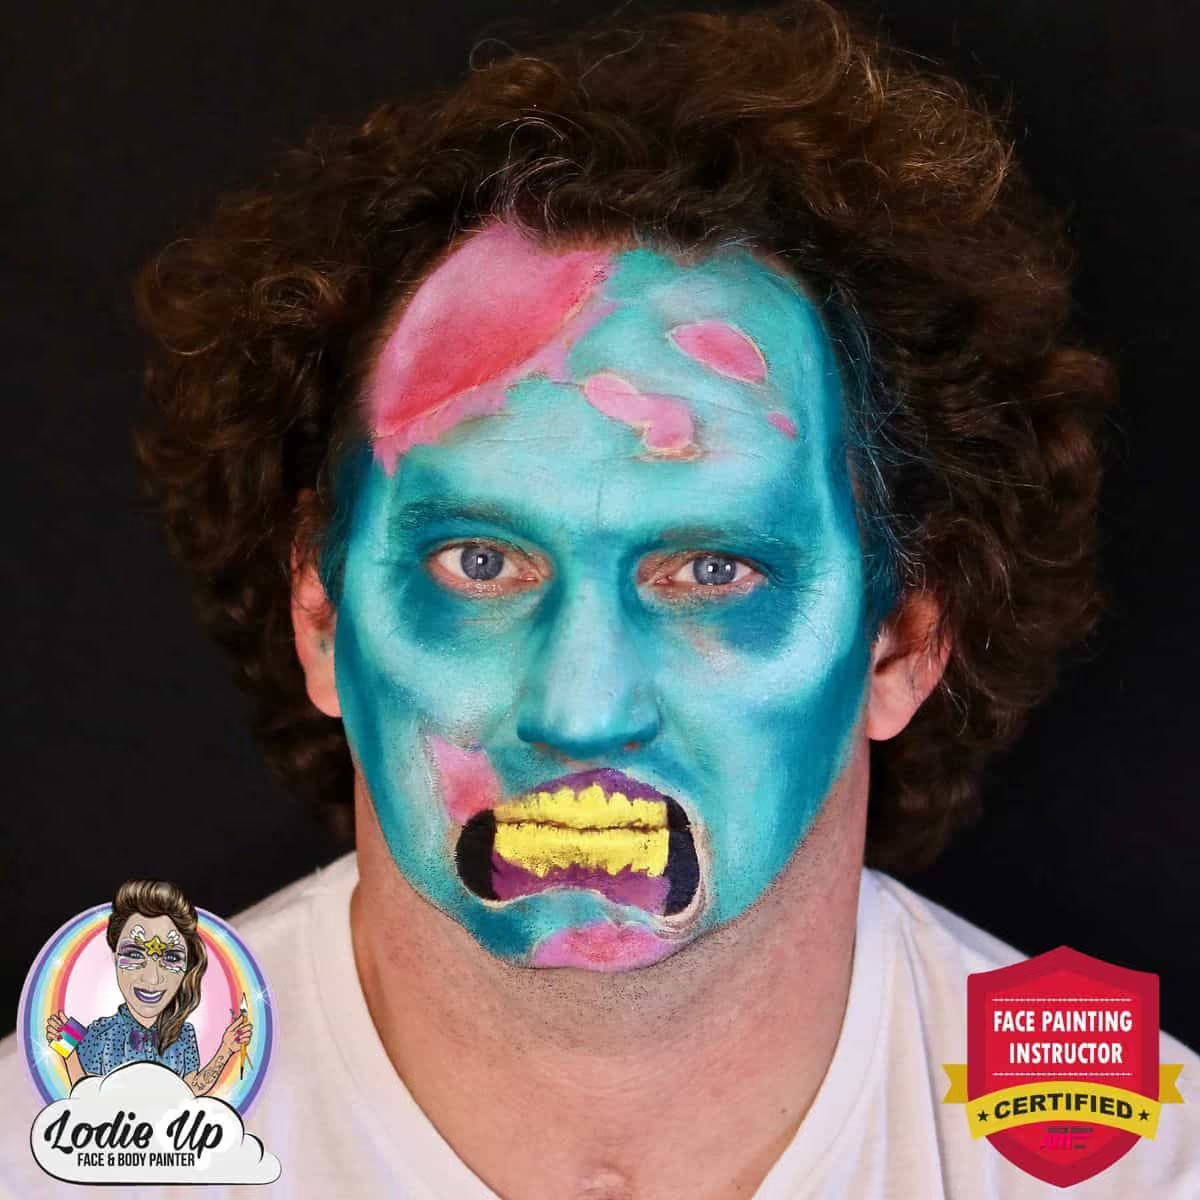
Step 6: The Outline
Linework time! With my Loew-Corrnel round brush #3 and Strong Black, I go around all the previously delimited areas, adding creases and creating angry eyebrows for a sinister look in my zombie face paint.
Make sure to keep your lines always thick in the middle and thin and pointy on tips.
If you feel that your linework needs improvement, then I highly recommend taking this Free Online Workshop — Improve your linework in 3 Days! You will be amazed at what you’ll achieve thanks to it! 😍
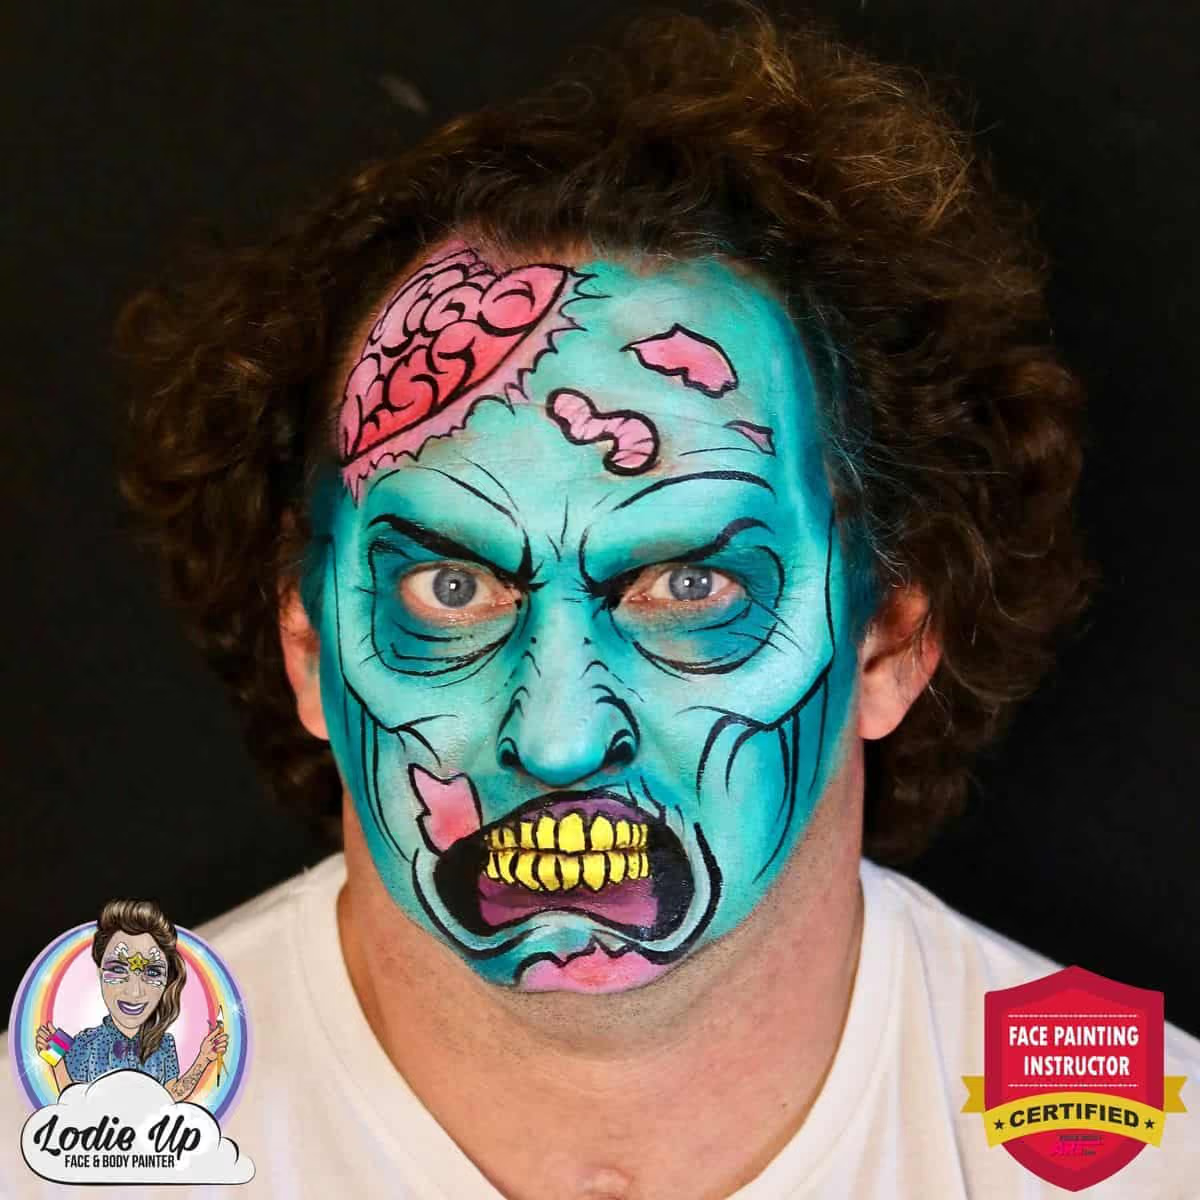
Step 7: Blend the Zombie Halloween Makeup
Using a Cameleon blending brush I am softening the shadows around the eyes and under the linework. Always thinking that the light comes from above, the shadow must be always placed BELOW!
Tip: Are you an experienced face painter, but feel that your art needs a boost? Take a class at the International Face Painting School and become the best in your area! You can do it! 💪🏆
Step 8: Final Touches on the Easy Zombie Face Paint
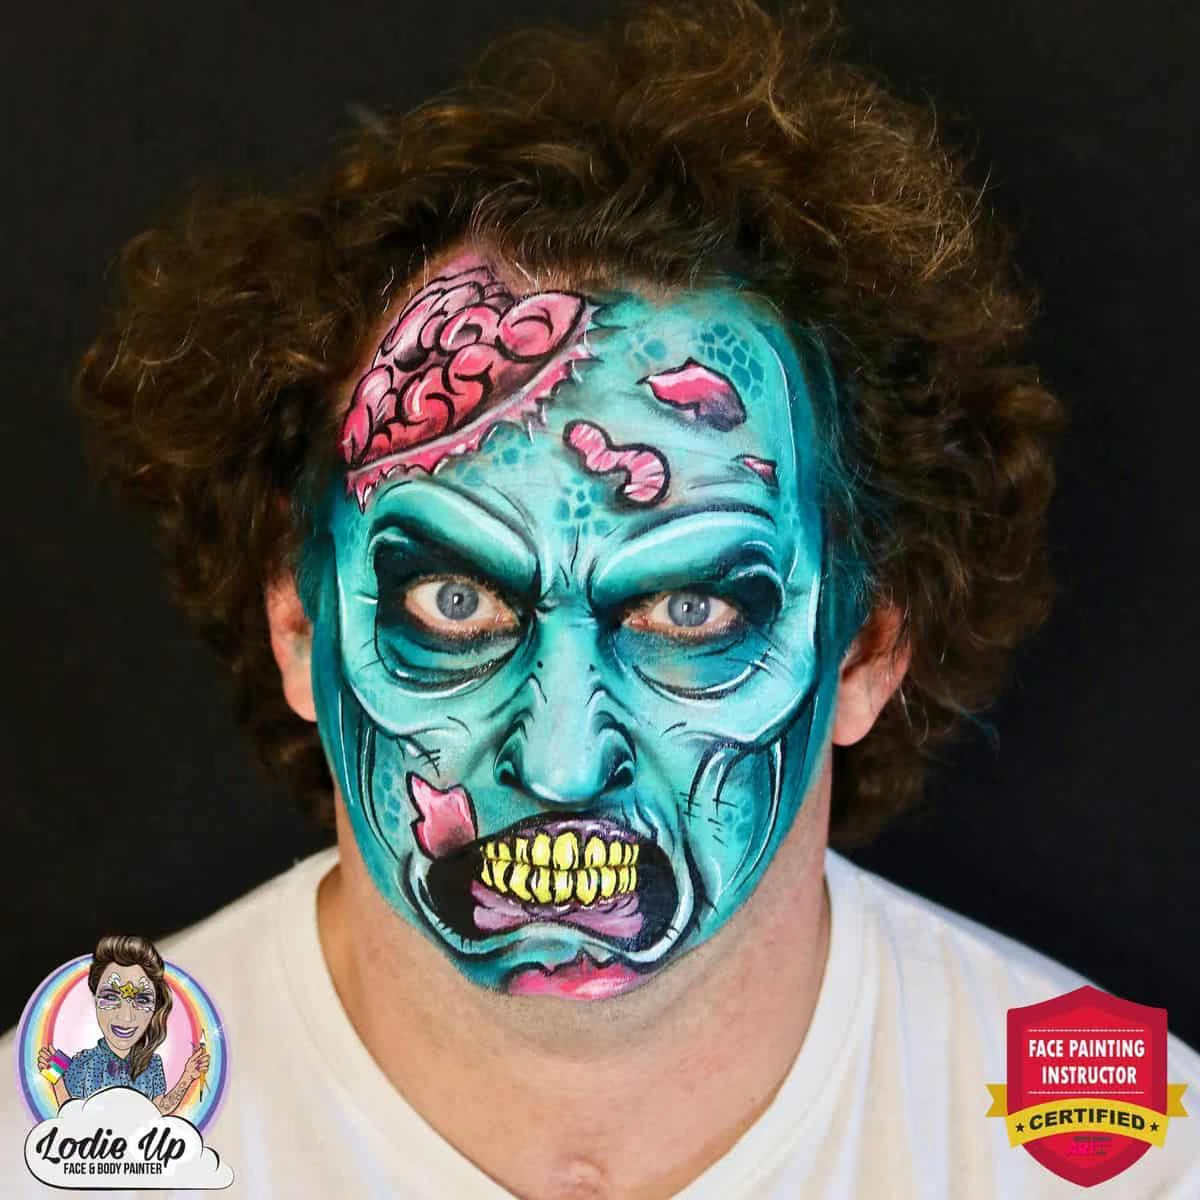
There are some very handy tricks on how you can take your design to a new level in seconds! And adding a stenciled texture as I did here is one of the best tricks! I used a scale stencil #230 by Diva and a petrol blue and went primarily on the empty areas of my design.
To make the stenciling cleaner and more precise I recommend using a finger dauber instead of a regular sponge.
Last but not least, I am adding fine white lines with Parrafin white by Fusion to make the zombie face paint design pop even more.
Tip: Use creamy paint consistency to obtain bright vibrant lines! You can learn more about paint consistency types in our Ultimate Guide for Professionals.
Voila! The Halloween zombie face paint is ready!
Very Creepy right?! 😄
For more Halloween inspiration, check out our other tutorials:Super Easy Skull by Kristin OlssonOld Joker vs New Joker by Elodie Ternois

Did you know that you can actually transform any design into a creepy one? 👻
Zombifying is one of the techniques we use to transform common characters into zombies.
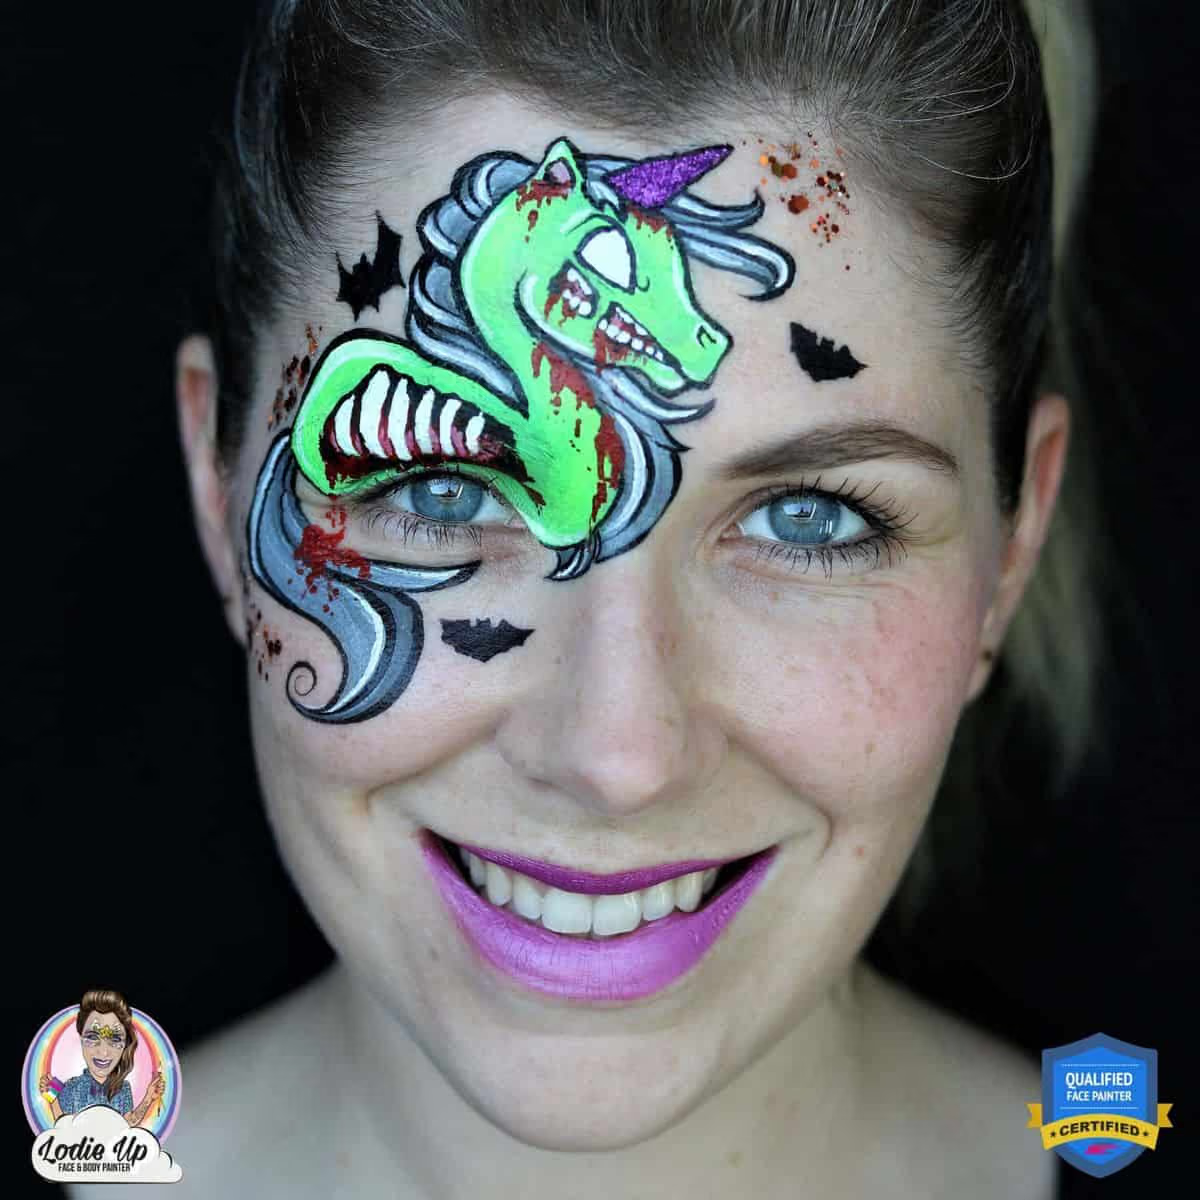
In this Halloween tutorial, our French instructor Elodie Ternois is going to teach you how to create a Zombie Unicorn face paint!
For all those little ladies that want a gore touch on their favorite ponies and unicorns! Let’s follow this easy Halloween face paint!
Looking for more Halloween versions of popular designs? Find a Bonus Video Tutorial at the end of this post for a Halloween roses design that is the perfect amount of glam and spooky!
Get Your Beginner Zombie Unicorn Face Paint Kit Here
I created this zombie unicorn basing on the technique that is presented in the T-Rex lesson of our online School.
That is where we are teaching you how to modify your common dinosaur into a zombified one.
And with this tutorial, I wanted to show you that this technique can work for any design and any character!
Let me explain more in the steps. ;)
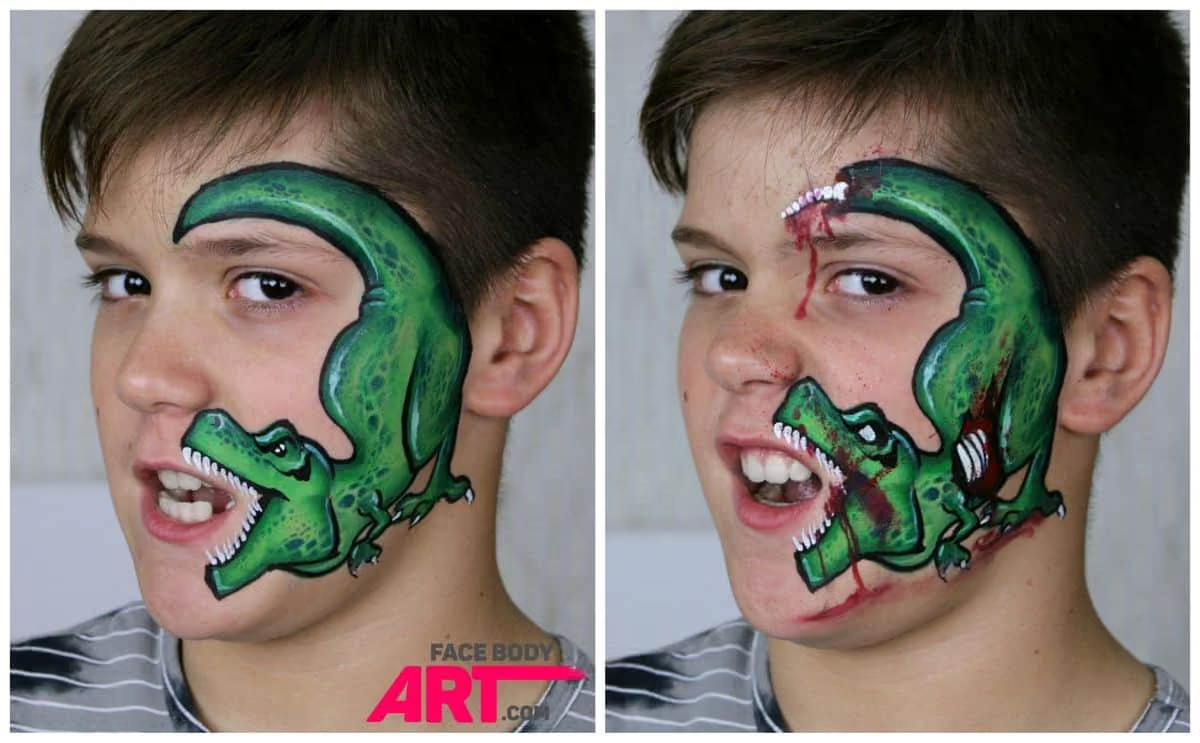
Tip: T-Rex design in two variations that is being studied at the International Face Painting School.
Zombie Unicorn Face Paint
Step 1: Create the Sketch
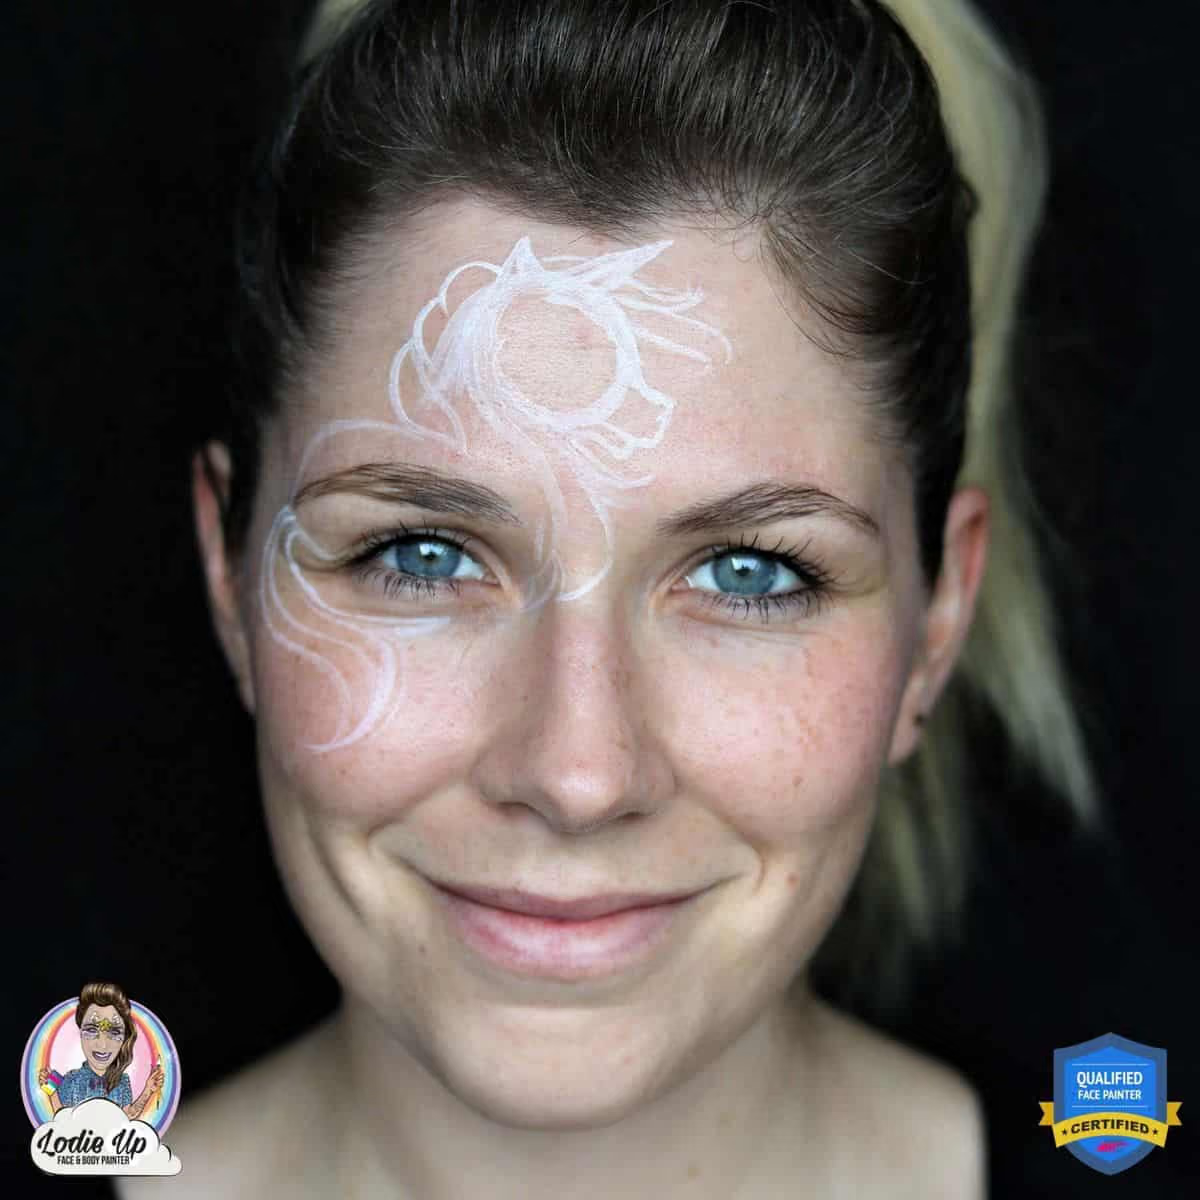
To make sure I’m getting the placement and the proportions right I start by making a sketch with Kryolan white.
Kryolan is a glycerin-based paint and therefore it blends out easily with other colors. If you didn’t know that yet, there are two types of paint: wax-based and glycerin-based.
The differences and similarities can be observed when using various application techniques, eg brush or sponge, as well as how they feel on the skin, and how they are worn.
To know exactly how to work with your paints, what works best for what and how to achieve the best results you NEED to learn this classification.
So I’ll leave the link to our Free Face Painting Guide for Beginners in case you want to find out more.
Step 2: Color the Background
To continue with my Halloween unicorn face paint, I fill in the body of the unicorn with Superstar Poison Green and paint the mane in Superstar Gray using a #3 round brush by Loew-Cornell 795 series.
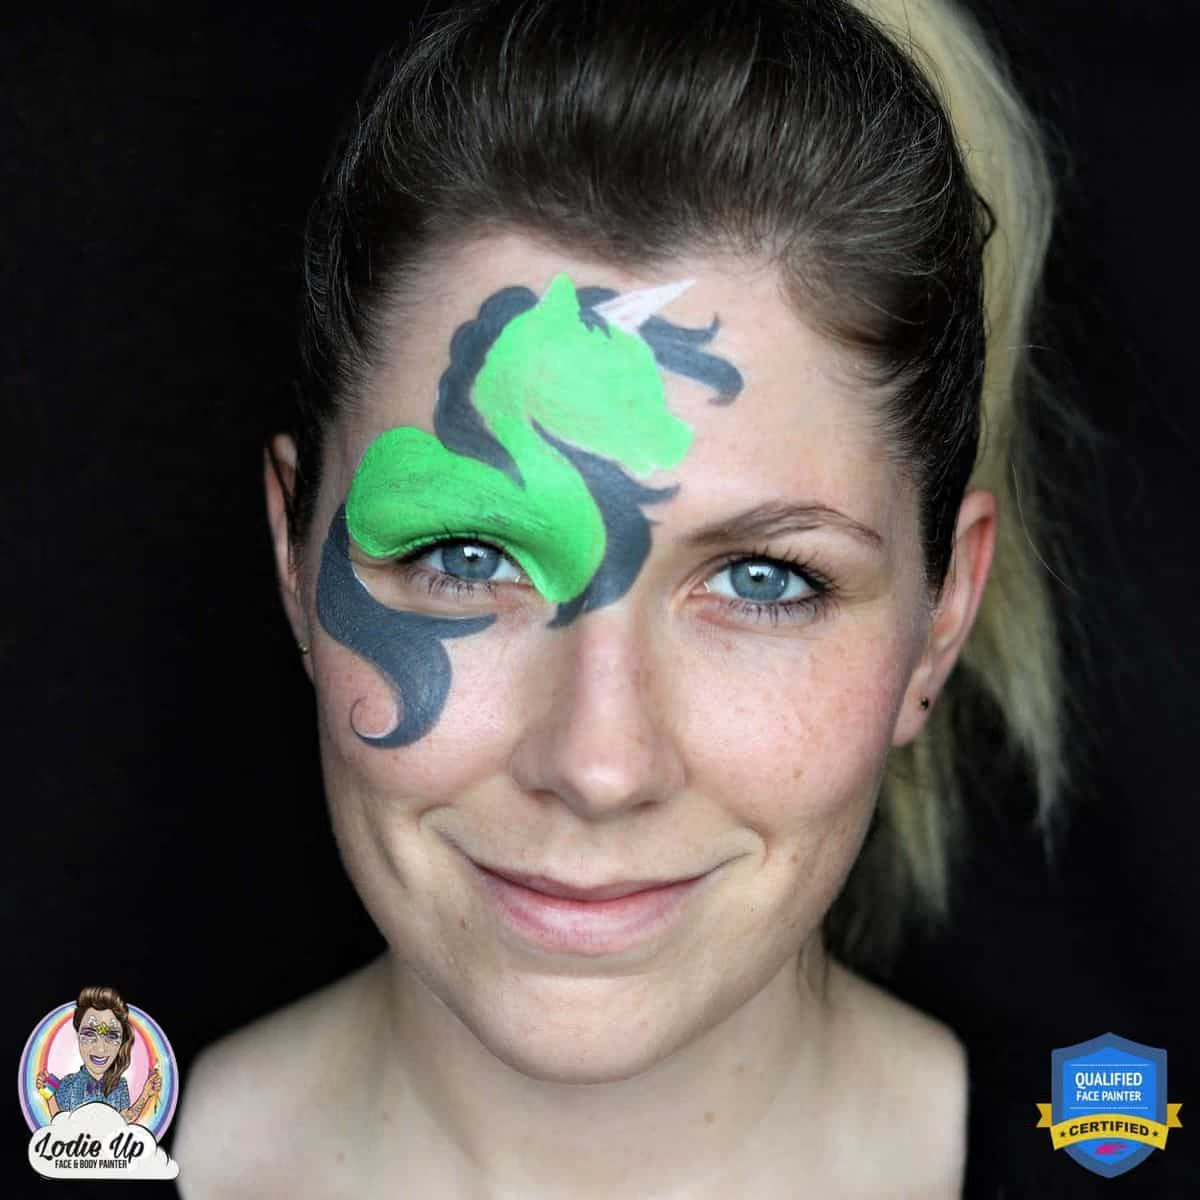
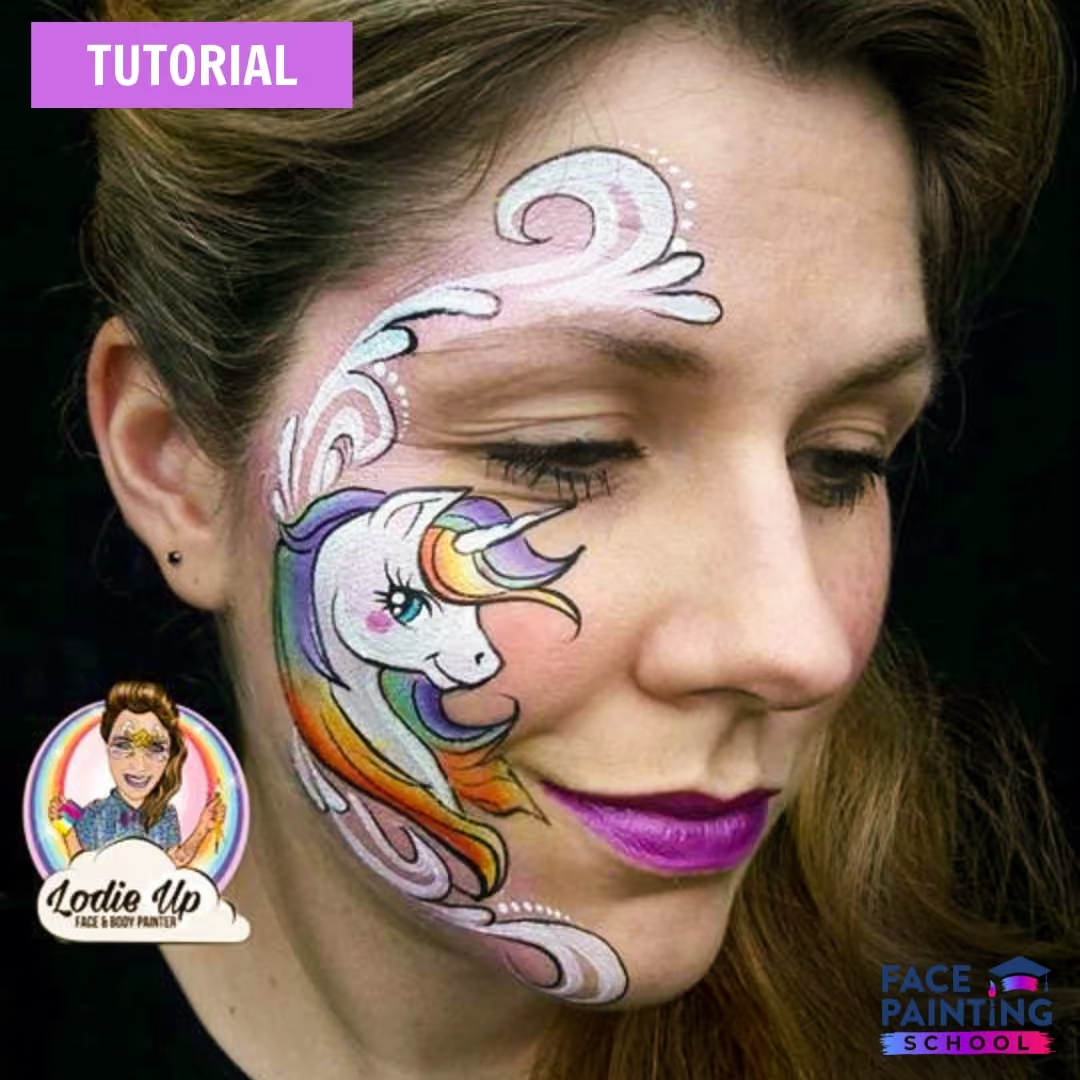
Elodie is affectionately known in the face painting community as the Unicorn Queen for good reason! We also have a cute Rainbow Unicorn face paint design tutorial by Elodie that you can paint any time of the year. 😍
Step 3: Add Highlights
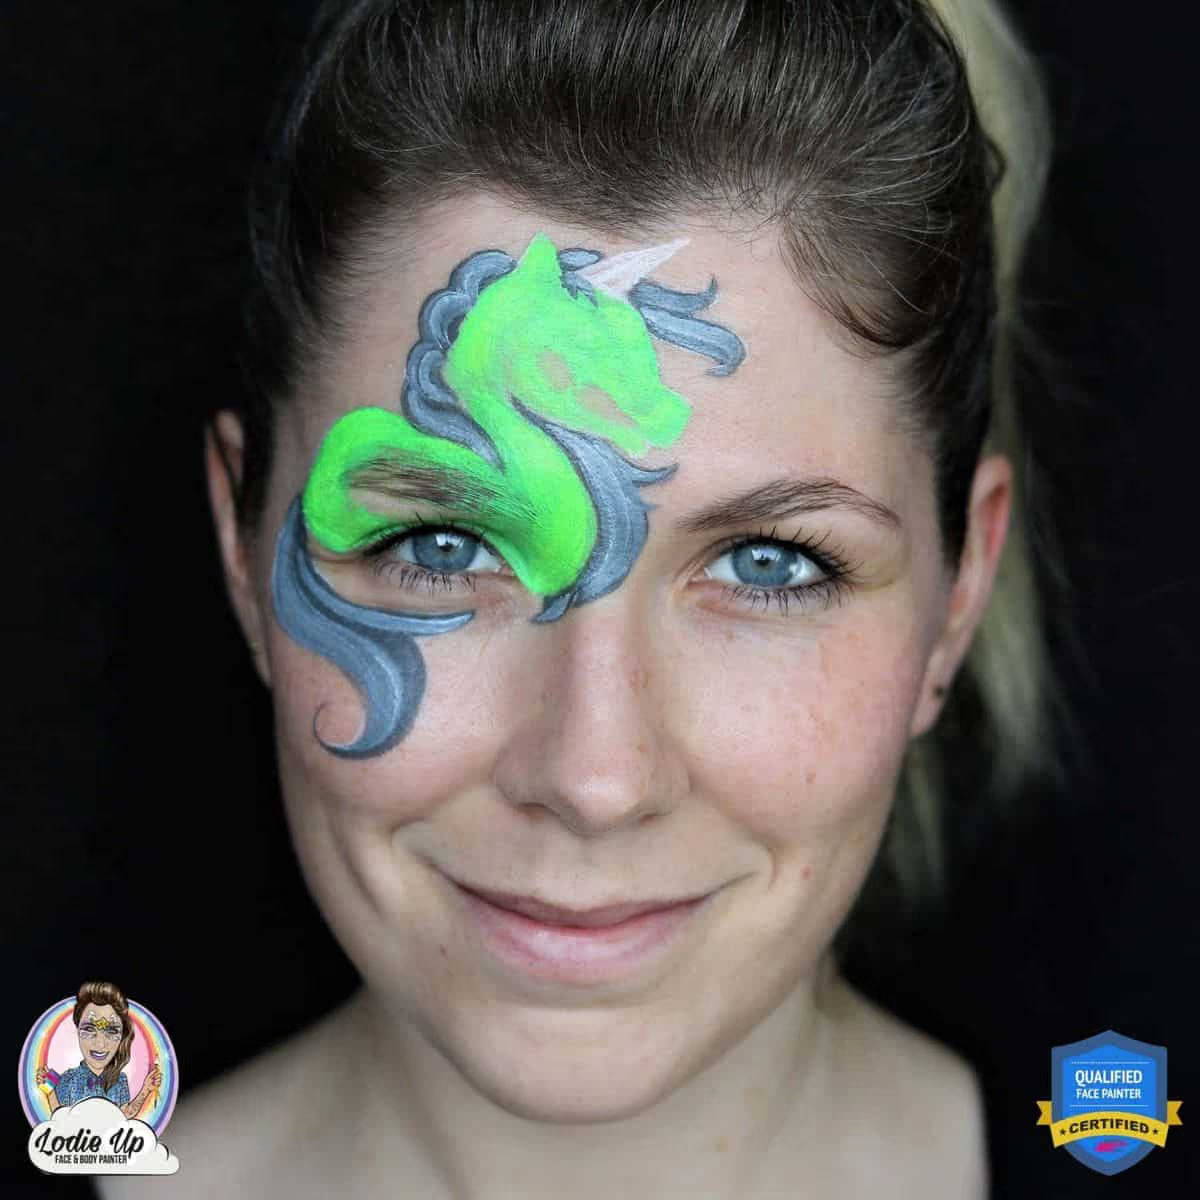
I decided to add a touch of Neon Yellow by Diamond FX to make the body color pop even more! And I also added highlights with Kryolan white on top of my unicorn face paint’s the mane and tail.
As you can see, this white is translucent, which creates a perfect effect for the highlight. One more reason to study the paint types. 😉
Next, I used a wet wipe to erase a section on unicorn’s body and on the mouth. This is where I will add zombifying elements — exposed ribs and teeth.
Tip: Want to learn more about the School? Take a class here! 😍
Get the training you need to face paint like a professional!
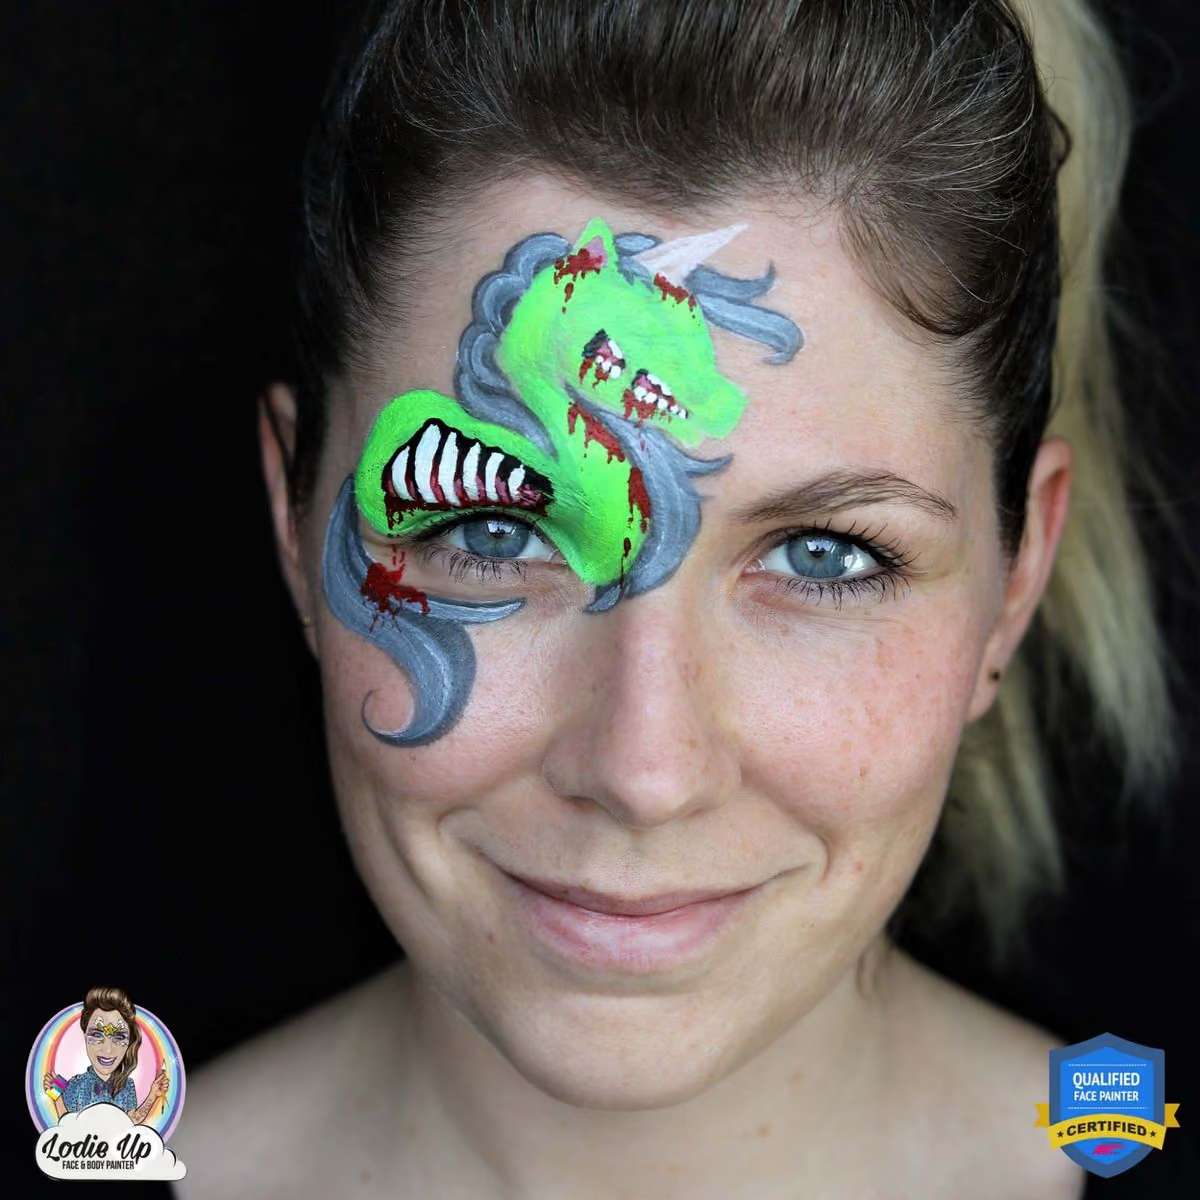
Step 4: The Teeth and the Ribs
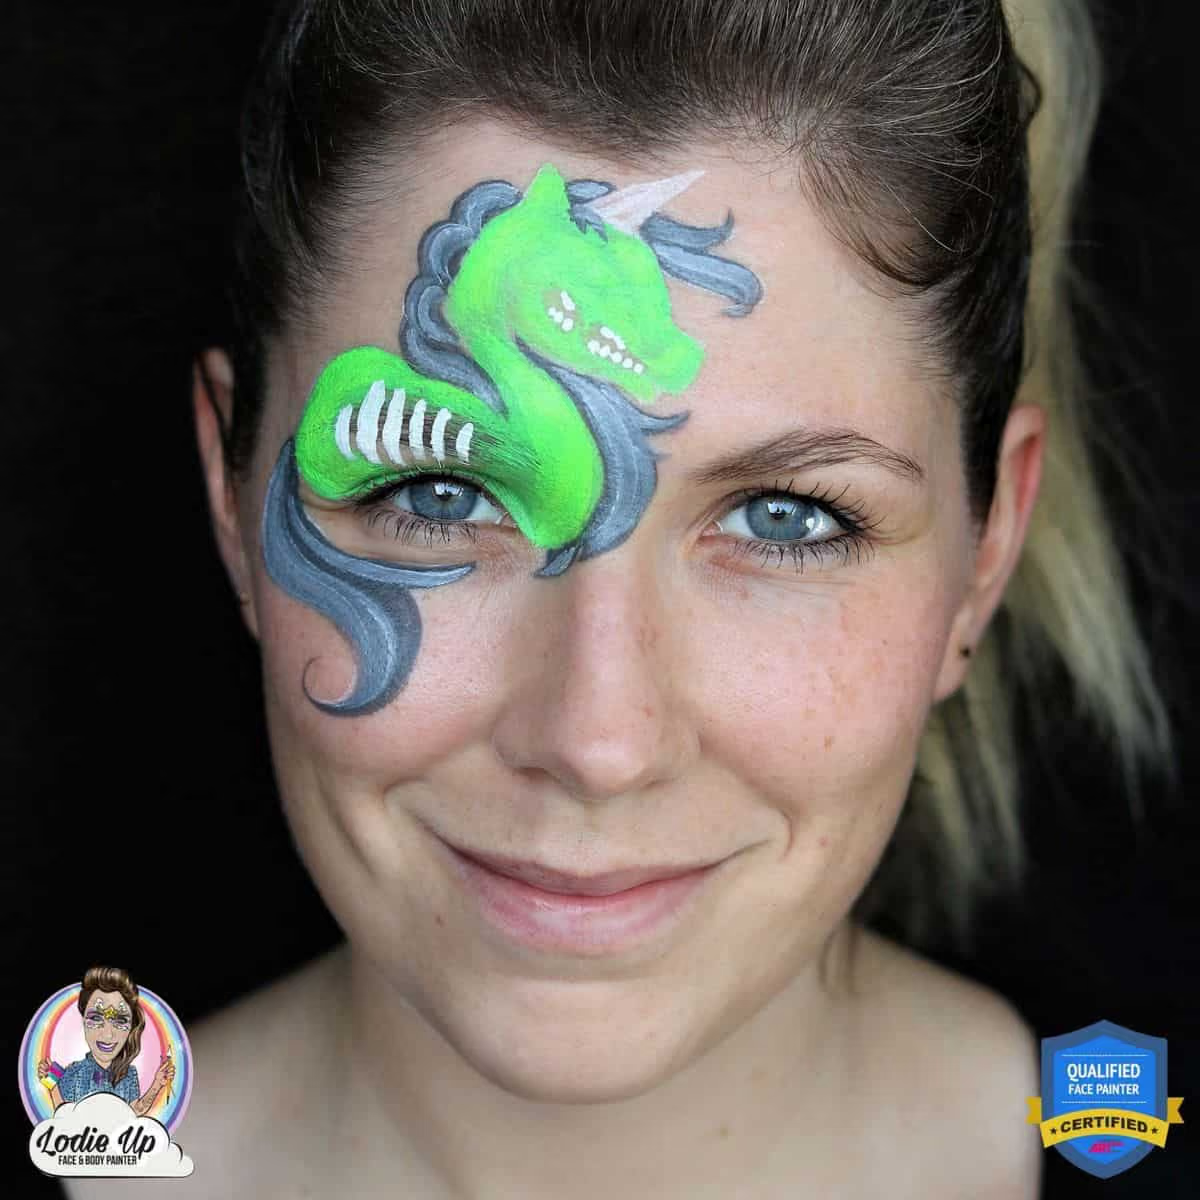
Now we’ll need a wax-based white to paint the teeth and the ribs of the zombie unicorn face paint! I am using Diamond FX an a #3 round brush by Loew Cornell 795 series. The reason why I’m using a wax-based paint is that in this case, I want a bright and strong color.
Also, paint consistency is important. For example, for the teeth and ribs I’m using creamy paint consistency and for the blood drops and splatters I will be applying later I will be using watery paint consistency.
If you want to learn more about paint consistencies, which will eventually help you activate and work with your paints properly, check out our article “How to activate face paints to get amazing results“.
Discover more creative Halloween designs for girls, boys, and adults in our Ultimate Halloween Face Paint Inspiration Guide! It’s quickly become the #1 resource for Halloween face painting for painters all over the world. 😱
Step 5: Blood and Shadows Details
To add more depth to the exposed ribs and teeth I am shading them with some Global Black using the same #3 round brush as previously.
And next, I’m applying blood drops with Superstar Carmine Red here and there on the body keeping in mind that watery paint consistency will work the best for this technique!
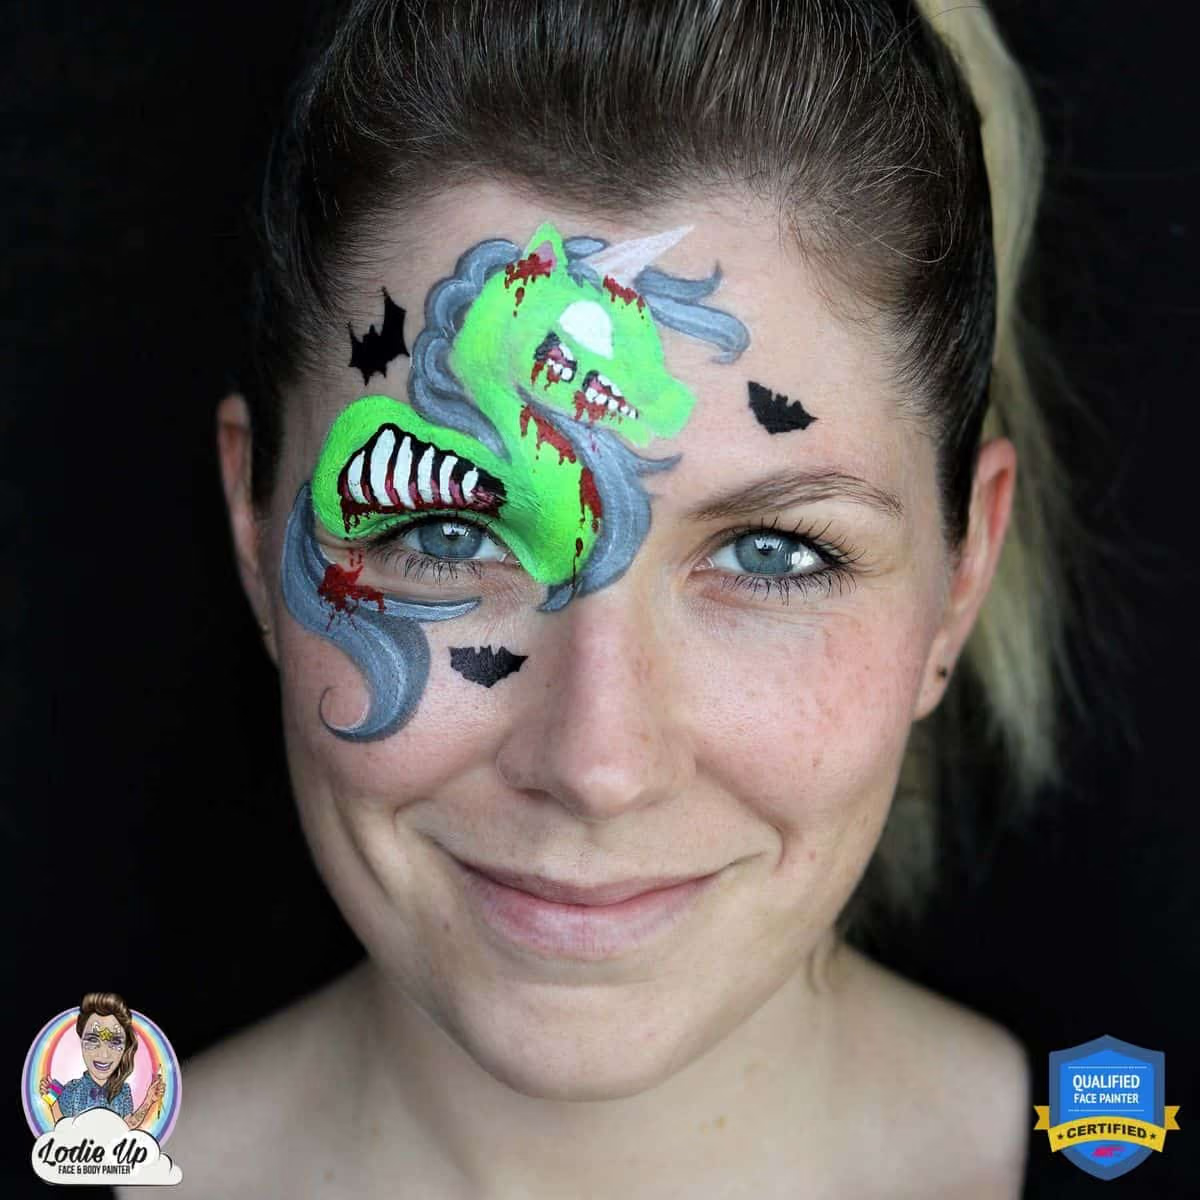
Step 6: Additional Decorations
To enhance the zombie unicorn makeup theme of this design I decided to add some bats. And the Tap Stencil 026 by Jest Paint and Global Black work just perfectly for this purpose!
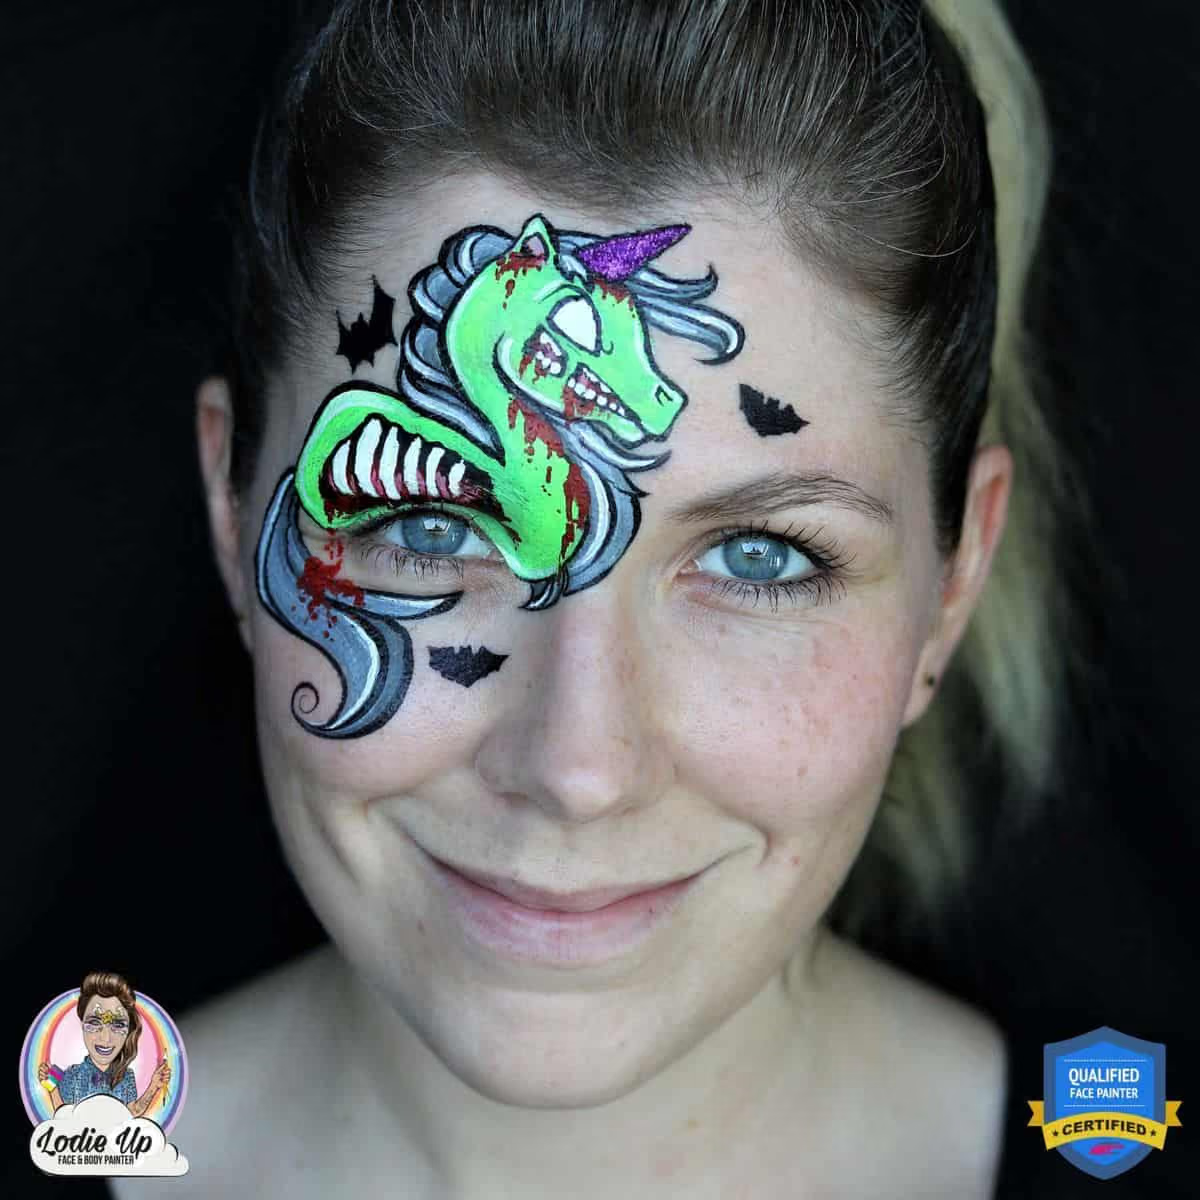
Step 7: Final Touches
Lastly, I outline the entire design using a #0 round brush by the Face Painting Shop and I paint the horn in red glitter glaze.
Just because a unicorn is a fantastic creature and it remains so even when it’s a zombie. 😉 Little girls are going to love it!
Tip: Are you impressed by Elodie’s skills and want to set up a career in face painting too? Check out our free guide How to Become a Professional Face Painter and Get Paid.
All done! Put on your best zombie smile, add some Pumpkin spice Festival Glitter by Art Factory and you are ready!
Did you enjoy this easy Halloween face paint tutorial? Hit “SHARE” and let your fellow face painters know about it! 👇👇👇
Let’s spread more smiles this Halloween season and make as many little girls happy as we can!
By the way, did you know you can take a free workshop at the International Face Painting School?
Check out our Improve your linework in 3 days Free Online Workshop!

Bonus Design Tutorial
Share this post with your friends so you’re all set up and ready to party!
