
Share this post:
Beginner’s Butterfly Face Paint Tutorial
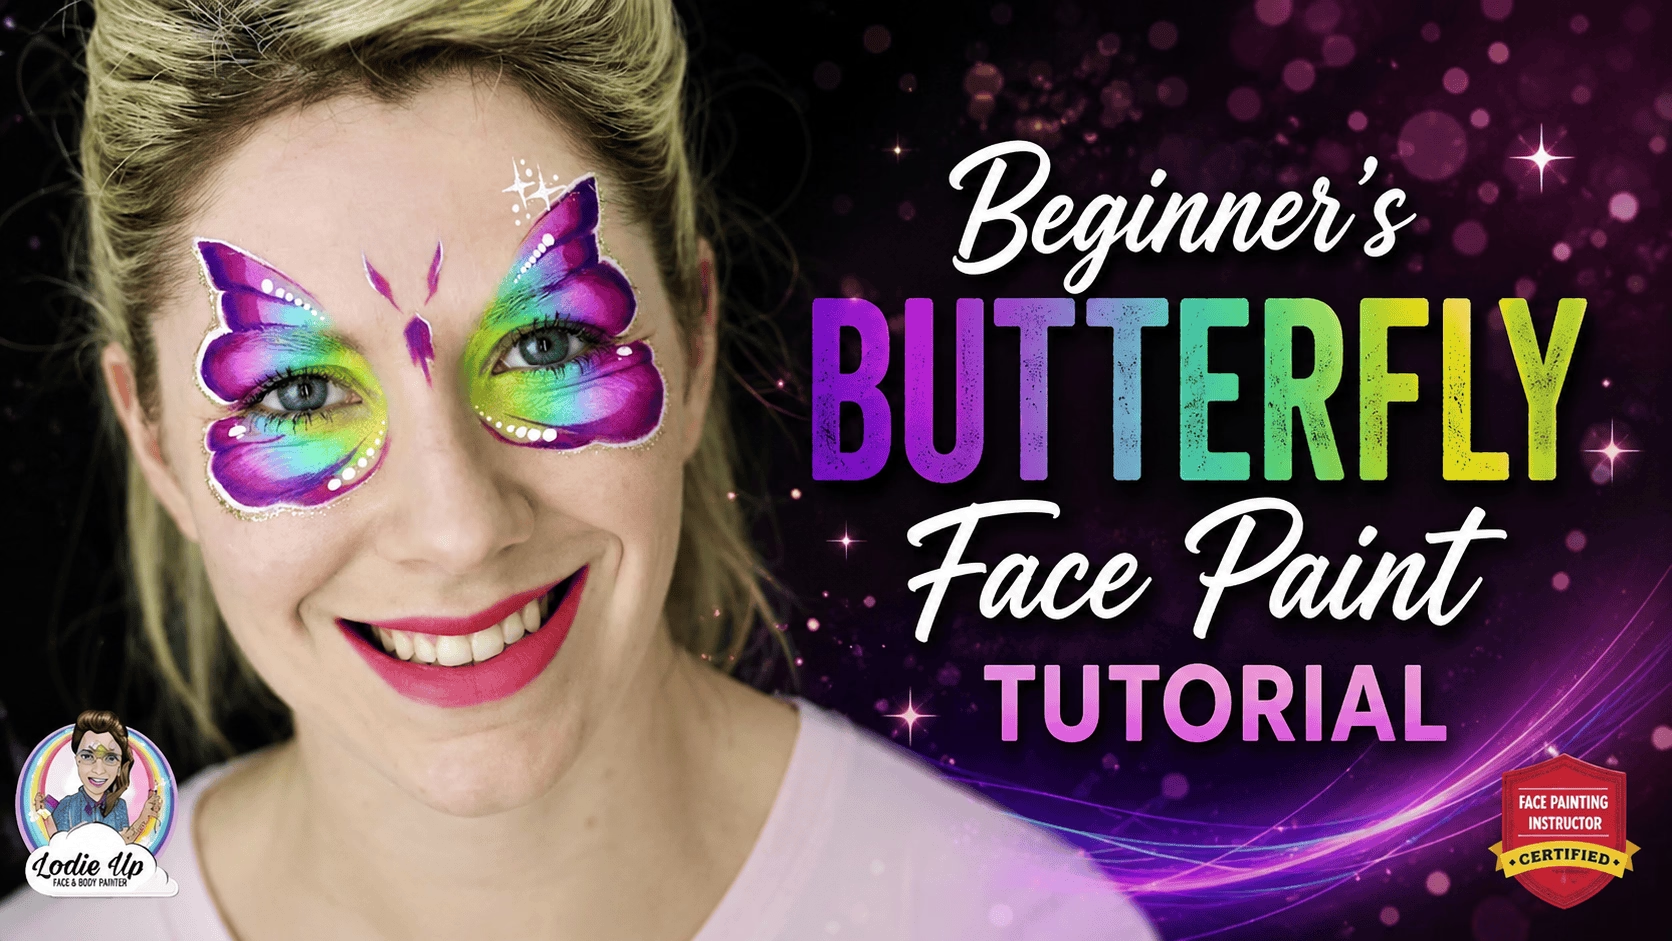
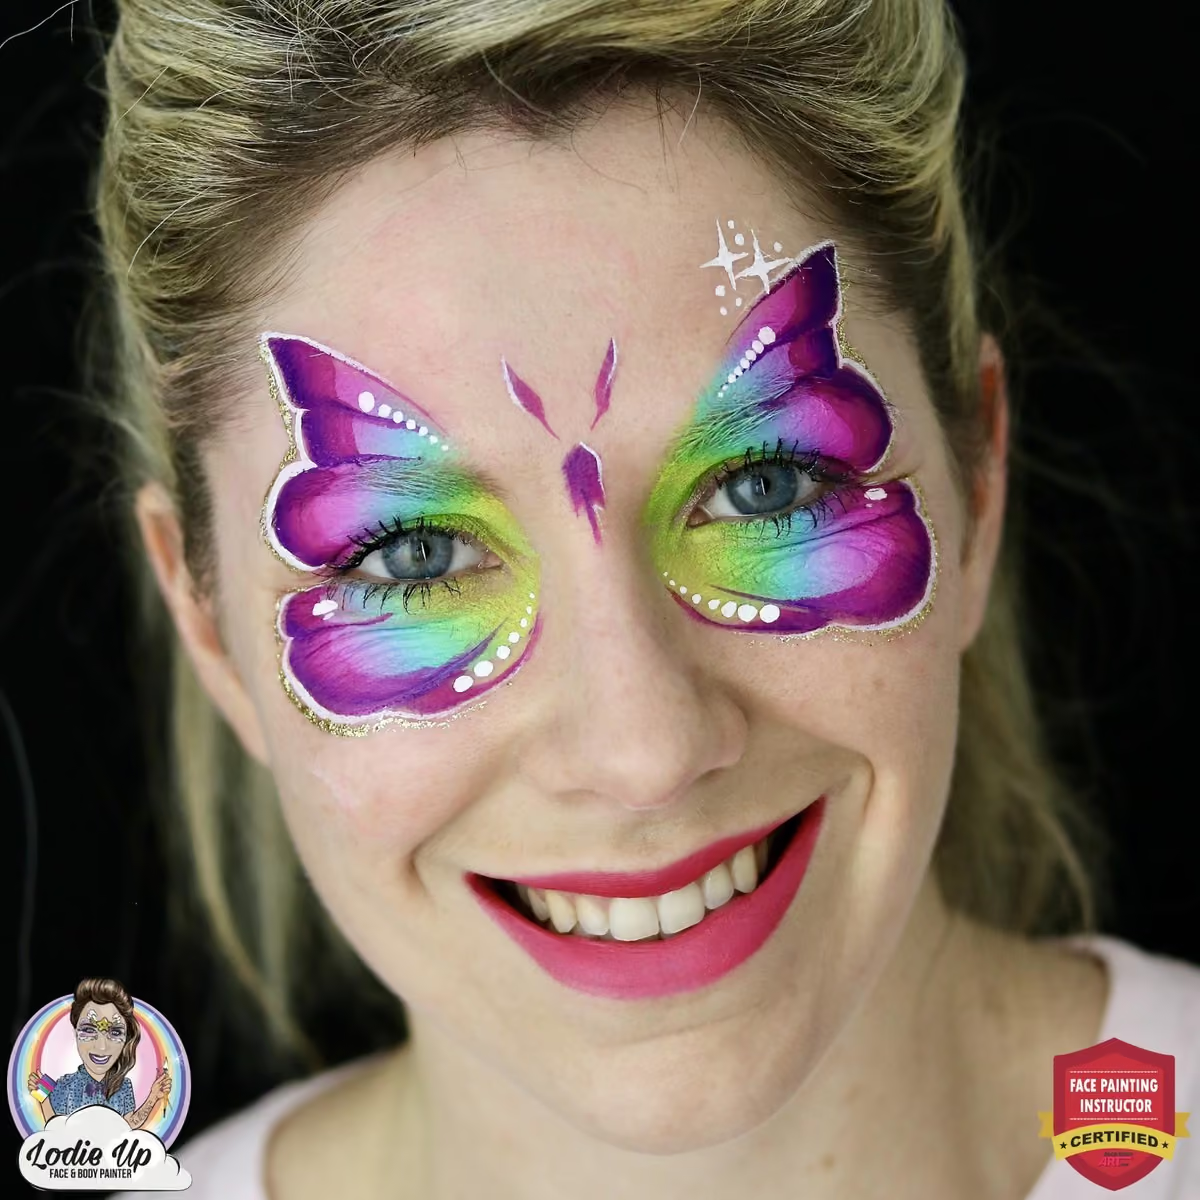
One stroke is a specific face painting technique where multiple colors are applied at once using a sponge or a flat brush. In this tutorial, the International Face Painting School instructor Elodie Ternois has prepared a super bright, colorful and super easy to paint butterfly face paint design for you to learn! Make sure to read this article till the very end, because there is a bonus video-review of the new Leane’s Happy Pixie Pallette. 😘

Beginner’s Butterfly Face Paint Step by Step Guide

- Leanne’s Happy Pixie — Petal Palette Fusion: Sweet Dreams Butterfly
- Paraffin White Fusion
- Petal sponge Fusion
- Angle brush “Ksenia” ⅜ by Superstar (or alternatively you can get the Paint Pal ⅜ angle brush)
- Round brush #1 by KingArt
- Liquid Bling “Brilliant Gold” Amerikan Body Art
By the way, if you are looking for the best face painting supplies, you may find it helpful checking out our specific recommendations for best paint, brushes, stencils and more! Check out our “Face Painting Supplies Guide”!
Step 1: Butterfly Face Paint Top Wings
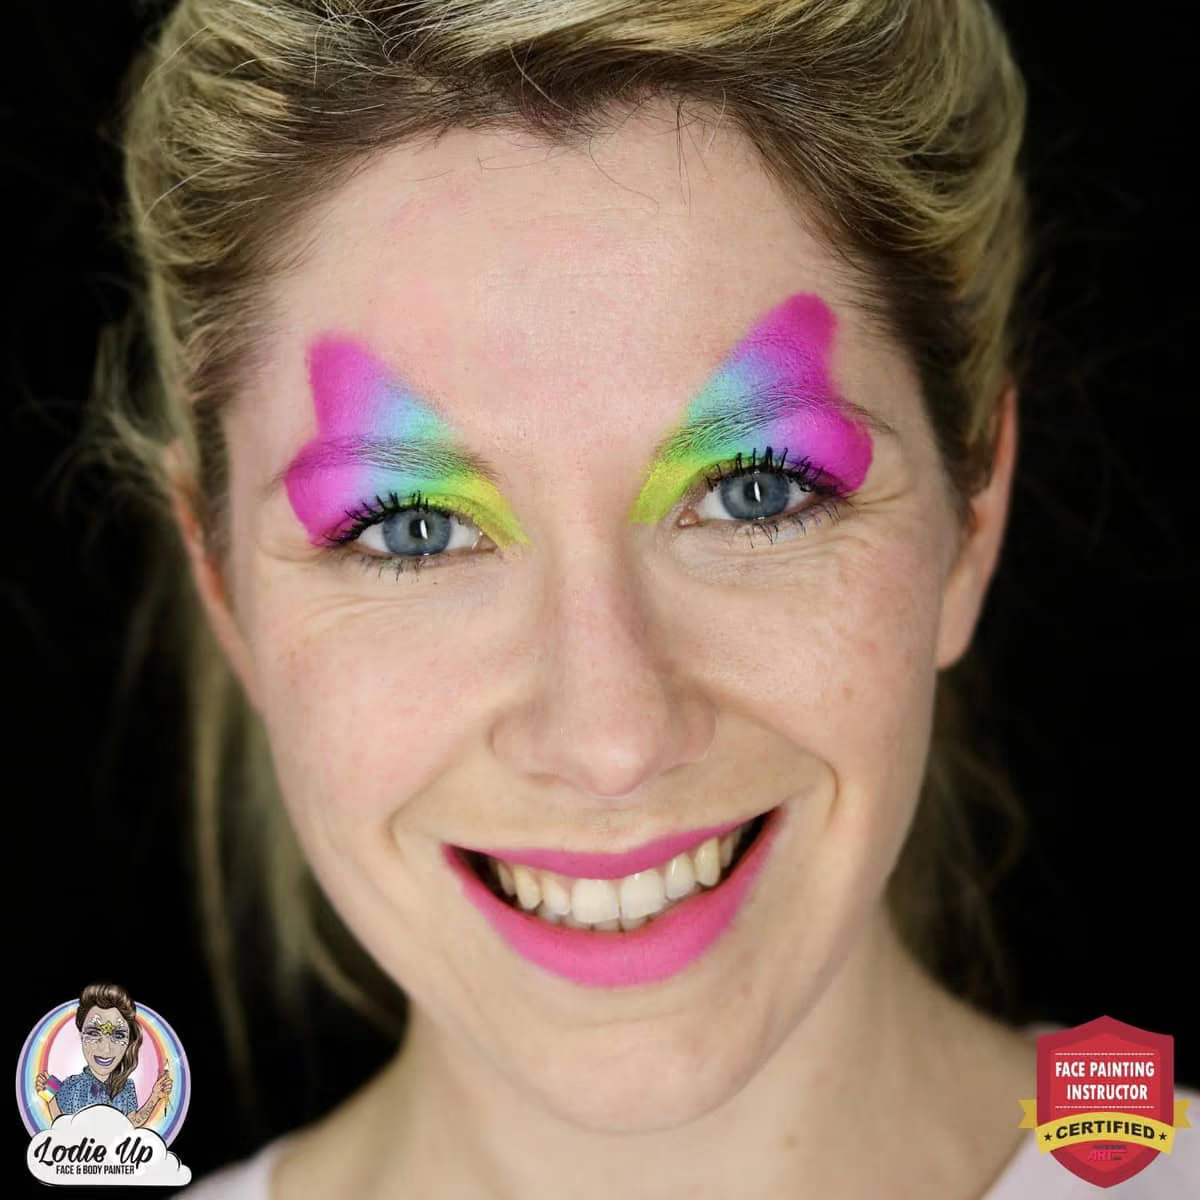
I used a petal sponge to paint the top butterfly wings. I really love this new petal sponge by Fusion because it is a little bit smaller than Paint Pal Petal sponge!
It is easier to pinch and create a small triangular shape, without going too far on the temple areas.
Pay attention to the eyebrows! Adults normally have longer eyebrows and you may have the temptation to cover the entire eyelid area and the eyebrows entirely. However, it is more important that you follow the eye-corner — nostril line (this is a line that Annabel also used in her Fancy Eye Design tutorial).
Thus, you may end up with a portion of eyebrows uncovered, yet the wings placement will elevate and open the eyes creating an elegant look, which is much more important!
Step 2: Bottom wings
Using the same sponge I created the bottom wings. And if the top ones had to be triangular with a little deepening above the eyebrow, then on the bottom we need a petal shape.
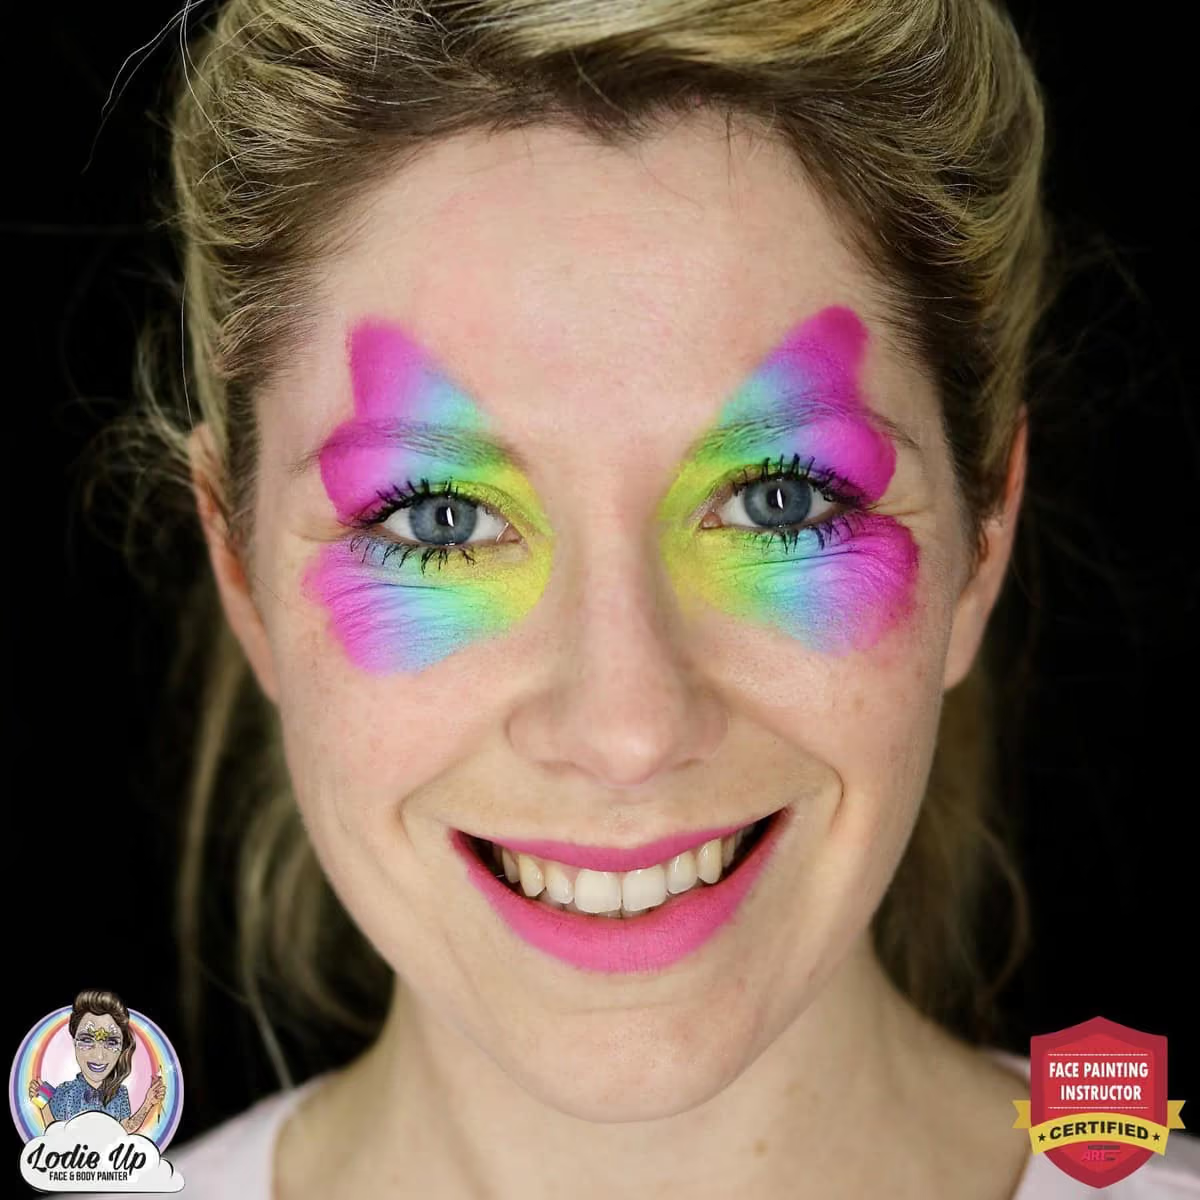
Tip: Make sure you connect the top and the bottom wings in the outer corners of the eyes, leaving a V gap between them.
Step 3: Outlining wings with one-stroke technique
Let’s outline our wings now! We will do it in one-stroke technique. I used a ⅜ angled brush to outline the top wing in three sections.
The second section must come a little deeper, to enhance even more the deepening that we’ve previously created with the sponge.
Also, pay attention to the size difference in sections. One of the main mistakes that our students make is painting all three sections of the same size.
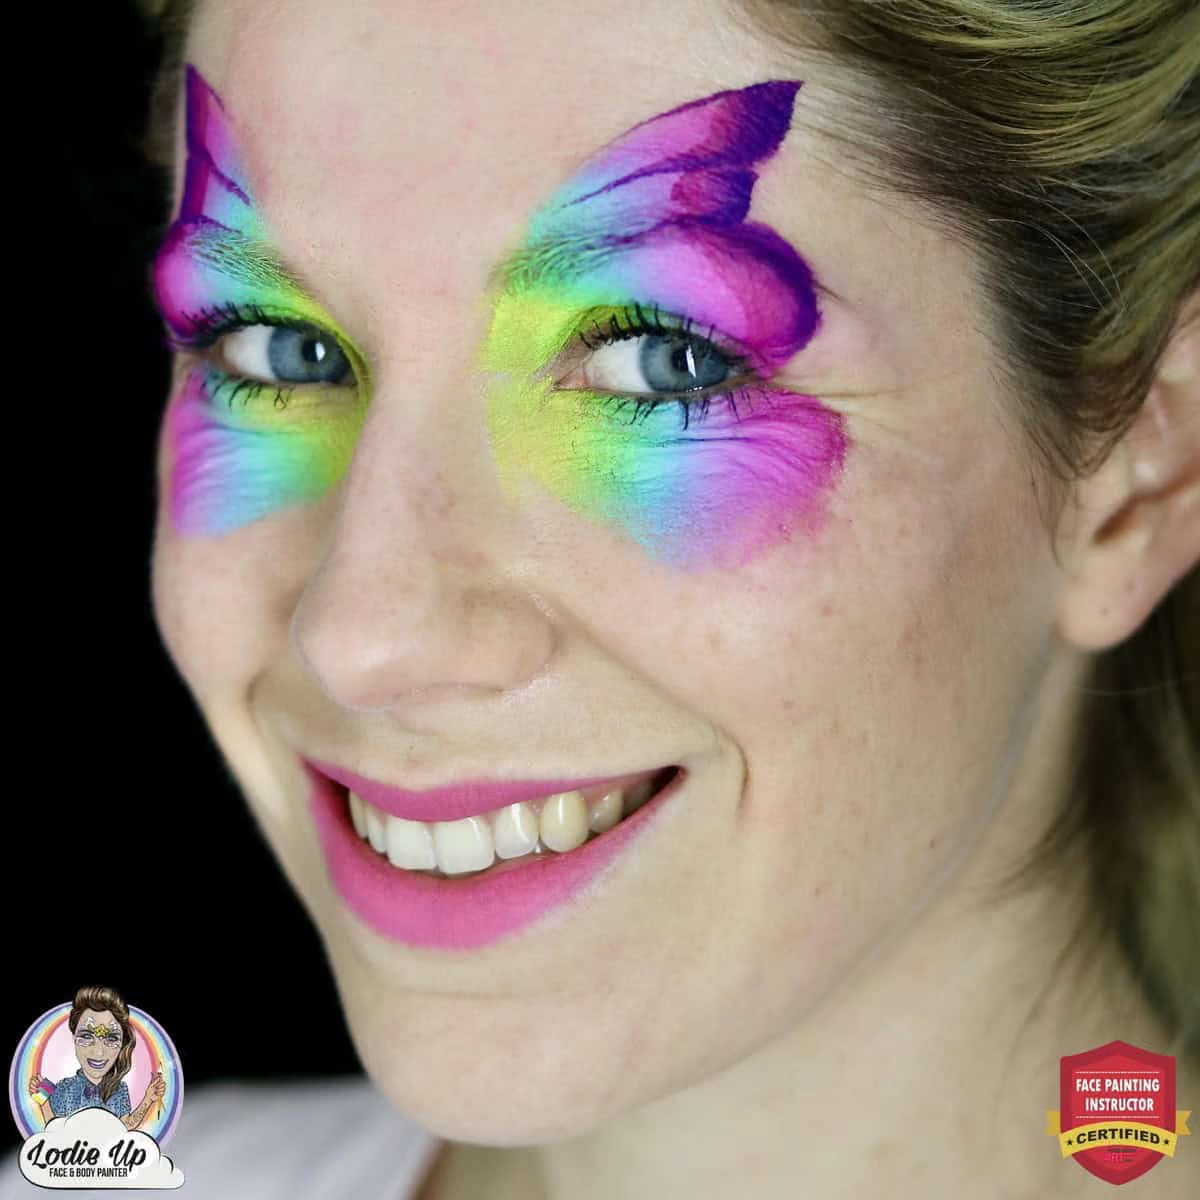
Tip: Notice that two sections are placed above the eyebrow and the last section is at the same level with the eyebrow. That’s very important! 😉
Step 4: Bottom Wings with Same Technique
Now, onto the bottom wings! Same technique and the same procedure! We need three sections of different sizes. I find that painting the middle section as the widest one creates the most eye-pleasing effect.
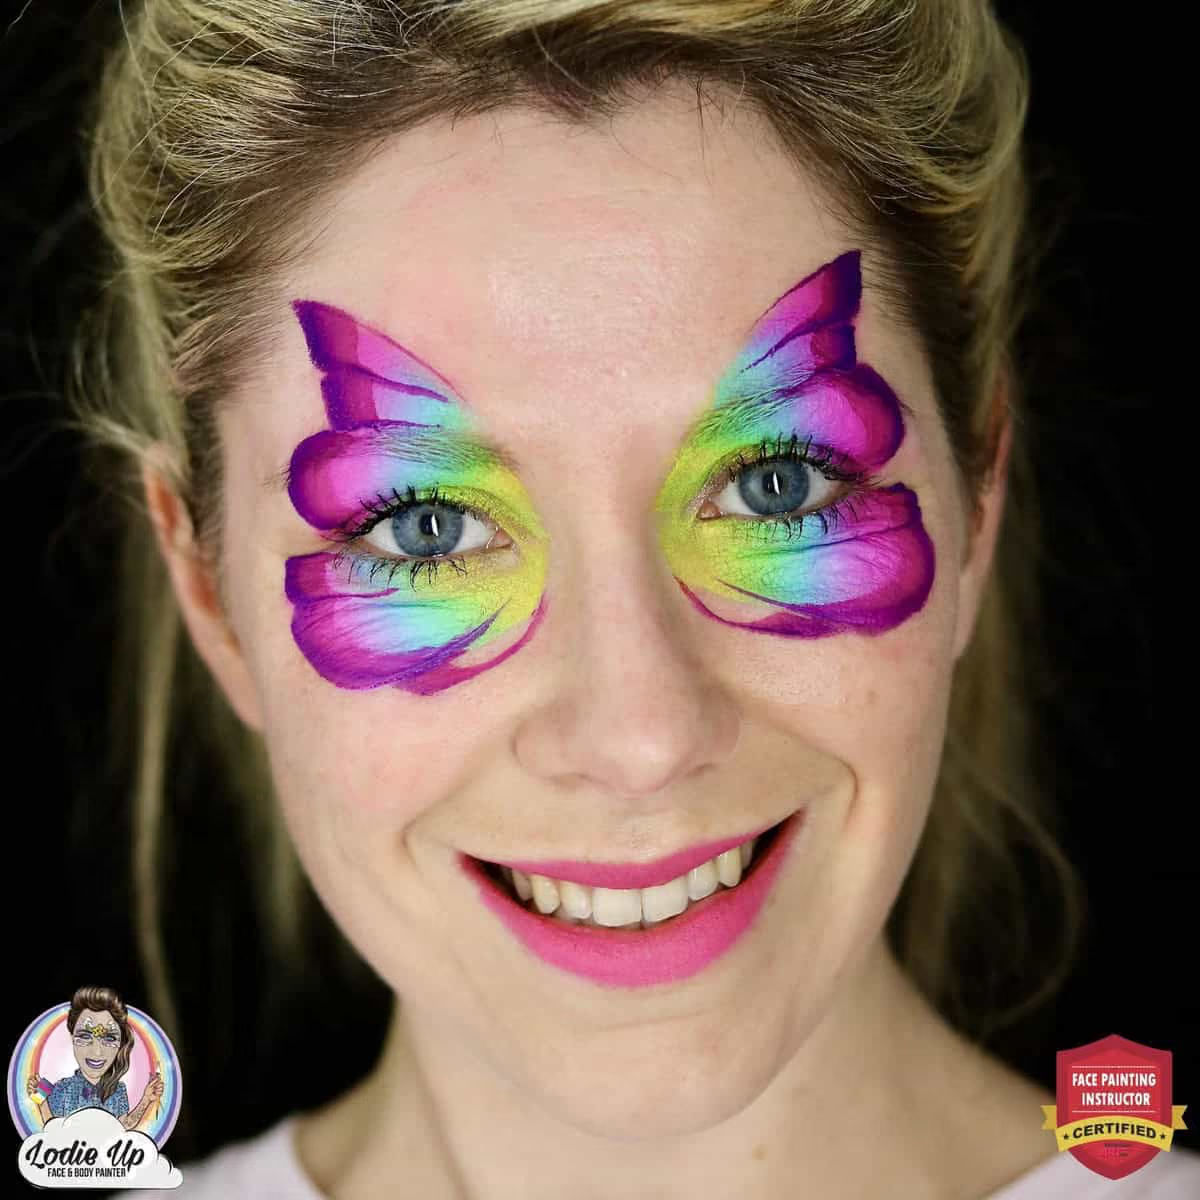
For the one stroke outline, I used the last two colors of the same palette — super handy!
Want to dig in even deeper? 😉 Learn how to polish your butterflies with our “Three Secrets to Mastering Your Butterflies” blog post!
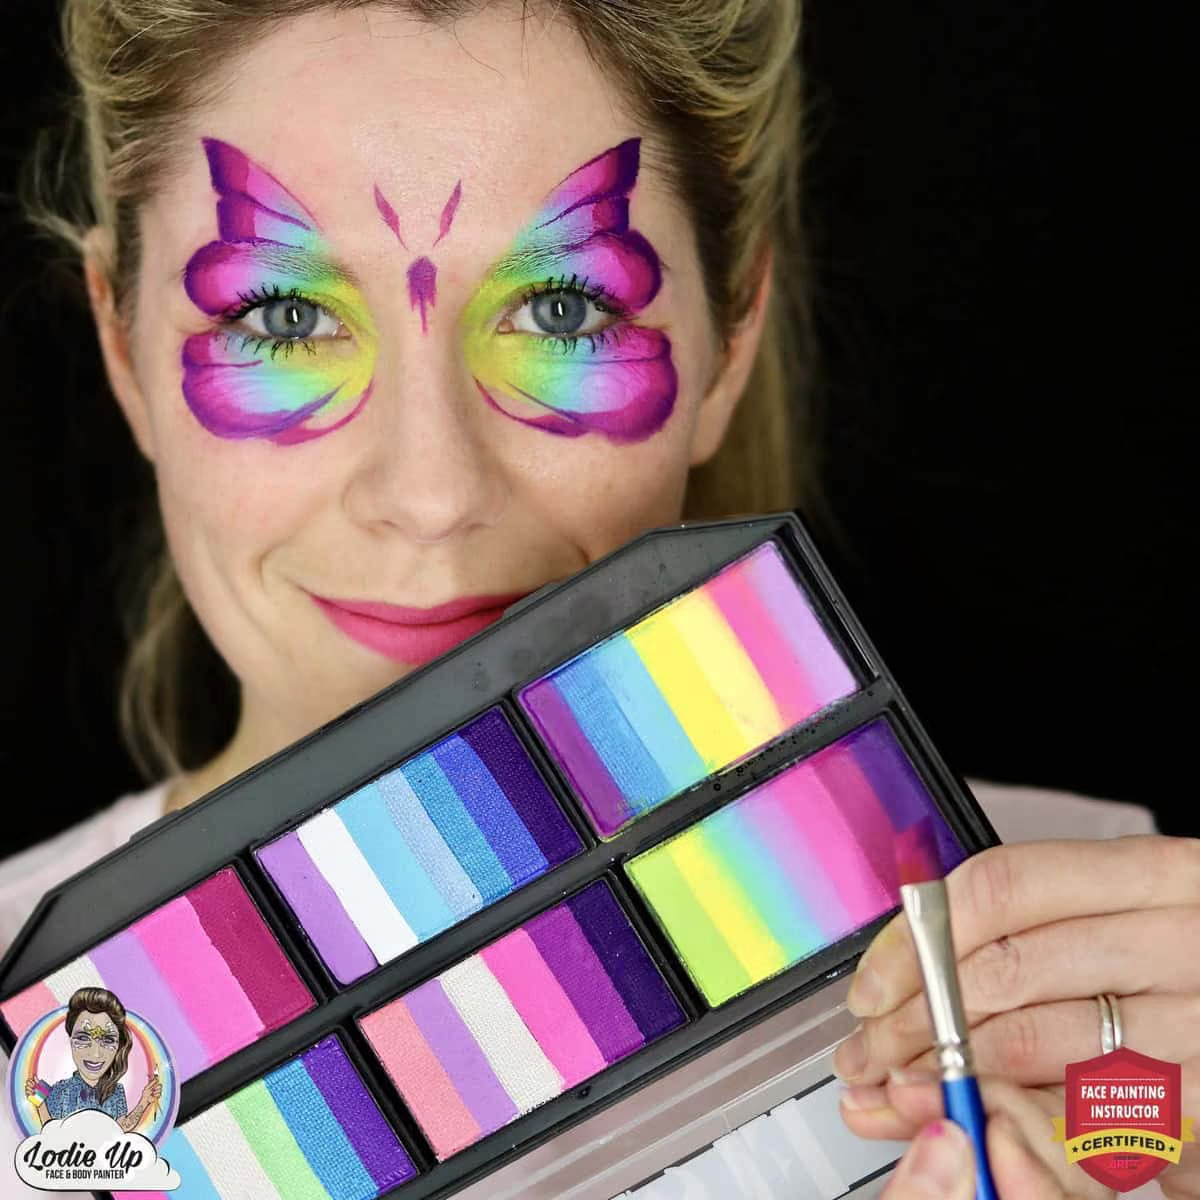
Step 5 – Complete Your Butterfly Face Paint Design
Now, you can paint the body with exactly the same brush and one-stroke as we used for the outline. Just make sure to keep it between the eyes, don’t lift it too much on the forehead.
And finally, we can add some contrast and sparkles! I used a #1 round brush and Paraffin white for the outline, dots and stars.
And that completes your simple butterfly face painting!
I then went with gold glitter gel for an extra outline, but that’s an optional step ;).
Check out my additional explanations here and I’d love to see you attempt at this butterfly in the comments!
Are you a newbie in the face painting world?Check out our “Ultimate Face painting guide for begginers”! You need it in your life! 😍
Bonus
Last, but not least, I prepared a bonus-video for you where I’ve tested all of the color combinations from the new Petal Palette | Leanne’s Happy Pixie by Fusion. I am seriously in love with it and I hope my review helps you see how yummy are these colors and how versatile is this new product!

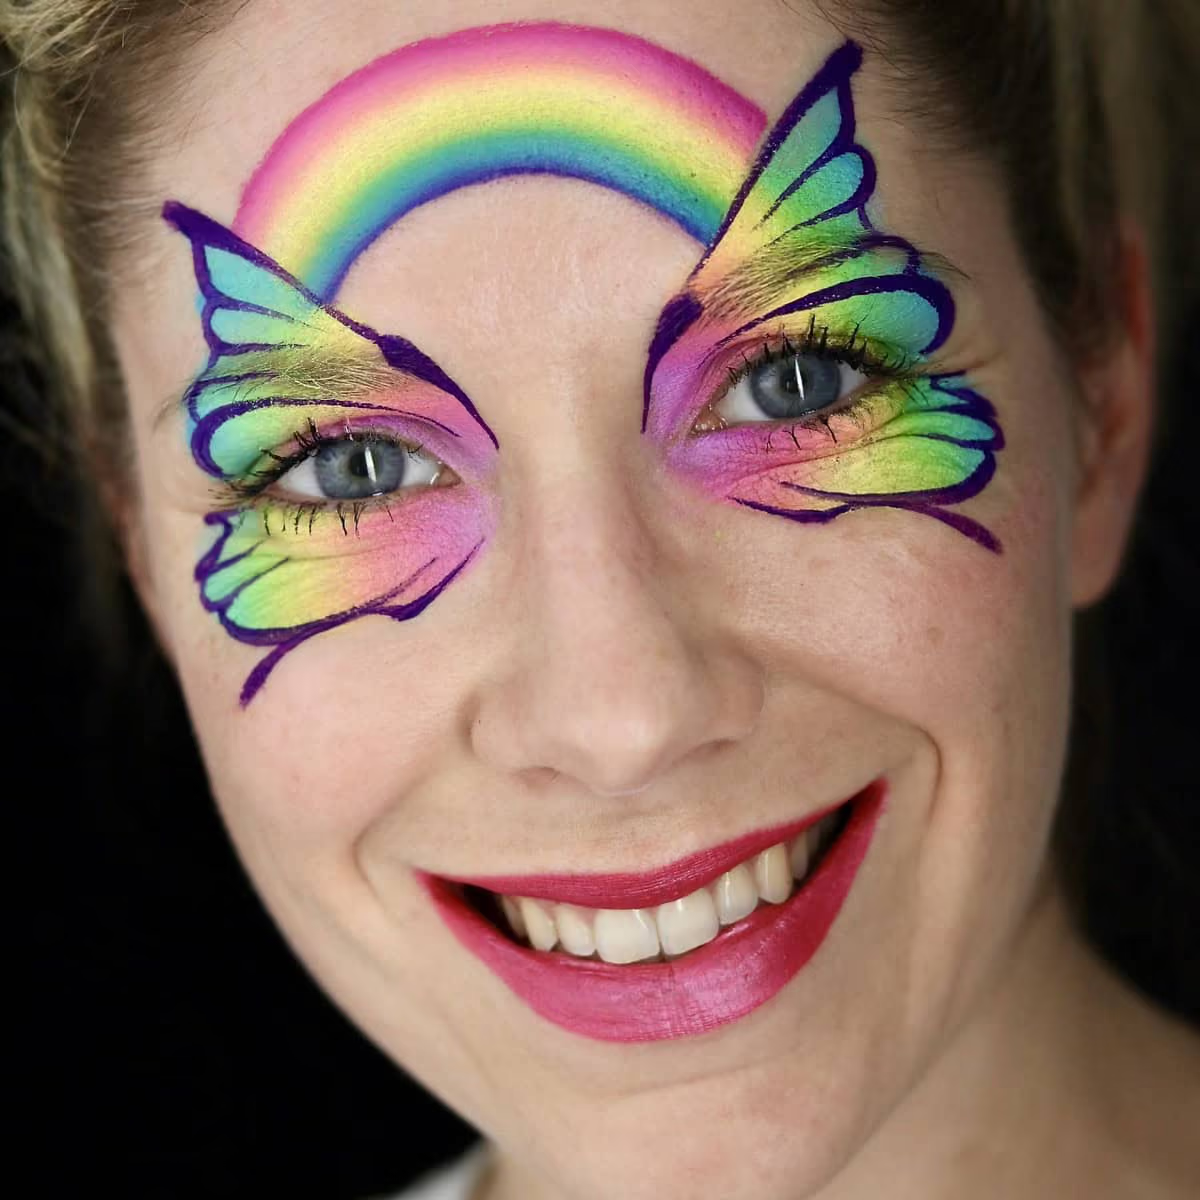
Colorful Rainbow Butterfly Face Paint Idea with Tutorial
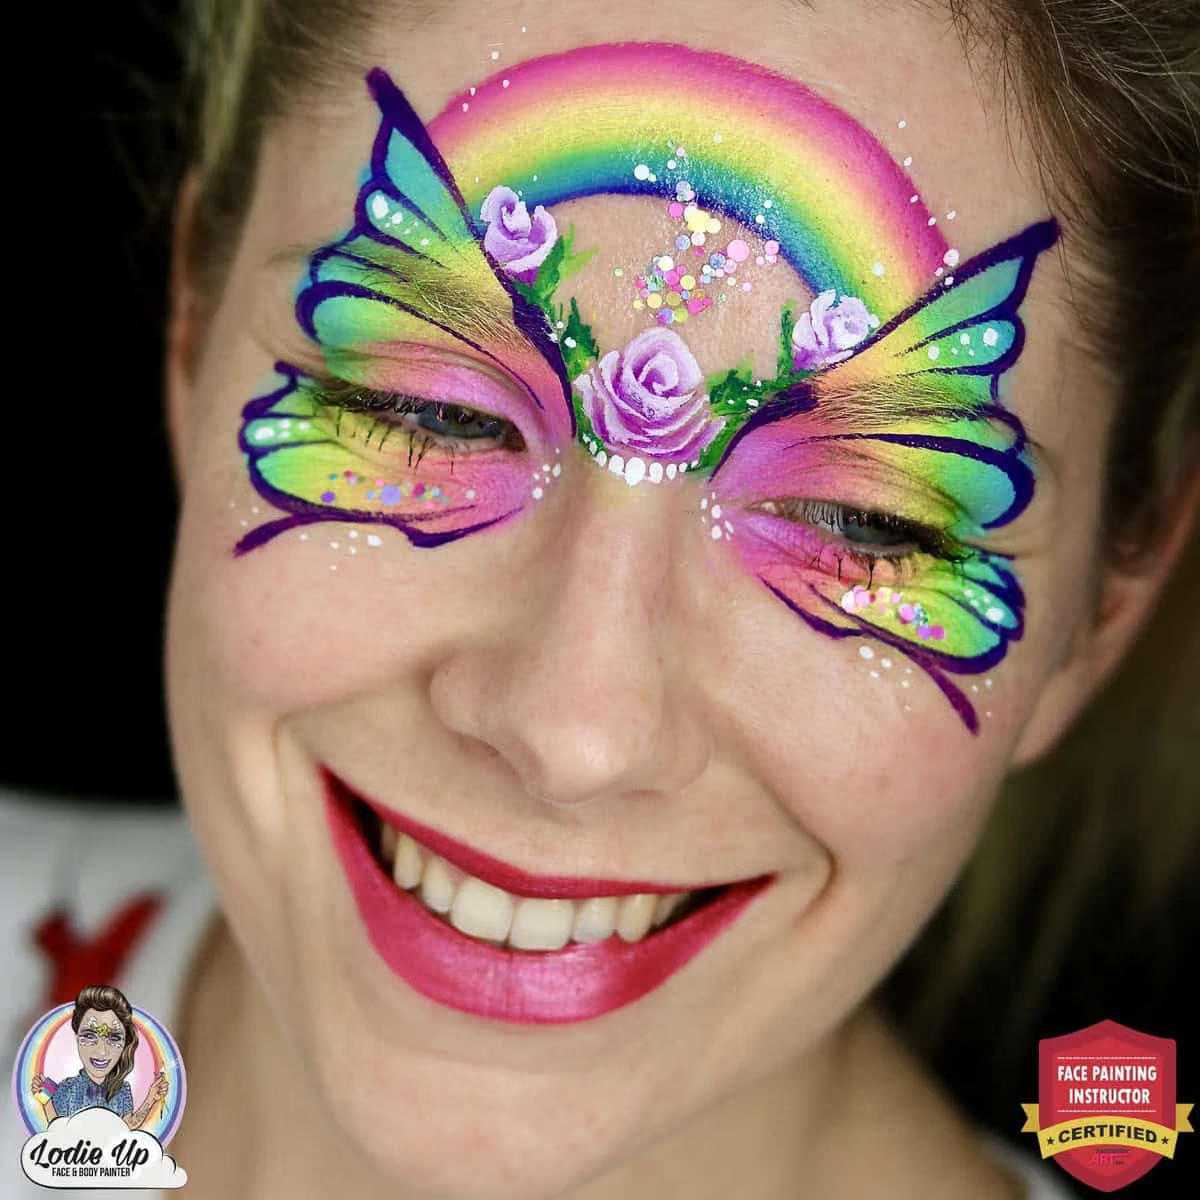
Rainbows, butterflies, flowers and lots of sparkles! What else a little girl can dream of? Check out our new tutorial, prepared by the super talented International Face Painting School instructor — Elodies Ternois.
Prefer a non-rainbow butterfly? See our simple butterfly face paint design.
- Leanne’s Happy Pixie Petal Palette by Fusion: Rainbow Unicorn combo
- Leanne’s Pretty Rainbow Spectrum Palette by Fusion: Rainbow Magic split-cake (for the rainbow)
- Leanne’s Pretty Rainbow Spectrum Palette by Fusion: Gypsy Rose (for roses) and Secret Garden (for leaves)
- Prime Deep Purple Fusion
- Paraffin White Fusion
- Petal sponge by Fusion
- Round brush #3 by KingArt
- Flat brush ¾ Stroke by Bolt
- Angle Brush “Ksenia” ⅜ Superstar (or alternatively you can get the Paint Pal ⅜ angle brush)
- Lodiepop by Elodie Ternois
By the way, if you are looking for the best face painting supplies, you may find it helpful checking out our specific recommendations for best paint, brushes, stencils and more!
Check out our “Face Painting Supplies Guide”!
Step 1: The sponged base
If you have already followed my first “One Stroke Butterfly” tutorial, you can see that I am using the same technique here — loading my petal sponge with a color combination and then sponging on the wings base.
This time I used the Rainbow Unicorn split-cake combo from the new sponge palette.
We’re keeping in mind that the top wings must be triangular and the bottom wings — of a petal shape.
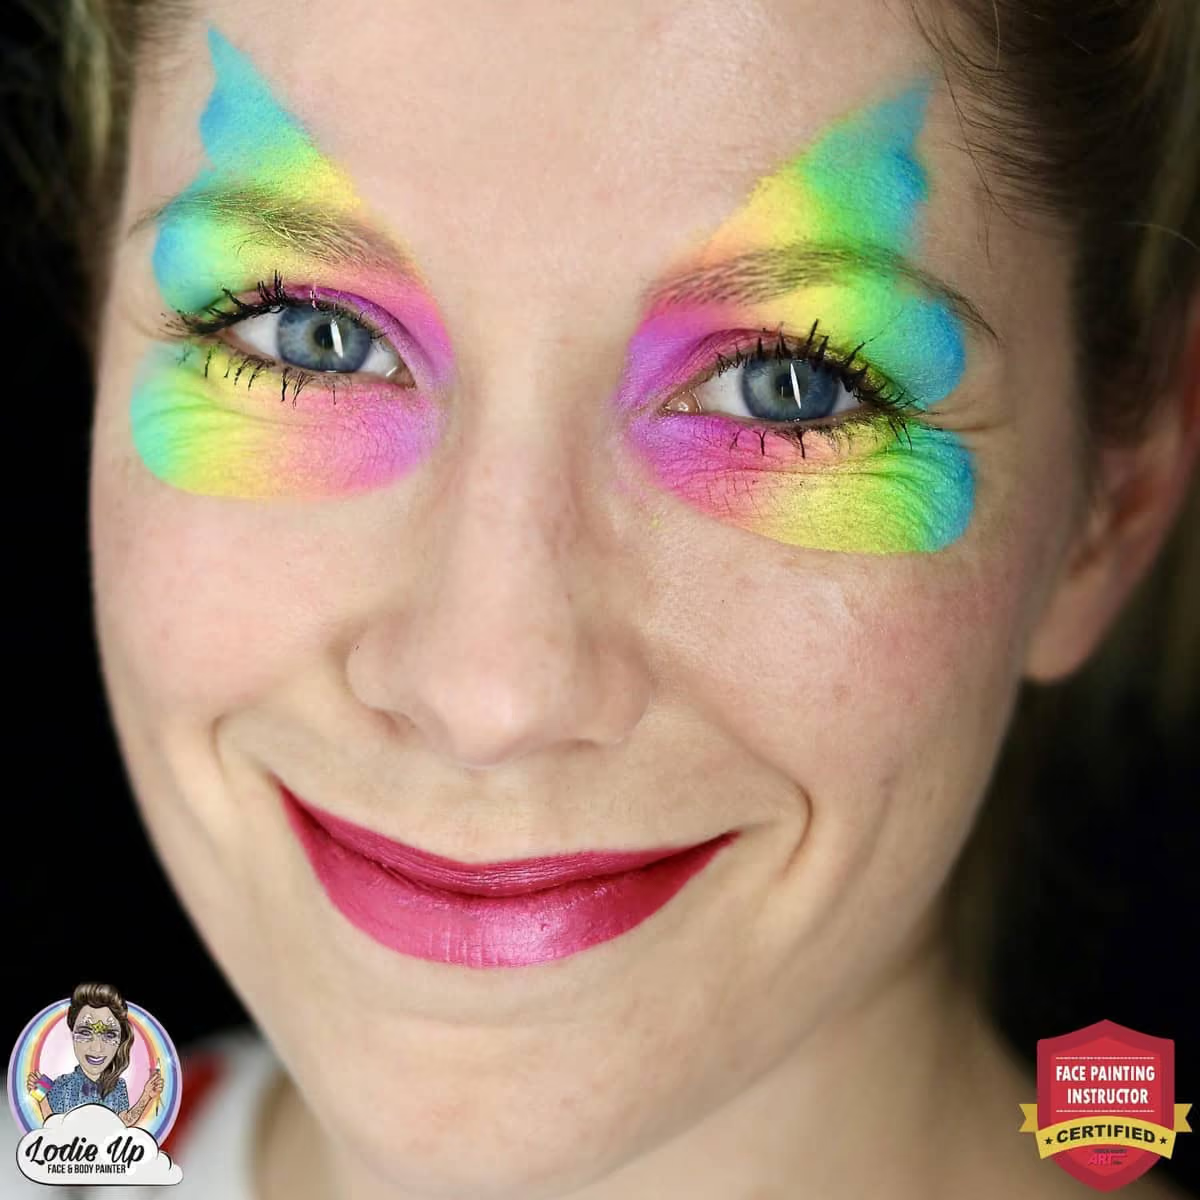
Tip: Use wet wipes to clean the edges and obtain a clean and symmetrical shape.
Step 2: The rainbow
Next, I am painting the rainbow using my Flat brush ¾ Stroke by Bolt and Leanne’s Pretty Rainbow Spectrum Palette by Fusion: Rainbow Magic split-cake.
It is essential that you get a very well curved and rounded shape! This will make your design look elegant and flowing!
I am using the outer corners of my eyes as a reference and imagine that the magenta color would start from the focal points in the outer corners of my eyes.
Make sure your paint is of a very creamy consistency to obtain the most vibrant colors!
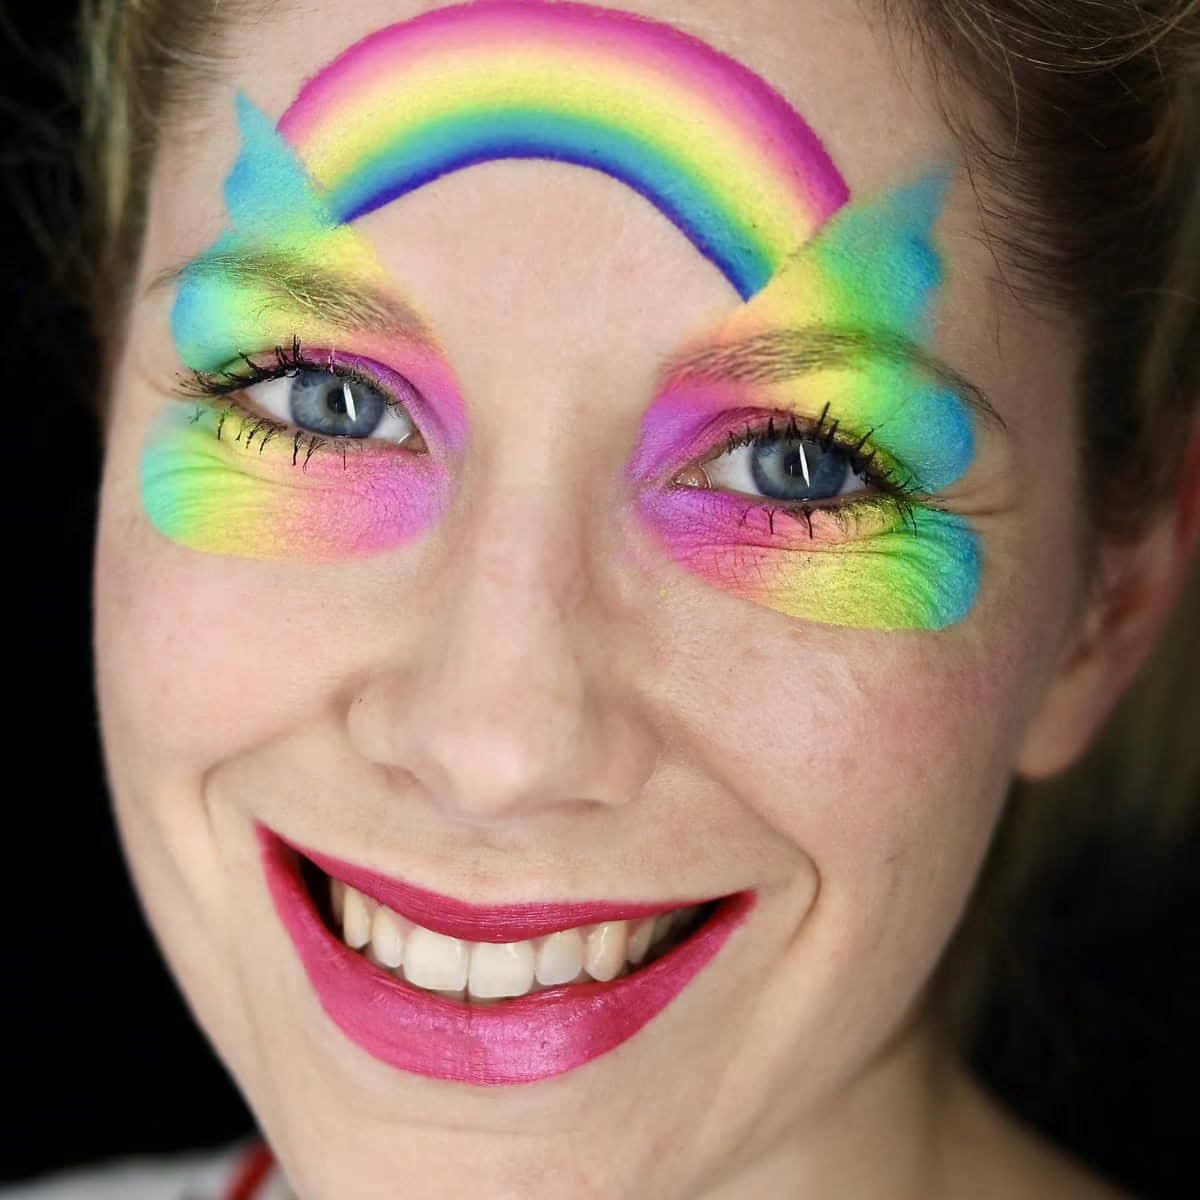
Tip: Check out our “Top 7 tips for vibrant designs in face painting” blog post for more advice!
Step 3: Let’s start outlining!
I am beginning to outline my design starting from the top wings, using a #3 round brush and the same pattern that is taught at the School in our online course in the Flower Fairy design.
I find that keeping the parts above the eyebrows pointy and triangular the most pleasing way of outlining the top wings.
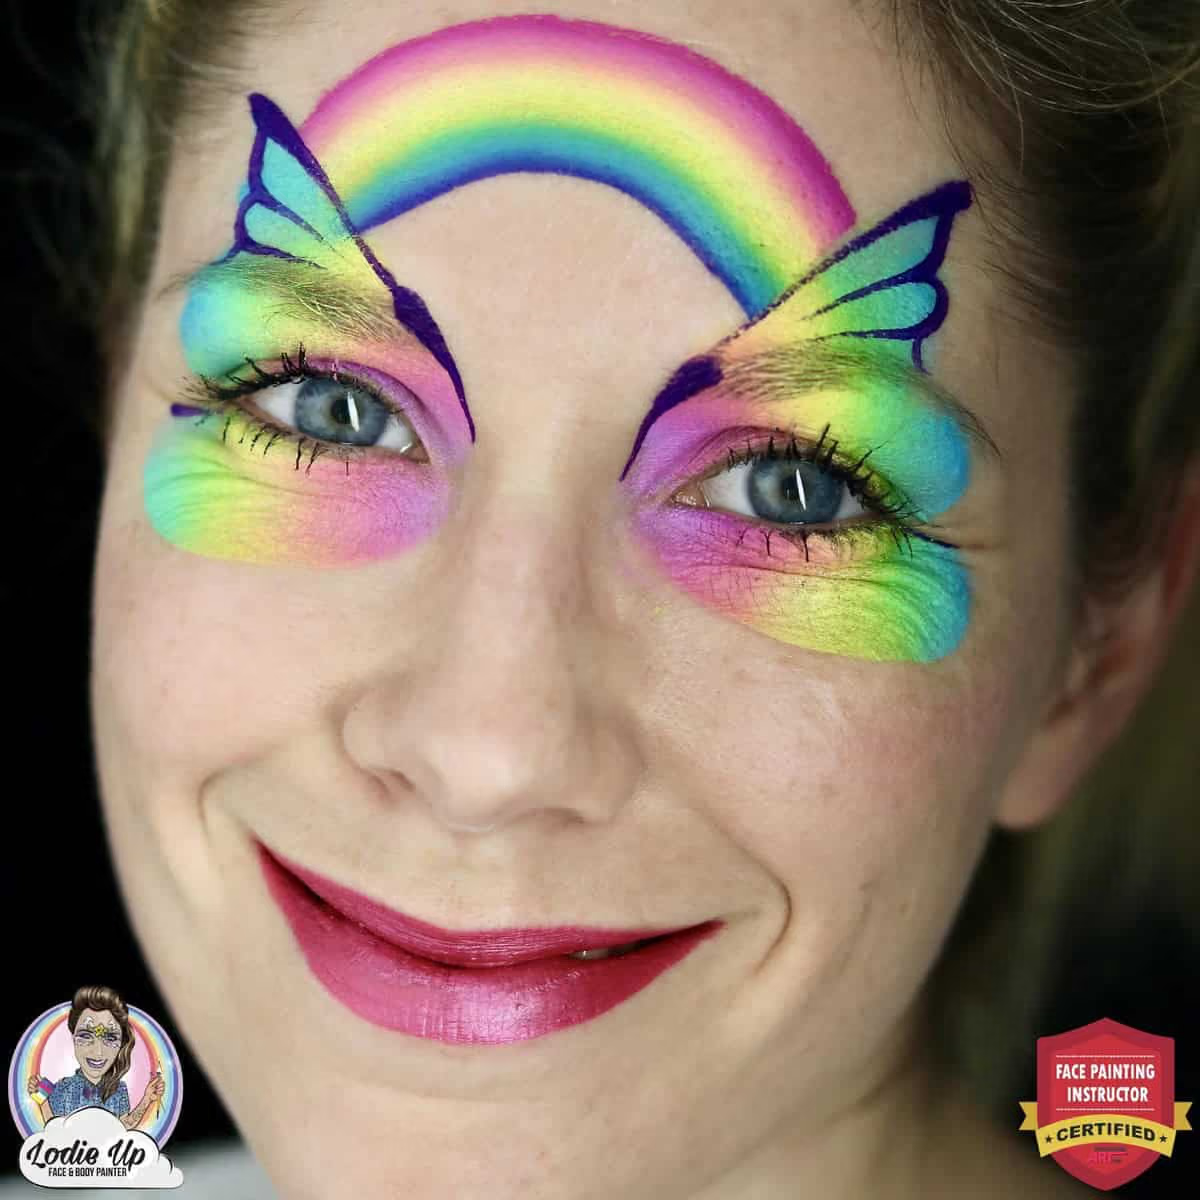
Tip: If you struggle with symmetry in your designs, follow the tips from our “7 Steps For Symmetrical Face Painting Designs”! You will master it in no time!
Step 4: The rest of the rainbow butterfly face paint outline
Outlining the eyebrows with a line that goes from the outside corners of the eyes into the inside eye corners is a great way to make the eyes look even more attractive in this design!
The bottom wings must be of a more rounded, so-called “petal” shape.
The little extensions in the cheek Focal Points help add interest and originality into this butterfly face paint design.
Not happy with your linework? Take our “Improve your linework in 3 days” workshop! It’s FREE!

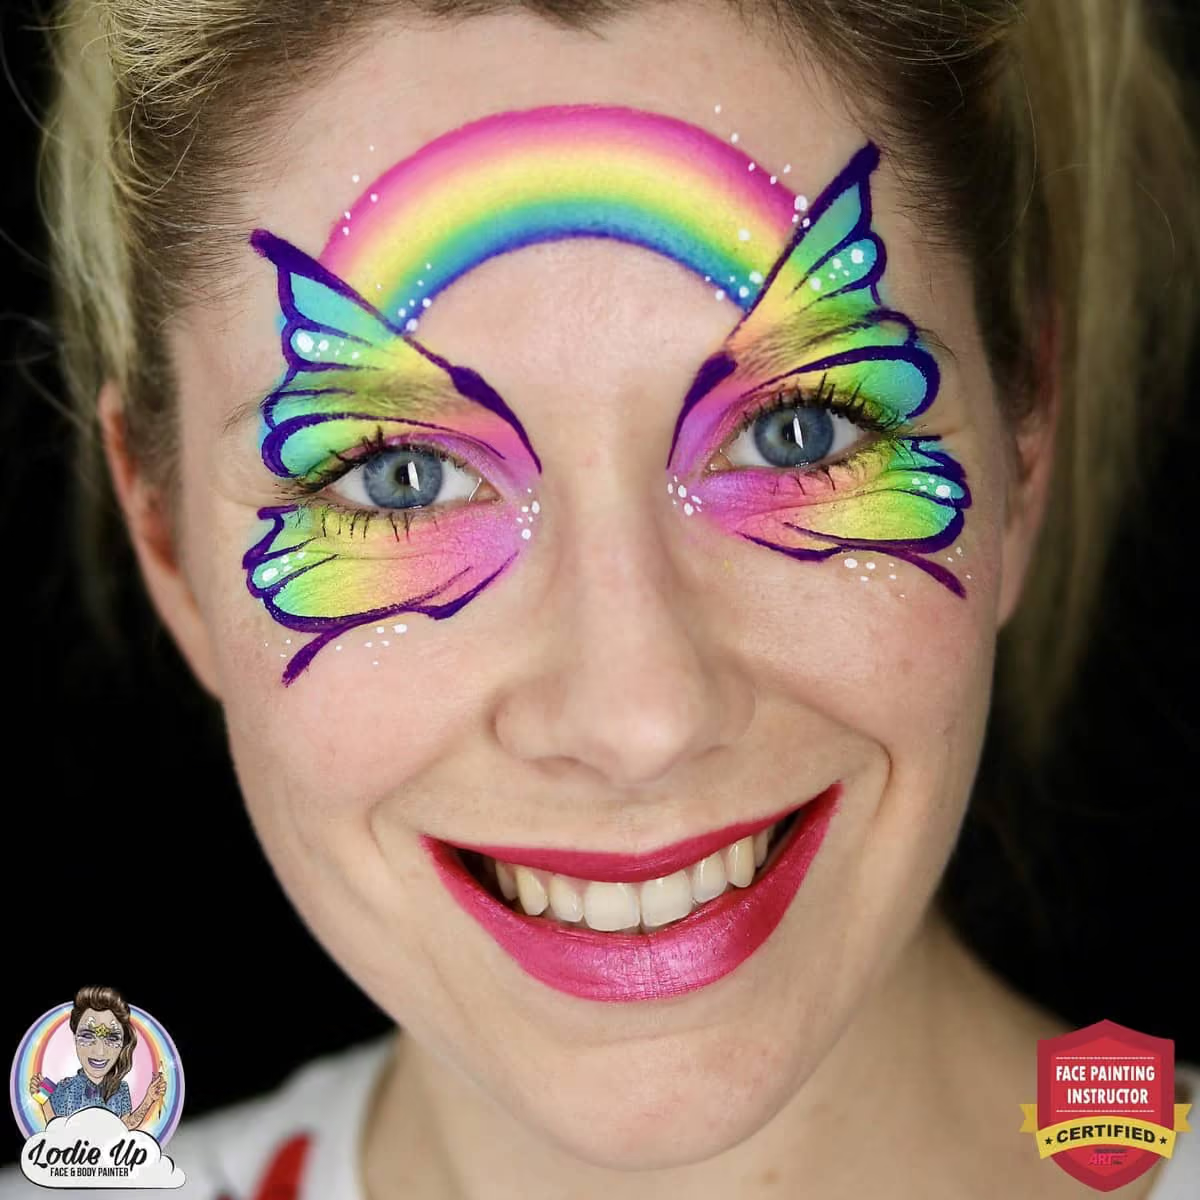
Step 5: The highlights
White dots of different sizes play the role of highlights, they add contrast, vibrance, but also, they help visually hide any asymmetrical mistakes.
Keep in mind to alternate the size of the dots in the clusters for the most impressive effect! And actually, you can stop at this stage with this design!
Or, you can move on and add some extra wow-factor to it! Let me show you how. 😘
Step 6: The roses and bling
To fill in the center of my design, I decided to paint a couple of one stroke roses.
If you aren’t familiar with the one stroke technique, then I highly suggest that you check out our “Professional Face Painting Guide” for more details about it. 😍
Last, but not least, add some colorful chunky glitter in the middle of the face and on the sides of the bottom wings and voila!
Your butterfly face paint design is ready!
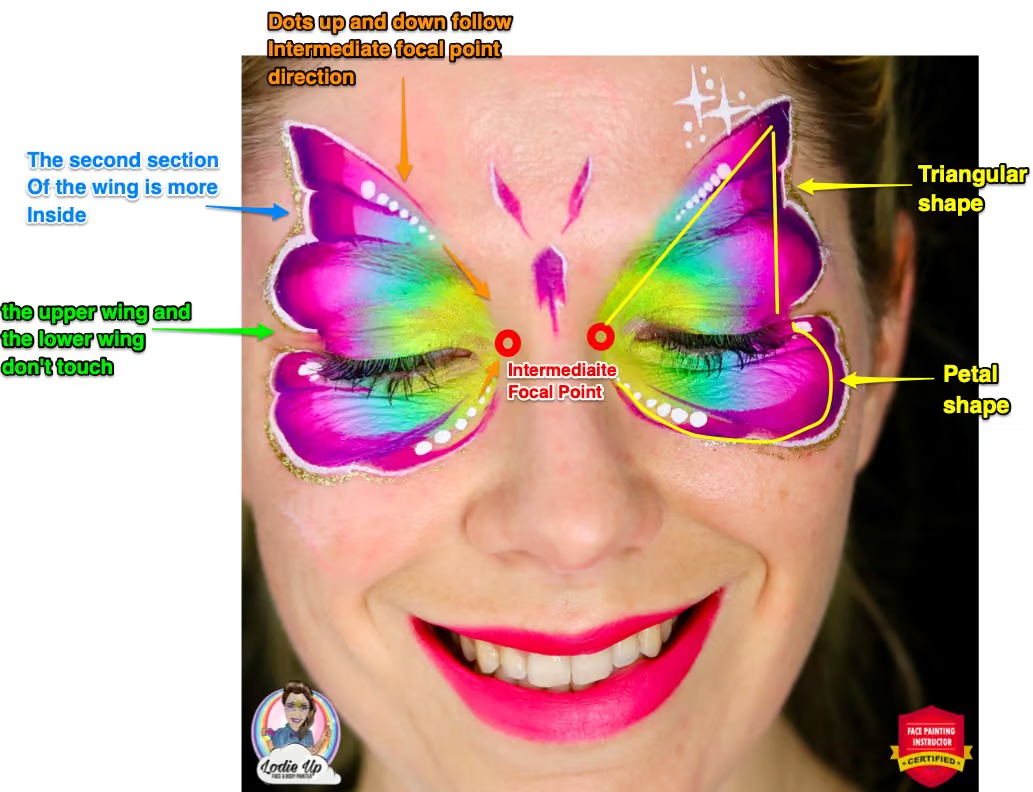
Check out my additional explanations for this design in this scheme:
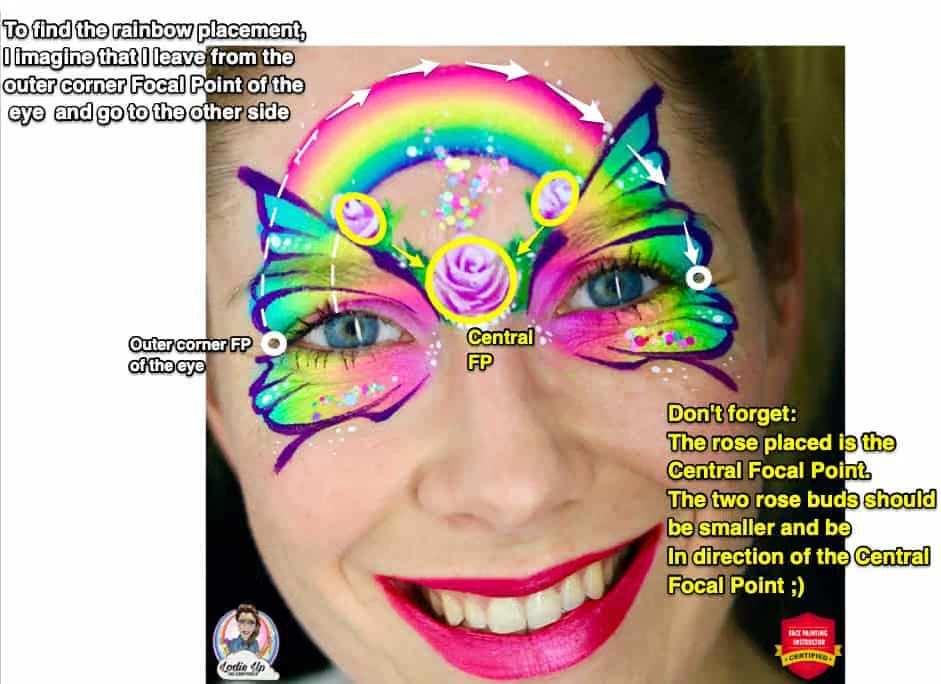
If you’re having a hard time with your one-stroke roses, you need more explanation than we can tag into the end of a tutorial. But you’re in luck! View an in-depth tutorial for one-stroke roses and follow along with video demonstration here.
Did you enjoy this tutorial? Hit “SHARE” and let your fellow face painters know about it! 👇👇👇
