
Share this post:
Easy Skull Face Paint Suitable for Newbies
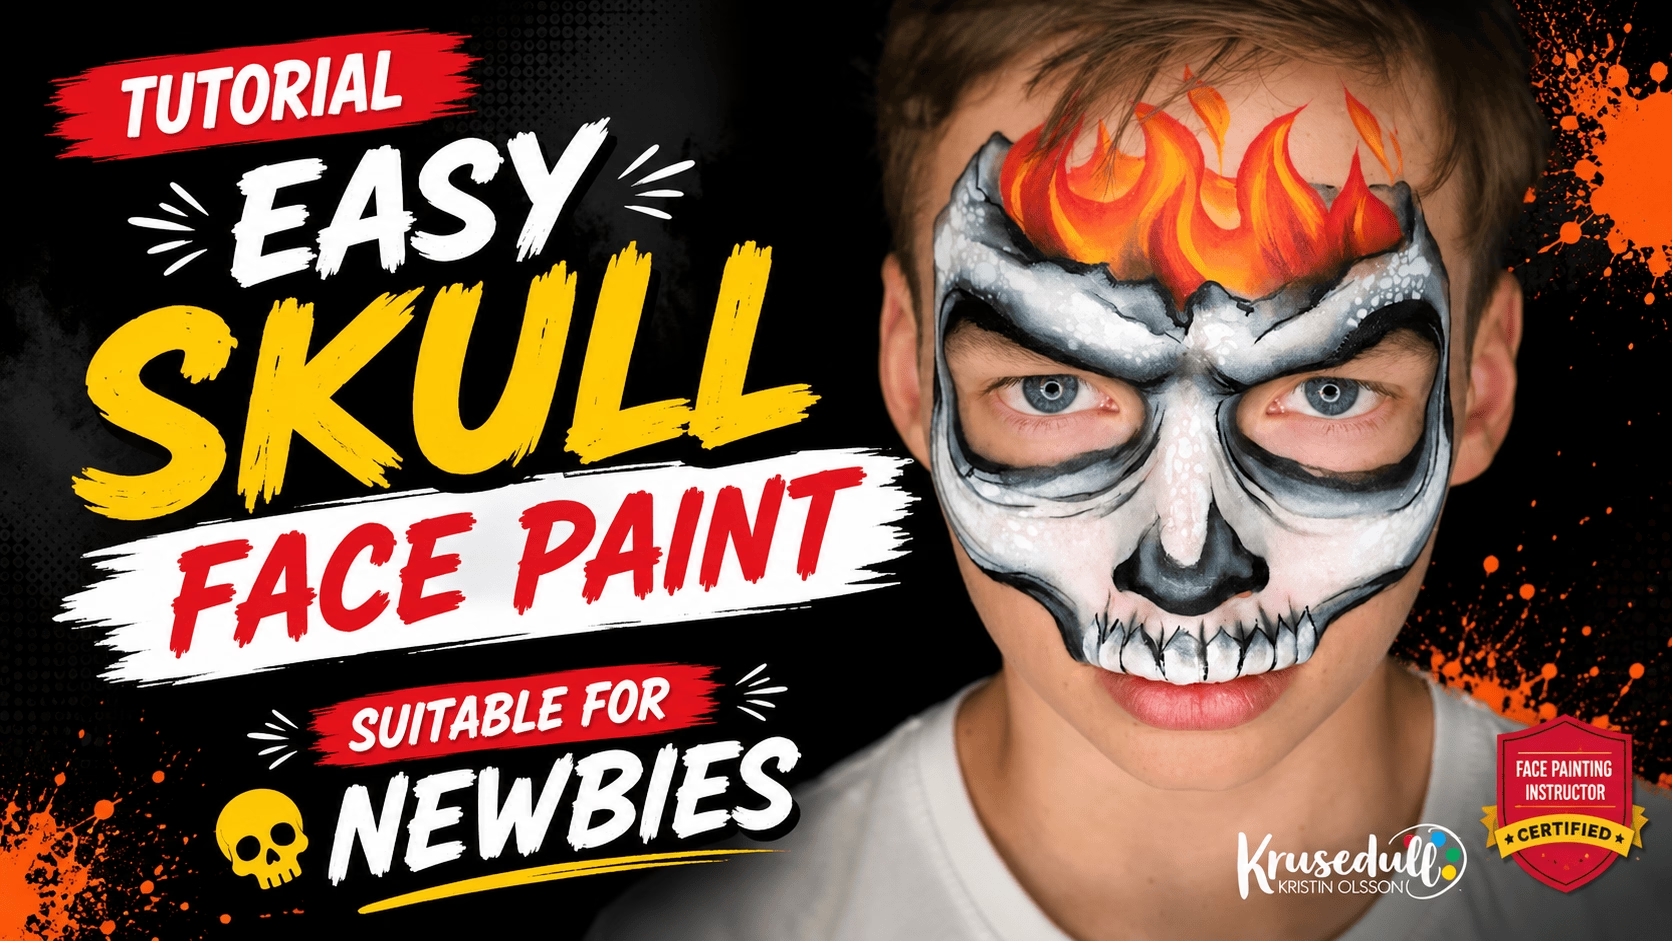
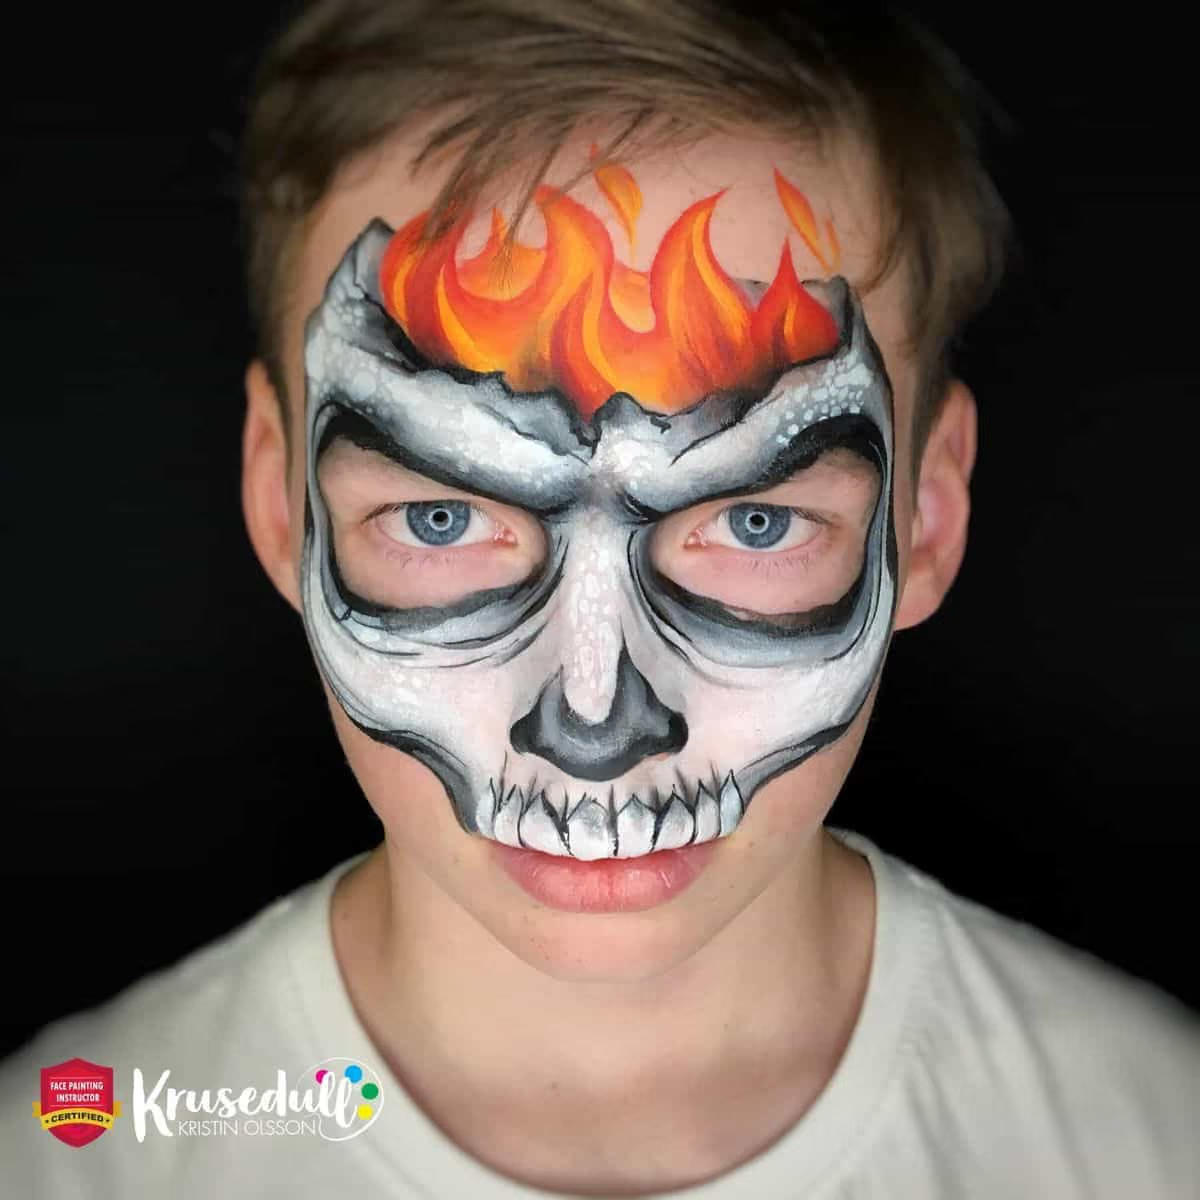
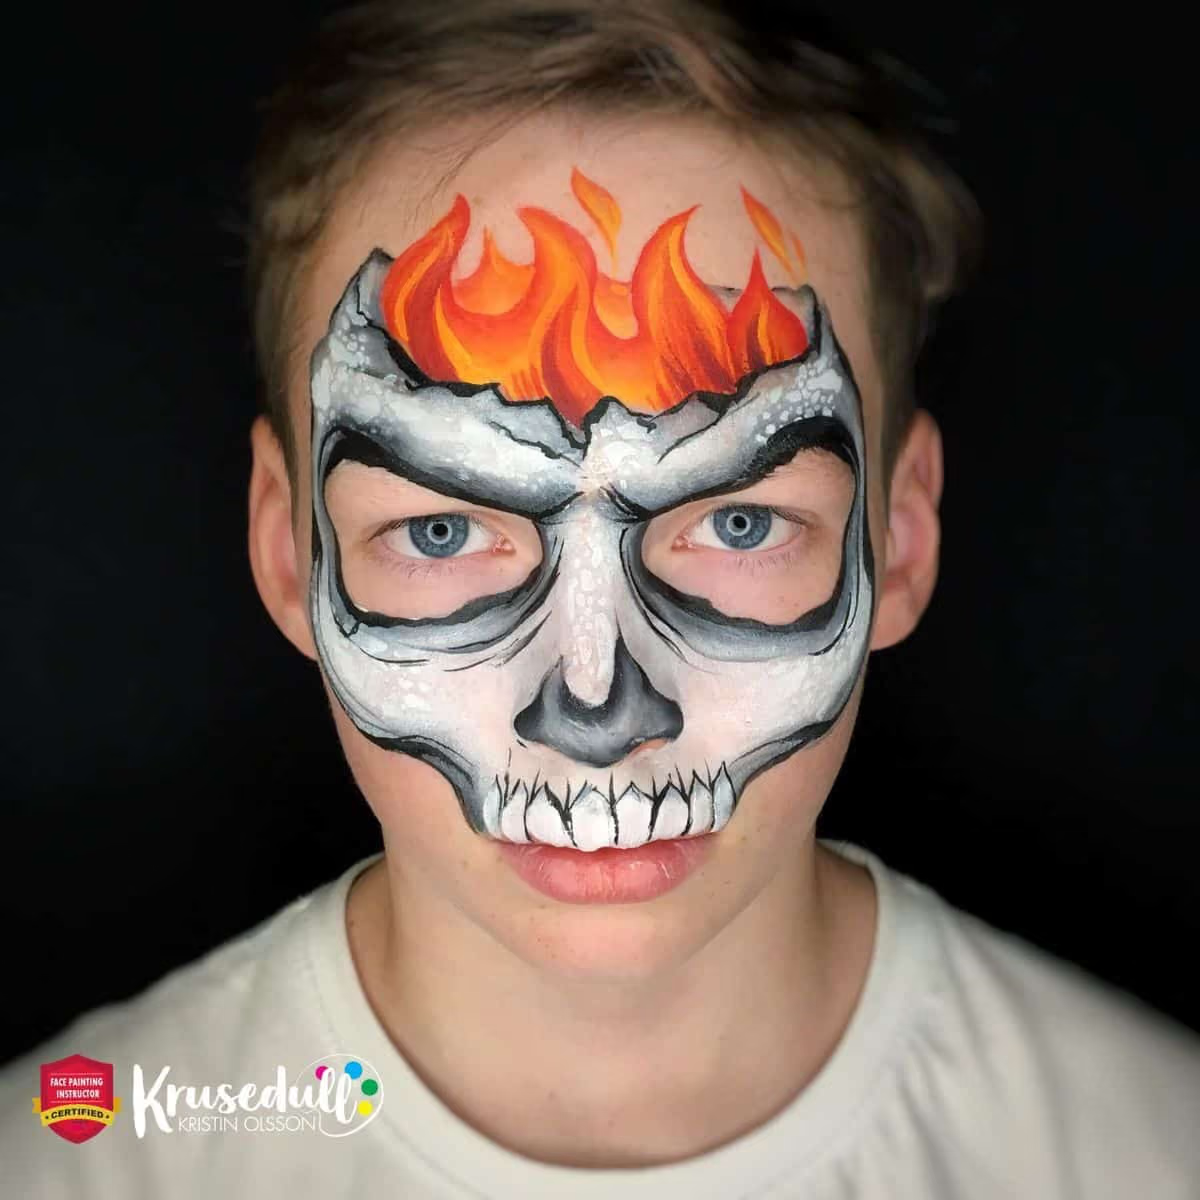
Skeleton face paint is popular all year round but the demand is certainly increasing with Halloween just around the corner! This flaming skull is super easy skeleton face paints to paint because it is mostly made in one stroke technique. And also, the absence of the paint around the eyes makes this design suitable even for the smallest children! Read to the end of this post to see a bonus reel Men’s Sugar Skull tutorial by Milena Potekhina! You won’t want to miss this design.

Confused with what tools you need to start face painting? We’ve compiled this Ultimate Face Painting SUPPLIES Guide where you can find direct links to the best face painting materials to start off like a pro!
.avif)
Easy Skull Face Paint Suitable for Newbies
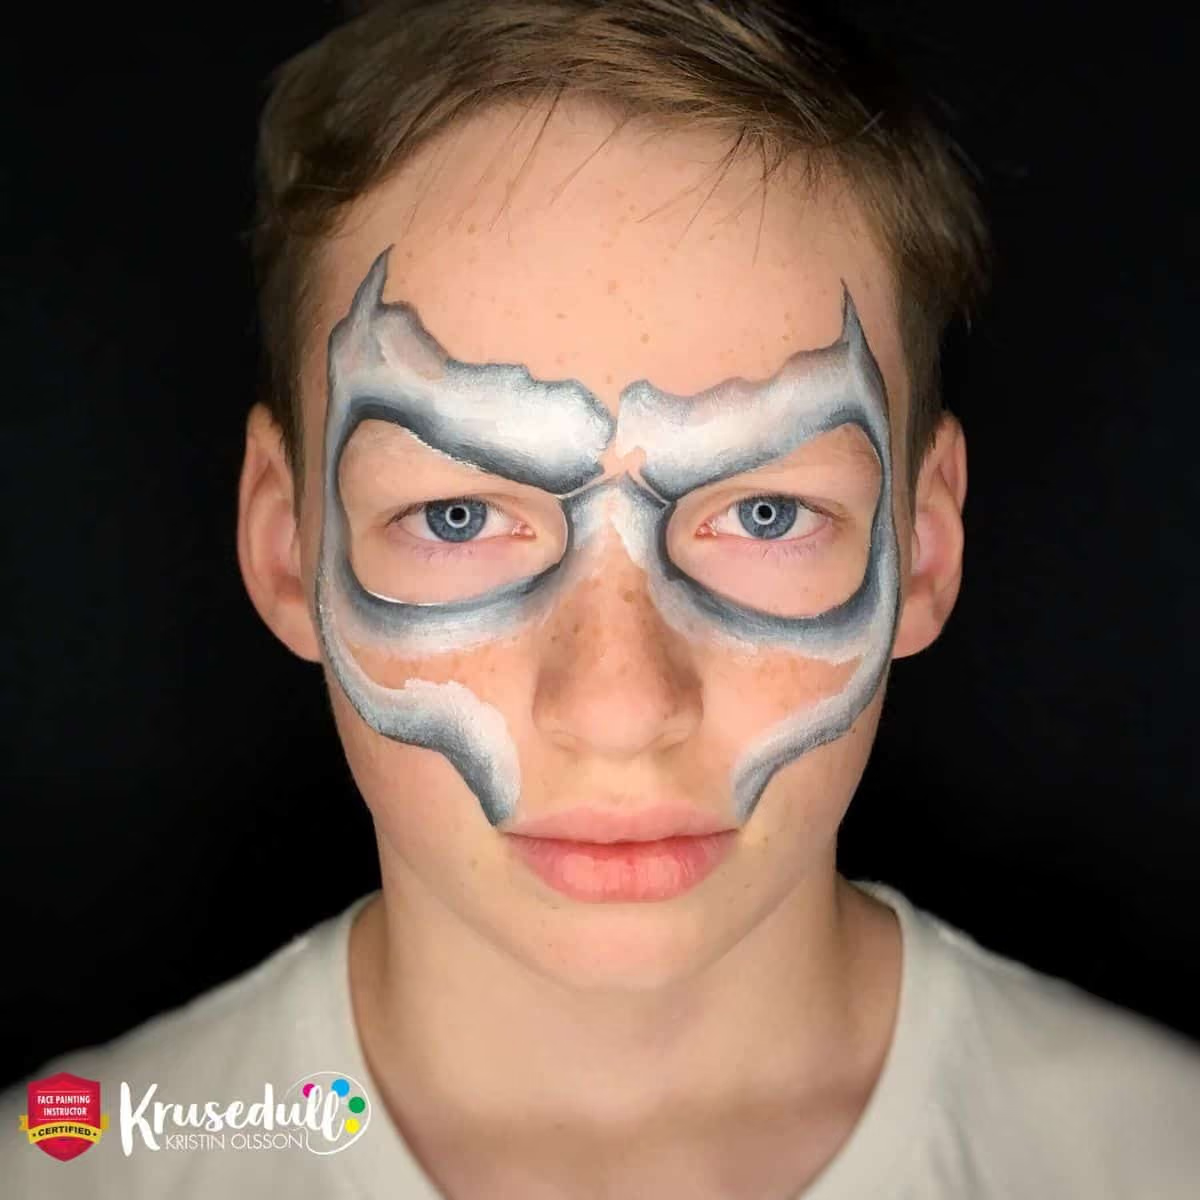
Step 1: Add Main Shape
For the main shape of this skeleton Halloween makeup, I use a black and white one stroke with a ⅝” angled brush. The split-cake I have is a homemade one consisting of white, silver and black.
If you want to buy one of your own, there is a good option from Cameleon called “swan” that I can also recommend using.
Tip: For best results, you’ll need specialized face painting brushes. And they aren’t cheap, true. Find out how to take care properly of your brushes in our Brush Care article and make them last for a lifetime!
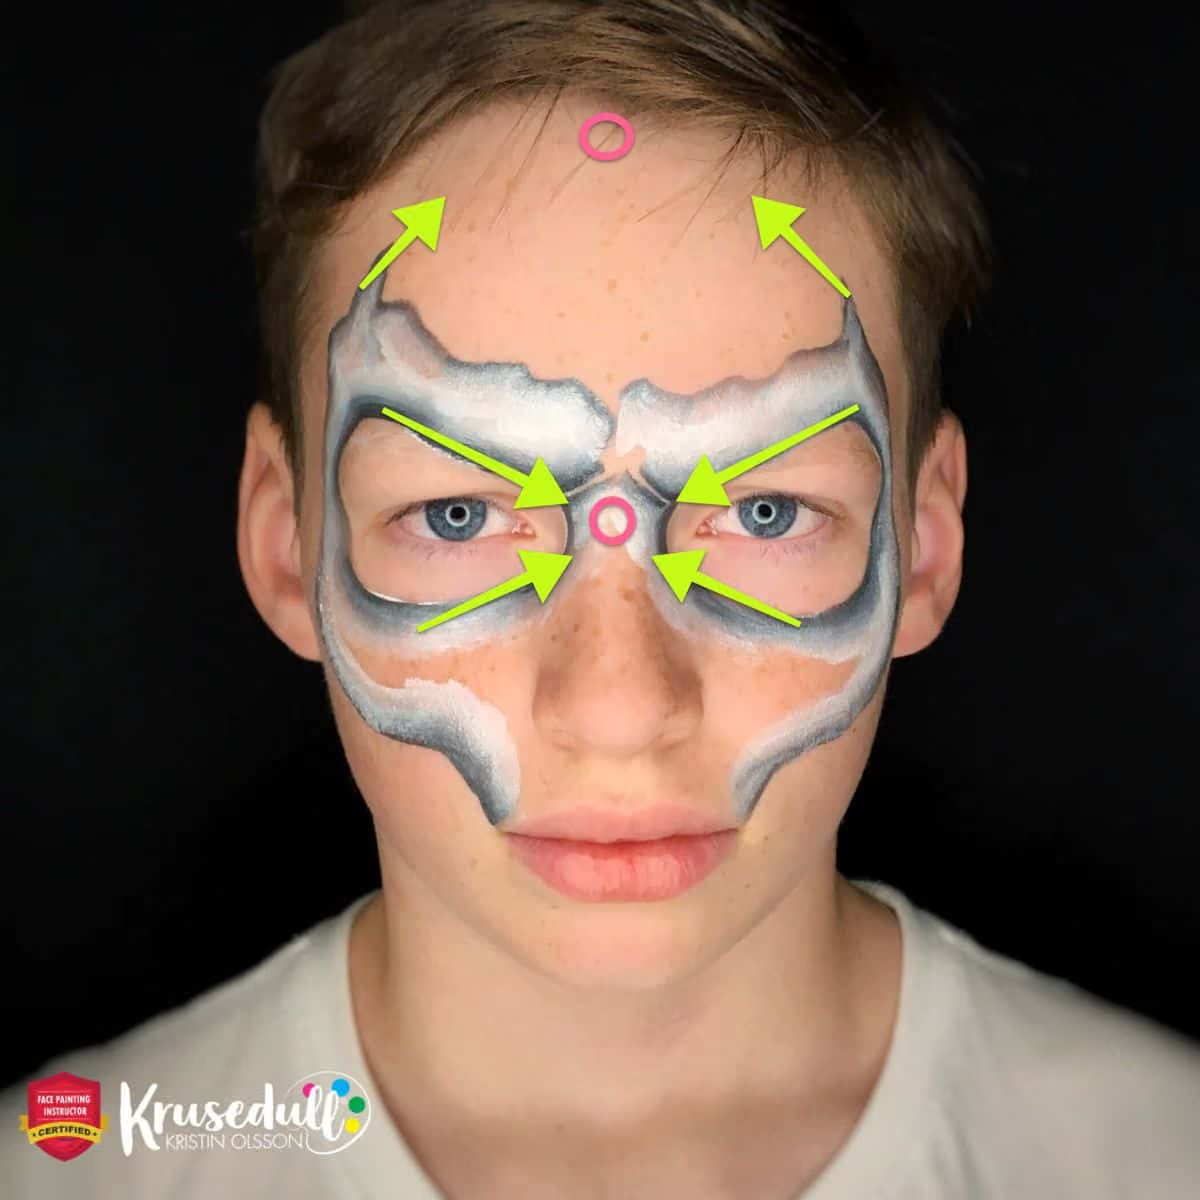
In the photo below, you can see how I shape the skull design, taking care that the lines are all flowing towards the focal points — the central FP between the eyes and top FP on the top of the forehead.
Also, when you angle the shape of the eyes like this, it automatically gives the appearance of a more sinister look.
Are you just starting out? Read the most complete Beginner’s Guide for face painters and find out how to face paint like a pro!
Step 2: Fill the White Base
I then move on to fill in the empty spaces with white. I recommend using a glycerin-based white for this step, like for example Superstar/FAB or Mehron Paradise. Not only are they easier to blend with other colors — but they also feel more comfortable on the skin.
Also, as you can see, the white is not very opaque. This comes in handy when I add some stenciled details with white paint in a later step.
You can find out more about glycerin-based paints, wax-based paint and other types of paints, as well as what they serve for and where to get them in our special Ultimate Guide on Face Paints.
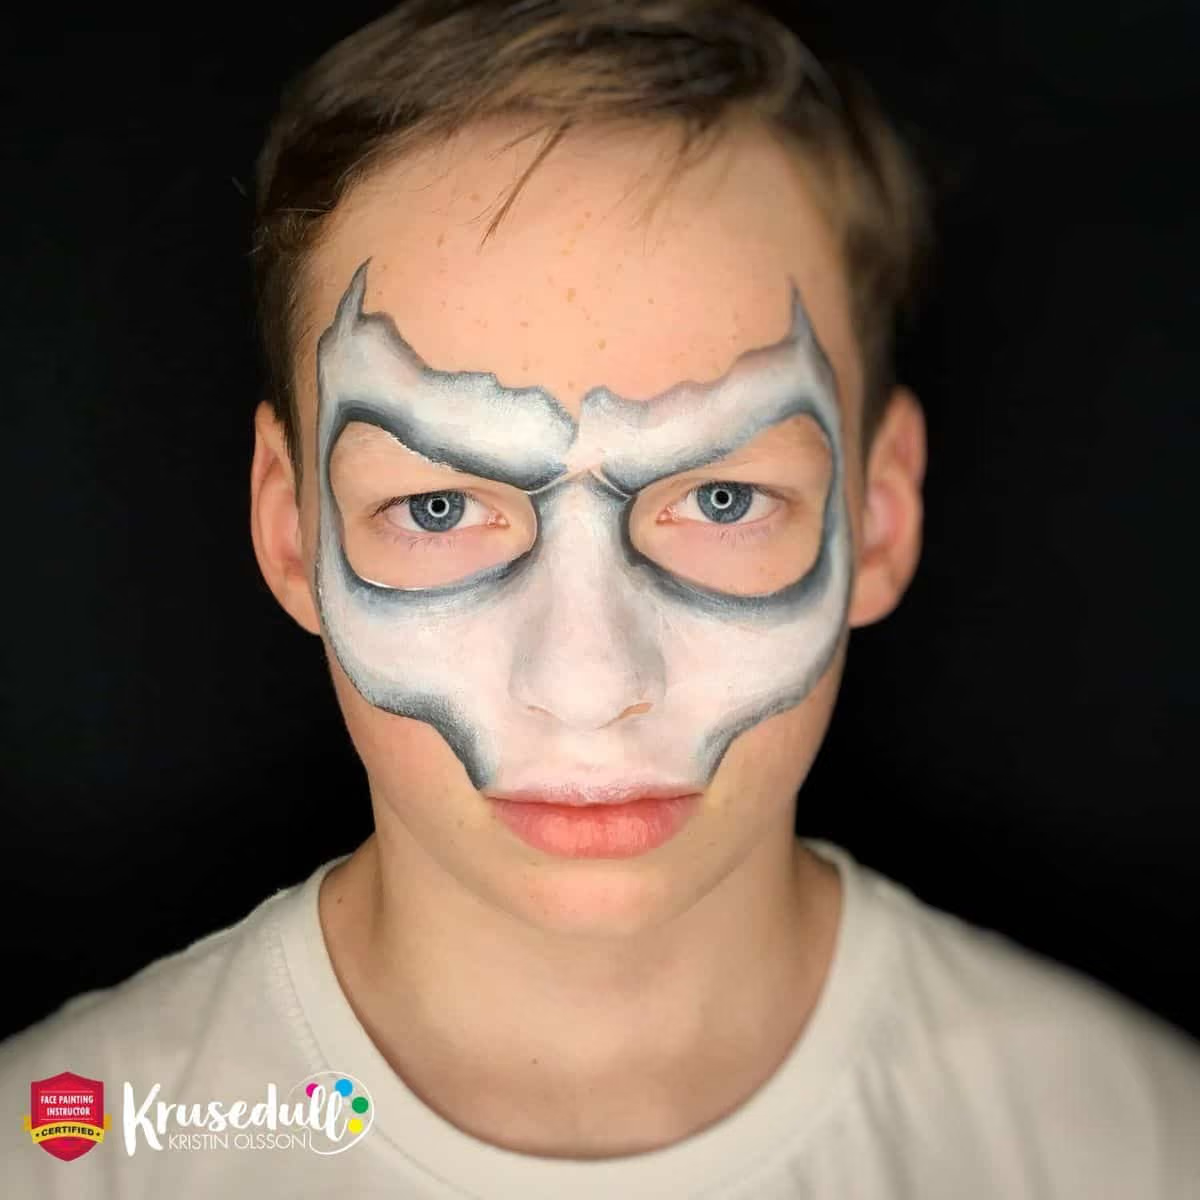
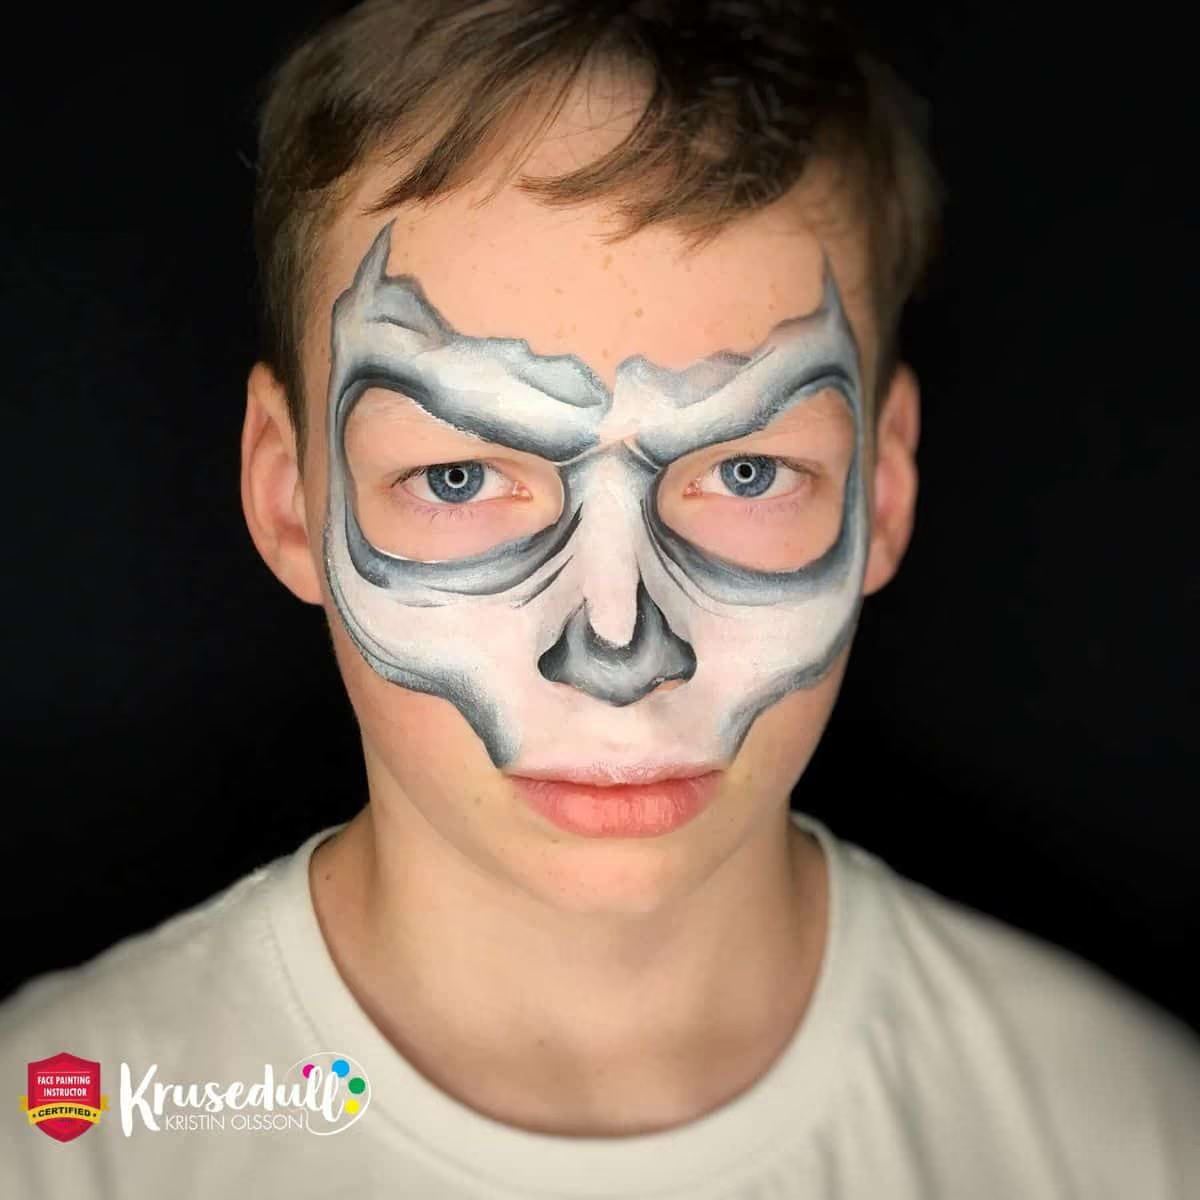
Step 3: More One Stroke Details
When I have filled in the empty space of my Halloween skull face paint, I return to my black and white one stroke again and add a few more details. You can just add the nose area and skip the rest of the linework I have added here.
Like for example, if you have a really long line then this step is not necessary — but I do like to add some more depth and details to my designs when I have the time to spare.
Find hundreds more great Halloween face paint ideas in our Ultimate Halloween Face Paint Inspiration Guide! You won’t believe how incredible these ideas are until you see them. This guide is a game-changer! ️🎨 🖌✨
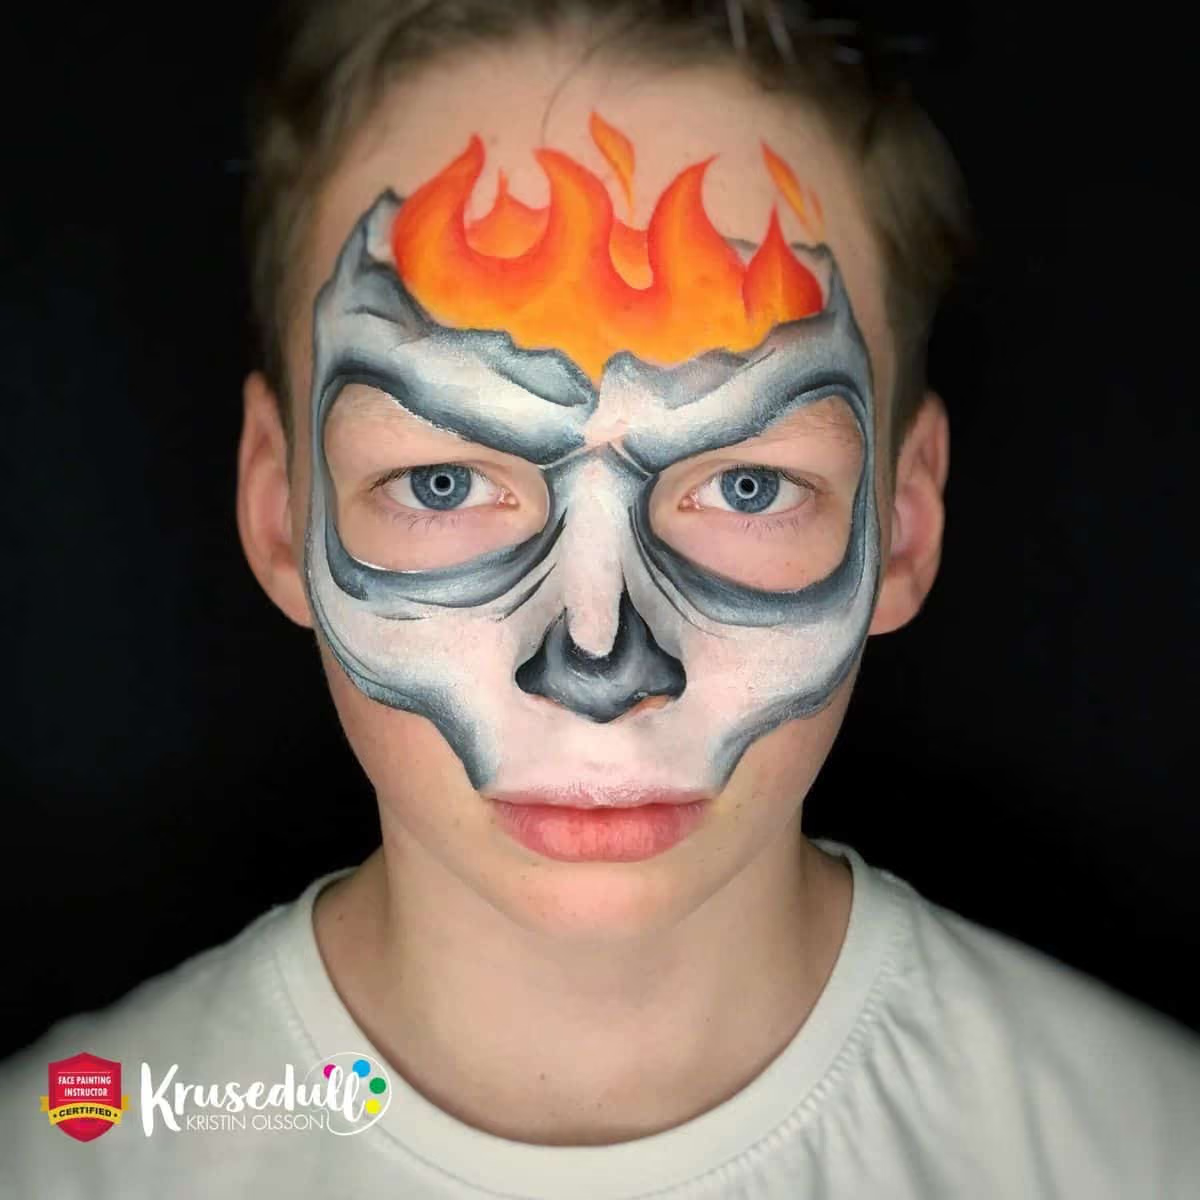
Step 4: Add Flames
With a ½” angled brush and a flame one stroke (I used TAG flame one stroke here), I paint some cool flames emerging from the top of the skull!
As you can see, I use the darkest color on the outside edge of the flames. This gives the flames a more realistic look.
With my black and white one stroke that I already have on my other brush, I fill in the empty spaces so that it looks like the flames are coming out from the inside of the skull.
Tip: Did you know that you can actually make a living out of face painting? Learn how to become a professional! Take a class at our online School!
Step 5: Add Stencil Details
I love stencils! When used correctly, they are such an amazing tool to help you make a design go from great to “Wow!”
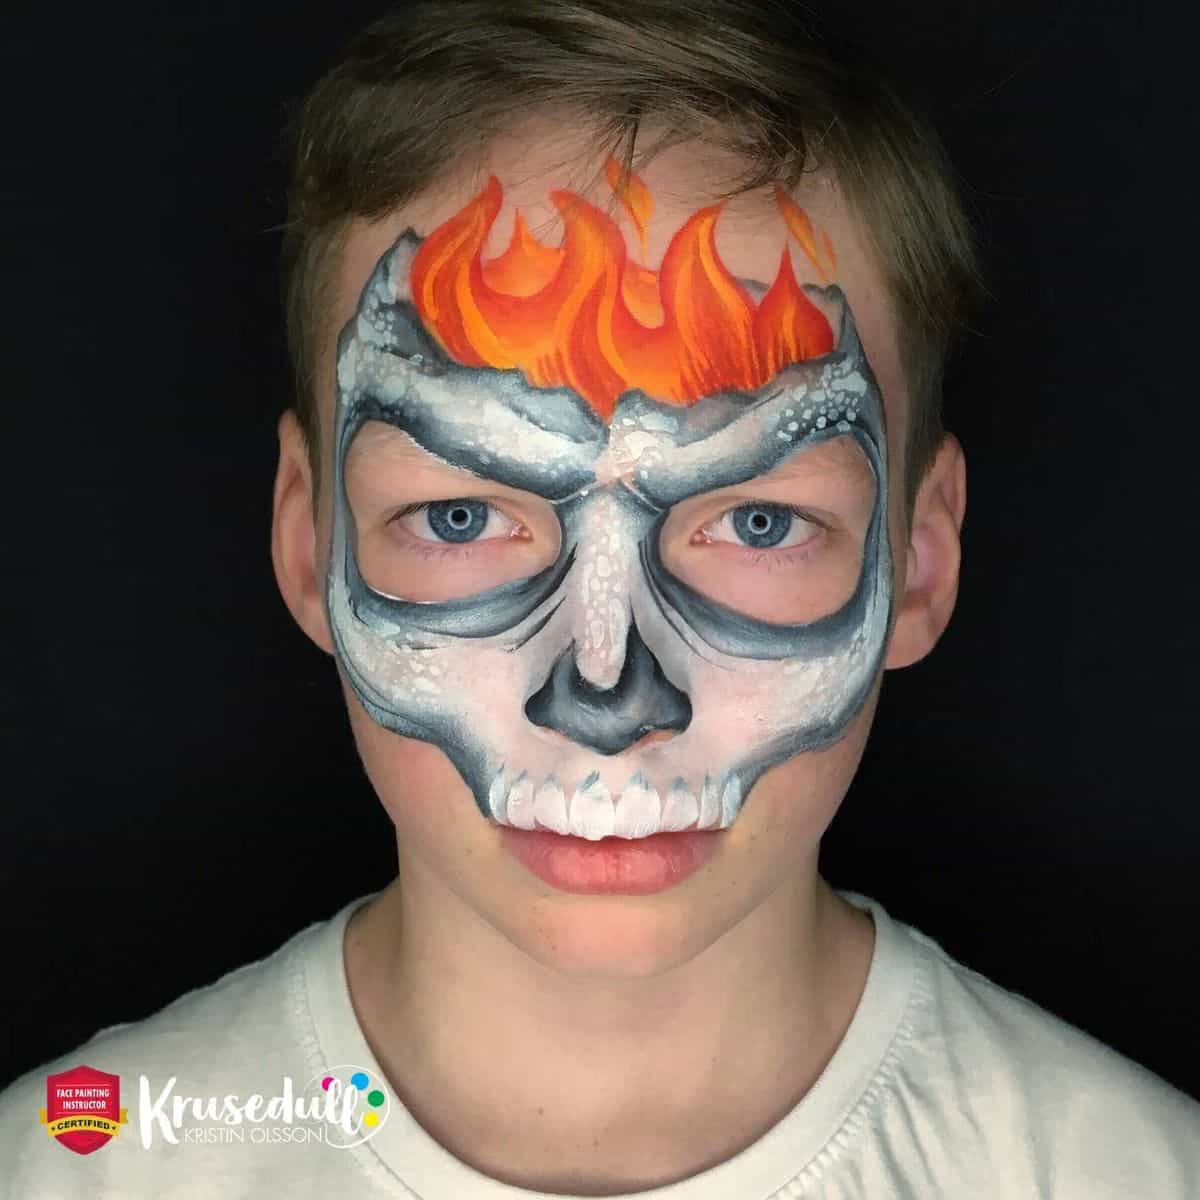
In making Halloween skeleton face paint, I used my Half Ass Organic set — one of my favorites at the moment — to add texture to the skull. I used DFX white for the stenciling, and you can see how this pops nicely against the more subtle white in the background.
I also used a small round brush and painted some more details in the flames, picking up the colors from my flame one stroke cake.
Again, these steps are optional and can be skipped if you have a long line. But like I already mentioned, I do like to add some more details to my skeleton Halloween makeup when I have the time and a patient model at hand.
And finally, I also added some teeth to the skull face paint design.
For those, I used a flora brush loaded with white and dipped the tip in black to give the teeth a little more dimension.
Tip: By the way, you can find the complete list of stencils that our instructors recommend for beginners, professionals and themed parties in the Ultimate face painting STENCILS Guide.
Step 6: Add Linework
Using one of my favorite brushes, Ultra point round #4 from Blazin Brush, and DFX black, I work my way around the skull.
The reason I really like this brush is that it allows me to make both really thin and crisp brush strokes, as well as more thick ones in one go. I outline the design and also add a few more details on the skull to bring it to life.
As you can see, I have also added a bit more detail in the flames here with a dark red/burgundy color as I wanted the flames to pop a bit more than they already did.
Usually, I would recommend outlining the whole design, but notice that I have not added a black outline to the flames, only to the skull — a black outline on the flames here would look very hard and not very realistic.
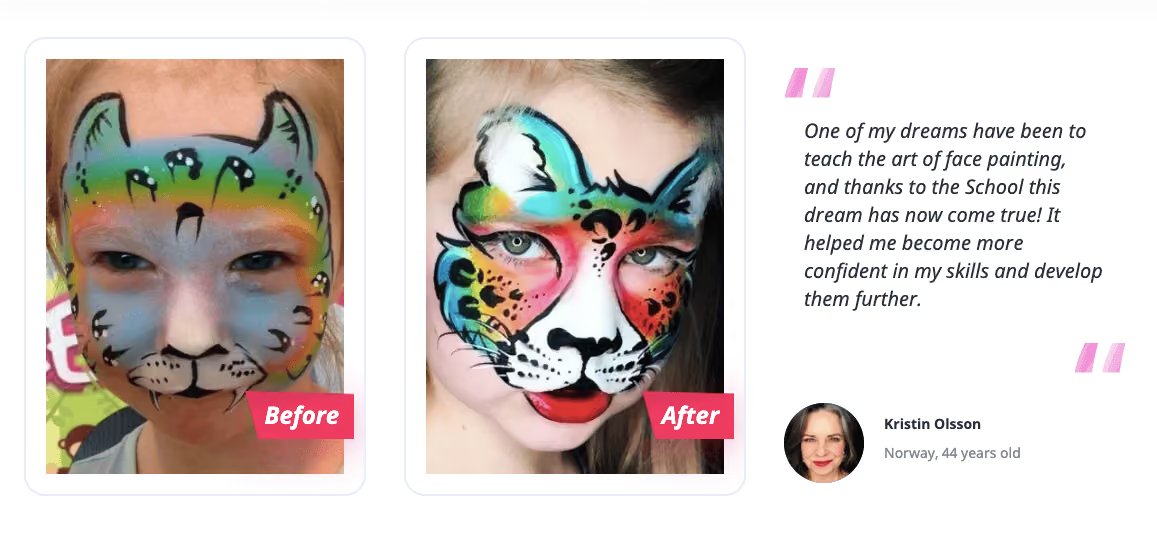
Could you ever imagine that Kristin, the author of this article and one of the instructors of the International Face Painting School was also a beginner and a student at the School? It’s hard to believe, but that wasn’t that long time ago!
Kristin made it into top-level professionals and one of the best face painters of the world in just two short years! Check out her incredible progress pictures and read about other impressive achievements of our students and graduates in The Payoff: The Graduates of 2018 Discuss Their Success & The Investment They Made in Themselves.
Step 7: Final Touch
For the very last step, I go over the design and dry brush the black line work. I hardly ever take the time to do this on the job – but if you have the time to add it to your design I highly recommend that you do it.
It adds a bit of softness to the overall look and really brings your design to life.
Looking for more Halloween inspiration? Check out our other incredible tutorials:Old Joker vs New Joker face painting tutorialZombie face painting tutorial
Bonus Design Tutorial

Get Your Beginner Skull Face Paint Kit Here
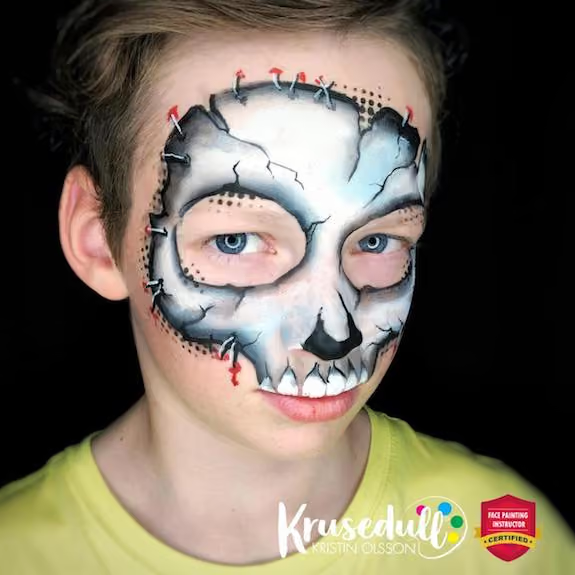
Many boys (my own son included) are not very fond of getting paint near their eyes. But they still love a cool skull design!
Our School certified instructor Kristin Olsson prepared a great solution! 😃 Learn how professional face painters approach design, technique, and execution in our face painting course.
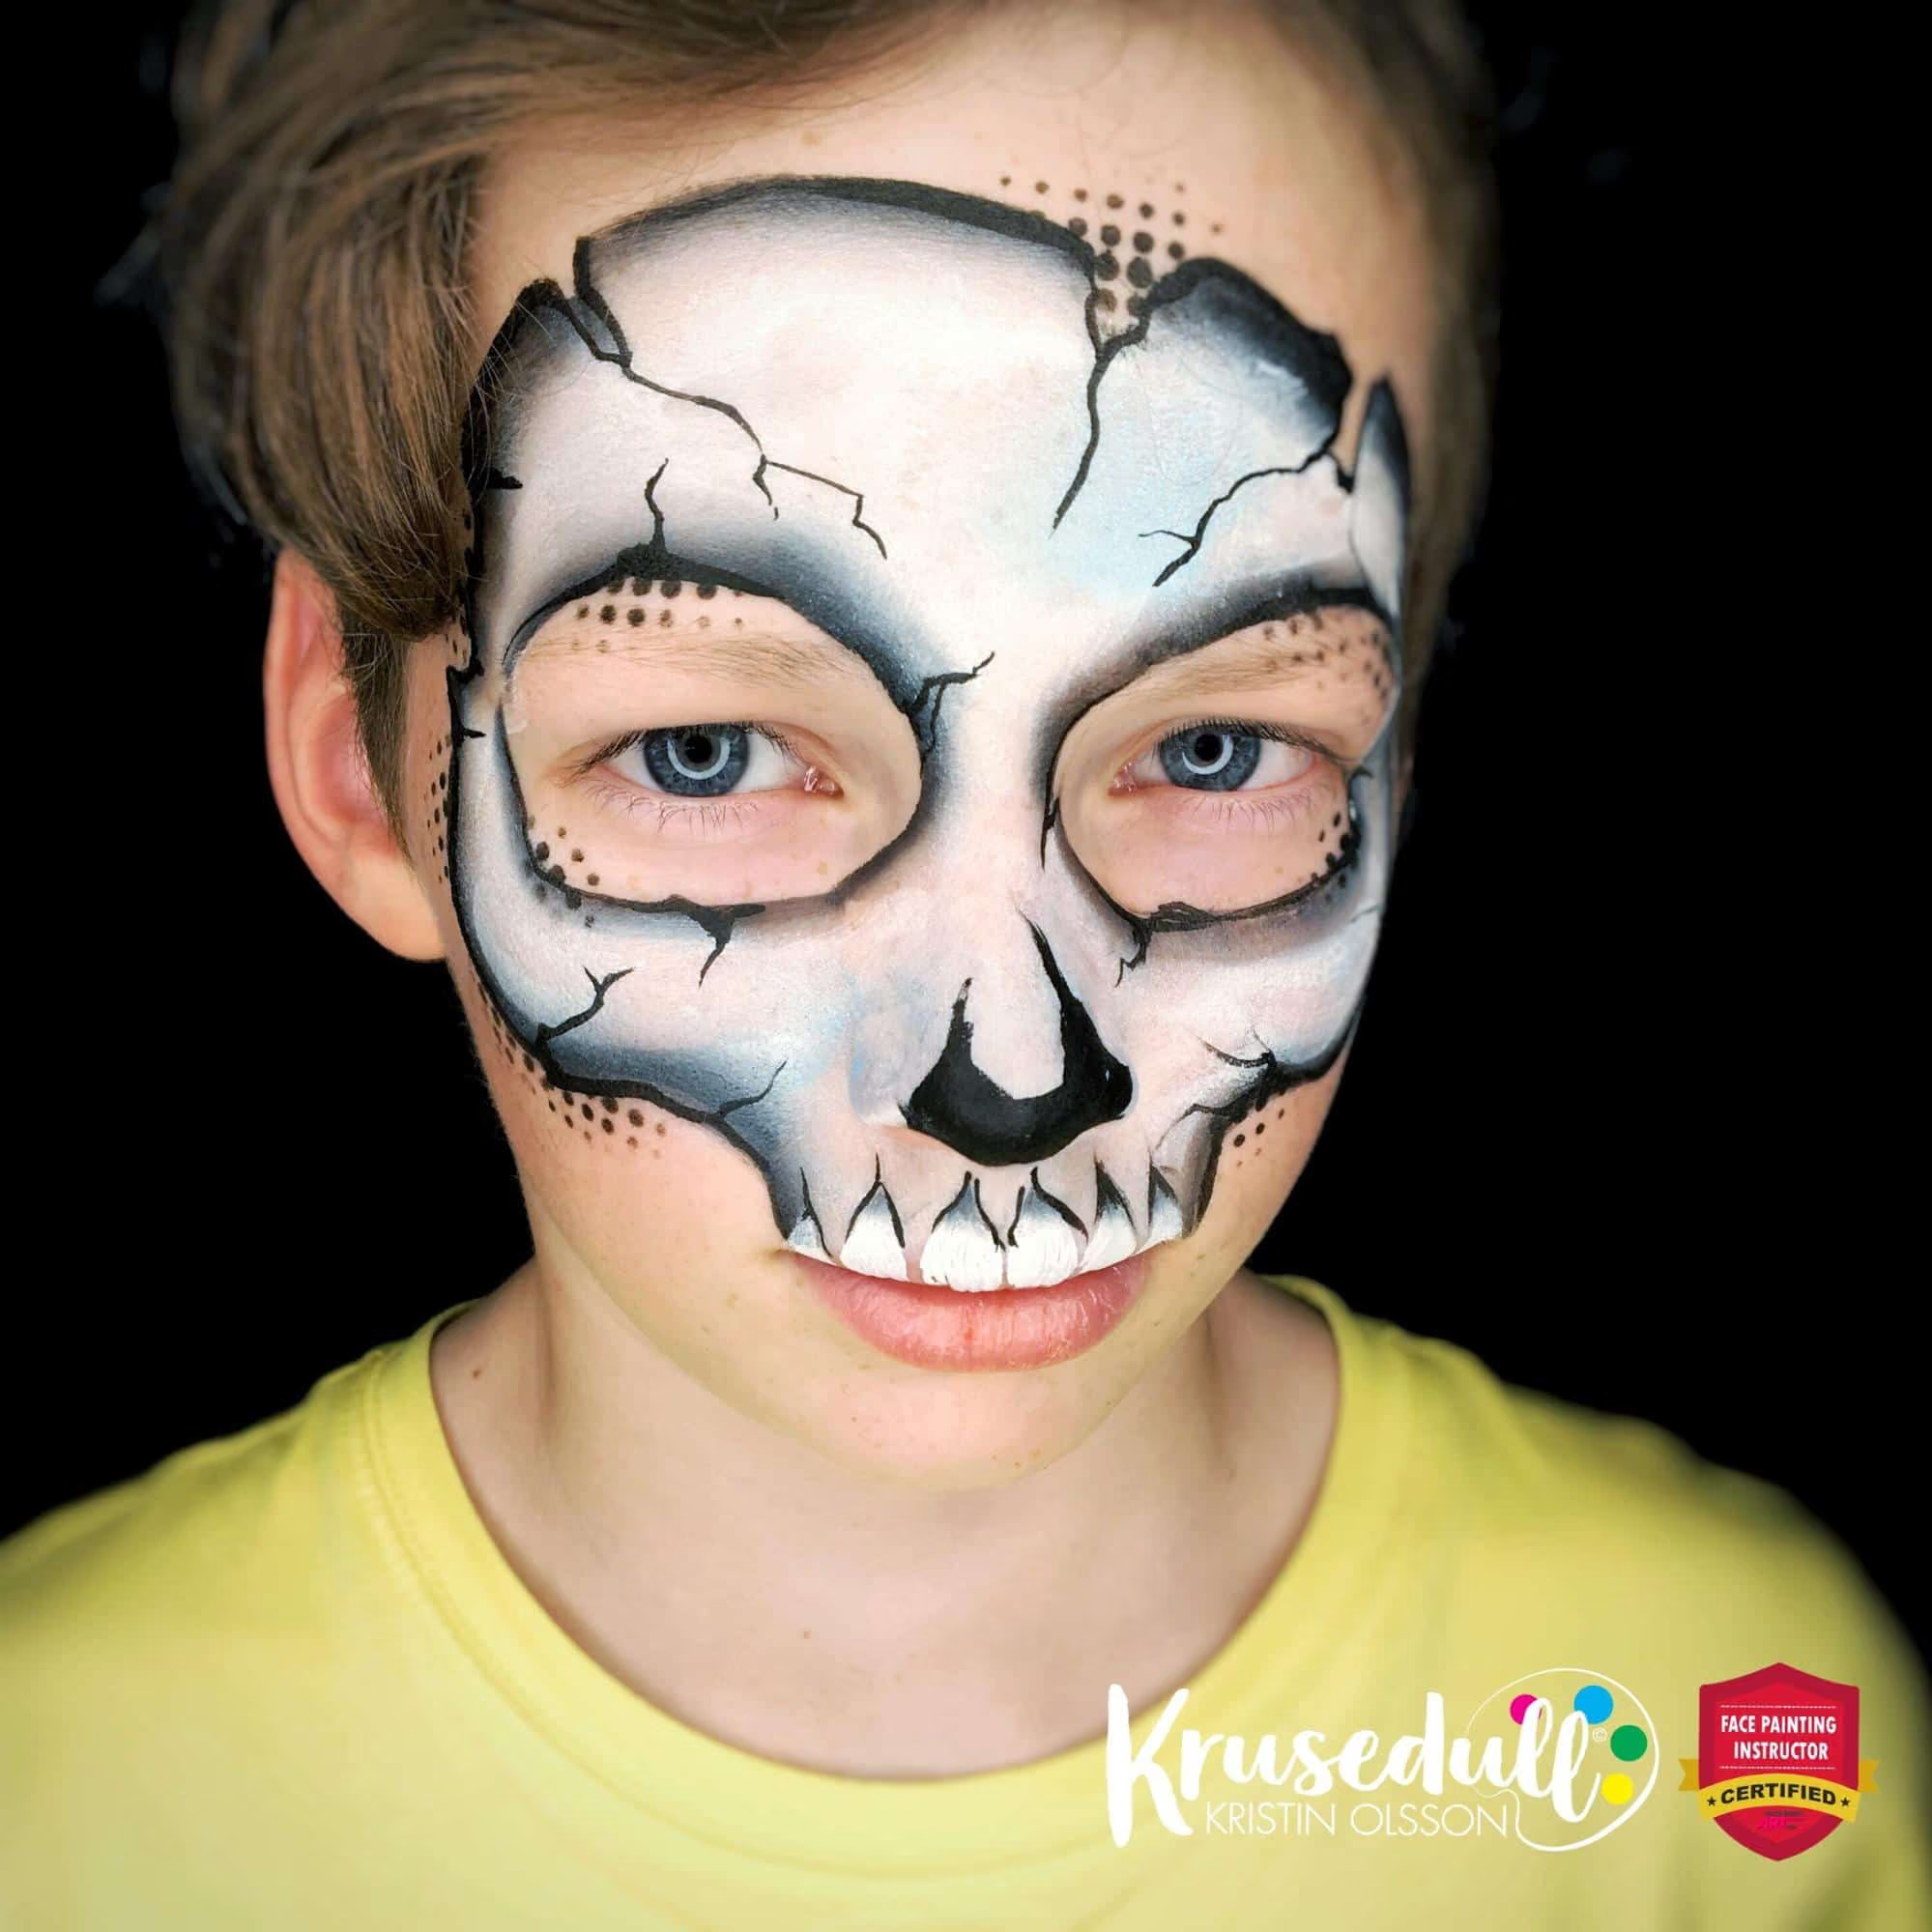
With Halloween just around the corner, I wanted to create a fun and easy one stroke skull mask that is fast but impressive looking — just what we are looking for when we have our busy Halloween gigs!
This design can be painted in just 3-4 minutes if you have a long line.
And if you have the chance to spend an additional minute or two, I will show you how to add some super cool details that will definitely impress your little customers! ;-)
- One stroke cake – Swan from Cameleon
- Superstar White
- Superstar Shimmer Baby Blue
- Superstar Fire Red
- Diamond FX black
- ¾ flat brush — Nat’s gold edition
- Flora bruh #6 by KingArt
- Round brush #3 from Paint Pal luxe swirl brush set (same as yellow handle #3 from the discontinued Loew Cornell 795 series which is now available as KingArt round #3)
- Graffiti eyes stencil — Lea Selley (Discontinued. Alternative: BAMS 1206 “Dots”)
- Finger dauber
- Half round sponge
Tip: Click here to download this super useful “Top 10 products a face painter needs” handout! It’s FREE!
Skull Mask for Beginners
Step 1: Add Contour
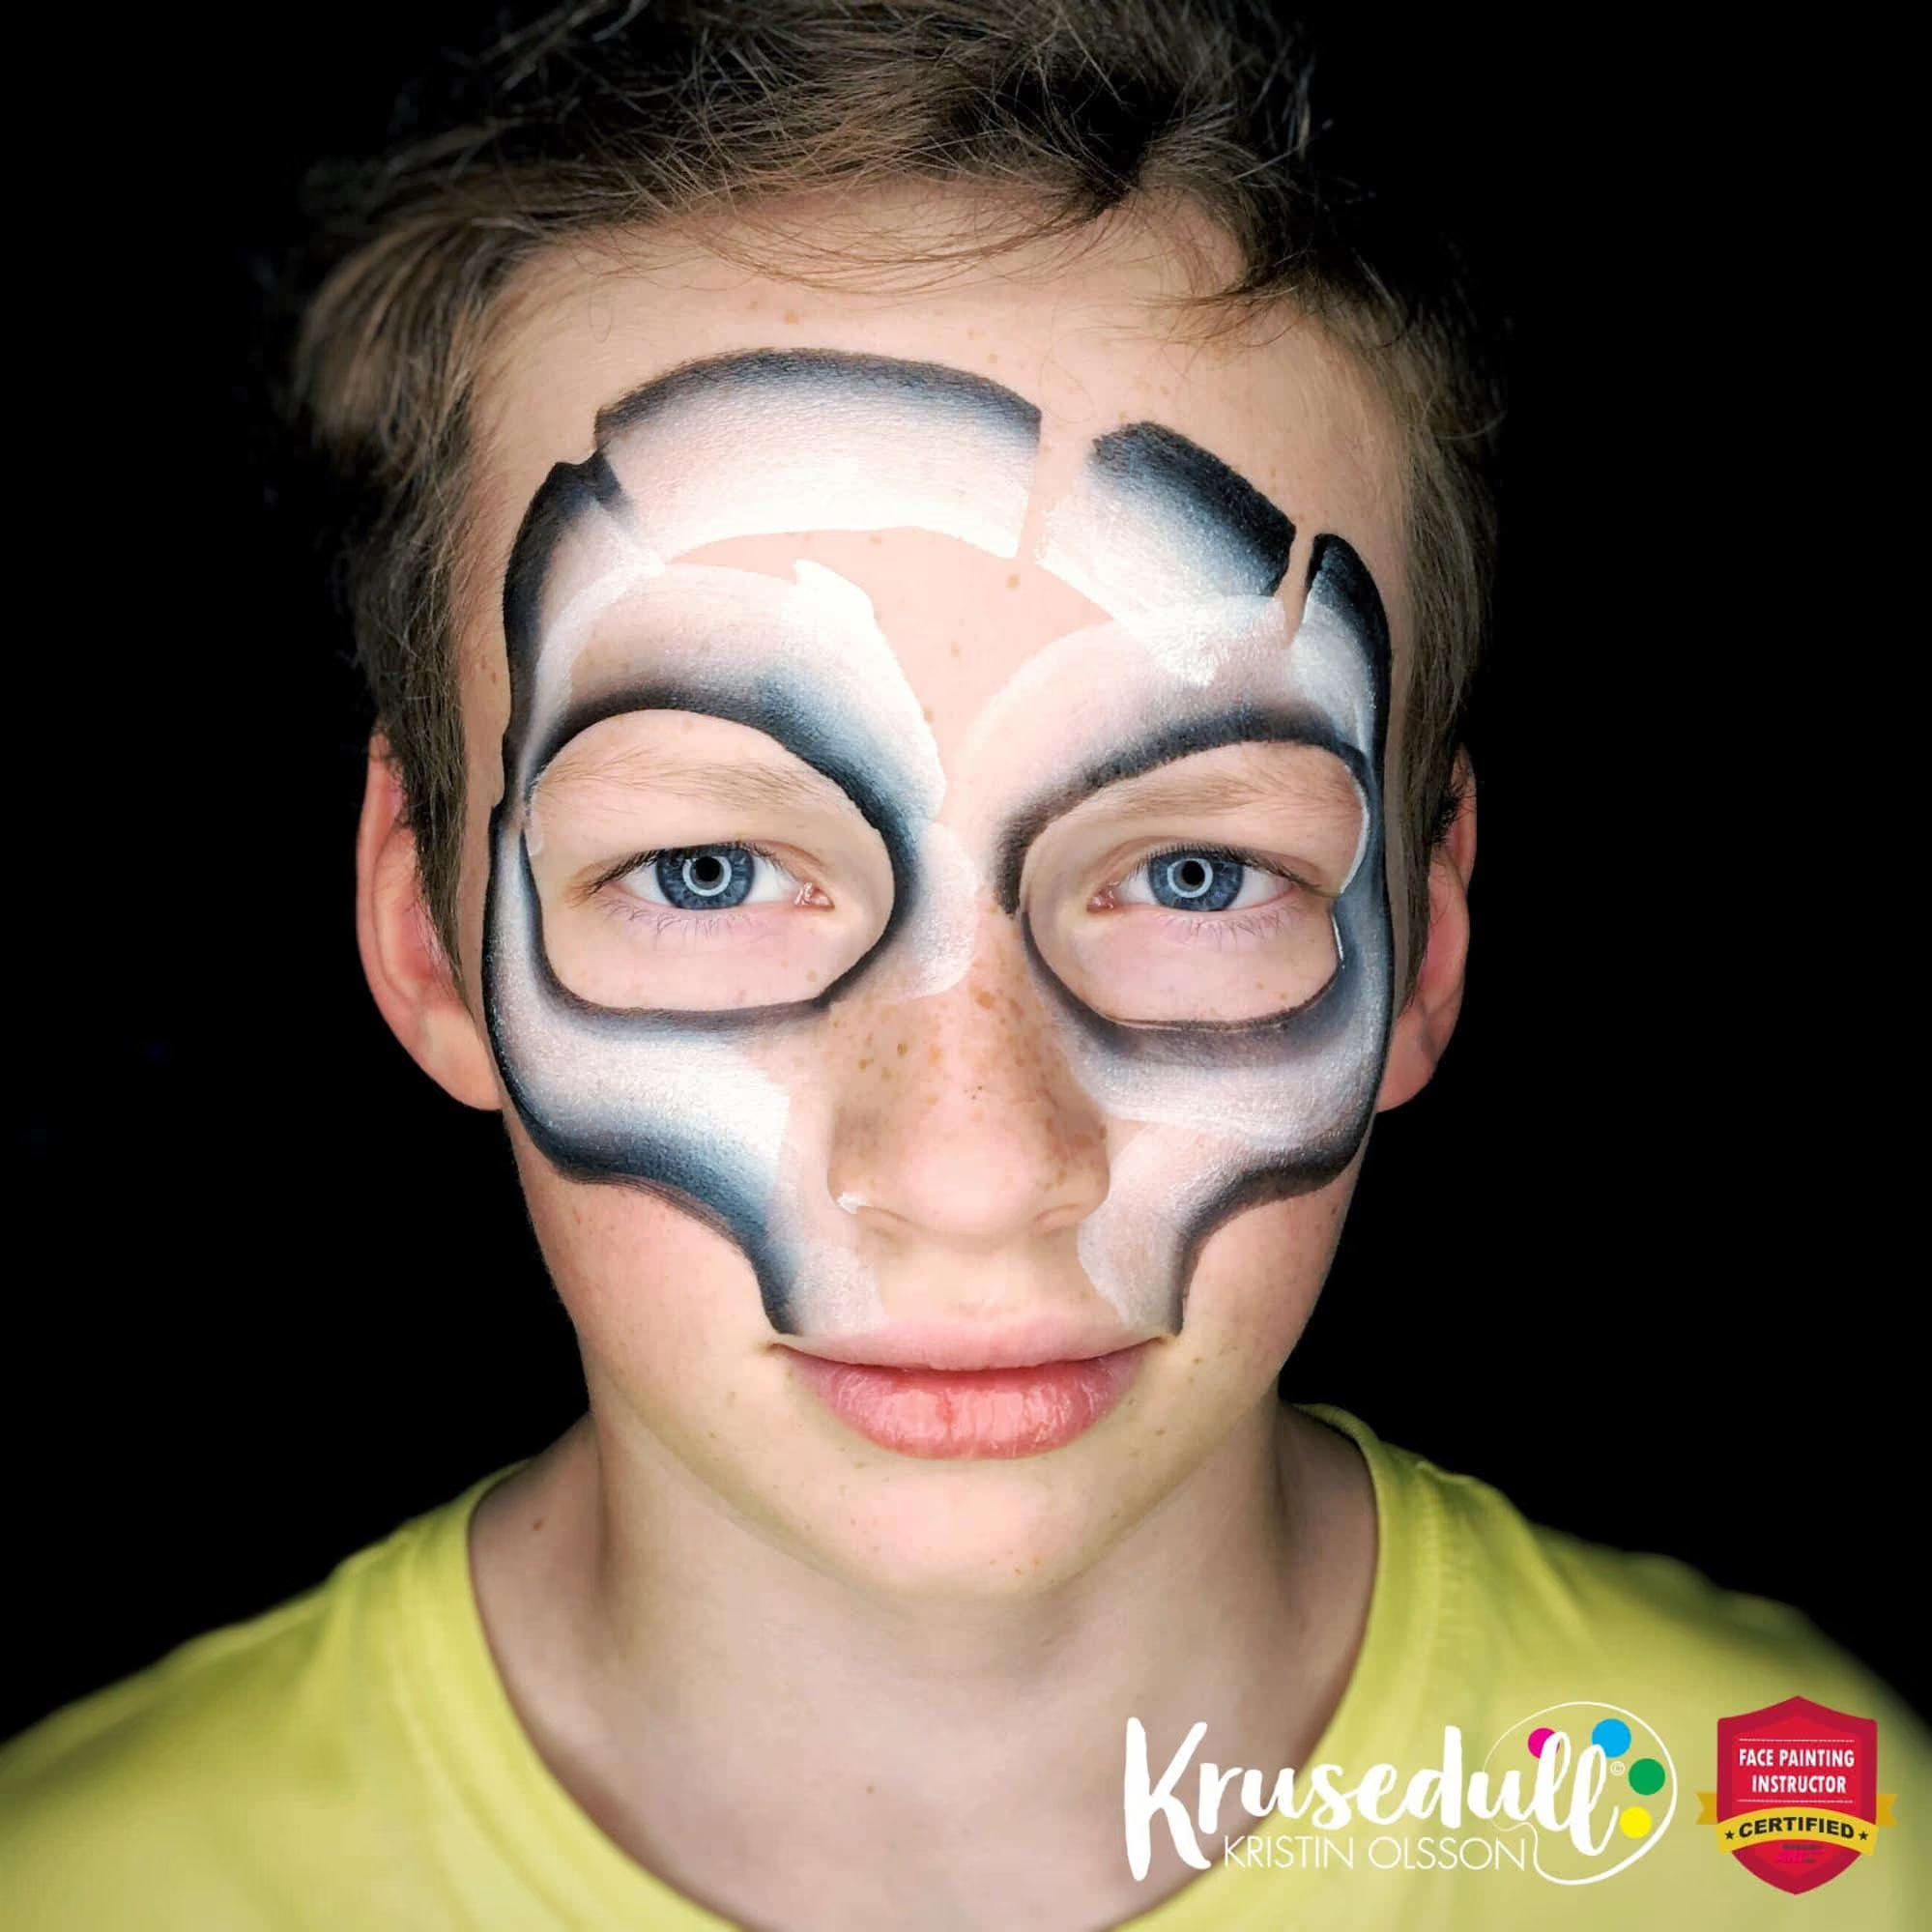
For the first step of creating this skull face paint, I start from the main shape, I use a ¾ flat brush and a one stroke.
As you can see, the outline is not very accurate and in places, I have lifted up the brush from the surface and placed it down again.
That is intentional — I will add some cool cracks here in the next step!
I have used Swan from Cameleon here which is black, silver and white, but you can always use another one stroke of your own preference, for example, a brown and white combination.
In the School, we have a whole module dedicated to one stroke painting technique — and nailing this is so useful when it comes to painting fast designs.
Tip: Are you a beginner? Check out our Free Guide for Beginner Face Painter and learn where to start, what tools to buy and how to face paint many amazing popular designs!
Step 2: Filling in the Mask
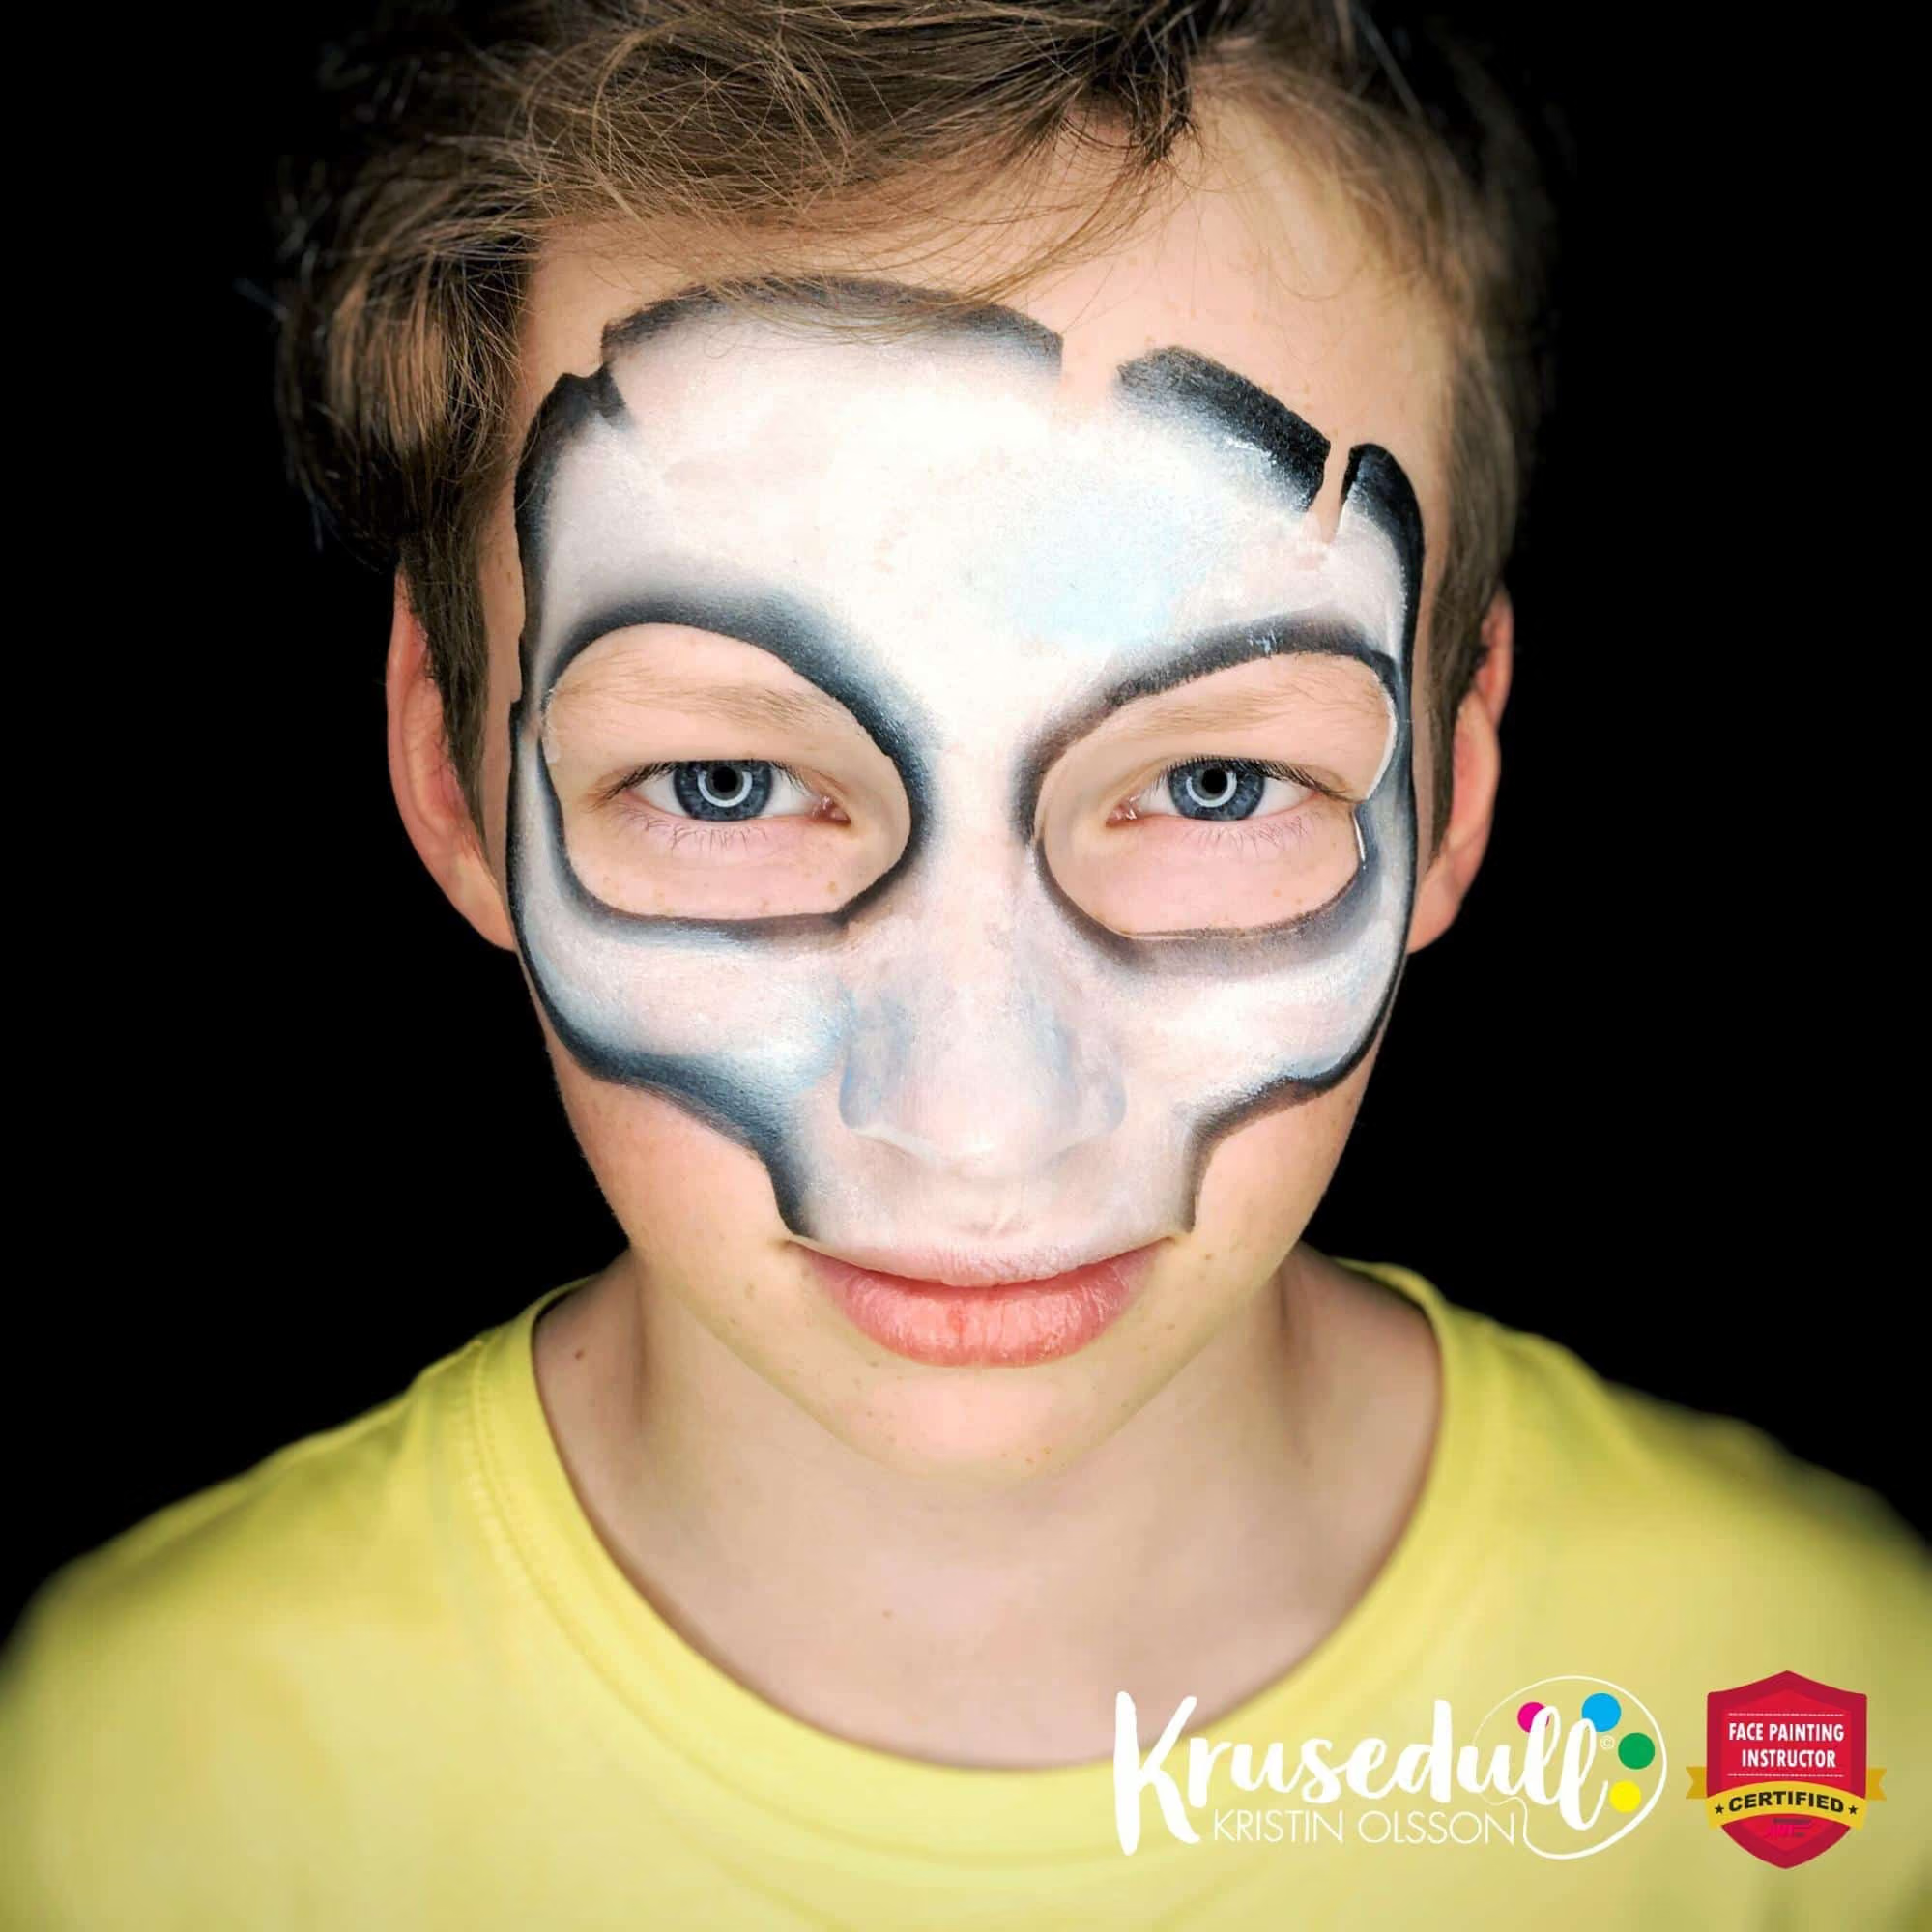
For this step, I fill in the empty area of the skull.
You can use the lightest part of your one stroke color to fill it in very fast, or you can use a sponge with some white color and dab it in the white areas, which is what I did.
I used Superstar white for this, as its glycerin based and blends in more easily with the other colors.
For an additional effect, I very lightly dabbed on a bit of light blue as well, but you can skip the blue if you are in a hurry. 😉
Tip: Find out what is the best white and black paint in our free face painting guide!
Step 3: Add Cracks
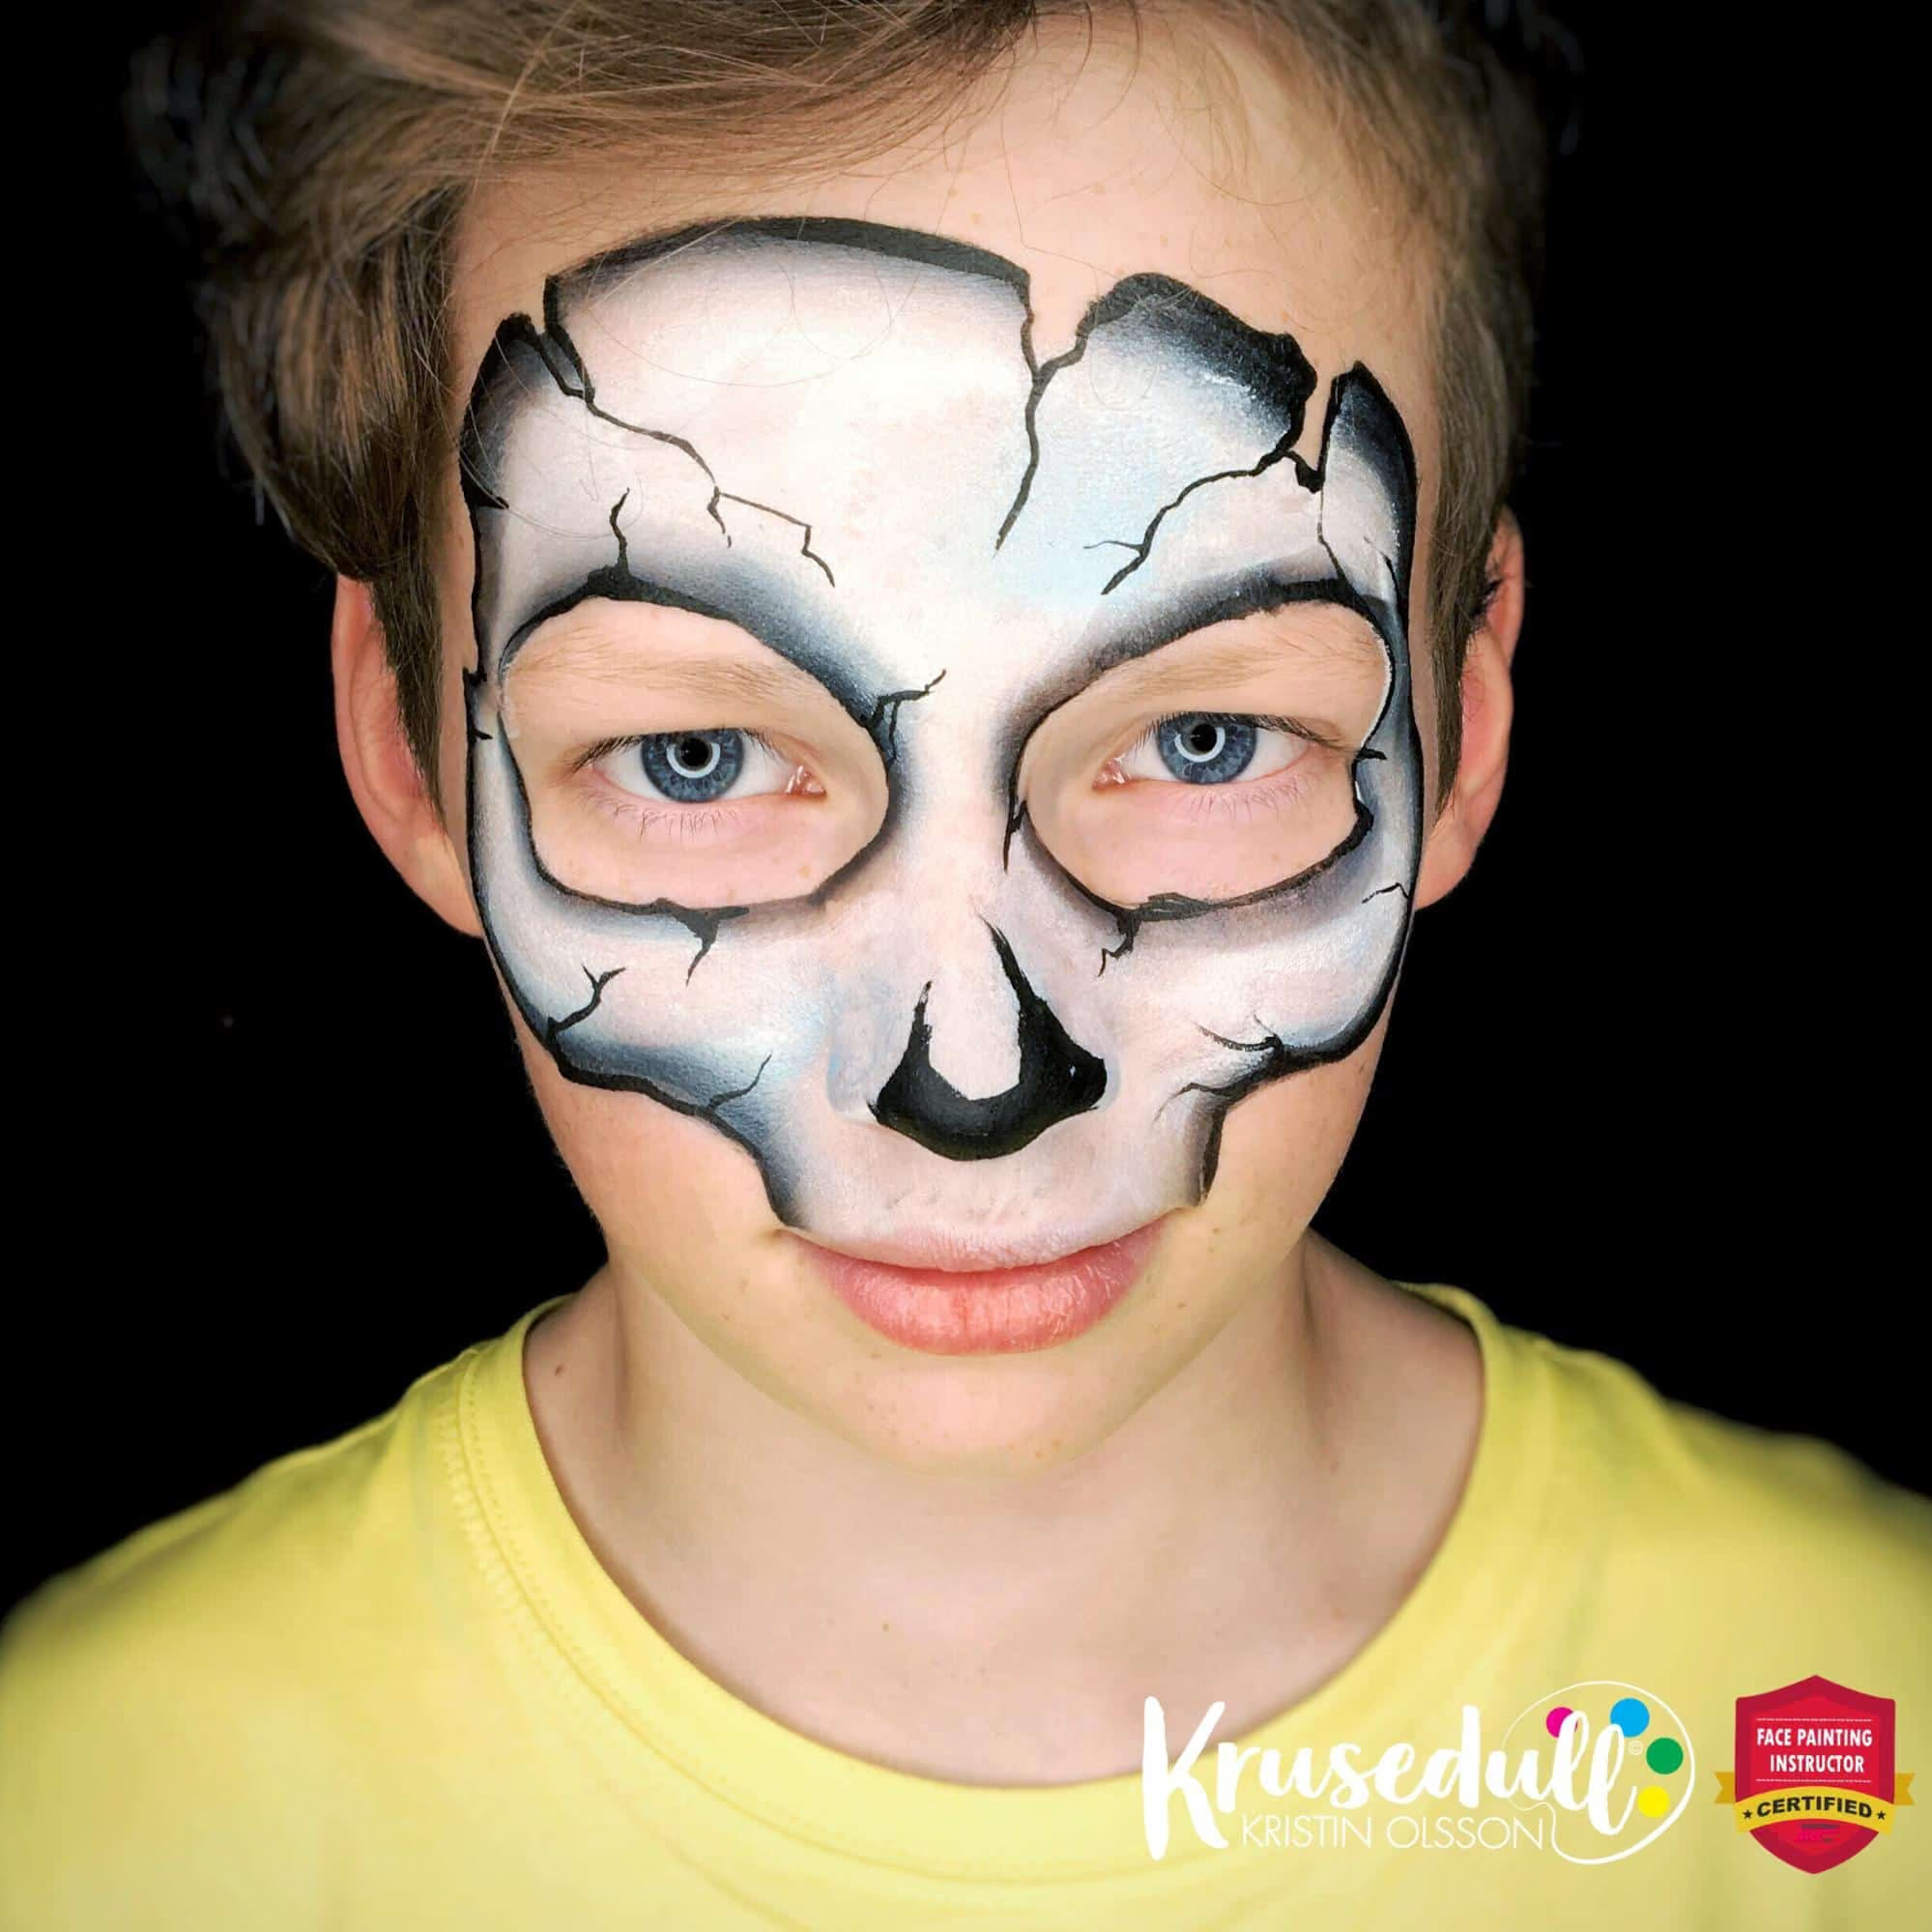
In this step, I add the black outline and paint the cracks in the skull.
As you can see, the gaps I left are now turned into some cool, deep cracks as well!
You don´t have to be very accurate but it is good to keep in mind how cracks would look in reality.
This is where you can put your thick to thin line practice in use, so make sure your brush strokes are not too heavy and finish this Halloween skull face paint in nice sharp tips.
By the way, don’t miss your chance to take our “Improve your linework in 3 Days” Free Online Workshop! 😍
Step 4: Add Teeth
For the teeth, I use a flora brush and the double dip technique — the shape of the flora brush is perfect for this shape!
I load the brush with white first, wipe off the excess of paint on the tip and reload the tip only with black. Press the brush down flat and voila — your skull face paint instantly have perfect teeth!
In this step I also add a bit of stenciling — I do love to add stenciled details to my designs! And instead of spending time on the shading, why not use some gradient dots instead?
It is a really fast way of adding interest to your Halloween skull face paint design and it looks super cool as well!
If you have a very long line, you can leave the design like this and you will have one happy customer…
Tip: Find out how to stay booked and paid in our free face painting guide!
Step 5: Another Level to Complete Your Skull Face Paint
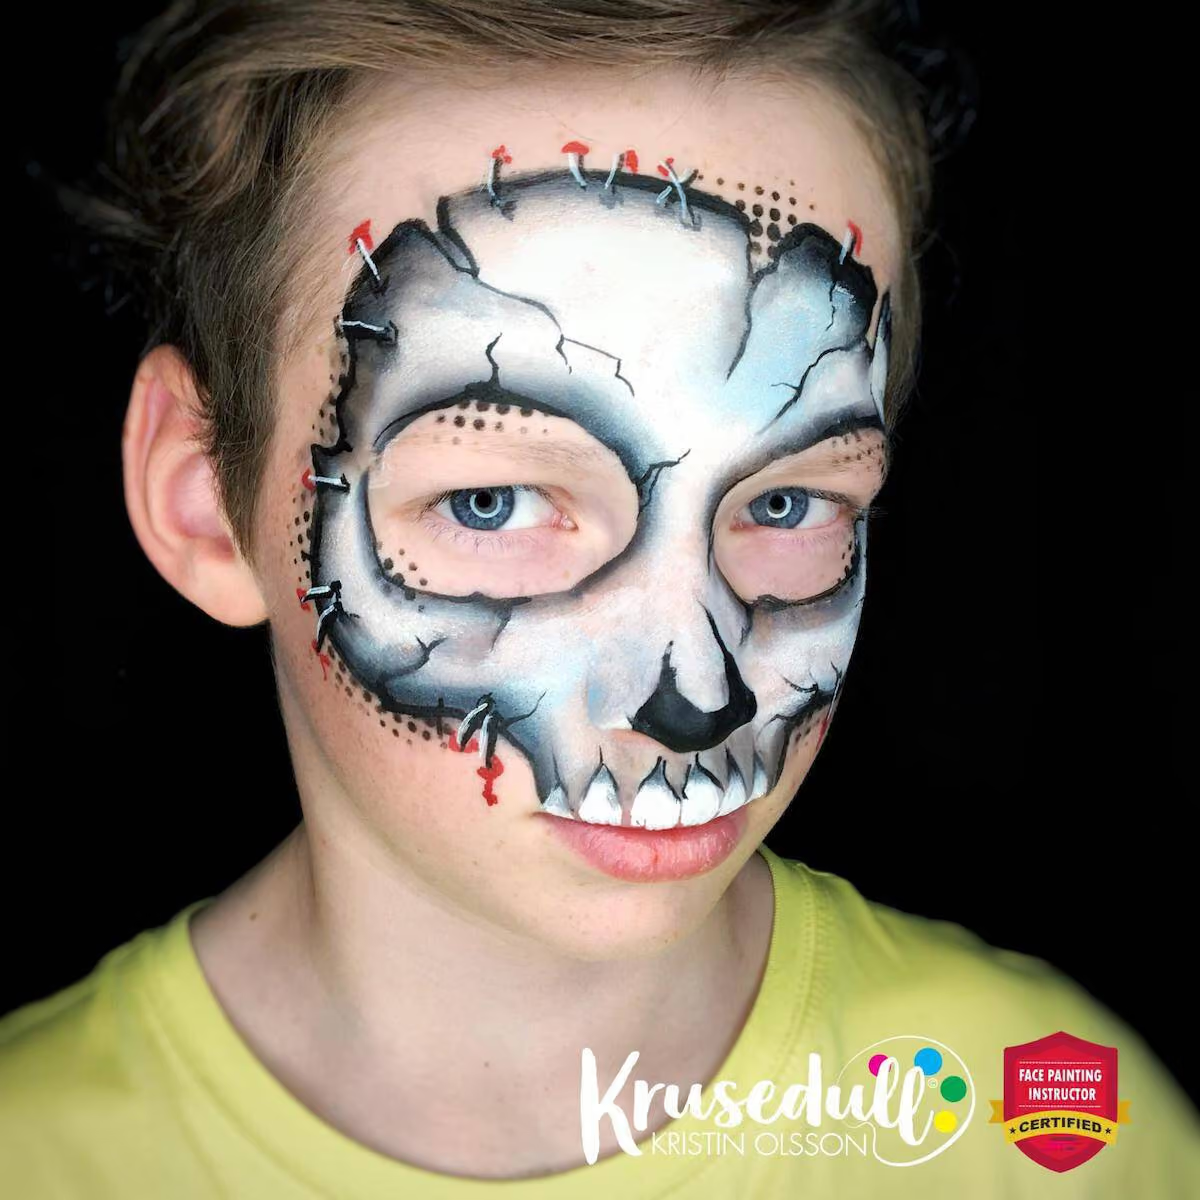
…or you can take your Halloween skeleton face paint design to the next level and add some cool stitches and a bit of dripping blood for an extra effect! In the photo below, I have made a little step by step for you on how to paint the stitches around the mask.
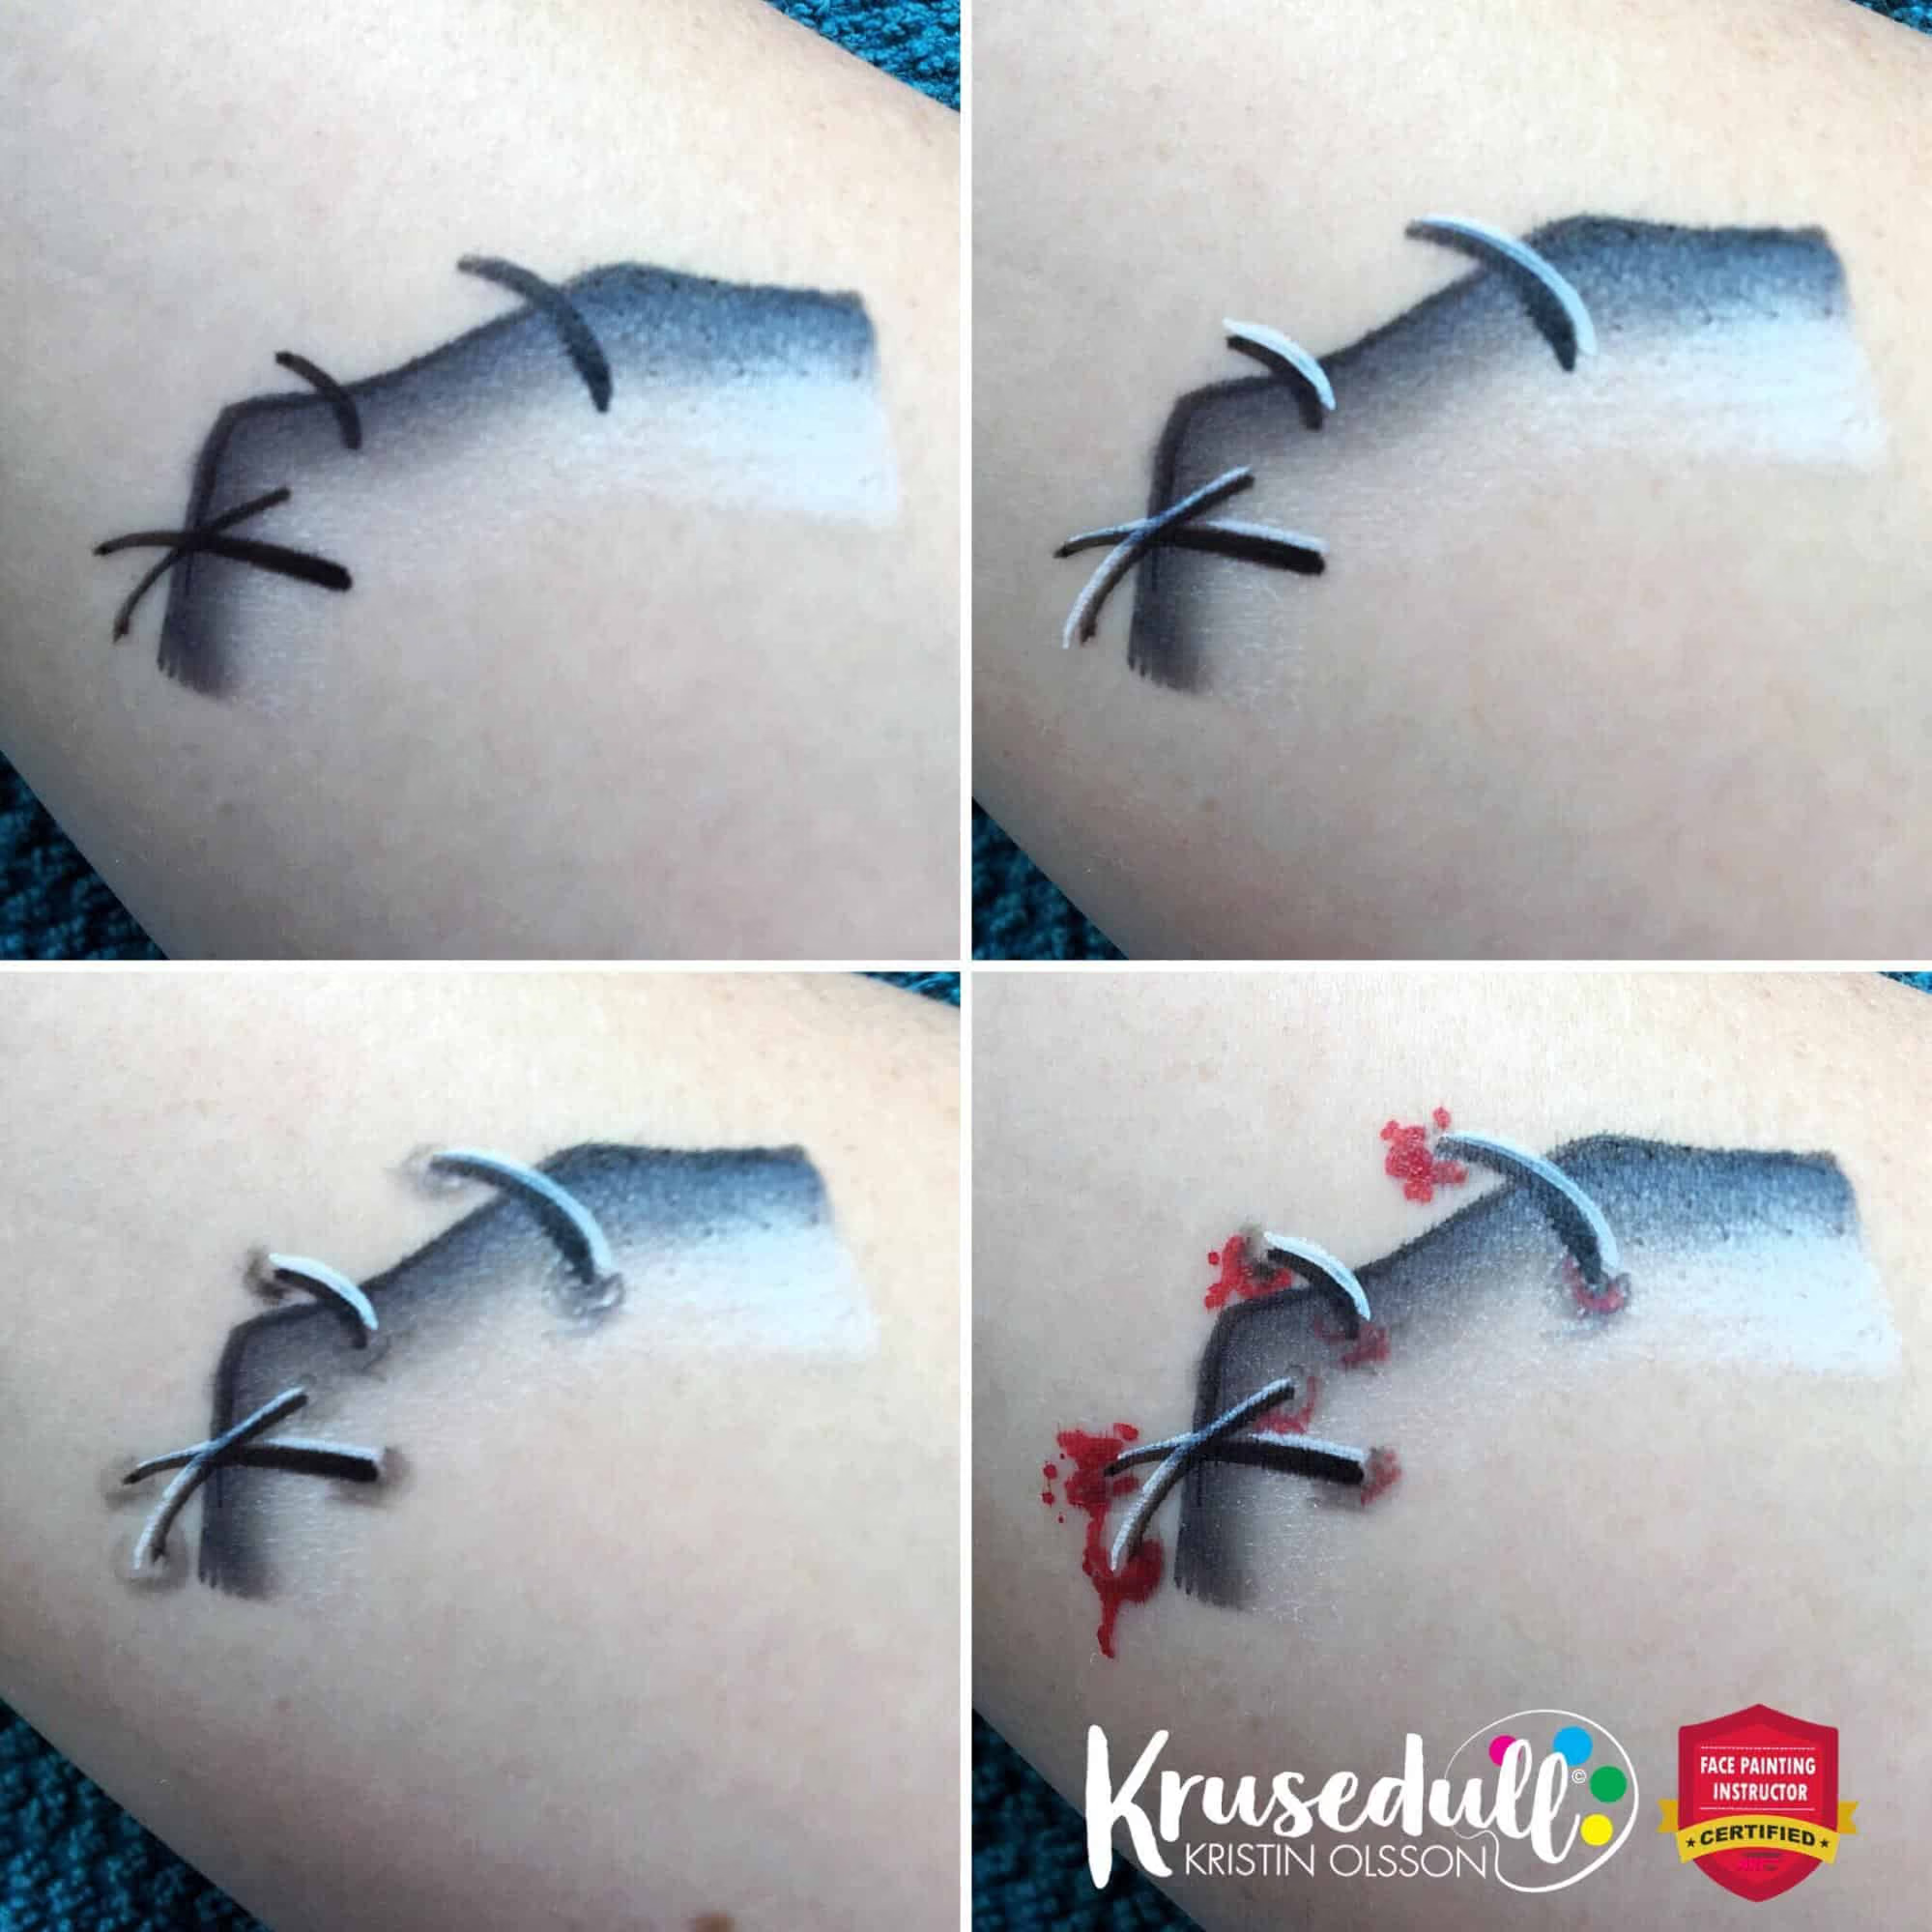
- With black paint and a round brush, paint the basic shape. If you curve some of the stitches very slightly and paint a few on top of each other like a cross-stitch, they will look more realistic on the mask.
- Paint the white highlights on top of the stitches. This highlight will make the stitches pop on your design!
- Wipe off the majority of black on your brush and dry brush the black on the tips of the stitches to add a shading effect. If your brush is too dry, you can moisten it a little bit on a wet wipe.
- Adding a few little drops of blood here and there will give your design an added creepy effect!
Add the stitching and voila — you have a super cool and fast Halloween skull face paint!
Want more Halloween inspiration? Our Ultimate Halloween Face Paint Inspiration Guide won’t disappoint! Full of hundreds of designs, video tutorials, and step-by-step instructions. The only way you won’t find the perfect inspiration you’re looking for is if you don’t check it out. 💀 😱
Did you enjoy this easy skull face paint tutorial? 😃
The International Face Painting School team is always working hard to help you stand out from the crowd and learn the most effective techniques and designs!
Share this article with your fellow face painters! 👇👇👇
